目录
- OpenSSH
- 参考
- OpenSSH
- 安装
- 最佳实践
- 配置文件建议修改项
- 基于公钥认证
- 相关命令
- *用户登陆信息
OpenSSH
Written by Zak Zhu
参考
- 马哥Linux视频
- 李墨凌/Linux学习日志(十五)(https://blog.csdn.net/teng_ling/article/details/51420748)
- ssh安全手册(http://www.wendangku.net/doc/4bcf984d852458fb770b561b.html)
- 金步国/sshd_config 中文手册(http://www.jinbuguo.com/openssh/sshd_config.html)
- RHCE培训(RH033-Unit13)
OpenSSH
openssh属于用户级别认证
从Linux系统层面看SSH公钥验证交互过程:
安装
建议openssh-clients和openssh-server都安装
客户端安装
yum install openssh-clients -y服务端安装
yum install openssh-server -y最佳实践
- 修改默认22端口
例如: Port 3721
- 限制监听地址
建议: 只监听内网IP
- 禁用SSHv1, 启用SSHv2
- 缩短登陆认证宽限时间
建议: LoginGraceTime 1m
- 禁用密码认证, 使用公钥认证
PasswordAuthentication no
建议: 用加密的U盘离线拷贝公钥
HostKey /etc/ssh/ssh_host_rsa_key
HostKey /etc/ssh/ssh_host_dsa_key
- 配置空闲超时长
例如: ClientAliveInterval 300 ClientAliveCountMax 0
- 经常做日志分析
- 及时更新OpenSSH和OS的补丁
配置文件建议修改项
根据上述最佳实践, 建议修改项如下(很多配置是默认的, 所以实际需要修改的不多):
服务端配置文件: /etc/ssh/sshd_config
Port
ListenAddress
HostKey /etc/ssh/ssh_host_rsa_key
HostKey /etc/ssh/ssh_host_dsa_keyLoginGraceTime 1m
PasswordAuthentication no# 在客户端公钥成功上传到服务端上, 测试可以成功连接后再修改该项ClientAliveInterval 300
ClientAliveCountMax 0
基于公钥认证
相关命令
ssh
ssh [user@][-p port] [command] scp
依赖于openssh-clients和openssh-server
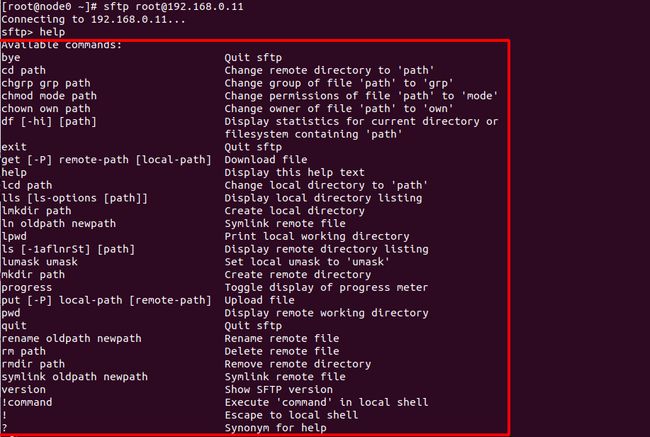
scpOptions: -r # recursive -P # port -p # preserve -C # Compression enable sftp
服务端配置文件要有以下项(默认开启), 则代表支持sftp
Subsystem sftp /usr/libexec/openssh/sftp-server
sftp [user@] [-P port] *用户登陆信息
参考:
last命令(http://man.linuxde.net/last)
lastlog命令(http://man.linuxde.net/lastlog)
lastb命令(http://man.linuxde.net/lastb)
last命令
last    # 显示用户最近登陆信息(读取/var/log/wtmp并格式化输出)
Options:
    -n  # 设置列出名单的显示列数
    -x  # 显示系统开关机, 以及执行等级的改变等信息
lastlog命令
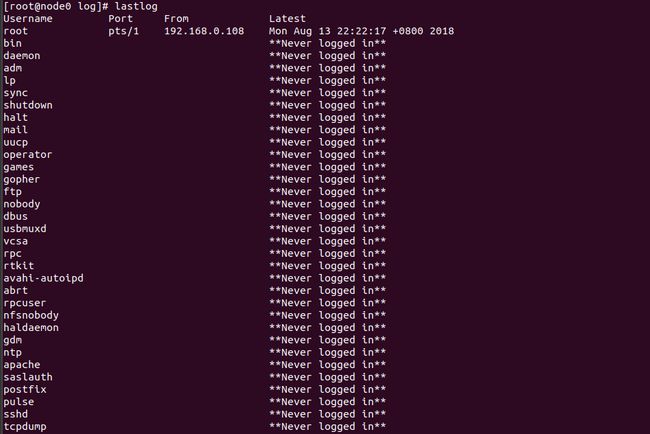
lastlog # 显示系统中所有用户最近一次登陆信息(读取/var/log/lastlog并格式化输出)
Options:
    -h, --help
    -b, --before DAYS
    -t, --time DAYS
    -u, --user LOGIN
lastb命令
lastb   # 显示用户错误登陆列表(读取/var/log/btmp并格式化输出), 通过该命令可以发现恶意尝试登陆IP信息(然后我们就可以用防火墙屏蔽)
Options:
    -n  # 设置列出名单的显示列数
-x # 显示系统开关机, 以及执行等级的改变等信息首次运行命令可能会报如下错误:
lastb: /var/log/btmp: No such file or directory
Perhaps this file was removed by the operator to prevent logging lastb info.解决办法:
touch /var/log/btmp


