概述
InputManagerService 是Android里面一个重要的service。它用于管理整个系统的输入部分,包括键盘、鼠标、触摸屏等等。
1.2涉及到的源码范围说明
(列出本成果所涉及到的Android源码文件/目录。)
在Android 6中,涉及到InputManagerService模块源码范围如下:
frameworks/base/services/java/com/android/server/SystemServer.java
frameworks/base/services/core/java/com/android/server/input/InputManagerService.java
frameworks/base/services/core/jni/com_android_server_input_inputmanagerservice.cpp
frameworks/base/core/java/android/hardware/input/InputManager.java
frameworks/native/services/inputFlinger/InputManager.cpp
frameworks/native/services/inputflinger/InputReader.h
frameworks/native/services/inputflinger/InputReader.cpp
frameworks/native/services/inputflinger/InputDispatcher.h
frameworks/native/services/inputflinger/InputDispatcher.cpp
frameworks/base/services/java/com/android/server/wm/WindowManagerService.java
frameworks/native/include/input/InputTransport.h
frameworks/base/include/androidfw/InputTransport.cpp*
frameworks/native/services/inputflinger/EventHub.cpp
frameworks/native/services/inputflinger/InputListener.cpp
frameworks/native/services/inputflinger/inputListener.h
system/core/libutils/looper.cpp
frameworks/base/services/core/java/com/android/server/wm/inputMonitor.java
详细介绍
(注:基于Android M 代码)
2.1 InputManagerService启动
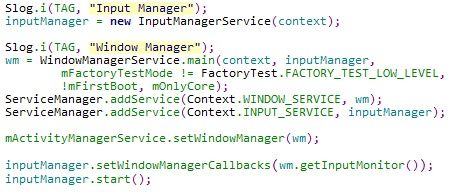
InputManagerService启动,是在SystemServer里面的run方法里面的startOtherServices进行的。
上面的start()其实通过调用com_android_service_input_InputManager的nativeStart(mPtr),
在nativeStart里面通过getInputManager获得 native的inputmanager,然后调用Inputmanager的start方法。这个时候InputManagerService就启动了。
InputManagerService的启动流程图
2.2 消息的读取跟分发
先说总体流程EventHub 读取dev/input里面的数据,InputReader 知道EventHub读取数据后,通知InputDispatcher进行事件的分发。
上节最后走到了InputManager.start()的方法,InputManagerService已经启动了,我们来看下start()方法里面做了什么?为什么start了,就可以启动了消息的读取跟分发。
InputManager.cpp
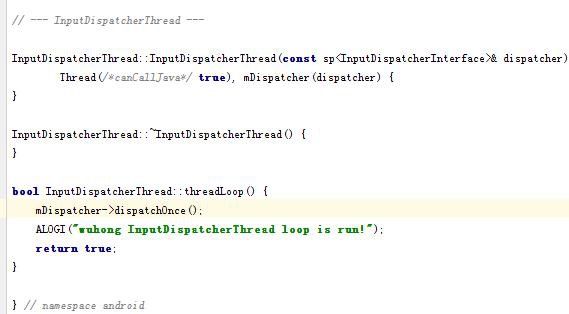
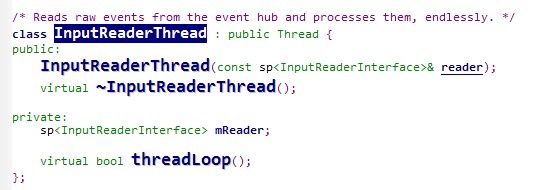
在start里面启动了两个线程,InputDispatcherThread()负责事件的分发,InputReaderThread负责事件的”Reader”
InputDispatcherThread是一个独立的线程,负责事件的分发,实现核心是InputDispatcher类。
InputDispatcher.cpp
InputReaderThread是一个独立循环线程,它的工作比较单一,即不断轮询相关设备节点是否有新的事件发生。
InputReaderThread的核心类是InputReader类,也是一个独立的线程,与WindowManagerService都运行于系统进程中,它与InputDispatcherThread协同工作,保证事件的正确派发和处理。但是它们如何关联的?
看下InputManager的构造函数
InputManager.cpp
InputManager::InputManager(
const sp
const sp
const sp
mDispatcher = new InputDispatcher(dispatcherPolicy);
mReader = new InputReader(eventHub, readerPolicy, mDispatcher);
initialize();
}
从上面的代码可以看出InputDispatcher作为参数传给了InputReader。这样实现了InputReader跟InputDispatcher的关联。可以对比上下两段代码,会发现上面传入的是InputDispatcher,但是InputReader的第三个参数类型InputListerInterface。这里大家应该会猜到这里InputDispatcher跟InputListenerInterface是继承关系的。而InputDispatcher 作为参数有传给了QueueInputListener,进行了进一步的封装,QueueInputListener也是继承InputListenerInterface.
2.2.1 消息的读取
消息的读取主要是在InputReader.LoopOnce方法里面。InputReaderThread.run起来,然后开始读取消息,跟分发消息。
看下LoopOnce的代码
Frameworks/native/services/inputflinger/InputReader.cpp
need-to-insert-img
CODE ----------
//通过EventHub 读取消息
need-to-insert-img
need-to-insert-img
CODE---------
//InputDispatcher 去处理相关消息
need-to-insert-img
need-to-insert-img
EventHub : : getEvents里面进行消息的读取
Frameworks/native/services/InputFlinger/EventHub.cpp
if (mNeedToReopenDevices) {
mNeedToReopenDevices = false;
ALOGI("Reopening all input devices due to a configuration change.");
//打开设备 dev/input
closeAllDevicesLocked();
mNeedToScanDevices = true;
break; // return to the caller before we actually rescan
}
//循环读取信息
// Report any devices that had last been added/removed.
while (mClosingDevices) {
Device* device = mClosingDevices;
ALOGV("Reporting device closed: id=%d, name=%s\n",
device->id, device->path.string());
mClosingDevices = device->next;
event->when = now;
event->deviceId = device->id == mBuiltInKeyboardId ? BUILT_IN_KEYBOARD_ID : device->id;
event->type = DEVICE_REMOVED;
event += 1;
delete device;
mNeedToSendFinishedDeviceScan = true;
if (--capacity == 0) {
break;
}
}
if (mNeedToScanDevices) {
mNeedToScanDevices = false;
//这个往里走就是通过EventHub::openDeviceLocked 打开*DEVICE_PATH = "/dev/input" 这//个设备 ,最终用的open,实际到kernel层就是input设备注册的open
scanDevicesLocked();
mNeedToSendFinishedDeviceScan = true;
}
Device* device = mDevices.valueAt(deviceIndex);
if (eventItem.events & EPOLLIN) {
//这里的device->fd就是/dev/input/event%d这个设备文件,就是从这里读取出event的buffer
int32_t readSize = read(device->fd, readBuffer,
上面的EventHub主要读取dev/input的里面的数据,然后把数据那回来在loopOnce()里面的processEventsLocked()处理
if (count) {
processEventsLocked(mEventBuffer, count);
}
问题:kernel层input.c 没有看
2.2.2 消息的分发
消息通过EventHub获得后,会走QueueListener—>flush()方法
void QueuedInputListener::flush() {
size_t count = mArgsQueue.size();
for (size_t i = 0; i < count; i++) {
NotifyArgs* args = mArgsQueue[i];
args->notify(mInnerListener);
delete args;
}
mArgsQueue.clear();
}
从上面的代码可以知道,里面会走notify的方法。我们以notifyKey为例,来具体分析事件分发的步骤notifykey方法里面会走enqueueInboundEventLocked方法,在这里mInboundQueue.enqueueAtTail(entry),会得到entry是key还是motion。然后进行相应的处理,走dispatchOnce()方法。最后因为是key事件,会走dispatchKeyLocked方法。在这里方法里面会涉及到跟对应的window进行消息交互。
第一步:前期处理,主要针对按键的repeatCount
//代码省略
第二步:检查是否Intercept_key_result_try_again_later 如果是的话,还要判断当前时间点满足要求与否--如果不满足,直接返回
//代码省略
第三步:在将事件发送出去前,先要检查当前系统策略(Policy)是否要对它进行先期处理,比如系统按键Home,就需要先由WMS来处理
//代码省略
第四步:判断是否要放弃当前事件
//代码省略
第五步:确定事件的接收方(Targets),这是最重要的一步
// Identify targets.
Vector
int32_t injectionResult =
//查找符合要求的事件投递目标,下面会针对这个函数进行分析
findFocusedWindowTargetsLocked(currentTime,
entry, inputTargets, nextWakeupTime);
if (injectionResult == INPUT_EVENT_INJECTION_PENDING) {
return false;
}
setInjectionResultLocked(entry, injectionResult);
if (injectionResult != INPUT_EVENT_INJECTION_SUCCEEDED) {
return true;
}
addMonitoringTargetsLocked(inputTargets);
第六步:投递消息到目标中
// Dispatch the key.
dispatchEventLocked(currentTime, entry, inputTargets);
return true;
重点分析下findFocusedWindowTargetsLocked这个方法
int32_t InputDispatcher::findFocusedWindowTargetsLocked(nsecs_t currentTime,
const EventEntry* entry, Vector
int32_t injectionResult;
String8 reason;
// If there is no currently focused window and no focused application
// then drop the event.
if (mFocusedWindowHandle == NULL) {
if (mFocusedApplicationHandle != NULL) {
injectionResult = handleTargetsNotReadyLocked(currentTime, entry,
mFocusedApplicationHandle, NULL, nextWakeupTime,
"Waiting because no window has focus but there is a "
"focused application that may eventually add a window "
"when it finishes starting up.");
goto Unresponsive;
}
上面有一个重点的变量 mFocusedWindowHandle,这个windowHandle在 InputDispatcher里面的setInputWindows里面设置。这个是由InputMonitor来设置的。在WindowManagerService里面的addWindow方法,通过InputMonitor调用setInputFocuslw方法,一路走进去,会调用InputManagerService的setInputWindows方法,然后就是InputManager获得InputDispatcher,然后调用setInputWindows方法,把接受消息的window告诉InputDispatcher.这样就实现了WMS 与 InputDispatcher的联系,中间的桥梁是InputMonitor.
上面的代码实现了InputDispatcher跟对应的window的关联,但是如何分发消息给window呢?
看下第六步dispatchEventLocked ,走进去看它的代码。
这里有一个InputTarget,查看它的代码,发现它里面有一个InputChannel。
查看下InputChannel的代码
/* Creates a pair of input channels.
*
* Returns OK on success.
*/
//用于打开一个Channel对(因为是双向通信,需要两个通道)
static status_t openInputChannelPair(const String8& name,
sp
inline String8 getName() const { return mName; }
inline int getFd() const { return mFd; }
status_t sendMessage(const InputMessage* msg);
status_t receiveMessage(InputMessage* msg);
sp
/// M: Switch log by command
static void switchInputLog(bool enable);
看下InputChannel的代码的注释,我们可以知道它是用来通信的。看下关键的函数openInputChannelPair
这里我们可以明白了InputDispatcher跟InputChannel的关联。下面我们看下WMS如何跟InputChannel的关联,看下WMS的addWindow的方法,可以看到WMS在添加的window的时候,就打开了一对通道。
try {
//设置当前通道的名字
String name = win.makeInputChannelName();
//打开一对通道
InputChannel[] inputChannels = InputChannel.openInputChannelPair(name);
win.setInputChannel(inputChannels[0]);
inputChannels[1].transferTo(outInputChannel);
mInputManager.registerInputChannel(win.mInputChannel, win.mInputWindowHandle);
InputDispatcher 如何跟WSM 关联?看下面的代码,就可以看到InputTarget/InputChannel 跟WMS添加的window的关联
void InputDispatcher::addWindowTargetLocked(const sp
int32_t targetFlags, BitSet32 pointerIds, Vector
inputTargets.push();
//这里把相关一些信息跟 targets进行绑定
const InputWindowInfo* windowInfo = windowHandle->getInfo();
InputTarget& target = inputTargets.editTop();
target.inputChannel = windowInfo->inputChannel;
target.flags = targetFlags;
target.xOffset = - windowInfo->frameLeft;
target.yOffset = - windowInfo->frameTop;
target.scaleFactor = windowInfo->scaleFactor;
target.pointerIds = pointerIds;
从上面可以知道了,InputChannel是 WMS和 InputDispatcher之间用来通信的。
InputChannel 是pipe在android的版本,InputDispatcher与 window 是通过pipe传递消息。
到这里为止,InputManagerService 、WindowManagerServicve 跟应用程序的交互讲完了。


