使用gitlab ci/cd + fastlane 在ios上实施ci/cd
gitlab跟github类似,都是基于git对源码进行版本控制,团队协作,并都是基于web端,跨平台,非常好用。但相比于github而言,gitlab提供一个CE(community edition)开源版本。这样我们就可以自己根据需求,在服务器上部署gitlab。
本教程专注如何使用gitlab中的ci/cd,并结合fastlane来实施ios的 ci/cd,提高我们的工作效率。
整个流程如下:
- 架设gitlab服务器(此处直接使用gitlab官方网站)
- 注册gitlab账号
- 在gitlab上,创建mydemo repo
- git repo(repo是repository的简写)到本地
- 在repo所在目录,创建ios demo工程
- push ios demo工程到gitlab
- 添加任务配置文件: .gitlab-ci.yml
- 配置,运行runner
- 使用fastlane完成自动执行: 单元测试,编译,发布
1. 架设gitlab服务器。
我们这里直接使用gitlab官网即可。 如果想要自己搭建gitlab服务器,可以采用donker架设,非常简单。
- 去https://www.docker.com/get-started下载相应的安装包,安装, 并启动docker即可。 这里是使用mac版本,在本地安装gitlab服务器。
打开terminal,输入如下命令:
sudo docker run --detach --hostname gitlab.example.com --env GITLAB_OMNIBUS_CONFIG="external_url 'http://192.168.1.5/'; gitlab_rails['lfs_enabled'] = true;" --publish 443:443 --publish 8080:80 --publish 22:22 --name gitlab --restart always --volume ~/gitlab/config:/etc/gitlab --volume ~/gitlab/logs:/var/log/gitlab --volume ~/gitlab/data:/var/opt/gitlab gitlab/gitlab-ce:latest
有几点需要注意 :
gitlab.example.com 这个是例子,要换成你公司的域名,如果没有就把
"external_url 'http://192.168.1.5/';中的ip地址换成服务器的地址,即可。
gitlab_rails['lfs_enabled'] = true是开启lfs(large file store)支持。 这个主要是用来对大文件(psd, audo,video等)的版本管理,使得本地repo的不会获取没有必要的大文件。只需获取最近需要是使用的大文件。从而减少本地repo的储存压力。
publish 443:443 --publish 8080:80 --publish 22:22开启宿主主机跟docker容器之间的端口映射。 比如8080:80,就是把本机的8080端口,映射到docker容器的80端口,需要注意的是,在本地测试安装gitlab时,因为自己的电脑开了很多程序,通常8080端口可能会被其他程序占用,所以测试安装时,最好用一些不常用的端口。
--volume ~/gitlab/logs:/var/log/gitlab --volume ~/gitlab/data:/var/opt/gitlabvolume的作用,就是把本机的目录映射到docker容器中相应的目录。 可以把docker中需要持久保存的数据保存到本机上。在设置volume本机目录时,一定要注意权限问题,在mac上,在根目录
/上,创建文件,文件夹需要root权限,因此,如果没有特殊需要,在~目录(即当前用户目录)下相对来说,就足够了。
-
如果是第一次运行这个命令行,需要下载gitlab-ce:last安装包。 等待下载完成后,会自动安装,如果想了解目前gitlab安装情况,可以在terminal中输入:
docker logs -f gitlab来查看目前安装的日志记录。 -
gitlab启动后,在浏览器中输入: https://127.0.0.1:8080即可访问在本机上架设好的gitlab服务器。 按提示输入管理员密码,然后自己注册一个账号,创建一个demo repo。
最终如下:
注意: 在git clone时,如果端口号映射时,不是80:80,那么需要加上端口号,这里用的是8080:80映射,所以要加上8080:
git clone http://192.168.1.5:8080/hi/demo.git
2. 在gitlab官网上注册账号
本教程使用官网的gitlab服务器,所以先在https://gitlab.com/注册一个账号。
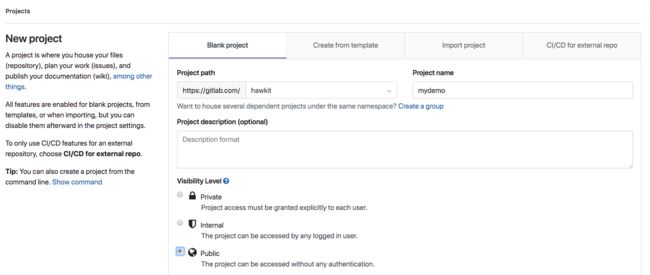
3. 在gitlab上,创建demo repo
在这里repo设置成public,让所有人可见,这根据项目情况自行设置即可。
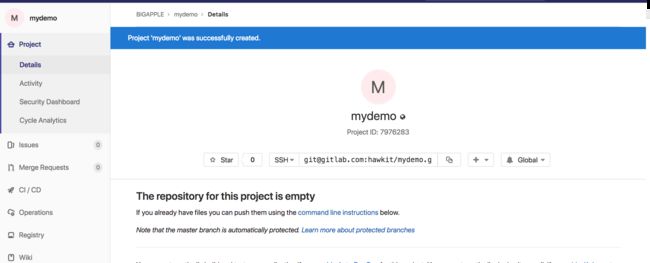
4.mydemo repo创建完成
5. clone repo到本地
在terminal中输入:
git clone https://gitlab.com/hawkit/mydemo.git
)
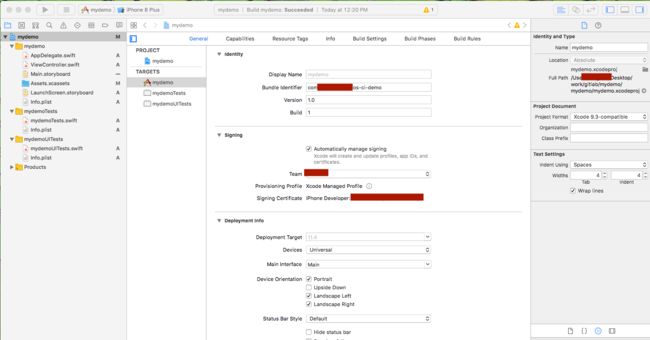
6. 进入mydemo目录,在此创建ios项目
app id, profile等证书,请自行在itunes developer上创建,并在itunes connect创建一个app。
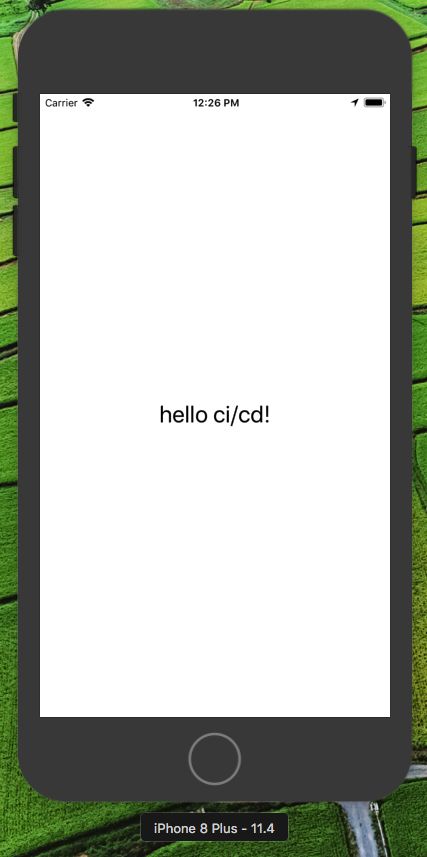
保证编译通过,可运行,测试用例都能跑通。
注意: 把项目mydemo目录下内容,全部移到到执行 git clone时,生成的目录下。
6. Push ios demo工程到gitlab
在terminal中依次输入如下命令:
git add .
git commit -m "init ios project"
git push origin master
7. 添加任务配置文件: .gitlab-ci.yml
内容如下:
stages:
  - test
  - build
  - release

test_job:
    stage: test
    script:
      - fastlane test
    tags:
      - ios

build_job:
    stage: build
    script:
      - fastlane build
    tags:
      - ios

release_job:
    stage: release
    script:
      - fastlane release
    tags:
      - ios
    only:
      - tags
在terminal中依次输入如下命令:
git add .
git commit -m "add .gitlab-ci.yml"
git push origin master
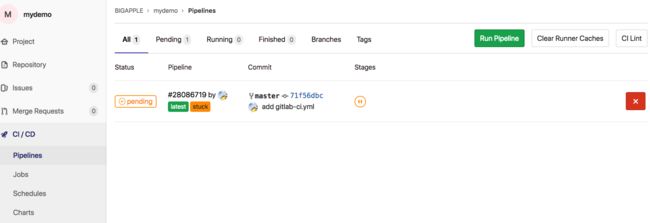
此时,去gitlab ci/cd页面,会发现有一个挂起的job。
因为,我们还没有配置runner来运行.gitlab-ci.yml中配置的job。下一步就是在本地配置一个specific runner。
8. 配置runner。
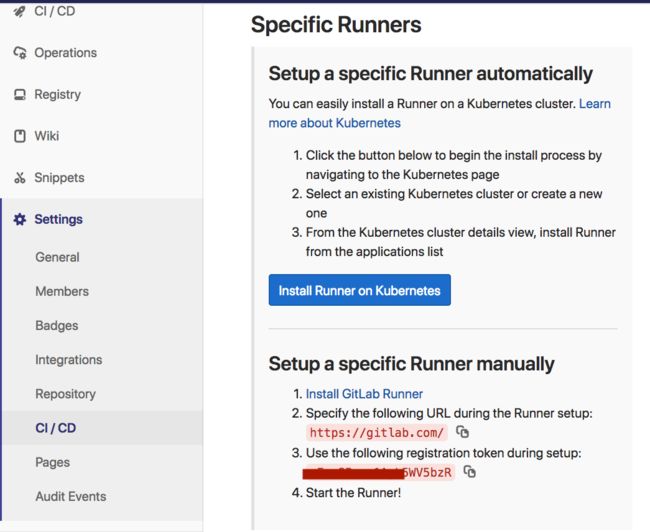
切换到mydemo项目下的setting-> CI/CD -> Runner页面。
这里我们配置一个Specific Runner,点击Install Gitlab Runner,按要求安装好Gitlab Runner 。
-
注册Runner, 在terminal中输入:
gitlab-runner register然后按提示依次输入gitlab服务器http地址:
这里是
https://gitlab.com/。然后输入: 上面截图中的regsitration token。
然后再输入runner简介,输入runner的tag:
这里输入
ios, 这个tag用来标识runner,在.gitlab-ci.yml中,每个job是通过这个tag来把任务分配到runner上运行。最后输入runner上executor的类型:
这里输入:
shell
输入:
gitlab-runner status查看gitlab-runner是否在运行,如果没有,需要输入gitlab-runner start启动。输入:
gitlab-runner verify来验证runner是否已激活。如果已激活,如下图所示:
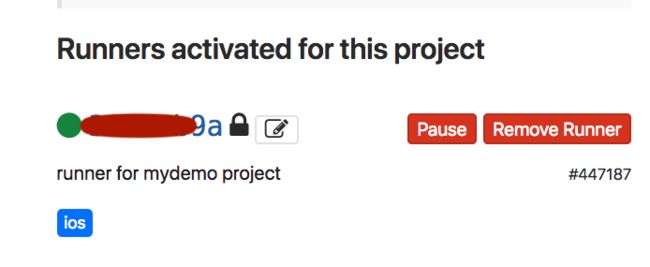
切换到mydemo项目下的setting-> CI/CD -> Runner页面, 会显示runner已经在线,等待接受任务了。
此时,切换到mydemo项目下的CI/CD -> Jobs页面,会看到刚才挂起的任务,执行失败。 因为在.gitlab-ci.yml中用到了fastlane,但fastlane还没有配置好。
- 如果想要了解runner目前的运行情况,可以在terminal中输入:
gitlab-runner --debug run
9. 使用fastlane完成ios自动化单元测试,编译,打包,发布
-
安装fastlane。
打开https://docs.fastlane.tools/getting-started/ios/setup/ 链接, 按要求安装好fastlane。
-
在terminal中,切换到mydemo项目所在位置,即mydemo.xcodeproj所在的目录。
输入
fastlane init -
我们在这里选择3: Automation app store distribution
-
输入appstore账号跟密码
注意: 这个username是Apple Developer Program上注册的用户email。
完成后,会在当前目录创建一个fastlane目录,fastlane相关的配置文件,都在这个目录里面。里面有两个文件Appfile, Fastfile.
-
在项目所在的根目录,加上.gitignore文件。 在terminal中输入
touch .gitignorehttps://www.gitignore.io/api/macos
https://www.gitignore.io/api/xcode
把上面两个文件中的内容。复制到
.gitignore中。 -
输入
git add .
git commit -m "add .gitignore and fastlane"
git push origin master
-
在项目所在根目录,创建两个环境变量配置文件。
touch .env.default
touch .env.secret
.env.default里面的内容:
XCODE_PROJECT = mydemo.xcodeproj
XCODE_SCHEME = mydemo
DEVELOP_CONFIGURATION = Debug
DEVELOP_EXPORT_METHOD = development
.env.secret里面的内容: 空。
暂时没用到,这个文件主要是配置一下敏感的信息。比如token,密钥等。
注意: 一定要把这些敏感的信息,加入到.gitignore中,避免提交到gitlab上去。
-
在项目所在根目录,创建Gemfile。
touch Gemfile内容如下:
source "https://rubygems.org"

gem "fastlane"
-
安装dotenv,这是一个ruby的gem。
PS: fastlane是用ruby开发的。
gem install dotenvgem是一个管理ruby包的工具,如果没有安装gem,请去https://github.com/rubygems/rubygems,按提示安装。
-
配置Fastfile。 内容如下:
# This file contains the fastlane.tools configuration
# You can find the documentation at https://docs.fastlane.tools
#
# For a list of all available actions, check out
#
#     https://docs.fastlane.tools/actions
#
# For a list of all available plugins, check out
#
#     https://docs.fastlane.tools/plugins/available-plugins
#

# Uncomment the line if you want fastlane to automatically update itself
# update_fastlane

fastlane_require 'dotenv'

default_platform(:ios)

platform :ios do

  before_all do
      Dotenv.overload '.env.secret'
      Dotenv.overload '.env.default'
  end

  lane :lint do
     swiftlint(
         reporter: "html",
         output_file: "fastlane/swiftlint.html",
      ignore_exit_status: true
         )
  end

  lane :test do

     scan(
         scheme: ENV['XCODE_SCHEME'],
         output_directory: "fastlane/tests",
         clean: true
         )
  end

  lane :build do

     # incerment the build number
     increment_build_number(
         build_number: ENV['CI_JOBENV_ID'],
         xcodeproj: ENV['XCODE_PROJECT']
         )

     # BUILD
     gym(
         scheme: ENV['XCODE_SCHEME'],
         configuration: ENV['DEVELOP_CONFIGURATION'],
         export_method: ENV['DEVELOP_EXPORT_METHOD'],
         #export_xargs: ENV['DEVELOP_XARGS'],
         silent: true,
         clean: true,
      codesigning_identity: "iPhone Developer: xxxx (xxxxxxxx)",
      export_options: {
          provisioningProfiles: {
            "com.xxxx.ios-ci-demo" => "ios-ci-demo-dev"
        }
      }
         )

  end

end
几点需要注意的:
codesigning_identity: "iPhone Developer: xxxx (xxxxxxxx)",
这是签名证书名。可以在keychain access中获取。
- provisioningProfiles: { "com.xxxx.ios-ci-demo" => "ios-ci-demo-dev" }
因为这里是有手动配置签名证书,profile,所以,务必在这里写上对应的app的id,以及相对应的provisioning profile名。
- 设置项目的scheme为shared
-
设置项目的versioning system为 Apple Generic。这样我们就可以在fastlane中使用
increment_build_number来自动变更build版本号了。
-
在terminal中,依次输入
fastlane lint
fastlane test
fastlane build
来测试fastlane任务能否成功完成。
-
成功后,把本地修改push到gitlab上的repo上去。
git add .
git commit -m "change Fastfile"
git push origin master
切换gitlab上,mydemo项目->CI/CD->Jobs页面。 我们可以看到push到gitlab后,会自动触发pipeline,执行我们在.gitlab-ci.ym中的指定的job。 gitlab上,项目默认情况下,只要有内容push到reop上,就会自动触发这些job。也就是所谓的ci/cd. 不过,在实际项目ci/cd实践中,要根据具体情况细分这些触发条件,以及相应的任务。
- 目前只有两个stage,因为在上面的release job我们设置了:
only:
 - tags
也就是说,只有给分支打tag时,才会触发这个任务的执行。
最后所有的job执行完成。如下图所示:
10. 可能出现的问题
- 在job运行过程中,可能会出现
Please update using `bundle update fastlane`
这时,需要在runner所在机器上, 更新fastlane,如果发现没有bundle,那就需要通过输入命令行:bundle install 来安装bundle。
-
在job日志中出现:Job failed: exit status 1
这个很有可能是RVM重写cd命令导致的问题。 要解决这个问题,需要在
.bash_profile(因为这里用的是bash,如果是使用其他的shell,配置文件有所不同)文件的末尾unset这个命令。unset cd.bash_profile所在位置:~/.bash_profile 在使用fastlane中也有出现各种各样的问题,但是这些问题基本上在google上能找到解决方案。
Gitlab中的ci/cd很多功能,很多细节,需要在具体项目实践中,边用边学才能很好的理解,掌握。Fastlane也是如此,本教程只涉及到一点皮毛。 还有很多高级功能,需要根据自己现有项目,团队特点,有针对性的去使用里面相关的功能。 如果你会ruby,那上手Fastlane也是非常容易,因为它是用ruby写的,Fastfile里面就是ruby代码,因此有ruby基础,理解起来就容易多了。

