简介
UIKit中的UIBezierPath是Core Graphics框架关于path的一个封装,顾名思义,它就是用来画路径的,在iOS中,画阴影,界面图形绘制,动画,很多都需要使用到它。
初始化
我们先看看系统的初始化接口,懂得这些接口就可以进行一些基础图形得绘制。
- 初始化一个
UIBezierPath
+ (instancetype)bezierPath; //初始化贝塞尔曲线(无形状)
- 初始化一个矩形
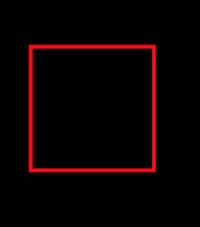
+ (instancetype)bezierPathWithRect:(CGRect)//绘制矩形贝塞尔曲线
- (void)drawRect:(CGRect)rect {
    UIBezierPath *path = [UIBezierPath bezierPathWithRect:CGRectMake(50, 50, 100, 100)];
    [[UIColor redColor] set];
    path.lineWidth = 3;
    [path stroke];
}
- 初始化矩形的内切圆
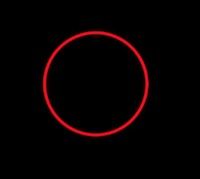
+ (instancetype)bezierPathWithOvalInRect:(CGRect)rect; //绘制椭圆(圆形)曲线
- 绘制一个矩形,(4个圆角)
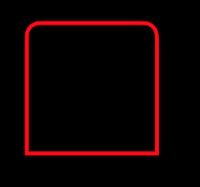
+ (instancetype)bezierPathWithRoundedRect:(CGRect)rect cornerRadius:(CGFloat)corner
// 绘制含有圆角的贝塞尔曲线
- 绘制可选择圆角方位的贝塞尔曲线
+ (instancetype)bezierPathWithRoundedRect:(CGRect)rect byRoundingCorners:(UIRectCorner)corners cornerRadii:(CGSize)cornerRadii; //绘制可选择圆角方位的贝塞尔曲线
圆角方位,位枚举
typedef NS_OPTIONS(NSUInteger, UIRectCorner) {
    UIRectCornerTopLeft     = 1 << 0, // 左上
    UIRectCornerTopRight    = 1 << 1,  // 右上
    UIRectCornerBottomLeft  = 1 << 2, // 左下
    UIRectCornerBottomRight = 1 << 3, // 右下
    UIRectCornerAllCorners  = ~0UL // 全方位
};
- 绘制圆弧
/**
 绘制圆弧

 @param center 圆心
 @param radius 半径
 @param startAngle 起点
 @param endAngle 终点
 @param clockwise 是否顺时针
 @return 圆弧
 */
+ (instancetype)bezierPathWithArcCenter:(CGPoint)center radius:(CGFloat)radius startAngle:(CGFloat)startAngle endAngle:(CGFloat)endAngle clockwise:(BOOL)clockwise;
属性和方法
- 贝塞尔曲线开始点
- (void)moveToPoint:(CGPoint)point;
- 闭合曲线
- (void)closePath;
- 填充颜色,区域必须是闭合区域
- (void)fill;
- 绘制曲线的边框
- (void)stroke;
- 删除
UIBezierPath对象中的所有点, 效果也就等同于删除了所有子路经
- (void)removeAllPoints;
- 判断路径是否为空
@property(readonly,getter=isEmpty) BOOL empty;
-
UIBezierPath当前路径的最小外围矩形的rect,只读属性
@property(nonatomic,readonly) CGRect bounds;
- 路径中的当前点,只读属性,下图中蓝色部分就是外围的最小矩形
@property(nonatomic,readonly) CGPoint currentPoint;
- 路径是否包含某个点
- (BOOL)containsPoint:(CGPoint)point;
- 线宽
@property(nonatomic) CGFloat lineWidth;
- 路径的终点样式,适用于非封闭式路径,封闭式路径无效
@property(nonatomic) CGLineCap lineCapStyle;

typedef CF_ENUM(int32_t, CGLineCap) {
    kCGLineCapButt,   // 默认,直角
    kCGLineCapRound,   // 圆角
    kCGLineCapSquare // 在两端添加宽度为线宽的正方形,也是直角
};
- 拐角样式
@property(nonatomic) CGLineJoin lineJoinStyle;

typedef CF_ENUM(int32_t, CGLineJoin) {
    kCGLineJoinMiter,   // 连接点为尖角
    kCGLineJoinRound, // 连接点为圆角
    kCGLineJoinBevel  // 连接点直线
};
- 拐角的内角和外角的距离
@property(nonatomic) CGFloat miterLimit;
- 填充规则
设置为 YES, 则路径将会使用 基偶规则 (even-odd) 进行填充.
设置为 NO,  则路径将会使用 非零规则 (non-zero) 规则进行填充.
@property(nonatomic) BOOL usesEvenOddFillRule;
- 添加一条直线
- (void)addLineToPoint:(CGPoint)point;
UIBezierPath *path = [UIBezierPath bezierPathWithArcCenter:CGPointMake(100, 100) radius:50 startAngle:M_PI_2 endAngle:-M_PI_4 * 3 clockwise:YES];
    [path addLineToPoint:CGPointMake(100, 100)];
    [[UIColor redColor] set];
    path.lineWidth = 3;
    [path closePath];
    [path stroke];
添加二次贝塞尔曲线
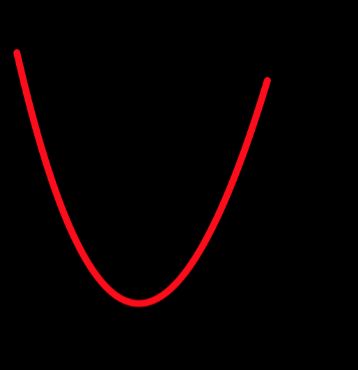
- (void)addQuadCurveToPoint:(CGPoint)endPoint controlPoint:(CGPoint)controlPoint;
UIBezierPath *path = [UIBezierPath bezierPath];
    [path moveToPoint:CGPointMake(20, 50)];
    [path addQuadCurveToPoint:CGPointMake(200, 70) controlPoint:CGPointMake(100, 400)];
    [[UIColor redColor] set];
    path.lineWidth = 5;
    path.lineCapStyle = kCGLineCapRound;
    [path stroke];
- 添加三次贝塞尔曲线
- (void)addCurveToPoint:(CGPoint)endPoint controlPoint1:(CGPoint)controlPoint1 controlPoint2:(CGPoint)controlPoint2;
UIBezierPath *path = [UIBezierPath bezierPath];
    [[UIColor redColor] set];
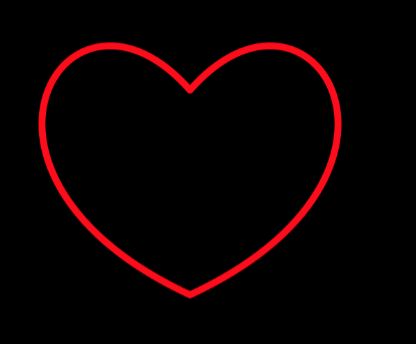
    path.lineWidth = 5;
    CGPoint startPoint = CGPointMake(self.frame.size.width/2, 120);
    [path moveToPoint:CGPointMake(self.frame.size.width/2, 120)];
    CGPoint endPoint = CGPointMake(self.frame.size.width/2, self.frame.size.height-400);
    CGPoint controlPoint1 = CGPointMake(100, 20);
    CGPoint controlPoint2 = CGPointMake(0, 180);
    [path addCurveToPoint:endPoint controlPoint1:controlPoint1 controlPoint2:controlPoint2];
    [path moveToPoint:endPoint];
    CGPoint controlPoint3 = CGPointMake(self.frame.size.width, 180);
    CGPoint controlPoint4 = CGPointMake(self.frame.size.width-100, 20);
    [path addCurveToPoint:startPoint controlPoint1:controlPoint3 controlPoint2:controlPoint4];
    path.lineCapStyle = kCGLineCapRound;
    path.lineJoinStyle = kCGLineJoinRound;
    [path stroke];
- 添加一个弧线
- (void)addArcWithCenter:(CGPoint)center radius:(CGFloat)radius startAngle:(CGFloat)startAngle endAngle:(CGFloat)endAngle clockwise:(BOOL)clockwise NS_AVAILABLE_IOS(4_0);
- 在原有路径基础上添加新路径
- (void)appendPath:(UIBezierPath *)bezierPath;
- 返回一个新的 UIBezierPath 对象, 形状和原来路径的形状一样, 但是绘制的方向相反.
- (UIBezierPath *)bezierPathByReversingPath NS_AVAILABLE_IOS(6_0);
- 对路径所有点进行二维变换。
- (void)applyTransform:(CGAffineTransform)transform;
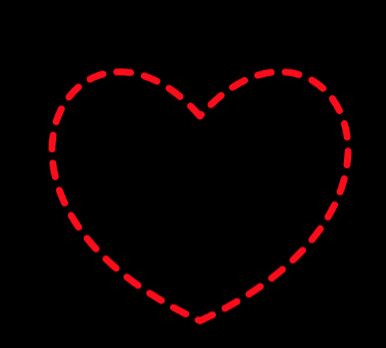
- 虚线的添加
/**
 @param pattern c语言数组,存储虚线的长度
 @param count 我一般给1
 @param phase 偏移值,绘制的位置
 */
- (void)setLineDash:(nullable const CGFloat *)pattern count:(NSInteger)count phase:(CGFloat)phase;
CGFloat dashLineConfig2[] = {10, 8};
[path setLineDash:dashLineConfig2 count:1 phase:0];
- 指定填充模式
// These methods do not affect the blend mode or alpha of the current graphics context
- (void)fillWithBlendMode:(CGBlendMode)blendMode alpha:(CGFloat)alpha;
- 指定边框绘制模式
- (void)strokeWithBlendMode:(CGBlendMode)blendMode alpha:(CGFloat)alpha;
- 裁剪
- (void)addClip;
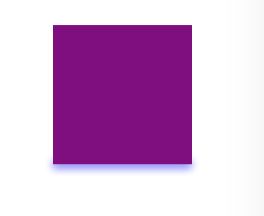
UIBezierPath 画阴影
// 视图
    _purpleView = [[UIView alloc] initWithFrame:CGRectMake(50, 50, 100, 100)];
    _purpleView.backgroundColor = [UIColor purpleColor];
    [self addSubview:_purpleView];

     // path创建
    UIBezierPath *bezierPath = [UIBezierPath bezierPathWithRect:CGRectMake(0, 101, 100, 5)];
    _purpleView.layer.shadowColor = [UIColor blueColor].CGColor;
    _purpleView.layer.shadowOpacity = 0.6;

     // 添加阴影
    _purpleView.layer.shadowPath = bezierPath.CGPath;
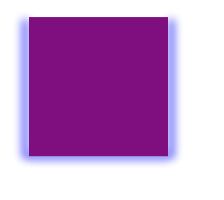
- 多面阴影
// 视图
    _purpleView = [[UIView alloc] initWithFrame:CGRectMake(50, 50, 100, 100)];
    _purpleView.backgroundColor = [UIColor purpleColor];
    [self addSubview:_purpleView];

     // path创建
    UIBezierPath *bezierPath1 = [UIBezierPath bezierPathWithRect:CGRectMake(-5, 5, 5, 100)];
    UIBezierPath *bezierPath2 = [UIBezierPath bezierPathWithRect:CGRectMake(0, 101, 100, 5)];
    UIBezierPath *bezierPath3 = [UIBezierPath bezierPathWithRect:CGRectMake(100, 5, 5, 100)];
    [bezierPath1 appendPath:bezierPath2];
    [bezierPath1 appendPath:bezierPath3];
    _purpleView.layer.shadowColor = [UIColor blueColor].CGColor;
    _purpleView.layer.shadowOpacity = 0.6;

     // 添加阴影
    _purpleView.layer.shadowPath = bezierPath1.CGPath;
UIBezierPath 切圆角
- 配合CAShapeLayer切圆角
UIBezierPath *path = [UIBezierPath bezierPathWithOvalInRect:CGRectMake(0, 0, 100, 100)];
    CAShapeLayer *layer = [CAShapeLayer layer];
    layer.path = path.CGPath;
    _purpleView.layer.mask = layer;
- 图片切圆角
- (UIImage *)imageWithRoundCorner:(UIImage *)sourceImage cornerRadius:(CGFloat)cornerRadius size:(CGSize)size {
    CGFloat scale = [UIScreen mainScreen].scale;
    UIGraphicsBeginImageContextWithOptions(size, NO, scale);
    CGRect bounds = CGRectMake(0, 0, size.width, size.height);
    UIBezierPath *path = [UIBezierPath bezierPathWithRoundedRect:bounds cornerRadius:cornerRadius];
    [path addClip];
    [sourceImage drawInRect:bounds];
    UIImage *image = UIGraphicsGetImageFromCurrentImageContext();
    UIGraphicsEndImageContext();
    return image;
}
