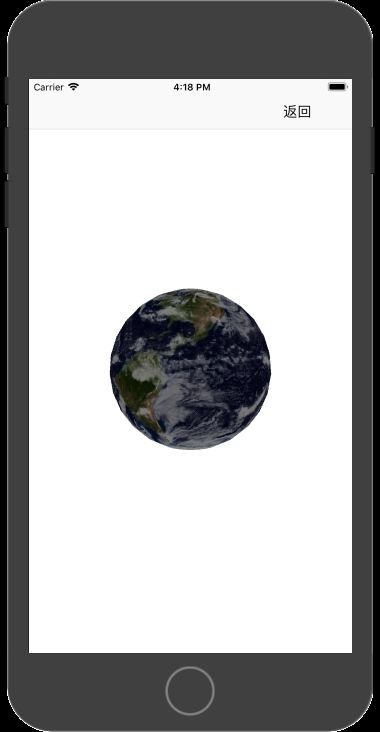
本章主要讲解内容如下
- glBufferSubData的用法
- glMapBuffer 的用法
- gl_PointSize 的使用
- gl_FragCoord 的使用
数据填充的三种方式
正常填充
到目前为止,我们一直是调用glBufferData函数来填充缓冲对象所管理的内存,这个函数会分配一块内存,并将数据添加到这块内存中。
我们一般这样用
 glGenBuffers(1, &_vertexBuffers);
  glBindBuffer(GL_ARRAY_BUFFER,
                 self.vertexBuffers);
    glBufferData( GL_ARRAY_BUFFER,
                 self.getAllocSpaceByteNum,
                 self.vertex,       ///buffer中已经存在数据了
                 usage);
这是我们经常使用的填充方式,一次性填充好
关键测试代码
我们用正常填充的关键测试代码如下
#import "DefaultViewController.h"
#import "DefaultBindObject.h"
#import "SphereManager.h"
@interface DefaultViewController ()

@end

@implementation DefaultViewController

-(void)initSubObject{
    glEnable(GL_DEPTH_TEST);
    glDepthFunc(GL_LESS);
    self.bindObject = [DefaultBindObject new];
}


-(void)loadVertex{
    self.vertexPostion= [Vertex new];
    int vertexNum =[SphereManager getVertexNum];
    [self.vertexPostion allocVertexNum:vertexNum andEachVertexNum:3];
    for (int i=0; iuniforms[DF_uniform_MVPMatrix], 1, 0,result.m);
    GLKVector4 ambientLight = GLKVector4Make(1.0, 1, 1, 1.0);
    glUniform4fv(self.bindObject->uniforms[DF_uniform_AmbientLight], 1,ambientLight.v);
    [self.textureUnit0 bindtextureUnitLocationAndShaderUniformSamplerLocation:self.bindObject->uniforms[DF_uniform_Samplers2D]];

    [self.vertexPostion drawVertexWithMode:GL_TRIANGLES startVertexIndex:0 numberOfVertices:[SphereManager getVertexNum]];
}

@end
结果如下
分批填充
除了使用一次函数调用填充整个缓冲之外,我们也可以使用glBufferSubData,填充缓冲的特定区域。这个函数需要一个缓冲目标、一个偏移量、数据的大小和数据本身作为它的参数。这个函数不同的地方在于,我们可以提供一个偏移量,指定从何处开始填充这个缓冲。这能够让我们插入或者更新缓冲内存的某一部分。要注意的是,缓冲需要有足够的已分配内存,所以对一个缓冲调用glBufferSubData之前必须要先调用glBufferData。
GL_API void GL_APIENTRY glBufferSubData (GLenum target, GLintptr offset, GLsizeiptr size, const GLvoid* data)
参数介绍
target 需要填充的缓冲区域
offset 缓冲区的偏移量
size 需要填充缓冲区的大小 填充在缓冲区位置是是 offset+size
data 需要填充的数据
    glBindBuffer(GL_ARRAY_BUFFER,
                 self.vertexBuffers);
    glBufferSubData(GL_ARRAY_BUFFER, offset, size, ptr);
因为可以分批写入,因为对填充数据具有更高的灵活性.
其实一次填充也可以完成上述操作的.只不过需要提前把需要填充的数据组织好
使用该方案,一般是需要分批填充顶点属性使用的
分批顶点属性
通过使用glVertexAttribPointer,我们能够指定顶点数组缓冲内容的属性布局。在顶点数组缓冲中,我们对属性进行了交错(Interleave)处理,也就是说,我们将每一个顶点的位置、发现和/或纹理坐标紧密放置在一起。既然我们现在已经对缓冲有了更多的了解,我们可以采取另一种方式。
我们可以做的是,将每一种属性类型的向量数据打包(Batch)为一个大的区块,而不是对它们进行交错储存。与交错布局123123123123不同,我们将采用分批(Batched)的方式111122223333。
当从文件中加载顶点数据的时候,你通常获取到的是一个位置数组、一个法线数组和/或一个纹理坐标数组。我们需要花点力气才能将这些数组转化为一个大的交错数据数组。使用分批的方式会是更简单的解决方案,我们可以很容易使用glBufferSubData函数实现:
float positions[] = { ... };
float normals[] = { ... };
float tex[] = { ... };
// 填充缓冲
glBufferSubData(GL_ARRAY_BUFFER, 0, sizeof(positions), &positions);
glBufferSubData(GL_ARRAY_BUFFER, sizeof(positions), sizeof(normals), &normals);
glBufferSubData(GL_ARRAY_BUFFER, sizeof(positions) + sizeof(normals), sizeof(tex), &tex);
这样子我们就能直接将属性数组作为一个整体传递给缓冲,而不需要事先处理它们了。我们仍可以将它们合并为一个大的数组,再使用glBufferData来填充缓冲,但对于这种工作,使用glBufferSubData会更合适一点。
我们还需要更新顶点属性指针来反映这些改变:
glVertexAttribPointer(0, 3, GL_FLOAT, GL_FALSE, 3 * sizeof(float), 0);
glVertexAttribPointer(1, 3, GL_FLOAT, GL_FALSE, 3 * sizeof(float), (void*)(sizeof(positions)));
glVertexAttribPointer(
  2, 2, GL_FLOAT, GL_FALSE, 2 * sizeof(float), (void*)(sizeof(positions) + sizeof(normals)));
注意stride参数等于顶点属性的大小,因为下一个顶点属性向量能在3个(或2个)分量之后找到。
这给了我们设置顶点属性的另一种方法。使用哪种方法都不会对OpenGL有什么立刻的好处,它只是设置顶点属性的一种更整洁的方式。具体使用的方法将完全取决于你的喜好与程序类型。
测试代码
#import "HeightDataSubViewController.h"
#import "SphereManager.h"
#import "DefaultBindObject.h"
@interface HeightDataSubViewController ()
@property (nonatomic ,strong) Vertex * heightVertex ;
@end

@implementation HeightDataSubViewController

-(void)loadVertex{
    self.heightVertex = [Vertex new];
    int vertexNum =[SphereManager getVertexNum];
    [self.heightVertex allocVertexNum:vertexNum andEachVertexNum:5];
    [self.heightVertex bindBufferWithUsage:GL_STATIC_DRAW];
    [self.heightVertex writeBufferInOffset:0 dataSize:sizeof(GL_FLOAT)* 3*vertexNum Data:[SphereManager getSphereVerts]];
    [self.heightVertex writeBufferInOffset:sizeof(GL_FLOAT)*3*vertexNum dataSize:sizeof(GL_FLOAT)*2*vertexNum Data:[SphereManager getSphereTexCoords]];
    [self.heightVertex enableVertexInVertexAttrib:DF_aPos numberOfCoordinates:3 attribOffset:0 vertexWidth:3*sizeof(GL_FLOAT)];
    [self.heightVertex enableVertexInVertexAttrib:DF_aTexCoords numberOfCoordinates:2 attribOffset:sizeof(GL_FLOAT)*3*vertexNum vertexWidth:2*sizeof(GLfloat)];
}

-(void)glkView:(GLKView *)view drawInRect:(CGRect)rect{
    glClear(GL_COLOR_BUFFER_BIT|GL_DEPTH_BUFFER_BIT);
    glClearColor(1, 1, 1, 1);
    GLKMatrix4  mvp= [self getMVP];
    static GLfloat angle=0;
    angle++;
    GLKMatrix4 mode =GLKMatrix4MakeRotation(angle*M_PI/180, 0, 1, 0);
    GLKMatrix4 result=  GLKMatrix4Multiply(mvp,mode);
    glUniformMatrix4fv(self.bindObject->uniforms[DF_uniform_MVPMatrix], 1, 0,result.m);
    GLKVector4 ambientLight = GLKVector4Make(1.0, 1, 1, 1.0);
    glUniform4fv(self.bindObject->uniforms[DF_uniform_AmbientLight], 1,ambientLight.v);
    [self.textureUnit0 bindtextureUnitLocationAndShaderUniformSamplerLocation:self.bindObject->uniforms[DF_uniform_Samplers2D]];

    [self.heightVertex drawVertexWithMode:GL_TRIANGLES startVertexIndex:0 numberOfVertices:[SphereManager getVertexNum]];

@end
结果如下
获取buffer指针赋值法
将数据导入缓冲的另外一种方法是,请求缓冲内存的指针,直接将数据复制到缓冲当中。通过调用glMapBuffer函数,OpenGL会返回当前绑定缓冲的内存指针,供我们操作:
  glBindBuffer(GL_ARRAY_BUFFER,
                 self.vertexBuffers);
   glBindBuffer(GL_ARRAY_BUFFER,
                     self.vertexBuffers);
        void *ptr = glMapBufferOES(GL_ARRAY_BUFFER, GL_WRITE_ONLY_OES);
        memcpy(ptr, self.vertex, self.getAllocSpaceByteNum);
        glUnmapBufferOES(GL_ARRAY_BUFFER);
当我们使用glUnmapBuffer函数,告诉OpenGL我们已经完成指针操作之后,OpenGL就会知道你已经完成了。在解除映射(Unmapping)之后,指针将会不再可用,并且如果OpenGL能够成功将您的数据映射到缓冲中,这个函数将会返回GL_TRUE。
如果要直接映射数据到缓冲,而不事先将其存储到临时内存中,glMapBuffer这个函数会很有用。比如说,你可以从文件中读取数据,并直接将它们复制到缓冲内存中。
关键代码
#import "HeightDataViewController.h"
#import "SphereManager.h"
#import "DefaultBindObject.h"

@interface HeightDataViewController ()

@end

@implementation HeightDataViewController

-(void)loadVertex{

    self.vertexPostion= [Vertex new];
    int vertexNum =[SphereManager getVertexNum];
    [self.vertexPostion allocVertexNum:vertexNum andEachVertexNum:3];
    [self.vertexPostion bindBufferWithUsage:GL_STATIC_DRAW];

    for (int i=0; i
结果如下
vertex核心代码如下
#import "Vertex.h"

@interface Vertex()

@property (nonatomic ,assign)   GLfloat  *vertex; ;
@property (nonatomic ,assign) GLsizei vertexNum ;
@property (nonatomic ,assign) GLsizei eachVertexNum ;
@property (nonatomic, assign) GLuint vertexBuffers;
@property (nonatomic ,assign) GLenum usage ;
@end

@implementation Vertex

- (instancetype)init
{
    self = [super init];
    if (self) {
        [self _customInit];
    }
    return self;
}

-(void)_customInit{
     glGenBuffers(1, &_vertexBuffers);
}

-(NSInteger)getAllocSpaceByteNum{
    return self.getVertexWidth*self.vertexNum;
}
-(GLsizei)getVertexWidth{
    return sizeof(GLfloat) * self.eachVertexNum;
}

-(void)allocVertexNum:(GLsizei)vertexNum andEachVertexNum:(GLsizei)eachVertexNum{
    [self releaseVertex];
    self.vertexNum = vertexNum;
    self.eachVertexNum = eachVertexNum;
     self.vertex =(GLfloat*)malloc(self.getAllocSpaceByteNum);
    memset( self.vertex, 0,  self.getAllocSpaceByteNum);
}

-(void)setVertex:(GLfloat *)vertex index:(NSInteger)index{
    if (self.vertex) {
        NSInteger offset = index * self.eachVertexNum;
        for (NSInteger i = 0; i=
             ((first + count) *sizeof(GLfloat) * self.eachVertexNum),
             @"Attempt to draw more vertex data than available.");
    glBindBuffer(GL_ARRAY_BUFFER,
                 self.vertexBuffers);
     glDrawArrays(mode, first, count);
}

- (void)dealloc
{
    [self releaseVertex];
}

@end
glsl的函数使用
gl_PointSize
我们已经见过gl_Position了,它是顶点着色器的裁剪空间输出位置向量。如果你想在屏幕上显示任何东西,在顶点着色器中设置gl_Position是必须的步骤。这已经是它的全部功能了。
但是有时候我们需要绘制一个点.即我们能够选用的其中一个图元是GL_POINTS,如果使用它的话,每一个顶点都是一个图元,都会被渲染为一个点。可是单纯一个点在屏幕上是没啥意义了,只有赋予了大小才可见.因此我们可以通过OpenGL的glPointSize函数来设置渲染出来的点的大小,但我们也可以在顶点着色器中修改这个值。
GLSL定义了一个叫做gl_PointSize输出变量,它是一个float变量,你可以使用它来设置点的宽高(像素)。在顶点着色器中修改点的大小的话,你就能对每个顶点设置不同的值了。
一个简单的例子就是将点的大小设置为裁剪空间位置的z值,也就是顶点距观察者的距离。点的大小会随着观察者距顶点距离变远而增大。
attribute vec3 beginPostion; ///开始位置
uniform mat4 u_mvpMatrix;

void main(){
    gl_Position =u_mvpMatrix * vec4(beginPostion, 1.0);
    gl_PointSize =300.0/gl_Position.z;

}
测试代码如下
#import "GLPointViewController.h"
#import "GLPointBindObject.h"
@interface GLPointViewController ()
@property (nonatomic ,strong) Vertex * vertex ;

@end

@implementation GLPointViewController

-(void)initSubObject{
    self.bindObject = [GLPointBindObject new];
}


-(void)loadVertex{
    self.vertex= [Vertex new];
    int vertexNum =1;
    [self.vertex allocVertexNum:vertexNum andEachVertexNum:3];
    float onevertex[3];
    for (int i=0; i<3; i++) {
        onevertex[i]=0;
    }
    [self.vertex setVertex:onevertex index:0];
    [self.vertex bindBufferWithUsage:GL_STATIC_DRAW];
    [self.vertex enableVertexInVertexAttrib:PT_aPos numberOfCoordinates:3 attribOffset:0];
}

-(GLKMatrix4)getMVP{
    GLfloat aspectRatio= CGRectGetWidth([UIScreen mainScreen].bounds) / CGRectGetHeight([UIScreen mainScreen].bounds);
    GLKMatrix4 projectionMatrix =
    GLKMatrix4MakePerspective(
                              GLKMathDegreesToRadians(85.0f),
                              aspectRatio,
                              0.1f,
                              20.0f);
    GLKMatrix4 modelviewMatrix =
    GLKMatrix4MakeLookAt(
                         0.0, 0.0, 3.0,   // Eye position
                         0.0, 0.0, 0.0,   // Look-at position
                         0.0, 1.0, 0.0);  // Up direction
    return GLKMatrix4Multiply(projectionMatrix,modelviewMatrix);
}


-(void)glkView:(GLKView *)view drawInRect:(CGRect)rect{
    glClear(GL_COLOR_BUFFER_BIT);
    glClearColor(1, 1, 1, 1);
    GLKMatrix4  mvp= [self getMVP];
    static GLfloat width = 2;
    static GLfloat angle=0;
    angle+=0.1;
    GLfloat z = width* sin(angle);
    GLKMatrix4 mode =GLKMatrix4Translate(mvp, 0, 0, z);
    GLKMatrix4 result=  GLKMatrix4Multiply(mvp,mode);
    glUniformMatrix4fv(self.bindObject->uniforms[PT_uniform_MVPMatrix], 1, 0,result.m);
    [self.vertex drawVertexWithMode:GL_POINTS startVertexIndex:0 numberOfVertices:1];
}
@end
gl_FragCoord
在讨论深度测试的时候,我们已经见过gl_FragCoord很多次了,因为gl_FragCoord的z分量等于对应片段的深度值。然而,我们也能使用它的x和y分量来实现一些有趣的效果。
gl_FragCoord的x和y分量是片段的窗口空间(Window-space)坐标,其原点为窗口的左下角。x y 的取值是与我们设定屏幕像素的大小.在ios中默认是全屏
通过利用片段着色器,我们可以根据片段的窗口坐标,计算出不同的颜色。gl_FragCoord的一个常见用处是用于对比不同片段计算的视觉输出效果,这在技术演示中可以经常看到。比如说,我们能够将屏幕分成两部分,在窗口的左侧渲染一种输出,在窗口的右侧渲染另一种输出。下面这个例子片段着色器会根据窗口坐标输出不同的颜色:
precision mediump float;
uniform float screenWidth;

void main()
{
    if(gl_FragCoord.x < screenWidth/2.0)
        gl_FragColor = vec4(1.0, 0.0, 0.0, 1.0);
    else
        gl_FragColor = vec4(0.0, 1.0, 0.0, 1.0);
}
测试代码如下
#import "GLFragCoordViewController.h"
#import "GLFragCoordBindObject.h"
#import "CubeManager.h"

@interface GLFragCoordViewController ()
@property (nonatomic ,strong) Vertex * vertex;

@end

@implementation GLFragCoordViewController
-(void)initSubObject{
    glEnable(GL_DEPTH_TEST);
    glDepthFunc(GL_LESS);
    self.bindObject = [GLFragCoordBindObject new];
}


-(void)loadVertex{
    self.vertex= [Vertex new];
    int vertexNum =[CubeManager getTextureNormalVertexNum];
    [self.vertex allocVertexNum:vertexNum andEachVertexNum:3];
    for (int i=0; iuniforms[FC_uniform_view], 1, 0,viewMatrix.m);
}
-(void)_bindProjectionMatrix4:(GLBaseBindObject*)bindObject{
    GLfloat aspectRatio= CGRectGetWidth([UIScreen mainScreen].bounds) / CGRectGetHeight([UIScreen mainScreen].bounds);
    GLKMatrix4 projectionMatrix =
    GLKMatrix4MakePerspective(
                              GLKMathDegreesToRadians(100.0f),
                              aspectRatio,
                              0.1f,
                              100.0f);
    glUniformMatrix4fv(bindObject->uniforms[FC_uniform_projection], 1, 0,projectionMatrix.m);
}


-(void)glkView:(GLKView *)view drawInRect:(CGRect)rect{

    /// 模板测试虽然开启了. 但是不起作用.

    glClearStencil(0);
    glClearColor(1,1, 1, 1);
    glClear(GL_COLOR_BUFFER_BIT | GL_DEPTH_BUFFER_BIT);
    GLKMatrix4 cubeMode1 =[self _getModeMatrix4Location:GLKVector3Make(0.0f, 0.0f, 1.0f)];
    static CGFloat angle = 0;
    angle++;
    cubeMode1 = GLKMatrix4Rotate(cubeMode1, angle*M_PI/180.0, 0, 1, 0);
    [self.shader use];
    [self _bindViewMatrix4:self.bindObject];
    [self _bindProjectionMatrix4:self.bindObject];

    [self _drawCubeMode:cubeMode1 bindObject:self.bindObject];

}

-(GLKMatrix4)_getModeMatrix4Location:(GLKVector3)location{
    GLKMatrix4  mode = GLKMatrix4Identity;
    mode =  GLKMatrix4TranslateWithVector3(mode, location);
    //    mode = GLKMatrix4Rotate(mode, 30*M_PI/180.0, 0, 1, 0);
    return mode;
}

-(void)_drawCubeMode:(GLKMatrix4)mode bindObject:(GLBaseBindObject*)bindObject{

    glUniformMatrix4fv(bindObject->uniforms[FC_uniform_model], 1, 0,mode.m);
    glUniform1f(bindObject->uniforms[FC_uniform_screenWidth], UIScreen.mainScreen.bounds.size.width*UIScreen.mainScreen.scale);
    [self.vertex enableVertexInVertexAttrib:FC_aPos numberOfCoordinates:3 attribOffset:0];
    [self.vertex drawVertexWithMode:GL_TRIANGLES startVertexIndex:0 numberOfVertices:[CubeManager getTextureNormalVertexNum]];
}

@end
本章主要就是讲究几个函数的使用.这里简单的贴下代码.代码不全,读者可以下载demo 观看
参考地址2
参考地址1
OpenGLZeroStudyDemo(15)-高级Opengl-高级数据和高级glsl
