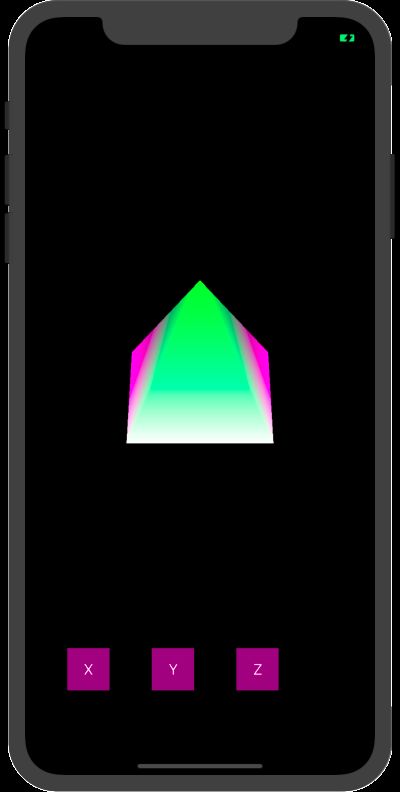
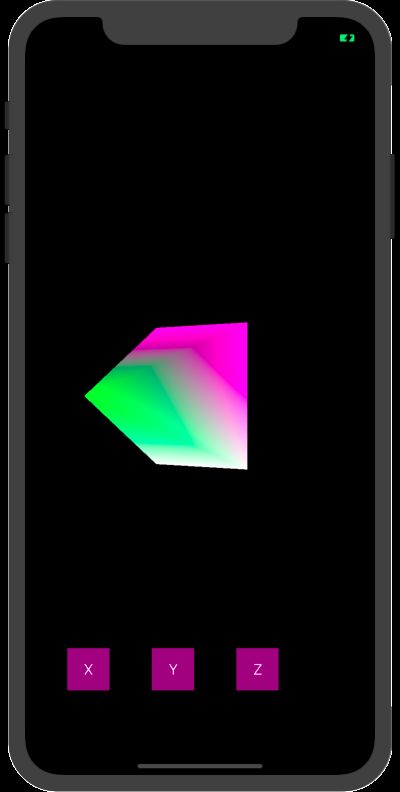
一、理解
顶点数据存储在申请的缓冲区中,其由数据总线传递给着色器(如果是片元着色器,还须将顶点转换成片元),再由着色器最终渲染到涂层上;
二、思路
1.设置涂层;
2.创建上下文;
3.清空缓存区;
4.创建渲染缓存区和帧缓存区;
5.开始绘制;
三、核心代码
//最终渲染
- (void)renderLayer
{
    //设置窗口背景颜色
    glClearColor(0.0, 0.0, 0.0, 1.0);
    //清空颜色缓存
    glClear(GL_COLOR_BUFFER_BIT);
    //设置视口大小
    CGFloat scale = [[UIScreen mainScreen] scale];
    glViewport(self.frame.origin.x*scale, self.frame.origin.y*scale, self.frame.size.width*scale, self.frame.size.height*scale);

    //读取顶点和片元着色器程序
    NSString *vertFile = [[NSBundle mainBundle] pathForResource:@"shaderv" ofType:@"glsl"];
    NSString *fragFile = [[NSBundle mainBundle] pathForResource:@"shaderf" ofType:@"glsl"];
    NSLog(@"vertFile:%@", vertFile);
    NSLog(@"fragFile:%@", fragFile);

    //判断myProgram是否存在,存在则清空
    if (self.myProgram) {
        glDeleteProgram(self.myProgram);
        self.myProgram = 0;
    }

    //加载着色器到myProgram中
    self.myProgram = [self loadShader:vertFile frag:fragFile];

    //创建链接
    glLinkProgram(self.myProgram);
    GLint linkSuccess;

    //获取链接状态
    glGetProgramiv(self.myProgram, GL_LINK_STATUS, &linkSuccess);

    //判断链接是否成功
    if (linkSuccess == GL_FALSE) {
        //获取失败信息
        GLchar message[256];
        glGetProgramInfoLog(self.myProgram, sizeof(message), 0, &message[0]);
        //c字符串转换成oc字符串
        NSString *messageString = [NSString stringWithUTF8String:message];
        NSLog(@"error:%@", messageString);
        return;
    } else {
        //使用myProgram
        glUseProgram(self.myProgram);
    }

    //创建绘制索引数组
    GLuint indices[] = {
        0, 3, 2,
        0, 1, 3,
        0, 2, 4,
        0, 4, 1,
        2, 3, 4,
        1, 4, 3
    };

    //判断顶点缓存区是否为空,为空则申请一个缓存区标志符
    if (self.myVertices == 0) {
        glGenBuffers(1, &_myVertices);
    }

    //----------处理顶点坐标---------

    /*顶点数据
     1.前3个坐标值(x、y、z),后3个颜色值(RGB);
     2.有先后顺序,否则绘制形状完全不同
     */
    GLfloat attrArr[] =
    {
        -0.5f, 0.5f, 0.0f,      1.0f, 0.0f, 1.0f, //左上
        0.5f, 0.5f, 0.0f,       1.0f, 0.0f, 1.0f, //右上
        -0.5f, -0.5f, 0.0f,     1.0f, 1.0f, 1.0f, //左下
        0.5f, -0.5f, 0.0f,      1.0f, 1.0f, 1.0f, //右下
        0.0f, 0.0f, 1.0f,       0.0f, 1.0f, 0.0f, //顶点
    };

    //将_myVertices绑定到GL_ARRAY_BUFFER标志符上
    glBindBuffer(GL_ARRAY_BUFFER, _myVertices);
    //把顶点坐标数据从CPU复制到GPU上
    glBufferData(GL_ARRAY_BUFFER, sizeof(attrArr), attrArr, GL_DYNAMIC_DRAW);

    //将顶点坐标数据通过myProgram传递到顶点着色器程序的position

    //获取顶点属性入口
    GLuint position = glGetAttribLocation(self.myProgram, "position");
    /*传递数据
     1.一行6个数据,前3个为坐标,后3个为颜色;
     2.NULL开始位置:默认为0,指向数组首地址;
     */
    glVertexAttribPointer(position, 3, GL_FLOAT, GL_FALSE, sizeof(GLfloat)*6, NULL);
    //设置合适的格式从缓存区中读取数据
    glEnableVertexAttribArray(position);

    //处理顶点颜色数据:传递到顶点着色器的positionColor
    GLuint positionColor = glGetAttribLocation(self.myProgram, "positionColor");
    glVertexAttribPointer(positionColor, 3, GL_FLOAT, GL_FALSE, sizeof(GLfloat)*6, (float *)NULL +3);
    glEnableVertexAttribArray(positionColor);

    //在myProgram中找到透视投影矩阵和模型视图矩阵
    GLuint projectionMatrixSlot = glGetUniformLocation(self.myProgram, "projectionMatrix");
    GLuint modelViewMatrixSlot = glGetUniformLocation(self.myProgram, "modelViewMatrix");

    //创建透视投影矩阵并初始化
    float width = self.frame.size.width;
    float height = self.frame.size.height;
    KSMatrix4 _projectionMatrix;
    ksMatrixLoadIdentity(&_projectionMatrix);
    float aspect = width/height;
    ksPerspective(&_projectionMatrix, 30.0, aspect, 5.0f, 20.0f);

    //设置glsl里面的投影矩阵
    glUniformMatrix4fv(projectionMatrixSlot, 1, GL_FALSE, (GLfloat *)&_projectionMatrix.m[0][0]);

    //开启剔除功能
    glEnable(GL_CULL_FACE);

    //创建平移矩阵:Z轴平移-10
    KSMatrix4 _modelViewMatrix;
    ksMatrixLoadIdentity(&_modelViewMatrix);
    ksTranslate(&_modelViewMatrix, 0.0, 0.0, -10.0);

    //创建旋转矩阵
    KSMatrix4 _rotationMatrix;
    ksMatrixLoadIdentity(&_rotationMatrix);
    ksRotate(&_rotationMatrix, xDegree, 1.0, 0.0, 0.0);
    ksRotate(&_rotationMatrix, yDegree, 0.0, 1.0, 0.0);
    ksRotate(&_rotationMatrix, zDegree, 0.0, 0.0, 1.0);

    //将平移矩阵和旋转矩阵相乘,结果放到模型视图矩阵中
    ksMatrixMultiply(&_modelViewMatrix, &_rotationMatrix, &_modelViewMatrix);

    //设置glsl里面的模型视图矩阵
    glUniformMatrix4fv(modelViewMatrixSlot, 1, GL_FALSE, (GLfloat *)&_modelViewMatrix.m[0][0]);

    //设置绘制参数:片元、个数、索引数组
    glDrawElements(GL_TRIANGLES, sizeof(indices)/sizeof(indices[0]), GL_UNSIGNED_INT, indices);

    //由顶点着色器将缓存区中的数据渲染到显示涂层上
    [self.myContext presentRenderbuffer:GL_RENDERBUFFER];
}
四、效果
以上是采用GLSL自定义着色器绘制,下面是采用GLKit框架并添加纹理来绘制
//核心代码
- (void)renderLayer
{
    //顶点数据:前3个坐标(x、y、z),中间三个颜色(RGB),最后2个坐标(纹理)
    GLfloat attrArr [] = {
        -0.5, 0.5, 0.0,   0.0, 0.0, 0.5,   0.0, 1.0,
        0.5, 0.5, 0.0,    0.0, 0.5, 0.0,   1.0, 1.0,
        -0.5, -0.5, 0.0,  0.5, 0.0, 0.0,   0.0, 0.0,
        0.5, -0.5, 0.0,   0.0, 0.0, 0.5,   1.0, 0.0,
        0.0, 0.0, 1.0,     1.0, 1.0, 1.0,   0.5, 0.5
    };

    //绘图索引
    GLuint indices[] =
    {
        0, 3, 2,
        0, 1, 3,
        0, 2, 4,
        0, 4, 1,
        2, 3, 4,
        1, 4, 3,
    };

    //顶点个数
    self.count = sizeof(indices)/sizeof(GLuint);

    //顶点数据存入缓存区:CPU->GPU
    GLuint buffer;
    glGenBuffers(1, &buffer);
    glBindBuffer(GL_ARRAY_BUFFER, buffer);
    glBufferData(GL_ARRAY_BUFFER, sizeof(attrArr), attrArr, GL_STATIC_DRAW);

    //索引数据存入缓存区:CPU->GPU
    GLuint index;
    glGenBuffers(1, &index);
    glBindBuffer(GL_ELEMENT_ARRAY_BUFFER, index);
    glBufferData(GL_ELEMENT_ARRAY_BUFFER, sizeof(indices), indices, GL_STATIC_DRAW);

    //传递顶点数据到着色器指定位置
    glEnableVertexAttribArray(GLKVertexAttribPosition);
    glVertexAttribPointer(GLKVertexAttribPosition, 3, GL_FLOAT, GL_FALSE, sizeof(GLfloat)*8, NULL);

    //顶点颜色数据
    glEnableVertexAttribArray(GLKVertexAttribColor);
    glVertexAttribPointer(GLKVertexAttribColor, 3, GL_FLOAT, GL_FALSE, sizeof(GLfloat)*8, (GLfloat *)NULL + 3);

    //顶点纹理数据
    glEnableVertexAttribArray(GLKVertexAttribTexCoord0);
    glVertexAttribPointer(GLKVertexAttribTexCoord0, 2, GL_FLOAT, GL_FALSE, sizeof(GLfloat)*8, (GLfloat *)NULL + 6);

    //加载纹理
    NSString *filePath = [[NSBundle mainBundle] pathForResource:@"cTest" ofType:@"jpg"];
    NSDictionary *options = [NSDictionary dictionaryWithObjectsAndKeys:@"1", GLKTextureLoaderOriginBottomLeft, nil];
    GLKTextureInfo *textureInfo = [GLKTextureLoader textureWithContentsOfFile:filePath options:options error:nil];

    self.mEffect = [[GLKBaseEffect alloc] init];
    self.mEffect.texture2d0.enabled = GL_TRUE;
    self.mEffect.texture2d0.name = textureInfo.name;

    //创建透视投影矩阵
    CGSize size = self.view.bounds.size;
    float aspect = fabs(size.width/size.height);
    GLKMatrix4 projectionMatrix = GLKMatrix4MakePerspective(GLKMathDegreesToRadians(90.0), aspect, 0.1, 10.0);
    //设置等比缩放
    projectionMatrix = GLKMatrix4Scale(projectionMatrix, 1.0, 1.0, 1.0);

    self.mEffect.transform.projectionMatrix = projectionMatrix;

    //设置平移:Z轴负方向平移2.0
    GLKMatrix4 modelViewMatrix = GLKMatrix4Translate(GLKMatrix4Identity, 0.0, 0.0, -2.0);
    self.mEffect.transform.modelviewMatrix = modelViewMatrix;

    //设置定时器
    double seconds = 0.1;
    timer = dispatch_source_create(DISPATCH_SOURCE_TYPE_TIMER, 0, 0, dispatch_get_main_queue());
    dispatch_source_set_timer(timer, DISPATCH_TIME_NOW, seconds*NSEC_PER_SEC, 0);
    dispatch_source_set_event_handler(timer, ^{
        self.xDegree += 0.1*self.XB;
        self.yDegree += 0.1*self.YB;
        self.zDegree += 0.1*self.ZB;
    });
    dispatch_resume(timer);
}
效果:
GitHub


