十三、连接操作(Connectable Observable Operators)
1,可连接的序列
可连接的序列(
Connectable Observable):
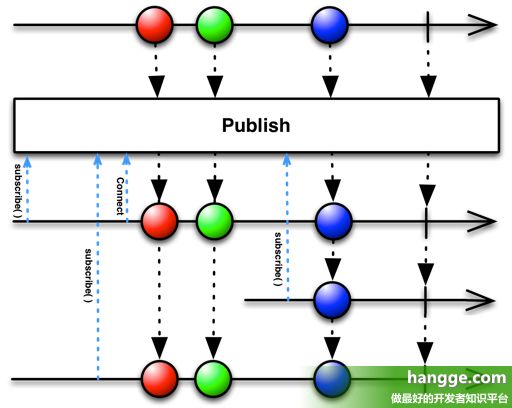
(1)可连接的序列和一般序列不同在于:有订阅时不会立刻开始发送事件消息,只有当调用connect()之后才会开始发送值。
(2)可连接的序列可以让所有的订阅者订阅后,才开始发出事件消息,从而保证我们想要的所有订阅者都能接收到事件消息。
(1)在演示可连接序列之前,先看一个普通序列的样例:
//每隔1秒钟发送1个事件
let interval = Observable.interval(1, scheduler: MainScheduler.instance)

//第一个订阅者(立刻开始订阅)
_ = interval
    .subscribe(onNext: { print("订阅1: \($0)") })

//第二个订阅者(延迟5秒开始订阅)
delay(5) {
    _ = interval
        .subscribe(onNext: { print("订阅2: \($0)") })
}
(2)为方便使用,这里我们定义了一个延迟执行方法:
///延迟执行
/// - Parameters:
///   - delay: 延迟时间(秒)
///   - closure: 延迟执行的闭包
public func delay(_ delay: Double, closure: @escaping () -> Void) {
    DispatchQueue.main.asyncAfter(deadline: .now() + delay) {
        closure()
    }
}
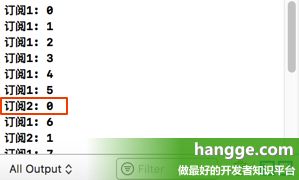
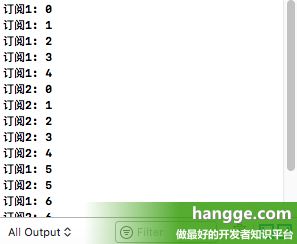
(3)运行结果如下。可以看到第一个订阅者订阅后,每隔 1 秒会收到一个值。而第二个订阅者 5 秒后才收到第一个值 0,所以两个订阅者接收到的值是不同步的。
2,publish
(1)基本介绍
-
publish方法会将一个正常的序列转换成一个可连接的序列。同时该序列不会立刻发送事件,只有在调用connect之后才会开始。
(2)这里我们对上面的样例稍加改造:
//每隔1秒钟发送1个事件
let interval = Observable.interval(1, scheduler: MainScheduler.instance)
    .publish()

//第一个订阅者(立刻开始订阅)
_ = interval
    .subscribe(onNext: { print("订阅1: \($0)") })

//相当于把事件消息推迟了两秒
delay(2) {
    _ = interval.connect()
}

//第二个订阅者(延迟5秒开始订阅)
delay(5) {
    _ = interval
        .subscribe(onNext: { print("订阅2: \($0)") })
}
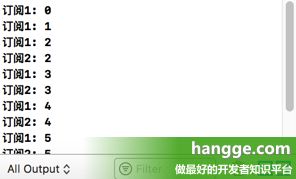
运行结果如下:
3,replay
(1)基本介绍
-
replay同上面的publish方法相同之处在于:会将将一个正常的序列转换成一个可连接的序列。同时该序列不会立刻发送事件,只有在调用connect之后才会开始。 -
replay与publish不同在于:新的订阅者还能接收到订阅之前的事件消息(数量由设置的bufferSize决定)。
(2)使用样例
//每隔1秒钟发送1个事件
let interval = Observable.interval(1, scheduler: MainScheduler.instance)
    .replay(5)

//第一个订阅者(立刻开始订阅)
_ = interval
    .subscribe(onNext: { print("订阅1: \($0)") })

//相当于把事件消息推迟了两秒
delay(2) {
    _ = interval.connect()
}

//第二个订阅者(延迟5秒开始订阅)
delay(5) {
    _ = interval
        .subscribe(onNext: { print("订阅2: \($0)") })
}
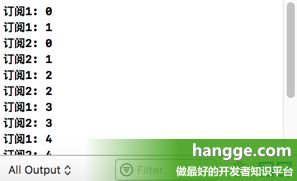
运行结果如下:
4,multicast
(1)基本介绍
-
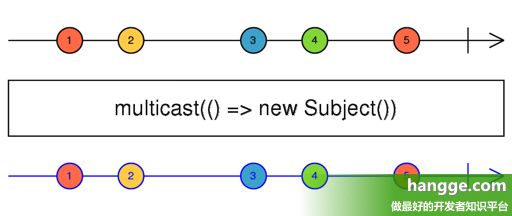
multicast方法同样是将一个正常的序列转换成一个可连接的序列。 - 同时
multicast方法还可以传入一个Subject,每当序列发送事件时都会触发这个Subject的发送。
(2)使用样例
//创建一个Subject(后面的multicast()方法中传入)
let subject = PublishSubject()

//这个Subject的订阅
_ = subject
    .subscribe(onNext: { print("Subject: \($0)") })

//每隔1秒钟发送1个事件
let interval = Observable.interval(1, scheduler: MainScheduler.instance)
    .multicast(subject)

//第一个订阅者(立刻开始订阅)
_ = interval
    .subscribe(onNext: { print("订阅1: \($0)") })

//相当于把事件消息推迟了两秒
delay(2) {
    _ = interval.connect()
}

//第二个订阅者(延迟5秒开始订阅)
delay(5) {
    _ = interval
        .subscribe(onNext: { print("订阅2: \($0)") })
}
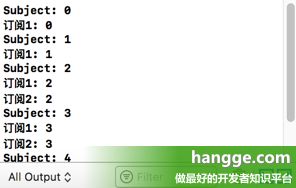
运行结果如下:
5,refCount
(1)基本介绍
-
refCount操作符可以将可被连接的Observable转换为普通Observable - 即该操作符可以自动连接和断开可连接的
Observable。当第一个观察者对可连接的Observable订阅时,那么底层的Observable将被自动连接。当最后一个观察者离开时,那么底层的Observable将被自动断开连接。
(2)使用样例
//每隔1秒钟发送1个事件
let interval = Observable.interval(1, scheduler: MainScheduler.instance)
    .publish()
    .refCount()

//第一个订阅者(立刻开始订阅)
_ = interval
    .subscribe(onNext: { print("订阅1: \($0)") })

//第二个订阅者(延迟5秒开始订阅)
delay(5) {
    _ = interval
        .subscribe(onNext: { print("订阅2: \($0)") })
}
运行结果如下:
6,share(relay:)
(1)基本介绍
- 该操作符将使得观察者共享源
Observable,并且缓存最新的 n 个元素,将这些元素直接发送给新的观察者。 - 简单来说
shareReplay就是replay和refCount的组合。
(2)使用样例
import UIKit
import RxSwift
import RxCocoa

class ViewController: UIViewController {
    override func viewDidLoad() {

        //每隔1秒钟发送1个事件
        let interval = Observable.interval(1, scheduler: MainScheduler.instance)
            .share(replay: 5)

        //第一个订阅者(立刻开始订阅)
        _ = interval
            .subscribe(onNext: { print("订阅1: \($0)") })

        //第二个订阅者(延迟5秒开始订阅)
        delay(5) {
            _ = interval
                .subscribe(onNext: { print("订阅2: \($0)") })
        }
    }
}

///延迟执行
/// - Parameters:
///   - delay: 延迟时间(秒)
///   - closure: 延迟执行的闭包
public func delay(_ delay: Double, closure: @escaping () -> Void) {
    DispatchQueue.main.asyncAfter(deadline: .now() + delay) {
        closure()
    }
}
运行结果如下:
RxSwift使用详解系列
原文出自:www.hangge.com转载请保留原文链接
