背景:本人博客自2014年上线以来,一直使用阿里云
ECS最低配的实例,由于最近阿里云ECS进行了升级迁移,原来的低配实例已经不存在了,升级后实例的配置有所提升,当然价格更高了,为了更好的发挥服务器性能,所以就想利用空闲时间对整站进行升级,包含阿里云ecs更换系统盘,MySQL 5.7.19 编译安装与配置,Nginx 1.12.1 编译安装与配置,PHP 7.1.9 编译安装与配置等。
服务器环境
CentOS 6.3 64位 全新纯净的系统/1核1GB/经典网络 1MB
进入PHP官网下载页面,如果你需要下载php-7.1.9.tar.gz版本,请点击此处
进入/usr/local/src目录,一般我喜欢把下载的文件放在此目录,根据自己的喜好设定
[root@iZ2864f6btwZ src]# cd /usr/local/src
使用wget下载php文件,如果wget没有安装,yum -y install wget即可安装
[root@iZ2864f6btwZ src]# wget http://cn2.php.net/distributions/php-7.1.9.tar.gz
安装编译所需的常用组件和依赖包 [ 参考于网络博客 ]
[root@iZ2864f6btwZ src]# yum -y install libxml2 libxml2-devel openssl openssl-devel curl-devel libjpeg-devel libpng-devel freetype-devel libmcrypt-devel libmcrypt mcrypt mhash
创建php用户组和用户,用来运行php, -g指定用户组, -r创建系统用户
[root@iZ2864f6btwZ src]# groupadd php
[root@iZ2864f6btwZ src]# useradd -r -g php -s /bin/false -M php
解压php,进入 php-7.1.9 目录
[root@iZ2864f6btwZ src]# tar zxvf php-7.1.9.tar.gz && cd php-7.1.9
注意:
部分源码执行./buildconf提示如下信息,说明你下载的是发行版本,不需要再执行此命令生成配置文件[root@iZ2864f6btwZ php-7.1.9]# ./buildconf You should not run buildconf in a release package. use buildconf --force to override this check.
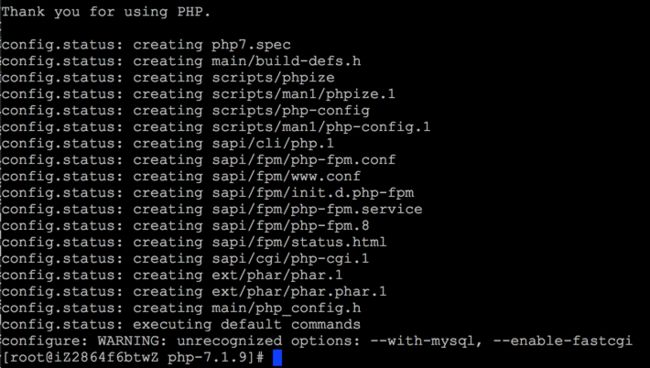
生成Makefile文件,所有扩展参考于网络博客,可根据个人需要安装相应的扩展
[root@iZ2864f6btwZ php-7.1.9]# ./configure \
--prefix=/usr/local/php \
--exec-prefix=/usr/local/php \
--bindir=/usr/local/php/bin \
--sbindir=/usr/local/php/sbin \
--includedir=/usr/local/php/include \
--libdir=/usr/local/php/lib/php \
--mandir=/usr/local/php/php/man \
--with-config-file-path=/usr/local/php/etc \
--with-mysql-sock=/var/run/mysql/mysql.sock \
--with-mcrypt=/usr/include \
--with-mhash \
--with-openssl \
--with-mysql=shared,mysqlnd \
--with-mysqli=shared,mysqlnd \
--with-pdo-mysql=shared,mysqlnd \
--with-gd \
--with-iconv \
--with-zlib \
--enable-zip \
--enable-inline-optimization \
--disable-debug \
--disable-rpath \
--enable-shared \
--enable-xml \
--enable-bcmath \
--enable-shmop \
--enable-sysvsem \
--enable-mbregex \
--enable-mbstring \
--enable-ftp \
--enable-gd-native-ttf \
--enable-pcntl \
--enable-sockets \
--with-xmlrpc \
--enable-soap \
--without-pear \
--with-gettext \
--enable-session \
--with-curl \
--with-jpeg-dir \
--with-freetype-dir \
--enable-opcache \
--enable-fpm \
--enable-fastcgi \
--with-fpm-user=nginx \
--with-fpm-group=nginx \
--without-gdbm \
注意:
php-fpm用户和用户组必须与nginx用户和用户对应--with-fpm-user=nginx \ --with-fpm-group=nginx \
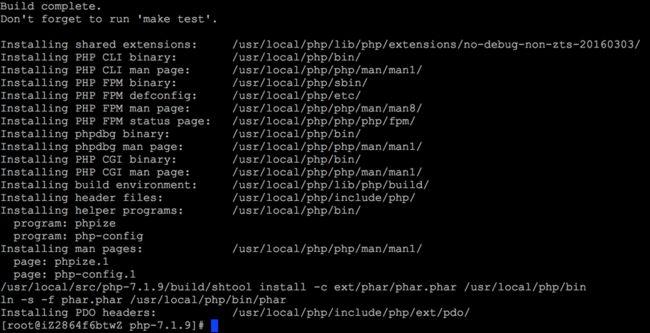
编译并安装
[root@iZ2864f6btwZ php-7.1.9]# make && make install
注意:
检查安装后的目录和文件,查看相应的扩展文件是否存在[root@iZ2864f6btwZ php-7.1.9]# cd /usr/local/php/lib/php/extensions/no-debug-non-zts-20160303/ [root@iZ2864f6btwZ no-debug-non-zts-20160303]# ll total 7608 -rwxr-xr-x 1 root root 1375334 Sep 24 23:56 mysqli.a -rwxr-xr-x 1 root root 648840 Sep 24 23:56 mysqli.so -rwxr-xr-x 1 root root 3391640 Sep 24 23:56 opcache.a -rwxr-xr-x 1 root root 1631520 Sep 24 23:56 opcache.so -rwxr-xr-x 1 root root 497702 Sep 24 23:56 pdo_mysql.a -rwxr-xr-x 1 root root 229568 Sep 24 23:56 pdo_mysql.so [root@iZ2864f6btwZ no-debug-non-zts-20160303]#
将 php 添加到环境变量,新建/etc/profile.d/php7.sh文件,在php7.sh文件中添加export PATH=/usr/local/php/bin:/usr/local/php/sbin:$PATH
[root@iZ2864f6btwZ no-debug-non-zts-20160303]# vim /etc/profile.d/php7.sh
[root@iZ2864f6btwZ no-debug-non-zts-20160303]# source /etc/profile.d/php7.sh
查看PHP版本
[root@iZ2864f6btwZ no-debug-non-zts-20160303]# php -v
PHP 7.1.9 (cli) (built: Sep 24 2017 23:55:54) ( NTS )
Copyright (c) 1997-2017 The PHP Group
Zend Engine v3.1.0, Copyright (c) 1998-2017 Zend Technologies
[root@iZ2864f6btwZ no-debug-non-zts-20160303]#
配置php.ini文件,从php源码拷贝php.ini-production到/usr/local/php/etc/目录,编译php.ini文件,一般只需要设置扩展目录及相应的扩展和时区即可
[root@iZ2864f6btwZ etc]# cp /usr/local/src/php-7.1.9/php.ini-production /usr/local/php/etc/php.ini
[root@iZ2864f6btwZ etc]# vim /usr/local/php/etc/php.ini

...
extension_dir = "/usr/local/php/lib/php/extensions/no-debug-non-zts-20160303"
zend_extension=opcache.so
extension=mysqli.so
extension=pdo_mysql.so
...
date.timezone = PRC
...
[opcache]
; Determines if Zend OPCache is enabled
opcache.enable=1
...
设置php-fpm.conf文件,此文件是php-fpm运行配置文件,先将php-fpm脚本文件拷贝到/ect/init.d/目录并给出执行权限,并添加到开机自动启动,编译php-fpm.conf,设置好扩展配置文件的路径和错误日志保存路径
[root@iZ2864f6btwZ etc]# cp /usr/local/src/php-7.1.9/sapi/fpm/init.d.php-fpm /etc/init.d/php-fpm
[root@iZ2864f6btwZ etc]# chmod +x /etc/init.d/php-fpm
[root@iZ2864f6btwZ etc]# chkconfig --add php-fpm
[root@iZ2864f6btwZ etc]# chkconfig php-fpm on
[root@iZ2864f6btwZ etc]#
[root@iZ2864f6btwZ etc]# cp php-fpm.conf.default php-fpm.conf
[root@iZ2864f6btwZ etc]# vim php-fpm.conf

...
error_log = /var/log/php-fpm/error.log
....
include=/usr/local/php/etc/php-fpm.d/*.conf
...
设置www.conf文件,此文件是php-fpm运行的扩展配置文件
[root@iZ2864f6btwZ etc]# cp php-fpm.d/www.conf.default php-fpm.d/www.conf
[root@iZ2864f6btwZ etc]# vim php-fpm.d/www.conf

...
user = nginx
group = nginx
...
listen = /var/run/php-fpm/php-fpm.sock
...
slowlog = /var/log/php-fpm/$pool.log.slow

; The timeout for serving a single request after which a PHP backtrace will be
; dumped to the 'slowlog' file. A value of '0s' means 'off'.
; Available units: s(econds)(default), m(inutes), h(ours), or d(ays)
; Default Value: 0
request_slowlog_timeout = 1m
...
php_value[session.save_handler] = files
php_value[session.save_path] = /var/lib/php/session
...
注意:
此配置文件参考于网络博客,请务必注意以上user,group,listen,slowlog,request_slowlog_timeout,php_value等位置的配置,listen= /var/run/php-fpm/php-fpm.sock是根据个人喜爱来设定的,你也可以配置成listen = 127.0.0.1:9000,只不过到时候nginx.conf配置文件里面的fastcgi_pass指定的监听方式不同,后续步骤整合php和nginx将会提及到。
设置php-fpm运行目录及相关目录和权限
[root@iZ2864f6btwZ etc]# mkdir -p /var/log/php-fpm /var/run/php-fpm
[root@iZ2864f6btwZ etc]# chown nginx:nginx -R /var/run/php-fpm/
[root@iZ2864f6btwZ etc]# ll -d /var/run/php-fpm/
drwxr-xr-x 2 nginx nginx 40 Sep 25 10:30 /var/run/php-fpm/
[root@iZ2864f6btwZ etc]#
注意:
由于之前我们在www.conf中使用的的user和group来运行php-fpm的,所以/var/run/php-fpm运行时的目录一定要把拥有者改变为相应的用户和组,即nginx用户和nginx组,否则启动php-fpm时会报错。
在 /etc/init.d/php-fpm中添加如下代码,让php-fpm运行目录自动创建并修改权限
...
php_fpm_log="/var/log/php-fpm"
php_fpm_run="/var/run/php-fpm"

if [ ! -d $php_fpm_log ];then
  mkdir -p  $php_fpm_log
  chown -R nginx.nginx $php_fpm_run
fi

if [ ! -d $php_fpm_run ];then
  mkdir -p  $php_fpm_run
  chown -R nginx.nginx $php_fpm_run
fi

chown -R nginx:nginx /var/run/php-fpm/
...
设置session的存储目录
[root@iZ2864f6btwZ etc]# mkdir -p /var/lib/php/session && chown nginx.nginx -R !$
mkdir -p /var/lib/php/session && chown nginx.nginx -R /var/run/php-fpm/
[root@iZ2864f6btwZ etc]#
注意:
上述命令中!$为简写,意为上次使用的路径
检测php-fpm配置启动php-fpm进程
[root@iZ2864f6btwZ etc]# php-fpm -t
[25-Sep-2017 10:58:58] NOTICE: configuration file /usr/local/php/etc/php-fpm.conf test is successful
[root@iZ2864f6btwZ etc]# service php-fpm start
Starting php-fpm  done
[root@iZ2864f6btwZ etc]#
注意:
启动php-fpm进程后,最好检查一下php-fpm.sock的所有者和权限,如果不是nginx更换成nginx[root@iZ2864f6btwZ etc]# chown nginx.nginx -R /var/run/php-fpm/php-fpm.sock [root@iZ2864f6btwZ etc]# ll !$ total 0 srw-rw---- 1 root root 0 Sep 25 13:40 /var/run/php-fpm/php-fpm.sock
配置nginx.conf文件,添加index.php索引,并添加php脚本解析引擎
...
 location / {
            root   html;
            index  index.php index.html index.htm;
            autoindex  on;
 }
...
location ~ \.php$ {
            fastcgi_pass   unix:/var/run/php-fpm/php-fpm.sock;
            fastcgi_index  index.php;
            fastcgi_param  SCRIPT_FILENAME $document_root$fastcgi_script_name;
            include        fastcgi_params;
 }
...
include conf.d/*.conf;
...
注意:
fastcgi_pass unix:/var/run/php-fpm/php-fpm.sock;配置信息必须与www.conf设置的 listen 保持一致,fastcgi_param 路径中根据/scripts替换为$document_root,不然无法找到php脚本文件。
重启nginx服务器和php-fpm
[root@iZ2864f6btwZ conf]# service nginx restart
Restarting nginx (via systemctl):                          [  OK  ]
[root@iZ2864f6btwZ conf]#
[root@iZ2864f6btwZ conf]# service php-fpm restart
Gracefully shutting down php-fpm . done
Starting php-fpm  done
[root@iZ2864f6btwZ conf]#
注意:
如果你在启动 nginx 的时候遇到如下错误,请仔细检查你的nginx.conf文件是否某个位置少写了分号或是配置文件语法是否有误[root@iZ2864f6btwZ conf]# service nginx restart Starting nginx (via systemctl): Job for nginx.service failed because the control process exited with error code. See "systemctl status nginx.service" and "journalctl -xe" for details. [FAILED]
测试访问php文件是否正常,在网站根目录新建info.php文件,在浏览器地址栏输入 http://服务器ip/info.php
[root@iZ2864f6btwZ etc]# cd /usr/local/nginx/html/
[root@iZ2864f6btwZ html]# ll
total 8
-rw-r--r-- 1 nginx nginx 537 Sep 24 15:07 50x.html
-rw-r--r-- 1 nginx nginx 612 Sep 24 15:07 index.html
[root@iZ2864f6btwZ html]# vim info.php
结尾:
至此,php 7.1.9 编译安装与配置全部完成,有问题的朋友请给我留言,如有毛病,欢迎指正。


