一、ngx_http_proxy_module模块
The ngx_http_proxy_module module allows passing requests to another server;允许将请求报文传递给另外一台服务器。
1. proxy_pass URL;
- Context:location,if in location,limit_except
配置示例1:
我们以lvs-nat模式构建的虚拟环境演示nginx的反代功能,Director上双网卡,公网192.168.43.110,私网192.168.128.129,并安装nginx,RS1私网地址192.168.128.111,RS2私网地址192.168.128.122配置反代服务
      [root@localhost ~]# yum -y install nginx
      [root@localhost ~]# yum -y install nginx/conf.d
      [root@localhost conf.d]# vim ilinux.conf
          #编辑如下配置内容
          server {
                listen 80;
                server_name www.ilinux.io;
                location / {
                        proxy_pass http://192.168.128.111:80;    #反代服务指向后端的RS1
                }
            }
       [root@localhost conf.d]# nginx -t
       [root@localhost conf.d]# systemctl start nginx.service
       #反代服务已经配置好,使用外部主机访问本机测试
       [root@localhost ~]# curl http://www.ilinux.io
        RS1,192.168.1.111
配置第二台后端主机,使其能显示图片:
#在RS2:
[root@rs2 ~]# find /usr/share -iname "*.jpg" -exec cp {} /var/www/html/ \;    #在httpd默认目录下面复制几张图片以便测试
#在Director上编辑nginx配置文件
[root@localhost nginx]# vim /etc/nginx/conf.d/ilinux.conf
    location ~* \.(jpg|png|peng)$ {
            proxy_pass http://192.168.128.122:80;
    }
访问测试:

- 注意:
<1> proxy_pass 后面的路径不带uri时,其会将location的url传递给后端主机
<2> proxy_pass 后面的路径是个uri时,其会将location的uri替换为proxy_pass 的uri替换为proxy_pass的uri
-
<3> 如果location 定义uri时使用了正则表达式的模式,或在if语句或limt_execept中使用proxy_pass指令,则proxy_pass之后必须不能使用uri,用户请求时传递的uri将直接附加代理到的服务的之后;
示例2:
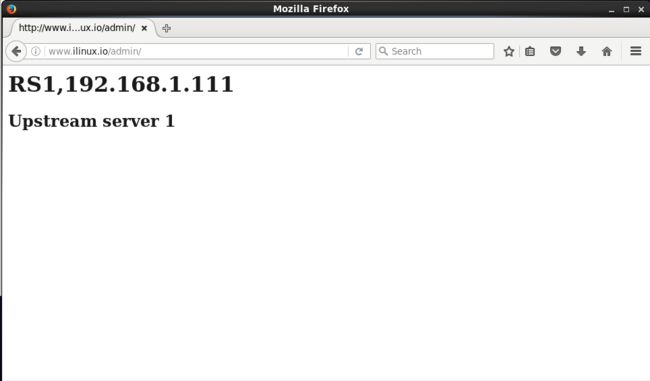
#在Director上编辑nginx配置文件 [root@localhost nginx]# vim /etc/nginx/conf.d/ilinux.conf server { listen 80; server_name www.ilinux.io; location / { root /web/nginx/html; } location /admin/ { proxy_pass http://192.168.128.111:80; } location ~* \.(jpg|png|peng)$ { proxy_pass http://192.168.128.122:80; } } #在RS1上创建目录admin,和index.html文件 [root@rs1 admin]# mkdir /var/www/html/admin [root@rs1 admin]# vim /var/www/html/admin/index.htmladmin server1
访问测试:

    示例3:
    #将上文中配置稍微改动一下加上uri
    [root@localhost nginx]# vim /etc/nginx/conf.d/ilinux.conf
    location /admin/ {
            proxy_pass http://192.168.128.111:80/;
            }
访问测试:
2. proxy_set_header field value;
设定发往后端主机的请求报文的请求首部的值;
- Context:http、server、location
proxy_set_header X-Real-IP $remote_addr;
proxy_set_header X-Forwarded-For $proxy_add_x_forwarded_for; - X-Real-IP $remote_addr: client address;
- X-Forwarded-For $proxy_add _x_forwarded_for;约定俗称的使用方式
示例4:
#在上文的示例1中location上下文中添加
location /admin/ {
            proxy_pass http://192.168.128.111:80;
            proxy_set_header X-Real-IP $remote_addr;
    }
[root@localhost nginx]# nginx -s reload
#修改RS1上http服务日志格式后观察:
[root@rs1 logs]# vim /etc/httpd/conf/httpd.conf
#修改编辑内容
 LogFormat "%{X-Real-IP}i %l %u %t \"%r\" %>s %b \"%{Referer}i\" \"%{User-Agent}i\"" combined
 [root@rs1 logs]# httpd -t
 Syntax OK
 [root@rs1 logs]# systemctl restart httpd
 #外部主机强刷访问查看访问日志
 [root@rs1 logs]# tail -1 /etc/httpd/logs/access_log
     \192.168.1.106 - - [18/Aug/2018:22:47:27 +0800] "GET /admin/ HTTP/1.0" 200 23 "-" "Mozilla/5.0 (X11; Linux x86_64; rv:45.0) Gecko/20100101 Firefox/45.0"

#X-Forwarded-For示例:
#将上文的配置修改:
[root@localhost ~]# vim /etc/nginx/conf.d/ilinux.conf
location /admin/ {
            proxy_pass http://192.168.128.111:80;
            proxy_set_header X-Forwarded-For $proxy_add_x_forwarded_for;
            }
[root@localhost ~]# nginx -s reload
#RS1上修改日志格式
[root@rs1 conf]# vim httpd.conf
 LogFormat "%h %l %u %t \"%r\" %>s %b \"%{Referer}i\" \"%{User-Agent}i\" \"%{X-Forwarded-For}i\"" combined
 [root@rs1 conf]# httpd -t
  Syntax OK
 [root@rs1 conf]# systemctl restart httpd
#重新访问后查看日志
[root@rs1 conf]# tail -1 /var/log/httpd/access_log
192.168.128.129 - - [18/Aug/2018:23:22:18 +0800] "GET /admin/ HTTP/1.0" 200 23 "-" "Mozilla/5.0 (X11; Linux x86_64; rv:45.0) Gecko/20100101 Firefox/45.0" "192.168.1.106"
3. ngx_http_headers_module模块
The ngx_http_headers_module module allows adding the “Expires” and “Cache-Control” header fields, and arbitrary fields, to a response header.
向由代理服务器响应给客户端的响应报文添加自定义首部,或修改指定首部的值;
- Context: http, server, location, if in location
-
add_header name value [always];添加自定义首部add_header X-Via $server_addr;add_header X-Accel $server_name;
-
expires [modified] time;用于定义Expire或Cache-Control首部的值expires epoch | max | off;
示例5:
[root@localhost ~]# vim /etc/nginx/conf.d/ilinux.conf
server {
    listen 80;
    server_name www.ilinux.io;
    location / {
            root /web/nginx/html;
    }
    location /admin/ {
            proxy_pass http://192.168.128.111:80;
            proxy_set_header X-Forwarded-For $proxy_add_x_forwarded_for;
            add_header X-Via $server_addr;
            add_header X-Accel $server_name;

    }
    location ~* \.(jpg|png|peng)$ {
            proxy_pass http://192.168.128.122:80;
    }
}
[root@localhost ~]# nginx -s reload
访问测试:

4. proxy_cache_path
定义可用于proxy功能的缓存;
- Context:http
-
proxy_cache_path path [levels=levels] [use_temp_path=on|off] keys_zone=name:size [inactive=time] [max_size=size] [manager_files=number] [manager_sleep=time] [manager_threshold=time] [loader_files=number] [loader_sleep=time] [loader_threshold=time] [purger=on|off] [purger_files=number] [purger_sleep=time] [purger_threshold=time];- path:缓存存放路径
- [levels=levels] 定义缓存空间有几层目录,每层目录有多少个文件;
- 例:
level=1:2:2表示缓存空间有3层目录,第一层为1个字母(16进制共16个),第二层和第三层为2个字母(共256个); - use_temp_path:指明临时文件存放;默认on,表示临时文件目录是use_temp_path参数设置,如果为off则表示临时文件直接放在缓存目录中;
- keys_zone=named:size : name是给这个缓存取的名字,size是指缓存空间大小;
- inactive=time:指数据存放多久没被访问将被删除;
- max_size=size:设置最大缓存大小,当超过此大小时,会删除最近最少使用的数据;
- 例:
5. proxy_cache zone | off;
指明要调用的缓存,或关闭缓存机制;
- Context:http、server、location
6.proxy_cache_key string
缓存中用于“键”的内容
- 默认值:
proxy_cache_key $scheme$proxy_host$request_uri;
7. proxy_cache_valid [code ...] time
定义对特定响应码的响应内如的缓存时长;
注意:缓存空间要先定义后使用
示例6:
#在nginx.conf配置文件中的http段中添加如下内容,定义缓存空间
proxy_cache_path /data/nginx/cache level=1:2:2 keys_zone=one:10m;
#在ilinux.conf的配置文件中的location段中添加调用缓存的功能
server {
listen 80;
server_name www.ilinux.io;
location / {
    proxy_pass http://192.168.128.111:80;
    proxy_set_header X-Forwarded-For $proxy_add_x_forwarded_for;
    add_header X-Via $server_addr;
    add_header X-Accel $server_name;
    }
location ~* \.(jpg|png|peng)$ {
    proxy_pass http://192.168.128.122:80;
    proxy_cache pcache;
    proxy_cache_key $request_uri;
    proxy_cache_valid 200 302 301 1h;
    proxy_cache_valid any 1m;
    }
}
#使用外部主机访问www.ilinux.io/day.jpg后查看缓存目录
[root@localhost ef]# ls /data/nginx/cache
3
[root@localhost ef]# ls /data/nginx/cache/3
4b
[root@localhost ef]# ls /data/nginx/cache/3/4b
ef
[root@localhost ef]# ls /data/nginx/cache/3/4b/ef
a4893a06ce3e93c8819d30481e6ef4b3
8. proxy_cache_use_stale
proxy_cache_use_stale error | timeout | invalid_header | updating | http_500 | http_502 | http_503 | http_504 | http_403 | http_404 | off ...;
Determines in which cases a stale cached response can be used when an error occurs during communication with the proxied server.
确定当与代理服务器通信期间发生错误时,在哪些情况下可以使用过时的缓存响应。
9.proxy_cache_methods GET | HEAD | POST ...;
If the client request method is listed in this directive then the response will be cached. “GET” and “HEAD” methods are always added to the list, though it is recommended to specify them explicitly.
如果这个指令中列出了客户机请求方法,那么响应将被缓存。“GET”和“HEAD”方法总是添加到列表中,不过建议显式地指定它们。
10. proxy_hide_header field;
By default, nginx does not pass the header fields “Date”, “Server”, “X-Pad”, and “X-Accel-...” from the response of a proxied server to a client. The proxy_hide_header directive sets additional fields that will not be passed.
默认情况下,nginx不会传递头字段“Date”、“Server”、“X-Pad”和“X-Accel-…”从代理服务器到客户端的响应。proxy_hide_header指令设置不会传递的其他字段。
11.proxy_connect_timeout time;
Defines a timeout for establishing a connection with a proxied server. It should be noted that this timeout cannot usually exceed 75 seconds.
定义与代理服务器建立连接的超时。应该注意的是,这个超时通常不能超过75秒。
- 默认为60s;最长为75s;
12. proxy_read_timeout time;
Defines a timeout for reading a response from the proxied server. The timeout is set only between two successive read operations, not for the transmission of the whole response.
定义从代理服务器读取响应的超时。超时只设置在两个连续的读操作之间,而不是整个响应的传输。
13. proxy_send_timeout time;
Sets a timeout for transmitting a request to the proxied server. he timeout is set only between two successive write operations, not for the transmission of the whole request. If the proxied server does not receive anything within this time, the connection is closed.
设置向代理服务器发送请求的超时。仅在两个连续的写操作之间设置超时,而不为整个请求的传输设置超时。如果代理服务器在此期间没有接收到任何信息,则连接将关闭。
二、 ngx_http_fastcgi_module模块(反代php的后端服务器)
The ngx_http_fastcgi_module module allows passing requests to a FastCGI server.
ngx_http_fastcgi_module模块允许将请求传递给FastCGI服务器。
- fastcgi_pass address;
- address为fastcgi server的地址;
- Context:location、if in loaction
fastcgi_index name;
fastcgi默认的主页资源-
fastcgi_param parameter value [if_not_empty];
设置一个应该传递给FastCGI服务器的参数。值可以包含文本、变量及其组合。
配置示例7:前提:配置好fpm server和mariadb-server服务; #在nginx端配置反代服务 server { listen 80; server_name www.ilinux.io; location / { root /data/nginx/html; } location ~* \.php$ { fastcgi_pass 192.168.128.122:9000; fastcgi_index index.php; fastcgi_param SCRIPT_FILENAME /usr/share/nginx/html$fastcgi_script_name; include fastcgi_params; } } #在后端php主机上提供一个index.php [root@rs2 html]# vim /usr/share/nginx/html/index.php
外部主机访问测试:

- fastcgi_cache_path
astcgi_cache_path path [levels=levels] [use_temp_path=on|off] keys_zone=name:size [inactive=time] [max_size=size] [manager_files=number] [manager_sleep=time] [manager_threshold=time] [loader_files=number] [loader_sleep=time] [loader_threshold=time] [purger=on|off] [purger_files=number] [purger_sleep=time] [purger_threshold=time];
定义fastcgi的缓存;缓存位置为磁盘上的文件系统,由path所指定的路径来定义
- levels=levels:缓存目录的层级数量,以及每一级的目录数量;levels=ONE:TWO:THREE
- keys_zone=name:size;k/v映射的内存空间的名称及大小
- inactive=time;非活动时长
- max_size=size;磁盘上用于缓存数据的缓存空间上限
- fastcgi_cache zone | off;
调用指定的缓存空间来缓存数据;
- Context:http、server、location
fastcgi_cache_key string
定义用作缓存项的key的字符串;fastcgi_cache_methods GET | HEAD | POST ...;
为哪些请求方法使用缓存;fastcgi_cache_min_uses number;
缓存空间中的缓存项在inactive定义的非活动时间内至少要被访问到此处所指定的次数方可被认作活动项;-
fastcgi_cache_valid [code ...] time;
不同的响应码各自的缓存时长示例: http { ... fastcgi_cache_path /var/cache/nginx/fastcgi_cache levels=1:2:1 keys_zone=fcgi:20m inactive=120s; ... server { ... location ~* \.php$ { ... fastcgi_cache fcgi; fastcgi_cache_key $request_uri; fastcgi_cache_valid 200 302 10m; fastcgi_cache_valid 301 1h; fastcgi_cache_valid any 1m; ... } ... } ... } fastcgi_keep_conn on | off
By default, a FastCGI server will close a connection right after sending the response. However, when this directive is set to the value on, nginx will instruct a FastCGI server to keep connections open.
默认情况下,FastCGI服务器会在发送响应后立即关闭连接。然而,当这个指令被设置为on时,nginx会指示FastCGI服务器保持连接打开。
三、ngx_http_upstream_module模块(7层负载均衡)
The ngx_http_upstream_module module is used to define groups of servers that can be referenced by the proxy_pass, fastcgi_pass, uwsgi_pass, scgi_pass, and memcached_pass directives.
- upstream name { ... }
定义后端服务器组,会引入一个新的上下文;
-
Context:htttp
配置:
      upstream httpdsrvs {
              server ...
              server...
              ...
     }
- server address [parameters];
在upstream上下文中server成员,以及相关的参数;
- Context:upstream
- address的表示格式:
- unix:/PATH/TO/SOME_COCK_FILE
- IP[:PORT]
- HOSTNAME[:PORT] - parameters:
- weight=number:权重,默认为1
- max_fails=number:失败尝试最大次数,超出此处指定的次数时,server将被标记为不可用
- fail_timeout=time:设置将服务器标记为不可用状态的超时时长
- max_conns:当前的服务器的最大并发连接数
- backup:将服务器标记为“备用”,即所有服务器均不可用时此武器才启用;
- down :标记为“不可用”;
- least_conn;
最少连接调度算法,当server拥有不同的权重时其为wlc; - ip_hash
源地址hash调度方法 - hash key [consistent];
基于指定的key的hash表来实现对请求的调度,此处的keykey直接文本、变量或二者的组合;
作用:将请求分类,同一类请求将发往同一个upstream server
-
示例:
      hash $request_uri consistent;
      hash $remote_addr;(=ip_hash)
- keepalive connections;
为每个worker进程保留的空闲的长连接数量;
配置示例:
  #先配置2台后端的httpd服务主机,并编辑index.html访问主页
     [root@rs1 ~]# yum -y install httpd

                         servername "192.168.1.111"
                         DocumentRoot "/data/web/ilinux"

                                    options None
                                    allowoverride None
                                    Require all granted

                         Customlog "logs/ilinux_access_log" combined

      [root@rs1 ~]# mkdir /data/web/ilinux -pv
      [root@rs1 ~]# vim /data/web/ilinux/index.html
            httpd server 1 192.168.1.111

    #第二个httpd服务器节点同样配置,server_name 改为192.168.1.122即可
    #使用nginx主机访问测试
      [root@localhost nginx]# curl http://192.168.1.111
      httpd server 1 192.168.1.111
      [root@localhost nginx]# curl http://192.168.1.122
      httpd server 2 192.168.1.122
    #配置nginx服务,实现7层负载均衡
    #在nginx.conf配置中的http段中定义upstream的name
         [root@localhost ~]# vim /etc/nginx/nginx.conf
             upstream websrvs {
                  server 192.168.1.111:80 weight=2;
                  server 192.168.1.122:80 max_fails=3     fail_timeout=5s;
                  server 127.0.0.1:80 backup;
              }
    #在ilinux.conf配置中配置反代服务
    [root@localhost ~]# vim /etc/nginx/conf.d/ilinux.conf
        server {
              listen 80;
              server_name www.ilinux.io;
              index index.html index.php;
              location / {
                    proxy_pass http://websrvs;
                }
            }
      [root@localhost ~]# nginx -t
      [root@localhost ~]# nginx -s reload
      #使用外部主机访问测试
      [root@localhost ~]# for i in {1..10};do curl         http://www.ilinux.io; done
      httpd server 1 192.168.1.111
      httpd server 2 192.168.1.122
      httpd server 1 192.168.1.111
      httpd server 1 192.168.1.111
      httpd server 2 192.168.1.122
      httpd server 1 192.168.1.111
      httpd server 1 192.168.1.111
      httpd server 2 192.168.1.122
      httpd server 1 192.168.1.111
      httpd server 1 192.168.1.111
  #使用hash key [consistent] 后可以实现dh算法,目标地址绑定
    [root@localhost ~]# vim /etc/nginx/nginx.conf
             upstream websrvs {
                  hash $ request_uri consistent;
                  server 192.168.1.111:80 weight=2;
                  server 192.168.1.122:80 max_fails=3     fail_timeout=5s;
              }
     [root@localhost ~]# for i in {1..5};do curl http://www.ilinux.io;done
              httpd server 1 192.168.1.111
              httpd server 1 192.168.1.111
              httpd server 1 192.168.1.111
              httpd server 1 192.168.1.111
              httpd server 1 192.168.1.111
四、ngx_stream_core_module模块(伪四层负载均衡)
模拟反代基于tcp或udp的服务连接,即工作于传输层的反代或调度器;
- ngx_stream_core_module
ngx_stream_core_module模块从1.9.0版本开始就可用了。这个模块不是默认构建的,它应该使用-with-stream配置参数启用。
          [root@localhost ~]# rpm -qa | grep nginx
          nginx-mod-stream-1.12.2-2.el7.x86_64   #只要有次模块,即可直接使用stream的模块
          [root@localhost ~]# rpm -ql nginx-mod-stream-1.12.2-2.el7.x86_64
            /usr/lib64/nginx/modules/ngx_stream_module.so
            /usr/share/nginx/modules/mod-stream.conf
          [root@localhost ~]# cat /usr/share/nginx/modules/mod-stream.conf
            load_module "/usr/lib64/nginx/modules/ngx_stream_module.so";
- Syntax:
listen address:port [ssl] [udp] [backlog=number] [bind] [ipv6only=on|off] [reuseport] [so_keepalive=on|off|[keepidle]:[keepintvl]:[keepcnt]];
- 监听的端口:默认为tcp协议;udp:监听udp协议的端口
- Context: server
- ngx_stream_proxy_module
ngx_stream_proxy_module模块(1.9.0)允许通过TCP、UDP(1.9.13)和unix域套接字代理数据流。
- (1) proxy_pass address;
Sets the address of a proxied server. The address can be specified as a domain name or IP address, and a port or as a UNIX-domain socket path. - (2) proxy_timeout timeout;
Sets the timeout between two successive read or write operations on client or proxied server connections. If no data is transmitted within this time, the connection is closed. 默认为10m; - (3) proxy_connect_timeout time;
设置nginx与被代理的服务器尝试建立连接的超时时长;默认为60s; - nginx伪四层负载均衡用法和nginx7层负载均衡基本一样,只是引入一个新的stream { ... }上下文;定义stream相关的服务;
- Context:main
配置示例:
[root@localhost ~]# cd /etc/nginx
[root@localhost nginx]# vim nginx.conf
    #将配置文件http段之后全部删除,添加stream{...}段内容
      stream {
                 server {
                        listen 22922;
                        proxy_pass sshsrvs;
                        }
                upstream sshsrvs {
                        server 192.168.1.111:22;
                        server 192.168.1.122:22;
                       }
             }
  [root@localhost nginx]# nginx -t
  [root@localhost nginx]# nginx -s reload
 #使用循环方法登录测试
  [root@localhost ~]# for i in {1..5};do ssh -p 22922 [email protected] "hostname";done
  The authenticity of host '[192.168.1.110]:22922     ([192.168.1.110]:22922)' can't be established.
  ECDSA key fingerprint is       SHA256:poc/T3yYQlr8AGSlEmKjlTPvyIYMyAQdSAva8FJcRPo.
  ECDSA key fingerprint is   MD5:10:9c:00:03:d9:34:be:bd:67:fd:c3:68:7c:58:24:47.
  Are you sure you want to continue connecting (yes/no)? yes
  Warning: Permanently added '[192.168.1.110]:22922'     (ECDSA) to the list of known hosts.
  [email protected]'s password:
  rs1.ilinux.com
  [email protected]'s password:
  rs2.ilinux.com
  [email protected]'s password:
  rs1.ilinux.com
  [email protected]'s password:
  rs2.ilinux.com
  [email protected]'s password:
  rs1.ilinux.com