1、下载 tengine 源码文件地址:
http://tengine.taobao.org/download/tengine-2.2.0.tar.gz
2、将下载包上传到服务器目录
/usr/local/src
3、解压 tenginx 到当前目录下
tar -zxvf tengine-2.2.0.tar.gz
删掉源码文件:rm tengine-2.2.0.tar.gz
4、进入 tengine 目录
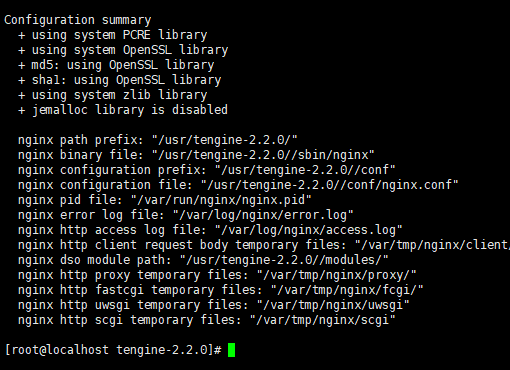
5、其中绿色的 configure 为可执行文件,他的作用是检查 tengine 文件完整性及预编译
./configure
--prefix=/usr/tengine-2.2.0/ \ 安装路径
--error-log-path=/var/log/nginx/error.log \ 错误日志输出路径
--http-log-path=/var/log/nginx/access.log \ http请求日志输出路径
--pid-path=/var/run/nginx/nginx.pid \ pid输出路径
--lock-path=/var/lock/nginx.lock \ lock输出路径
--with-http_ssl_module \
--with-http_flv_module \
--with-http_stub_status_module \
--with-http_gzip_static_module \
--http-client-body-temp-path=/var/tmp/nginx/client/ \
--http-proxy-temp-path=/var/tmp/nginx/proxy/ \
--http-fastcgi-temp-path=/var/tmp/nginx/fcgi/ \
--http-uwsgi-temp-path=/var/tmp/nginx/uwsgi \
--http-scgi-temp-path=/var/tmp/nginx/scgi \
--with-pcre
出现以下内容说明检查通过
这不可能会出现错误,这是因为 tengine 需要依赖,安装好依赖就没问题了。
6、安装
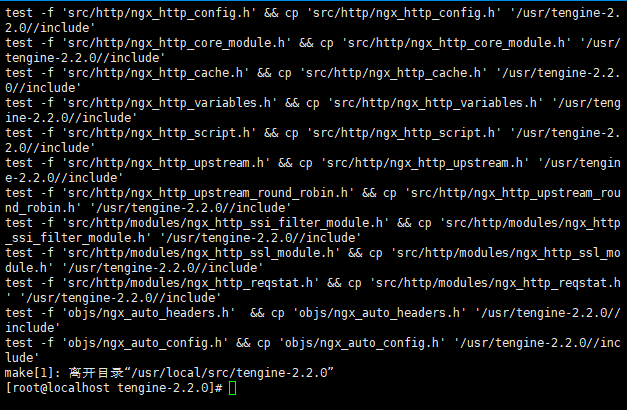
执行 make && make install :安装在预编译是设定的目录下
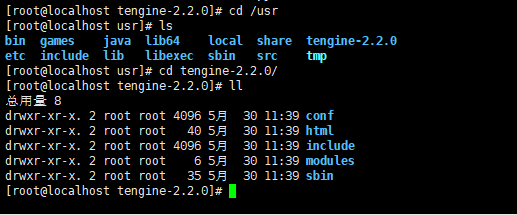
安装完成,查看安装路径下的文件
说明安装完成。
7、设置 tengine 启动服务,启动服务文件路径:
/etc/init.d/
这里有个 network 可执行文件,这是 network 的启动服务,我们参考这个来写 tengine 的启动文件
#!/bin/bash
#
# chkconfig: - 85 15
# description: nginx is a World Wide Web server. It is used to serve
# Source function library.
. /etc/rc.d/init.d/functions
# Source networking configuration.
. /etc/sysconfig/network
# Check that networking is up.
[ "$NETWORKING" = "no" ] && exit 0
nginx="/usr/tengine-2.2.0/sbin/nginx" #tengine 的启动执行路径
prog=$(basename $nginx)
NGINX_CONF_FILE="/usr/tengine-2.2.0/conf/nginx.conf" #tengine 的启动配置路径
#[ -f /etc/sysconfig/nginx ] && . /etc/sysconfig/nginx
lockfile=/var/lock/subsys/nginx
#make_dirs() {
# # make required directories
# user=`nginx -V 2>&1 | grep "configure arguments:" | sed 's/[^*]*--user=\([^ ]*\).*/\1/g' -`
# options=`$nginx -V 2>&1 | grep 'configure arguments:'`
# for opt in $options; do
# if [ `echo $opt | grep '.*-temp-path'` ]; then
# value=`echo $opt | cut -d "=" -f 2`
# if [ ! -d "$value" ]; then
# # echo "creating" $value
# mkdir -p $value && chown -R $user $value
# fi
# fi
# done
#}
start() {
[ -x $nginx ] || exit 5
[ -f $NGINX_CONF_FILE ] || exit 6
# make_dirs
echo -n $"Starting $prog: "
daemon $nginx -c $NGINX_CONF_FILE
retval=$?
echo
[ $retval -eq 0 ] && touch $lockfile
return $retval
}
stop() {
echo -n $"Stopping $prog: "
killproc $prog -QUIT
retval=$?
echo
[ $retval -eq 0 ] && rm -f $lockfile
return $retval
}
restart() {
configtest || return $?
stop
sleep 1
start
}
reload() {
configtest || return $?
echo -n $"Reloading $prog: "
# -HUP是nginx平滑重启参数
killproc $nginx -HUP
RETVAL=$?
echo
}
force_reload() {
restart
}
configtest() {
$nginx -t -c $NGINX_CONF_FILE
}
rh_status() {
status $prog
}
rh_status_q() {
rh_status >/dev/null 2>&1
}
case "$1" in
start)
rh_status_q && exit 0
$1
;;
stop)
rh_status_q || exit 0
$1
;;
restart|configtest)
$1
;;
reload)
rh_status_q || exit 7
$1
;;
force-reload)
force_reload
;;
status)
rh_status
;;
condrestart|try-restart)
rh_status_q || exit 0
;;
*)
echo $"Usage: $0 {start|stop|status|restart|condrestart|try-restart|reload|force-reload|configtest}"
exit 2
esac
修改路径
nginx="/usr/tengine-2.2.0/sbin/nginx"
NGINX_CONF_FILE="/usr/tengine-2.2.0/conf/nginx.conf"
修改 tengine 的权限
chmod 755 tengine
添加启动项
chkconfig --add tengine
查看 tengine 启动项
chkconfig --list tengine
开启
chkconfig tengine on
这是开机的时候就自动启动 tengine 了。
8、以上是 tengine 的配置,但是在浏览器中还是无法访问,原因是 centos 的防火墙或者是80端口没有开启,关闭防火墙开启80端口
防火墙设置引用地址: http://www.cnblogs.com/silent2012/archive/2015/07/28/4682770.html
Cenots 7.0 默认使用的是firewall作为防火墙,使用iptables必须重新设置一下
1)直接关闭防火墙
systemctl stop firewalld.service #停止 firewall
systemctl disable firewalld.service #禁止 firewall 开机启动
2)设置iptables sevice
安装iptables-services :yum -y install iptables-services
修改防火墙配置,添加 80 端口
vi /etc/sysconfig/iptables
添加
-A INPUT -m state --state NEW -m tcp -p tcp --dport 80 -j ACCEPT
保存后退出
systemctl restart iptables.service # 重启防火墙是配置是配置生效
systemctl enable iptables.service # 设置防火墙开机启动
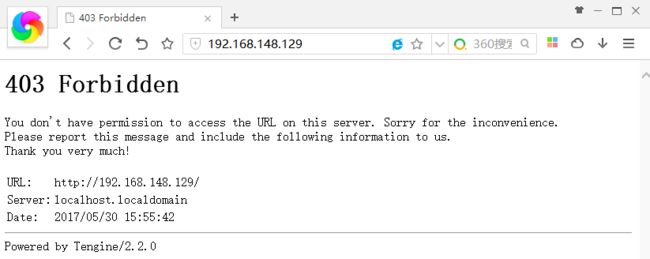
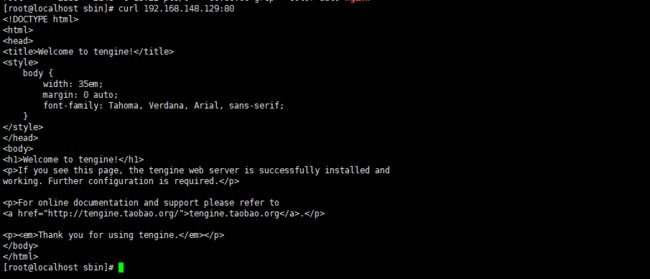
9、浏览器访问 tengine
10、客户端访问配置
修改nginx的配置文件:
vi /usr/tengine-2.2.0/conf/nginx.conf
server {
listen 80;
server_name localhost;
#charset koi8-r;
#access_log logs/host.access.log main;
location / {
allow 192.168.148.1/24;
root html;
index index.html index.htm;
}
}
修改 location : 添加
deny x.x.x.x; 拒绝x.x.x.x地址访问nginx
allow x.x.x.x;允许x.x.x.x地址访问nginx
例子如下:
location / {
deny 192.168.148.1; #win地址不允许访问
allow 192.168.148.128; # centos 129 地址允许访问
allow 192.168.148.1/24;
root html;
index index.html index.htm;
}
说明:依次检测匹配到第一条规则
重启 nginx 使配置生效:
service nginx restart
11、用户认证访问


