1.下载
首先先去官网 https://opencv.org/opencv-3-2.html 下载 Android SDK: sourceforge ,下载下来以后我们的开发方式目前有两种:一种是基于 OpenCV_3.2.0_Manager.apk 的纯 Java 代码;还有一种方式是配置好 opencv 后利用 Android NDK,使用C++开发。
解压下载好的文件夹后
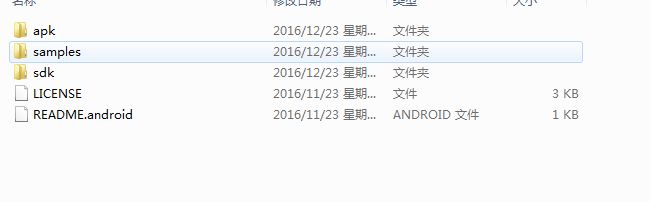
image.png
apk:OpenCV_3.2.0_Manager 可以说是一个服务 apk , 网上的所有代码都是基于 OpenCV_3.2.0_Manager,也就是说你必须运行这个 apk
samples:所有的与android相关的一些事例代码,基本全部都是 java 代码,封装了很多功能(图片转成灰度,高斯模糊,边缘检测),而且都是 Eclipse 版本,网上的例子(Java例子)
sdk:所有的资源,so库,头文件,源码(GitHub https://github.com/opencv/opencv)
2. 人脸识别实现的思路 (人脸登录)
2.1 人脸信息录入
- 2.1.1 获取相机的 Bitmap , 检测人脸(保证人脸特征信息比较精准)人脸要足够大,当前范围内人脸只能有一张人脸,比如:正常、眨眼睛、张嘴巴 (3张人脸信息)
- 2.1.2 获取到人脸必须要保存人脸特征信息,然后上传给后台(后台会再次做算法优化),保存到数据库
2.2 人脸的特征值的匹配
- 2.2.1 获取相机的 Bitmap , 检测人脸(保证人脸特征信息比较精准)人脸要足够大,当前范围内人脸只能有一张人脸,比如:正常、眨眼睛、张嘴巴 (3张人脸信息)
- 2.2.2 从后台去查询用户进行登录
3. 提取特征值和匹配人脸信息
思路:
- 整合 opencv
- 获取相机的 SurfaceView 传到 native 层去检测,或者不断的获取 SurfaceView 的 Bitmap,传到 Native 层
- 检测人脸,保存人脸特征信息在本地
- 上传到后台
4.灰度图算法:java 里面把一张图片转成灰度图?
RGB: 0-255,0-255,0-255 (彩色图)
灰度:R+G+B = 255 = 0.33R+0.33G+0.33B(一般) = 0.3R + 0.59G + 0.11B(适合人的眼睛)
灰度图所含有的信息量(取值范围 0-255)不高,而彩色图的取值范围比较高 (255 * 255 * 255)
5.实现人脸识别
下载完opencv后选择并添加到项目
image.png
首先修改CmakeLists.txt
# For more information about using CMake with Android Studio, read the
# documentation: https://d.android.com/studio/projects/add-native-code.html

# Sets the minimum version of CMake required to build the native library.

cmake_minimum_required(VERSION 3.4.1)

#set(CMAKE_CXX_FLAGS "${CMAKE_CXX_FLAGS} -std=gnu++11")
#判断编译器类型,如果是gcc编译器,则在编译选项中加入c++11支持
if(CMAKE_COMPILER_IS_GNUCXX)
    set(CMAKE_CXX_FLAGS "-std=c++11 ${CMAKE_CXX_FLAGS}")
    message(STATUS "optional:-std=c++11")
endif(CMAKE_COMPILER_IS_GNUCXX)

#需要引入我们头文件,以这个配置的目录为基准
include_directories(src/main/jniLibs/include)

# 添加依赖 opencv.so 库
set(distribution_DIR ${CMAKE_SOURCE_DIR}/../../../../src/main/jniLibs)
add_library(
            opencv_java3
            SHARED
            IMPORTED)
set_target_properties(
            opencv_java3
            PROPERTIES IMPORTED_LOCATION
            ../../../../src/main/jniLibs/armeabi/libopencv_java3.so)

# Creates and names a library, sets it as either STATIC
# or SHARED, and provides the relative paths to its source code.
# You can define multiple libraries, and CMake builds them for you.
# Gradle automatically packages shared libraries with your APK.

add_library( # Sets the name of the library.
             native-lib

             # Sets the library as a shared library.
             SHARED

             # Provides a relative path to your source file(s).
             src/main/cpp/native-lib.cpp )

# Searches for a specified prebuilt library and stores the path as a
# variable. Because CMake includes system libraries in the search path by
# default, you only need to specify the name of the public NDK library
# you want to add. CMake verifies that the library exists before
# completing its build.

find_library( # Sets the name of the path variable.
              log-lib
              # Specifies the name of the NDK library that
              # you want CMake to locate.
              log )

# Specifies libraries CMake should link to your target library. You
# can link multiple libraries, such as libraries you define in this
# build script, prebuilt third-party libraries, or system libraries.

target_link_libraries( # Specifies the target library.
                       native-lib opencv_java3
                       #加入该依赖库
                       jnigraphics

                       # Links the target library to the log library
                       # included in the NDK.
                       ${log-lib} )
新建FaceDetection人脸识别类
public class FaceDetection {
    static {
        System.loadLibrary("native-lib");
    }
    /**
     * 检测人脸并保存人脸信息
     * @param faceBitmap
     */
    public  native void faceDetectionSaveInfo(Bitmap faceBitmap);

    /**
     * 加载人脸识别器
     * @param filePath
     */
    public native void loadCascade(String filePath);
}
MainActivity的使用
public class MainActivity extends AppCompatActivity {

    private ImageView mFaceImageView;
   private Bitmap mFaceBitmap;
   private FaceDetection mFaceDetection;
    private File mCascadeFile;
    @Override
    protected void onCreate(Bundle savedInstanceState) {
        super.onCreate(savedInstanceState);
        setContentView(R.layout.activity_main);

        mFaceImageView = findViewById(R.id.face_image);

        mFaceBitmap= BitmapFactory.decodeResource(getResources(),R.drawable.face);
        mFaceImageView.setImageBitmap(mFaceBitmap);
        copyCascadeFile();
        mFaceDetection=new FaceDetection();
        //人脸识别
        mFaceDetection.loadCascade(mCascadeFile.getAbsolutePath());
    }

    private void copyCascadeFile() {
        try {
            // load cascade file from application resources
            InputStream is = getResources().openRawResource(R.raw.lbpcascade_frontalface);
            File cascadeDir = getDir("cascade", Context.MODE_PRIVATE);
            mCascadeFile = new File(cascadeDir, "lbpcascade_frontalface.xml");
            if(mCascadeFile.exists()) return;
            FileOutputStream os = new FileOutputStream(mCascadeFile);

            byte[] buffer = new byte[4096];
            int bytesRead;
            while ((bytesRead = is.read(buffer)) != -1) {
                os.write(buffer, 0, bytesRead);
            }
            is.close();
            os.close();
        } catch (IOException e) {
            e.printStackTrace();
        }
    }

    public void faceDetection(View view) {
    //识别人脸,保存人脸
        mFaceDetection.faceDetectionSaveInfo(mFaceBitmap);
    }
}
native-lib实现功能
#include
#include
#include
#include
#include
#include
using namespace cv;
#define TAG "JNI_TAG"
#define LOGE(...) __android_log_print(ANDROID_LOG_ERROR,TAG,__VA_ARGS__)


extern "C" {
JNIEXPORT void JNICALL
Java_com_peakmain_ndk_FaceDetection_faceDetectionSaveInfo(JNIEnv *env, jobject instance,
                                                          jobject faceBitmap);
void bitmap2Mat(JNIEnv *pEnv, Mat &mat, jobject bitmap);
void mat2Bitmap(JNIEnv *env, Mat mat, jobject bitmap);
JNIEXPORT void JNICALL
Java_com_peakmain_ndk_FaceDetection_loadCascade(JNIEnv *env, jobject instance, jstring filePath);
}
//bitmap转成mat
void bitmap2Mat(JNIEnv *env, Mat &mat, jobject bitmap) {
  //mat里面有个type CV_8UC4刚好是我们的bitmap中RGB_8888,CV_8UC2对应的是我们的bitmap中的RGB_565
    //获取bitmap的信息
    AndroidBitmapInfo info;
    void* pixels;
    AndroidBitmap_getInfo(env,bitmap,&info);
    //锁定Bitmap
    AndroidBitmap_lockPixels(env,bitmap,&pixels);
    //指定mat的宽高和type,bgra
    mat.create(info.height,info.width,CV_8UC4);
    if(info.format== ANDROID_BITMAP_FORMAT_RGBA_8888){
        //对应的mat应该是CV_8UC4
        Mat temp(info.height,info.width,CV_8UC4,pixels);
       temp.copyTo(mat);
    }else if(info.format==ANDROID_BITMAP_FORMAT_RGB_565){
        //对应的mat应该是CV_8UC2
        Mat temp(info.height,info.width,CV_8UC2,pixels);
        //mat是CV_8UC4,
        cvtColor(temp,mat, COLOR_BGR5652BGRA);
    }

    //其他的要自己去转
    //解锁Bitmap画布
    AndroidBitmap_unlockPixels(env,bitmap);
}
CascadeClassifier cascadeClassifier;

extern "C"
JNIEXPORT void JNICALL
Java_com_peakmain_ndk_FaceDetection_loadCascade(JNIEnv *env, jobject instance, jstring filePath_) {
    const char *filePath = env->GetStringUTFChars(filePath_, 0);

    cascadeClassifier.load(filePath);
    LOGE("加载分类器文件成功");
    env->ReleaseStringUTFChars(filePath_, filePath);
}

extern "C"
JNIEXPORT void JNICALL
Java_com_peakmain_ndk_FaceDetection_faceDetectionSaveInfo(JNIEnv *env, jobject instance,
                                                          jobject bitmap) {

    //检测人脸,opencv有一个非常关键的类,opencv是c和c++写的,只处理Mat,android界面是bitmap
    //1.bitmap转换成opencv能操作的c++对象Mat,mat是个矩阵
     Mat mat;
    bitmap2Mat(env,mat,bitmap);
     //处理灰度,提高效率,一般操作都会执行
    Mat gray_mat;
    //转换成灰度
    cvtColor(mat,gray_mat,COLOR_BGRA2GRAY);
    //再次处理,直方均衡处理
    Mat equalize_mat;
    equalizeHist(gray_mat,equalize_mat);
  //识别人脸,当然我们可以直接用彩色去做,识别人脸要加载人脸分类器文件
    CV_OUT std::vector faces;
    //5次识别
   cascadeClassifier.detectMultiScale(equalize_mat,faces,1.1,5);
    LOGE("人脸个数:%d",faces.size());
    if(faces.size()==1){
        Rect faceRect=faces[0];
        //保存人脸信息,保存的其实就是mat,图片
        // 在人脸部分画个图
        rectangle(mat,faceRect,Scalar(255,155,155),8) ;
        //把mat放到bitmap里面
        mat2Bitmap(env,mat,bitmap);
        //保存人脸的一部分
        Mat face_info_mat(equalize_mat,faceRect);
        //保存face_info_mat即可
    }


    //保存人脸信息

}

void mat2Bitmap(JNIEnv *env, Mat mat, jobject bitmap) {
    // 1. 获取 bitmap 信息
    AndroidBitmapInfo info;
    void* pixels;
    AndroidBitmap_getInfo(env,bitmap,&info);

    // 锁定 Bitmap 画布
    AndroidBitmap_lockPixels(env,bitmap,&pixels);

    if(info.format == ANDROID_BITMAP_FORMAT_RGBA_8888){// C4
        Mat temp(info.height,info.width,CV_8UC4,pixels);
        if(mat.type() == CV_8UC4){
            mat.copyTo(temp);
        }
        else if(mat.type() == CV_8UC2){
            cvtColor(mat,temp,COLOR_BGR5652BGRA);
        }
        else if(mat.type() == CV_8UC1){// 灰度 mat
            cvtColor(mat,temp,COLOR_GRAY2BGRA);
        }
    } else if(info.format == ANDROID_BITMAP_FORMAT_RGB_565){// C2
        Mat temp(info.height,info.width,CV_8UC2,pixels);
        if(mat.type() == CV_8UC4){
            cvtColor(mat,temp,COLOR_BGRA2BGR565);
        }
        else if(mat.type() == CV_8UC2){
            mat.copyTo(temp);

        }
        else if(mat.type() == CV_8UC1){// 灰度 mat
            cvtColor(mat,temp,COLOR_GRAY2BGR565);
        }
    }
    // 其他要自己去转

    // 解锁 Bitmap 画布
    AndroidBitmap_unlockPixels(env,bitmap);
}
build.gradle中defautConfig需要添加如下代码
 externalNativeBuild {
            cmake {
                cppFlags ""
                //只生成aremabi
                abiFilters "armeabi"
            }
        }
效果图

效果图.png