实验:
客户端(172.18.253.55)访问日志存放在远程rsyslog服务器(172.18.252.36),服务端的日志数据存放在mariadb服务器(172.18.253.62)
--------------------------------------------------------------------------------
mariadb服务端配置:
(1)安装mysql服务
yum installmariadb-server
(2)为了方便管理数据库中的表文件,建议在/etc/my.cnf 增设如下
[mysqld]中添加:
innodb_file_per_table = on 表为单独文件方便管理
skip_name_resolve = on 禁止主机名解析 加速访问
(3)启动服务,执行安全安装操作
systemctl start mariadb
(4)查看监听端口,3306为mariaDB的默认监听端口
ss -tnl
State Recv-Q Send-Q Local Address:Port Peer Address:Port
LISTEN 0 50 *:3306 *:*
LISTEN 0 128 *:22 *:*
LISTEN 0 128 :::22 :::*
(5)执行安全安装操作
mysql_secure_installation
Set rootpassword? [Y/n] y # 设置管理员登陆秘密(此密码和linux系统的root没关系)
Newpassword:
Re-enter newpassword: # 输入密码即可
Passwordupdated successfully!
Reloadingprivilege tables..
...Success!
Removeanonymous users? [Y/n] y # 是否移除匿名用户(在执行安全安装之前不需要密码登陆)
...Success! #允许匿名登陆时很危险的,建议移除
Disallow rootlogin remotely? [Y/n] n # 是否不允许管理员账号远程登陆,一般情况下建议不允许
...skipping.
Remove testdatabase and access to it? [Y/n] y # 移除测试数据库
-Dropping test database...
...Success!
-Removing privileges on test database...
...Success!
Reloading theprivilege tables will ensure that all changes made so far
will takeeffect immediately.
Reloadprivilege tables now? [Y/n] y # 重载权限表
...Success!
Cleaning up...
Alldone! If you've completed all of the above steps, your MariaDB
installationshould now be secure.
Thanks forusing MariaDB!
强烈建议在mariaDB安装完成后执行安全安装操作,这样可以使得数据库更安全
(6)在数据库中创建数据库和用户
6.1 在mysql server准备rsyslog专用数据库、数据库表
mysql -uroot -p123 < /mysql-createDB.sql
6.2 在mysql server准备rsyslog专用的用户账号并授权(数据库名叫Syslog是有原因的!查看后面)
mysql -u root -p
Enterpassword: 123
MariaDB[(none)]> grant all on Syslog.* to 'syslog'@'%' identified by '123';
MariaDB [(none)]>flush privileges;
MariaDB [(none)]>quit;
6.3 重启mariadb服务
systemctl restart mariadb
-----------------------------------------------------------------------------------
client端配置
vim /etc/rsyslog.conf修改:
在最后添加如下一行:
*.* @@172.18.252.36
即所有类别的所有级别日志全部写入172.18.252.36服务器上
注意,你也可以将rsyslog服务器的IP地址替换成它的主机名(FQDN)。
重启rsyslog服务:
systemctl start rsyslog
--------------------------------------------------------------------------------
rsyslog服务端配置
配置前准备关闭防火墙
systemctl stop firewalld
检查是否安装了rsyslog软件
rpm -qa|grep rsyslog #默认系统都安装了该软件
安装rsyslog连接MySQL数据库的模块
yum install rsyslog-mysql –y
# rsyslog-mysql 为rsyslog 将日志传送到MySQL 数据库的一个模块,这里必须安装。
在rsyslog服务器上准备ap或np组合
yum install httpd php php-mysql php-gd
启动Apache服务
systemctl start httpd.service
1 配置rsyslog
1.1开启相关日志模块
修改主配置文件rsyslog.conf
vim/etc/rsyslog.conf
取消如下两行信息的注释
$ModLoad immark #immark是模块名,支持日志标记
$ModLoad imtcp #imtcp是模块名,支持tcp协议
$InputTCPServerRun 514 #允许514端口接收使用TCP协议转发过来的日志
1.2配置服务端支持rsyslog-mysql 模块
vi /etc/rsyslog.conf
在 ####MODULES #### 下添加这行。
$ModLoad ommysql
在 #### RULES ####下添加这行。
*.* :ommysql:172.18.253.62,Syslog,rsyslog,123456
说明:*.*所有类别的所有级别 172.18.253.62表示远程数据库主机,Syslog为数据库名,rsyslog 为数据库的用户,123456为该用户密码
1.3 重启系统日志服务:
systemctl start rsyslog
1.4 检查514端口是否开启:
netstat -anupt | grep 514 #或者ss -tnl|grep 514
State Recv-Q Send-Q Local Address:Port Peer Address:Port
LISTEN 0 128 *:22 *:*
LISTEN 0 100 127.0.0.1:25 *:*
LISTEN 0 25 *:514 *:*
LISTEN 0 128 :::22 :::*
LISTEN 0 100 ::1:25 :::*
LISTEN 0 25 :::514 :::*
2 安装配置loganalyzer
tar xf loganalyzer-4.1.5.tar.gz
# 解压到网页访问站点目录directoryindex下
cp -a loganalyzer-4.1.5/src /var/www/html/loganalyzer
cd /var/www/html/loganalyzer
touchconfig.php
chmod666 config.php
3 添加测试资源
vim /var/www/html/index.php
$link = mysql_connect('172.18.253.62','syslog','123');
# ip填写mysql主机ip 用户(loganalyzer对应数据库用户)密码
if($link)
echo"Success...";
else
echo"Failure...";
mysql_close();
phpinfo(); #此函数调用会显示php的详细信息
?>
添加php主页索引
vim /etc/httpd/conf/httpd.conf
DirectoryIndex index.php index.html #将index.php添加在前头,这样就会默认访问此类资源索引
4 重启httpd服务
systemctlstart httpd.service
5 传入数据库主机方便创建数据库、表
scp /usr/share/doc/rsyslog-7.4.7/mysql-createDB.sql172.18.253.62:/mysql-createDB.sql
测试:
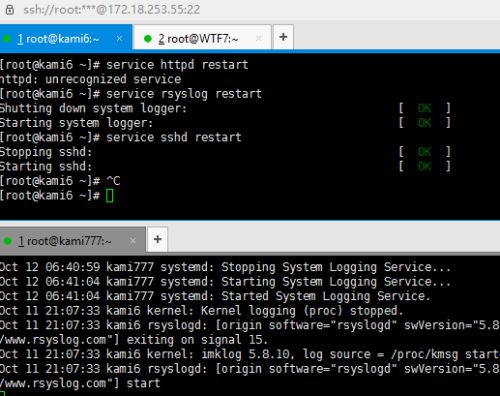
(1)客户端访问测试
(2)连通性测试
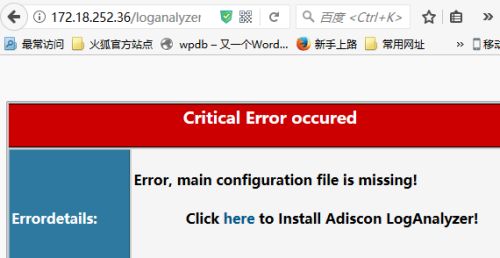
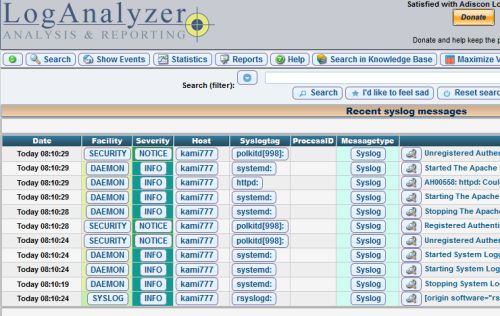
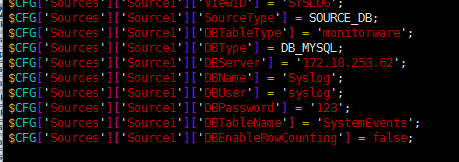
(3)网络访问并执行操作,配置loganalyzer 注意数据库用户表名的大小写
http://172.18.252.36/loganalyzer
MySQL Native, Syslog Fields, Monitorware
rsyslog服务端配置文件/var/www/html/loganalyzer/config.php生成记录
配置完成后对记录文件设置权限禁止修改
cd /var/www/html/loganalyzer
chmod 644 config.php


