Linux Centos7.5 三台虚拟机真实搭建Zookeeper集群
一、准备
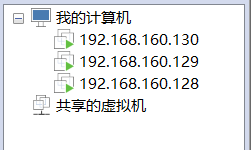
1、安装三台虚拟机。(可以用克隆的方式)
2、安装jdk
由于zookeeper依赖于jdk环境,因此首先三台虚拟机都需要安装jdk。
参考:Linux Centos7.5 安装配置Oracle jdk1.8
至此,三台虚拟机的jdk环境安装成功。
3、安装zookeeper(ps:我是安装在/usr/local目录下,当然你可以随意)
ps:这里先安装在其中一个虚拟机中即可,我是先安装在192.168.160.128上。
1) 下载安装包
wget https://www-us.apache.org/dist/zookeeper/zookeeper-3.4.10/zookeeper-3.4.10.tar.gz2)解压
tar -zxvf zookeeper-3.4.10.tar.gz
3)修改zoo.cfg
cd /usr/local/zookeeper-3.4.10/conf
cp zoo_sample.cfg zoo.cfg
vim zoo.cfg
编辑内容如下(完整zoo.cfg):
# The number of milliseconds of each tick
tickTime=2000
# The number of ticks that the initial
# synchronization phase can take
initLimit=10
# The number of ticks that can pass between
# sending a request and getting an acknowledgement
syncLimit=5
# the directory where the snapshot is stored.
# do not use /tmp for storage, /tmp here is just
# example sakes.
dataDir=/usr/local/zookeeper-3.4.10/dataDir
dataLogDir=/usr/local/zookeeper-3.4.10/dataLogDir
# the port at which the clients will connect
clientPort=2181
# the maximum number of client connections.
# increase this if you need to handle more clients
#maxClientCnxns=60
#
# Be sure to read the maintenance section of the
# administrator guide before turning on autopurge.
#
# http://zookeeper.apache.org/doc/current/zookeeperAdmin.html#sc_maintenance
#
# The number of snapshots to retain in dataDir
#autopurge.snapRetainCount=3
# Purge task interval in hours
# Set to "0" to disable auto purge feature
#autopurge.purgeInterval=1
server.1=192.168.160.128:2188:2888
server.2=192.168.160.129:2188:2888
server.3=192.168.160.130:2188:2888
4)添加环境变量
vim /etc/profile #编辑配置文件
export JAVA_HOME="/opt/jdk1.8.0_191"
export CLASSPATH=".:$JAVA_HOME/lib"
export MAVEN_HOME="/usr/local/apache-maven-3.6.0"
export ZOOKEEPER_HOME="/usr/local/zookeeper-3.4.10"
export NGINX_HOME="/usr/local/nginx"
export PATH="$JAVA_HOME/bin:$MAVEN_HOME/bin:$ZOOKEEPER_HOME/bin:$NGINX_HOME/sbin:$PATH"
source /etc/profile #让配置文件生效
【注:】
1、/etc/profile 配置文件一定要配置对,否则生效之后,会导致很多命令找不到
2、如果配置文件你配置错了,并且让其生效了,导致很多原本生效的命令提示找不到的话,可以在命令行中执行:
export PATH=/usr/bin:/usr/sbin:/bin:/sbin:/usr/X11R6/bin,然后赶紧去/etc/profile将配置修改正确。
5)将192.168.160.128虚拟机上安装的 zookeeper-3.4.10拷贝到其它两台虚拟机中。
scp -r zookeeper-3.4.10/ [email protected]:/usr/local
scp -r zookeeper-3.4.10/ [email protected]:/usr/local
如图:
6) 拷贝完成后,可以发现在192.168.160.129与192.168.160.130两台虚拟机中/usr/local中已经出现zookeeper-3.4.10目录了。然后将其它两台的/etc/profile的zookeeper环境变量添加进去,然后source /etc/profile 让其生效。(生效后,可以用Java或者zookeeper的命令检查下,环境变量有没有配置错误)
7)修改各个服务器中的myid
echo "2">myid #在129中执行
echo "3">myid #在130中执行
8)注意:
启动192.168.160.128zookeeper时,启动未报错,查看状态报错了,如图:
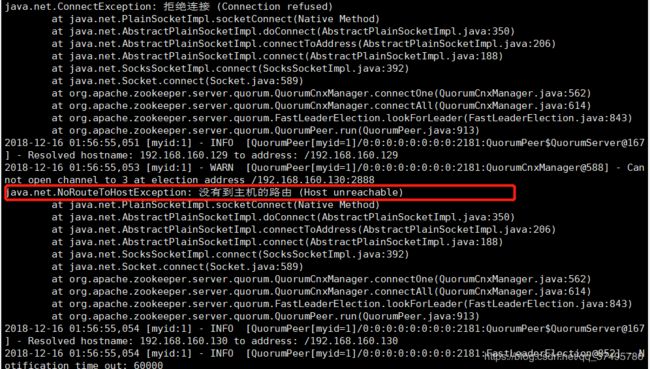
查看日志:
cat zookeeper.out
查看三台服务器的防火墙,发现防火墙都是关闭的,因此我这里跟防火墙肯定是没有关系的。但是三台服务器防火墙都需要关闭,或者你为了安全性,去三台服务器单独开放你zookeeper使用的端口号。
附:防火墙的常用命令
systemctl stop firewalld.service  (关闭防火墙)
systemctl disable firewalld.service (禁用防火墙)
systemctl status firewalld.service  (查看防火墙状态)
这时候报错我觉得是因为另外两台服务器的zookeeper必须启动一台,zookeeper集群中启动的zookeeper服务必须大于1/2,在启动zookeeper之前,建议先使用命令netstat -nap查看各个服务器中有没有zookeeper中用到的端口被占用了,有的话就kill -9 pid(pid:进程号)
ps:./zkServer.sh start-foreground 这个命令可以启动zookeeper并查看日志
我自己试了一下,如果zookeeper集群中启动的zookeeper服务必须小于1/2,会提示如下图:
首先用命令./zkServer.sh start 启动最少两台服务器的zookeeper服务,然后再用./zkServer.sh status去查看。
下面是我在百度找了一堆解决办法,但是并没有解决我的问题:
1、/etc/hosts文件,将第一行注释掉,但是我这里并没有注释掉,一样可以成功,因此我感觉跟这个没有关系。
2、在zoo.cfg中添加quorumListenOnAllIPs=true,我的zoo.cfg完整如下,并没有添加这一行,也照样没有问题。


