Centos7.6源码编译安装lamp+Discuz网站搭建
文章目录
- 绪论
- 一、准备lamp所需安装包
- 二、编译安装httpd及所需依赖
- 三、编译安装php及所需依赖
- 四、apache和php的整合
- 五、编译安装mysql及所需依赖
- 六、创建网站专属数据库
- 七、 解压配置Discuz
- 八、访问配置个人网站
- 九、总结
绪论
本文讲述如何使用源码在centos7上编译安装LAMP+Discuz搭建网站门户,全部步骤详细讲述。下面介绍下环境和各源码包的版本,所有安装包在/root/data文件夹下。
| 名称 | 版本号 |
|---|---|
| 阿里云centos7系统 | CentOS Linux release 7.6.1810 |
| apache | httpd-2.4.16.tar.bz2 |
| mysql | mariadb-10.2.27-linux-x86_64.tar.gz |
| php | php-7.3.6.tar.gz |
| Discuz | Discuz_X3.4_SC_UTF8【20190917】.zip |
| apr | apr-1.5.2.tar.gz |
| apr-util | apr-util-1.5.4.tar.bz2 |
| curl | curl-7.66.0.tar.gz |
| pcre | pcre-8.37.tar.bz2 |
一、准备lamp所需安装包
绪论中说明了个源码包的版本,在服务器上创建data文件夹,将所有安装包先上传到data目录下。按照下方步骤依次对各源码包进行解压、编译、安装即可,需要源码包的可以留言或者私信。
二、编译安装httpd及所需依赖
1. cd /root/data                              #进入源码包目录
2. yum install -y pcre-devel openssl-devel gcc gcc-c++ #安装所需的依赖包
3. tar -zxvf apr-1.5.2.tar.gz               #解压apr源码包
4. tar -xf apr-util-1.5.4.tar.bz2          #解压apr-util源码包
5. tar -xf httpd-2.4.16.tar.bz2         #解压httpd源码包
6. # 将apr和apr-util的文件放到httpd文件中,统一编译安装
   mv apr-1.5.2 /root/data/httpd-2.4.16/srclib/apr
   mv apr-util-1.5.4 /root/data/httpd-2.4.16/srclib/apr-util
7. cd /root/data/httpd-2.4.16/        #进入httpd目录
8. #自定义编译路径
   ./configure --prefix=/app/httpd --enable-so --enable-ssl --enable-cgi --enable-rewrite --with-zlib --with-pcre --with-included-apr --enable-modules=most --enable-mpms-shared=all --with-mpm=prefork
9.  #编译安装
   make && make install
10. #编写脚本将apache和数据库放在bin下
   vim /etc/profile.d/app.sh
   cat /etc/profile.d/app.sh
   export PATH=/app/httpd/bin:/usr/local/mysql/bin:$PATH
11. #执行脚本使配置文件生效
   cd
   . /etc/profile.d/app.sh
12. #启动apache服务
   apachectl
启动遇到提示:
AH00558: httpd: Could not reliably determine the server’s fully qualified domain name, using localhost.localdomain. Set the ‘ServerName’ directive globally to suppress this message
解决方案:
----编辑apache的配置文件
vim /app/httpd/conf/httpd.conf
----在配置文件中搜索ServerName并添加
ServerName localhost:80
----重新启动apache即可。
关闭防火墙(centos7系统关闭防火墙命令如下)
systemctl stop firewalld
setenforce 0
三、编译安装php及所需依赖
1. #首先卸载旧版本
   rpm -aq | grep php   #查询旧版本
   rpm -e 版本名         #卸载旧版本
2. 安装php所需依赖包
   cd /root/data/
   tar xf curl-7.66.0.tar.gz  #源码安装curl(后期网站更新报错不支持CURL,在此提前安装curl)
   cd curl-7.66.0/
   ./configure         #编译检查依赖环境
   make && make install  #编译并安装
   yum -y install libxml2-devel bzip2-devel libmcrypt-devel
3. #进入php源码包所在目录解压php
   cd /root/data
   tar xf php-7.3.6.tar.gz
4. #进入php目录编译安装
   cd php-7.3.6/
   ./configure --prefix=/app/php --enable-mysqlnd --with-mysqli=mysqlnd --with-openssl --enable-mbstring --with-png-dir --with-jpeg-dir --with-freetype-dir --with-zlib --with-libxml-dir=/usr --enable-xml --enable-sockets --with-apxs2=/app/httpd/bin/apxs --with-mcrypt --with-config-file-path=/etc --with-config-file-scan-dir=/etc/php.d --with-bz2  --with-curl
   make && make install
5. #拷贝php配置文件
6. cp php.ini-production /etc/php.ini
以上完成php源码安装,接下来配置apache支持php
四、apache和php的整合
1. #修改apache配置文件使其支持php
  vim /app/httpd/conf/httpd.conf        #编辑配置文件修改以下内容
  .....
  <IfModule dir_module>                  #第257行
    DirectoryIndex index.html index.php  #index.php放在index.html前后都可,不同系统放前可能会存在报错
  </IfModule>
  .....
   AddType application/x-compress .Z    #第384行
   AddType application/x-gzip .gz .tgz
   AddType application/x-httpd-php .php
   AddType application/x-httpd-php-source .phps
2. #添加php测试文件测试即可
   cd /app/httpd/htdocs/
   #配置文件中定义的顺序是先访问html文件,可以在配置文件中将index.php放在前面或者删除自带index.html文件。
   vim index.php       #使用浏览器访问服务器ip即可
五、编译安装mysql及所需依赖
1. #首先查看有没有旧版本并卸载
   yum install libaio -y #后期安装时报错没有libaio.so,这里提前安装
3. #进入源码mysql源码包目录,将mariadb解压到/usr/local/
   cd /root/data/
   tar xf mariadb-10.2.27-linux-x86_64.tar.gz -C /usr/local/
4. #进入解压数据库的文件夹
   cd /usr/local/
   ln -s mariadb-10.2.27-linux-x86_64/ mysql
5. #创建mysql用户并指定家目录
   useradd -r mysql -s /sbin/nologin -d /app/mysqld -m
6. #进入mysql目录运行生成数据库的脚本
   cd /usr/local/mysql/
   scripts/mysql_install_db --datadir=/app/mysqldb --user=mysql
7. #创建配置目录
   mkdir /etc/mysql
8. #复制自带的配置模板
   cp support-files/my-huge.cnf /etc/mysql/my.cnf
9. #编辑mysql配置文件,添加编辑信息
   vim /etc/mysql/my.cnf
   #在[mysqld]下添加3行
   datadir         = /app/mysql    #data数据目录
   dbinnodb_file_per_table = ON    #启用innodb存储引擎
   skip_name_resolve = ON          #禁止主机名解析
10. #复制自带启动模板
   cp support-files/mysql.server /etc/init.d/mysqld
   chkconfig --add mysqld  #加入启动项
11. #启动服务
   service mysqld restart
12. #查看端口是否开放
   ss -ntl
13. #下面按照提示完成完成数据库安全配置向导即可
   mysql_secure_installation
14. #登录配置数据库
   mysql -uroot -p
   create database wpdb; #创建数据库
   #创建新用户和密码并分配权限
   grant all on webdb.* to web@'服务器ip.%' identified by "密码" ;
   exit    #退出
遇到报错
----Job for mysqld.service failed because the control process exited with error code. See “systemctl status mysqld.service” and “journalctl -xe” for details
----Process: 29526 ExecStart=/etc/rc.d/init.d/mysqld start (code=exited, status=1/FAILURE)
发现在执行script时提示没有安装libaio.so,使用yum安装即可。(已在教程中提前安装)
![]() 以上就完成了mysql的安装和配置了
以上就完成了mysql的安装和配置了
六、创建网站专属数据库
七、 解压配置Discuz
1. #将Discuz安装包解压到apache首页目录下
   cd /root/data/
   unzip Discuz_X3.4_SC_UTF8【20190917】.zip -d /app/httpd/htdocs/
2. #将upload内容移动到当前目录下
   cd /app/httpd/htdocs/
   mv upload/* .
   #输入yes覆盖之前的index.php文件
3. #关闭防火墙访问网站即可
    systemctl stop firewalld
    setenforce 0
以上完成了Discuz的安装
八、访问配置个人网站
- 访问服务器ip开始配置网站
选择同意后加入安装目录(这里使用X3.3的安装包讲解,X3.4的传好久没传上来,放弃了) - 同意会提示很多目录、文件权限检查错误,如下。


解决办法:
只需将上述文件赋读写可执行权限
   cd /var/www/html/
   chmod 777 -R config* data* uc_*
再次刷新即可
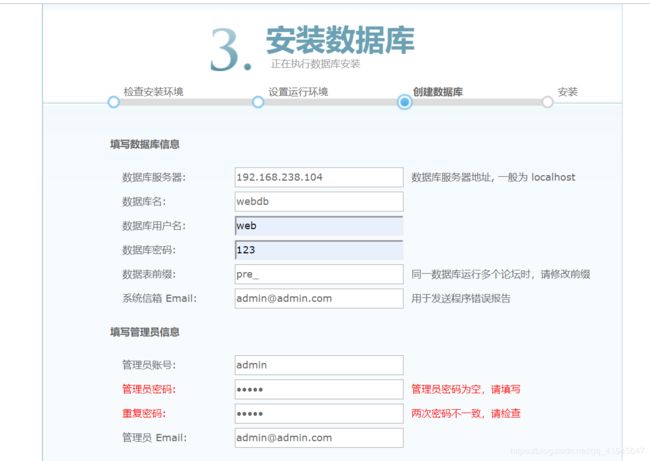
3. 选择全新安装,填写下述信息后选择下一步安装即可

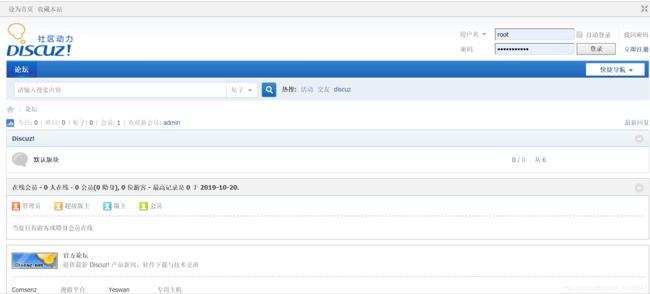
4. 拖到最下角提示安装完成即可访问,网站就这样搭建成功了~

九、总结
以上,完成了网站搭建全部内容,后期优化可以使用Discuz社区里的模板对网站进行自定义。如果想要其他人访问可以申请域名,备案等就可以拥有一个完整外网可访问的网站了。这篇文章绝对是本人写过的最详细认真的一篇了,边做边写,遇到无数报错,写到心绞痛。有什么疑问的欢迎在留言区留言,互相交流。感谢支持~


