Android 集成 React Native、原生视图加载RN组件模块分析
欢迎大家关注【跨平台开发那些事】公众号,定期推送跨平台开发技术实践。
今天分享一篇关于混合开发的文章: 如何在现有的 Android 项目中集成 React Native,以及如何在原生 Activity中加载 RN 视图。
原生项目 集成 React Native
1.创建Android工程:ReactNativeApp
关于如何创建Android工程就不再多述了。
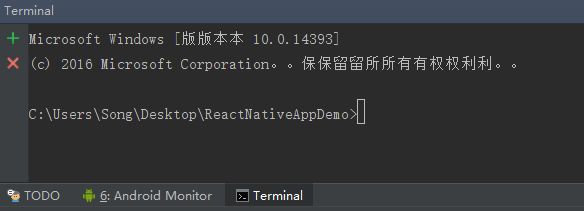
2.工程创建完毕后,切换到Android Studio左下角的Terminal窗口,执行npm init命令。
npm init 命令的作用是生成package.json文件,即RN的配置文件,当输入npm init命令回车后,会提示让你输入一些基本的信息,选择填写即可。
3.执行npm install --save react react-native 命令
install --save react react-native命令用于安装 React、React Native 相关文件。
4.创建.flowconfig文件
.flowconfig文件可以从facebook的github上复制,然后在工程的根目录创建.flowconfig文件,将其内容复制进去即可。
5.此时,你的工程中已经生成了package.json文件,然后将“start": "node node_modules/react-native/local-cli/cli.js start"添加到scripts节点下
6.添加index.android.js文件,也就是你的RN界面到根目录下
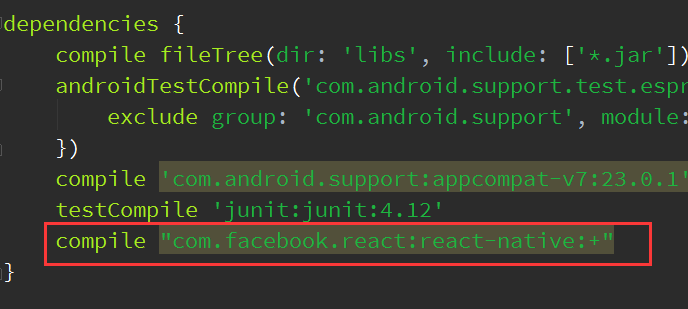
7.在App的build.gradle文件下添加facebook react 依赖包、react.gradle
apply from: "../node_modules/react-native/react.gradle"注意最新版本中支持的是23,即需要你修改编辑SDK的版本为23,以及appcompat-v7:23.0.1,同时将minSDK改为16.
8.在project的build.gradle文件下添加如下
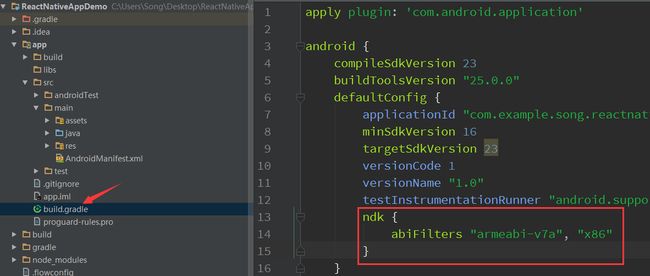
9.添加NDK的支持
10.在App的build.gradle文件的android节点下添加:
11.AndroidMainfest.xml文件中配置 权限、Activity 相关信息
// 权限
12.以上配置完成后,React Native就算集成到了我们现有的项目,接下来需要用Activity来展示RN,所以需要编写如下代码:
RN旧版本中,主要使用了两个类来完成界面的渲染工作:ReactRootView,ReactInstanceManager。顾名思义,ReactRootView代表了加载进来的RN界面,ReactInstanceManager用来构建React运行环境,管理React的属性配置。
有两点需要注意:
(1)调试模式下,需要将setUseDeveloperSupport的值设置为true,否则报错。
(2)startReactApplication中的第二个参数,名称需要与index.android.js中AppRegister的名称相同。
新版本RN中只需要自定义一个Activity,并继承ReactActivity,实现getMainComponentName方法,在getMainComponentName方法中返回RN注册的名称即可,名称需要与index.android.js中AppRegister的名称相同。通过源码可以看到,其实在ReactActivity中已经帮助我们实现了ReactRoow的添加和ReactInstanceManager的默认配置。
/**
 * Created by Song on 2017/2/13.
 */
public class MyReactActivity extends ReactActivity {

    @Nullable
    @Override
    protected String getMainComponentName() {
        return "HotRN";
    }

}
然后创建Application,去初始化ReactNativeHost。自定义Application需要继承ReactApplication,在源码loadApp方法中,会将当前Activity的Application强转为ReactApplication,所以这是必须的步骤。
public class MainApplication extends Application implements ReactApplication {

    private final ReactNativeHost mReactNativeHost = new ReactNativeHost(this) {
        @Override
        protected boolean getUseDeveloperSupport() {
            return BuildConfig.DEBUG;
        }

        @Override
        protected List getPackages() {
            return Arrays.asList(
                    new MainReactPackage()
            );
        }

    };

    @Override
    public ReactNativeHost getReactNativeHost() {
        return mReactNativeHost;
    }

    @Override
    public void onCreate() {
        super.onCreate();
        SoLoader.init(this,false);
    }

}
OK,如果以上步骤集成顺利的话,那么就大功告成啦!!
13.继续切换到Terminal窗口,执行npm start来启动
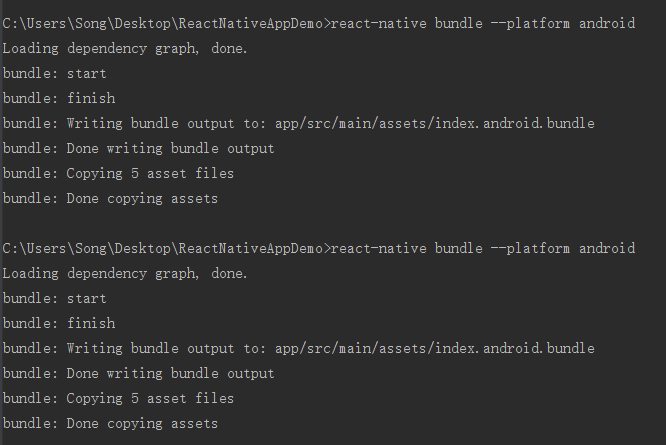
如果出现错误,则基本可以定位为没有bundle文件。此时需要我们手动来生成bundle文件,并放在assets目录下(app/src/main/assets)。
手动生成bundle文件,需要我们执行如下命令:
react-native bundle --platform android --dev false --entry-file index.android.js --bundle-output android/app/src/main/assets/index.android.bundle --assets-dest android/app/src/main/res/
(1)--platform:平台
(2) --dev:开发模式
(3) --entry-file:条目文件
(4)--bundle-output:bundle文件生成的目录
(5)--assets-dest:资源文件生成的目录
此时运行你的Android工程,可以看到RN已经被我们完美的集成进来了。那么如何在原生页面中嵌入RN模块呢?
原生页面中嵌入RN视图
在原生界面 Activity 中 嵌入RN模块,我们可以使 ReactRootView 作为原生布局中的一个模块来显示。
然后我们创建一个 RN 组件:
import React, { Component } from 'react';
import {
    Text,
    View,
    AppRegistry,
} from 'react-native';
import { customComponent as appName } from './app.json';
export default class CustomComponent extends Component {

  render() {
    return (


          哈哈,你成功啦~


    )
  }
}
AppRegistry.registerComponent(appName, ()=> CustomComponent);
此时,我们通过 react-native bundle 将该组件打包,生成 customcomponent.android.bundle 文件,并将 bundle 文件放到 assets目录下。
react-native bundle --entry-file CustomComponent.js --bundle-output c:\Users\songlcy\Desktop\RNTest\bundle\customcomponent.android.bundle --platform android --dev false
我们回到 Activity 通过 ReactInstanceManager 来加载该组件:
public class RNComponentActivity extends Activity {

    private ReactRootView rootView;

    @Override
    protected void onCreate(@Nullable Bundle savedInstanceState) {
        super.onCreate(savedInstanceState);
        setContentView(R.layout.rn_layout);
        initView();
        initAndLoadReactView();
    }

    private void initView() {
        rootView = findViewById(R.id.rtView);
    }

    private void initAndLoadReactView() {
        ReactInstanceManager reactInstanceManager = ReactInstanceManager.builder()
                .setApplication(getApplication())
                .addPackage(new MainReactPackage())
                .setBundleAssetName("customcomponent.android.bundle")
                .setInitialLifecycleState(LifecycleState.BEFORE_RESUME)
                .setUseDeveloperSupport(false)
                .build();
        rootView.startReactApplication(reactInstanceManager,"CustomComponent", null);
    }

}
此时 RN 组件就被渲染加载到 RNComponentActivity 布局中了。
上述方案中,我们通过给该组件单独打了一个 bundle 文件来加载、显示。那么如果有多个组件,按照上述方案,就需要打多个bundle 文件,并且需要创建多个 ReactInstanceManager 来加载 bundle。对于内存、渲染等都有所影响。此时就有了第二种实现方案:利用一个 bundle 文件,将所有的组件模块引入到入口文件,例如 index.js,在 index.js 中 统一注册。
// index.js

import {AppRegistry} from 'react-native';
import App from './App';
import CustomComponent from './CustomComponent';
import {name as app1Name, customComponent as app2Name } from './app.json';


AppRegistry.registerComponent(appName, () => App);
AppRegistry.registerComponent(app2Name, () => CustomComponent);
然后我们只需要打出一个 以 index.js 为入口的 bundle 文件即可。
react-native bundle --entry-file index.js --bundle-output c:\Users\songlcy\Desktop\RNTest\bundle\index.android.bundle --platform android --dev false
同样回到 Activity,假设我们有视图已经加载过一次 bundle 文件,那么此时只需要
private void initAndLoadReactView() {
        ReactInstanceManager reactInstanceManager = ((MainApplication)getApplication()).getReactNativeHost().getReactInstanceManager();
        rootView.startReactApplication(reactInstanceManager,"CustomComponent", null);
}
获取 ReactInstanceManager,加载 ReactRootView 即可。此时,由于bundle已经被加载过,可以很快的显示出RN组件视图。
可以明显看到,第一次进入的时候,由于加载 JsBundle,导致有一些延迟,但是当我们第二次进入的时候,就会瞬间加载完成并显示出来。此类问题的解决方案我单独写了一篇博客来介绍:基于最新版本React Native实现JsBundle预加载,界面秒开优化
如果你的项目要开启混淆策略,可以在proguard下添加如下:
# React Native

# Keep our interfaces so they can be used by other ProGuard rules.
# See http://sourceforge.net/p/proguard/bugs/466/
-keep,allowobfuscation @interface com.facebook.proguard.annotations.DoNotStrip
-keep,allowobfuscation @interface com.facebook.proguard.annotations.KeepGettersAndSetters
-keep,allowobfuscation @interface com.facebook.common.internal.DoNotStrip

# Do not strip any method/class that is annotated with @DoNotStrip
-keep @com.facebook.proguard.annotations.DoNotStrip class *
-keep @com.facebook.common.internal.DoNotStrip class *
-keepclassmembers class * {
    @com.facebook.proguard.annotations.DoNotStrip *;
    @com.facebook.common.internal.DoNotStrip *;
}

-keepclassmembers @com.facebook.proguard.annotations.KeepGettersAndSetters class * {
  void set*(***);
  *** get*();
}

-keep class * extends com.facebook.react.bridge.JavaScriptModule { *; }
-keep class * extends com.facebook.react.bridge.NativeModule { *; }
-keepclassmembers,includedescriptorclasses class * { native ; }
-keepclassmembers class *  { @com.facebook.react.uimanager.UIProp ; }
-keepclassmembers class *  { @com.facebook.react.uimanager.annotations.ReactProp ; }
-keepclassmembers class *  { @com.facebook.react.uimanager.annotations.ReactPropGroup ; }

-dontwarn com.facebook.react.**

# okhttp

-keepattributes Signature
-keepattributes *Annotation*
-keep class okhttp3.** { *; }
-keep interface okhttp3.** { *; }
-dontwarn okhttp3.**

# okio

-keep class sun.misc.Unsafe { *; }
-dontwarn java.nio.file.*
-dontwarn org.codehaus.mojo.animal_sniffer.IgnoreJRERequirement
-dontwarn okio.**
OK,今天的内容就到这里了,下一篇博客我将和大家分享如何实现热更新,敬请期待!
源码已分享到github,感兴趣的大家可以flow,star~ 源码下载


