Caravel数据可视化平台环境搭建与使用
Github: https://github.com/airbnb/caravel
官网: http://airbnb.io/caravel/index.html
Caravel提供了:
-
运行用户创建并分享仪表盘一样的可视化数据集;
-
一套丰富可视化地分析数据,同时也能够弹性地扩展这种可视化的能力;
-
一个可扩展的,高粒度安全模型允许复杂的规则应用到那些能够访问这些功能的模块上,并集成了主要的验证提供商(数据库,OpenID,LDAP,OAuth和REMOTE_USER通过Flask AppBuiler)
-
一个简单的语法层,允许控制在用户界面中数据源的显示,通过定义应显示在,其中,下拉和聚集的功能(指标)均可提供给用户。
-
深入集成Druid 允许Caravel 保存速度极快,并且切片和切块大,实时数据集。
环境
Caravel基于Python语言,要求版本Python2.7或者Python3.4+,推荐使用最新的Python3.5
基础环境安装:
For Debian and Ubuntu (本文以Ubuntu14.04为例)
sudo apt-get install build-essential libssl-dev libffi-dev python-dev python-pip libsasl2-dev libldap2-dev
For Fedora and RHEL-derivatives
sudo yum upgrade python-setuptools
sudo yum install gcc libffi-devel python-devel python-pip python-wheel openssl-devel libsasl2-devel openldap-devel
推荐使用virtualenv来配置单个项目的依赖。
sudo pip install virtualenv
# virtualenv is shipped in Python 3 as pyvenv
Mkdir envs && cd envs
virtualenv venv
source ./env/bin/activate如果需要退出deactivate
sudo pip install --upgrade setuptools pip
数据库依赖安装
database pypi package SQLAlchemy URI prefix
MySQL pip install mysqlclient mysql://
sqlite sqlite://
Oracle pip install cx_Oracle oracle://
先说明MySQL依赖安装:
安装mysqlclient for linux
sudo apt-get install libmysqlclient-dev
pip install mysqlclient
再进行Oracle依赖安装:
安装oracle-client for linux:
sudo apt-get install libaio1
下载oracle for linux-x64 client : http://www.oracle.com/technetwork/database/features/instant-client/index-097480.html
需要下载两个
instantclient-basic-linux.x64-11.2.0.4.0.zip
instantclient-sdk-linux.x64-11.2.0.4.0.zip
sudo apt-get install unzip
sudo mkdir /opt/ora
sudo unzip instantclient-basic-linux.x64-11.2.0.4.0.zip -d /opt/ora/
sudo unzip instantclient-sdk-linux.x64-11.2.0.4.0.zip -d /opt/ora/
sudo vim /etc/profile在文件最后添加
export ORACLE_HOME=/opt/ora/instantclient_11_2
export LD_LIBRARY_PATH=/opt/ora/instantclient_11_2/lib
export NLS_LANG=AMERICAN_AMERICA.UTF8
source /etc/profile
pip install cx_Oracle
初始化Caravel
# Install caravel
pip install caravel
这一步由于大家都懂得的原因进行得不是很顺利,针对没有成功下载的包,我们使用国内镜像来下载:pip install numpy -i http://pypi.douban.com/simple --trusted-host=pypi.douban.com
# Create an admin user
fabmanager create-admin --app caravel
# Initialize the database
caravel db upgrade
# Load some data to play with
caravel load_examples
# Create default roles and permissions
caravel init
# Start the web server on port 8088
caravel runserver -p 8088
# To start a development web server, use the -d switch
# caravel runserver –d
(Caravel默认采用gunicorn 作为服务器启动,这个服务器不支持windows)
之后便可以访问http://localhost:8088,然后登录用户,是你前面输入的用户,密码。
第一步Sources -> Refresh Druid Metadata,这一步是加载caravel能够访问到的所有datasources资源,之后你可以在Menu -> Datasources看到。
配置(可选)
新建caravel_config.py文件,保证该文件处于PYTHONPATH下面。
#---------------------------------------------------------
ROW_LIMIT = 5000
CARAVEL_WORKERS = 4
CARAVEL_WEBSERVER_PORT = 8088
#Flask App Builder configuration
#---------------------------------------------------------
# Your App secret key
SECRET_KEY = '\2\1thisismyscretkey\1\2\e\y\y\h'
# The SQLAlchemy connection string to your database backend
# This connection defines the path to the database that stores your
# caravel metadata (slices, connections, tables, dashboards, ...).
# Note that the connection information to connect to the datasources
# you want to explore are managed directly in the web UI
SQLALCHEMY_DATABASE_URI = 'sqlite:////path/to/caravel.db'
# Flask-WTF flag for CSRF
CSRF_ENABLED = True
# Set this API key to enable Mapbox visualizations
MAPBOX_API_KEY = ''
Virtualenv中配置pythonpath
add2virtualenv . #for current directory
缓存配置选项: CACHE_CONFIG,支持Memcache,Redis
配置数据源
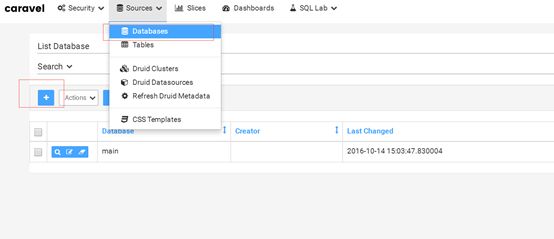
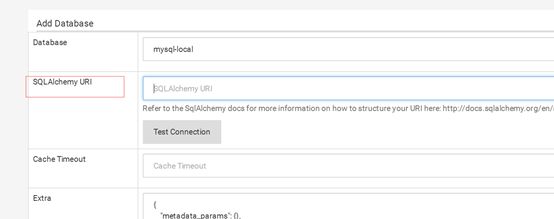
点击+添加数据源:
database SQLAlchemy URI prefix
MySQL mysql://
sqlite sqlite://
Oracle oracle://
SQLAlchemyURI写法具体查看http://docs.sqlalchemy.org/en/latest/core/engines.html,下面举出几个例子:
MySQL
The MySQL dialect uses mysql-python as the default DBAPI. There are many MySQL DBAPIs available, including MySQL-connector-python and OurSQL:
# default
engine = create_engine('mysql://scott:tiger@localhost/foo')
# mysql-python
engine = create_engine('mysql+mysqldb://scott:tiger@localhost/foo')
# MySQL-connector-python
engine = create_engine('mysql+mysqlconnector://scott:tiger@localhost/foo')
# OurSQL
engine = create_engine('mysql+oursql://scott:tiger@localhost/foo')
Oracle
The Oracle dialect uses cx_oracle as the default DBAPI:
engine = create_engine('oracle://scott:[email protected]:1521/sidname')
engine = create_engine('oracle+cx_oracle://scott:tiger@tnsname')
SQLite
using the Python built-in module sqlite3 by default.
# sqlite://
# where
engine = create_engine('sqlite:///foo.db')
#Unix/Mac - 4 initial slashes in total
engine = create_engine('sqlite:////absolute/path/to/foo.db')
#Windows
engine = create_engine('sqlite:///C:\\path\\to\\foo.db')
#Windows alternative using raw string
engine = create_engine(r'sqlite:///C:\path\to\foo.db')
To use a SQLite :memory: database, specify an empty URL:
engine = create_engine('sqlite://')
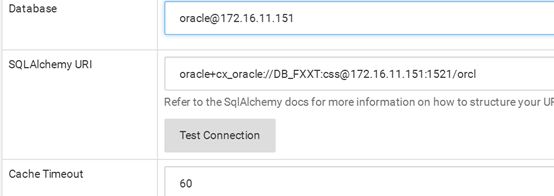
对于Oracle我们采用oracle+cx_oracle://scott:tiger@tnsname写法
对于MySQL我们采用mysql+mysqldb://scott:tiger@localhost/foo写法
例如:oracle+cx_oracle://DB_FXXT:[email protected]:1521/orcl
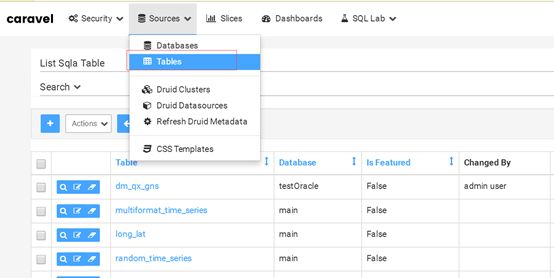
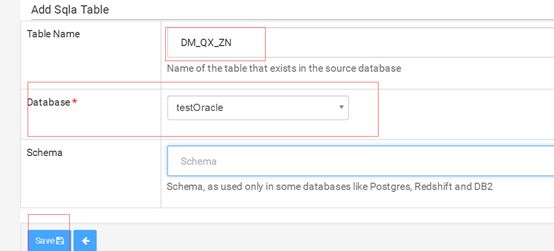
新建表
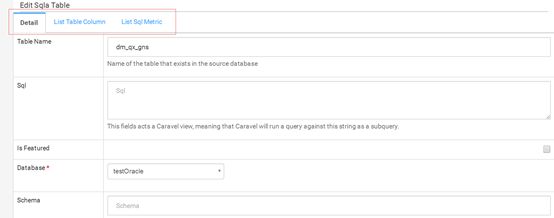
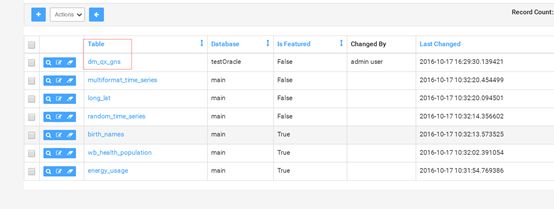
保存之后回到列表页面,然后点击编辑:
表名一定要与数据库中存在的表名一致。
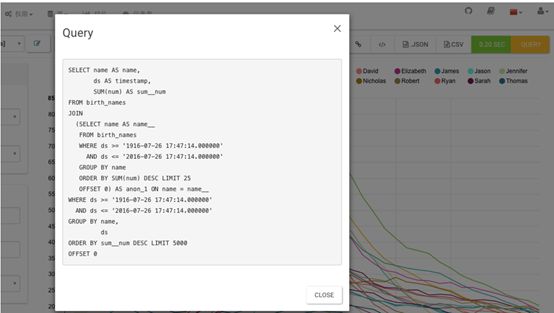
Sql表示你可以将这个sql 作为子查询。但是测试过程中好像存在问题。此问题发生原因为加了这个sql后,它会执行三层嵌套查询,而在嵌套查询中使用了as 表名。导致oracle报错。例如我写了sql为select t.*,z.* from dm_qx_gns t,dm_qx_zn z ,然后它会自动生成下面的SQL语句
SELECT ZNMC, GNMC
FROM (SELECT ZNMC AS ZNMC, GNMC AS GNMC
FROM (select t.*,z.* from dm_qx_gns t,dm_qx_zn z) as expr_qry
WHERE XGRQ >= TO_TIMESTAMP('2015-10-17T15:54:34', 'YYYY-MM-DD"T"HH24:MI:SS.ff6')
AND XGRQ <= TO_TIMESTAMP('2016-10-17T15:54:34', 'YYYY-MM-DD"T"HH24:MI:SS.ff6')
)
WHERE ROWNUM <= 50000
这个语句会报错,因为红字部分的as 别名。
目前不建议使用该功能,存在问题。
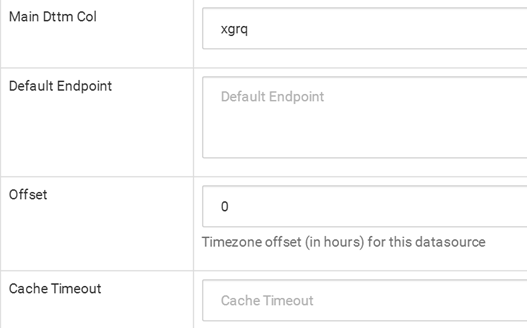
Main Dttm Col表示主DateTime字段。每一个建立的表必须存在时间字段
offset标识,小时的起始时间,默认即可
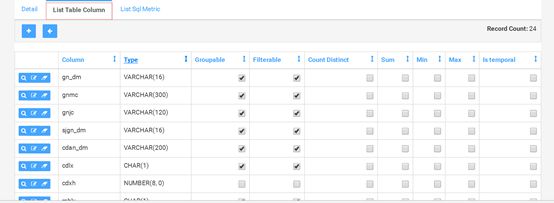
接下来切换到字段配置:
List Table Column中的操作决定,各个字段可以在可视化界面中做哪些操作(操作类型有,Groupable(分组),Filterable(过滤),Count Distinct(统计有多少种不同值),Sum(求和),Min(最小值),Max(最大值) Is tempora(是否是时间序列字段))
接下来就是最后可以被查询出来的字段。
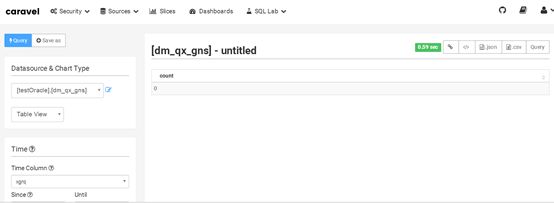
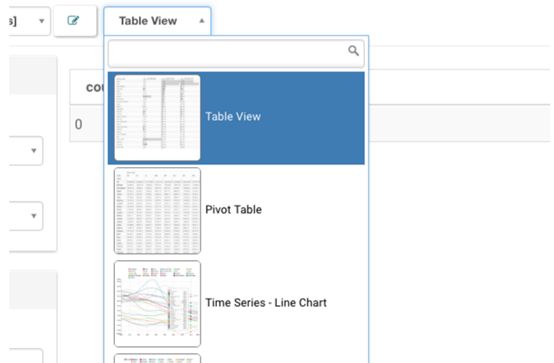
配置好之后点击表名即可进入可视化查询界面:
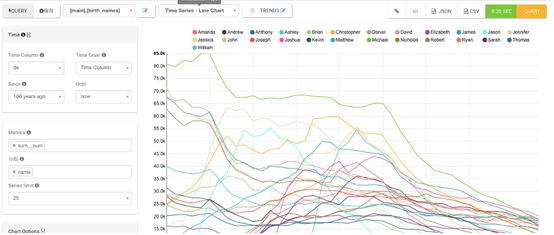
对于可视化得到的结果,你可以
-
将探索结果导出为JSON或是CSV
-
将探索的成果保存为slide,之后可以分享给同伴
-
将slide拼接为dashboard(就是这篇文章最初的那幅图)
-
将探索成果生成iframe嵌入到其他页面里(当报表用)

