Android性能优化:布局优化 详细解析(含、、讲解 )
- 在
Android开发中,性能优化策略十分重要 - 本文主要讲解性能优化中的布局优化,希望你们会喜欢。
目录
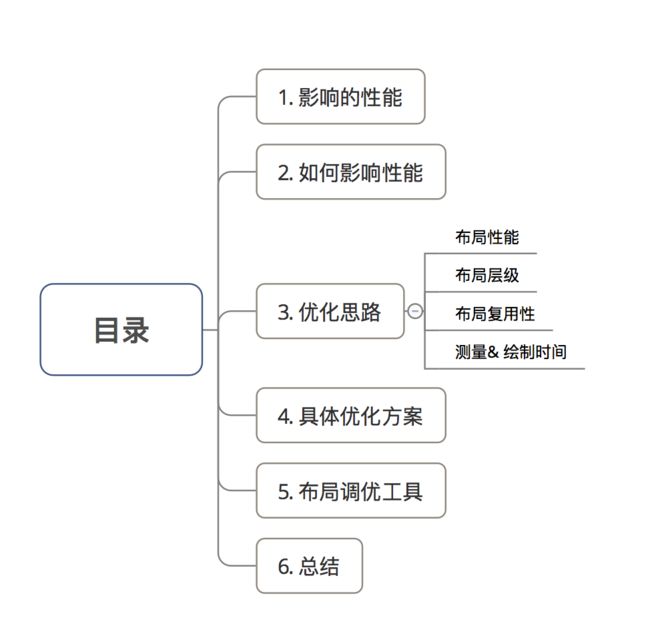
1. 影响的性能
布局性能的好坏 主要影响 :Android应用中的页面显示速度
2. 如何影响性能
布局影响Android性能的实质:页面的测量 & 绘制时间
1个页面通过递归 完成测量 & 绘制过程 =
measure、layout过程
3. 优化思路
- 优化方向:布局性能、布局层级、布局复用性 和 测量 & 绘制时间
- 具体如下

针对 页面布局的性能、层级、测量绘制时间 进行优化,从而提高 Android应用中的页面显示速度
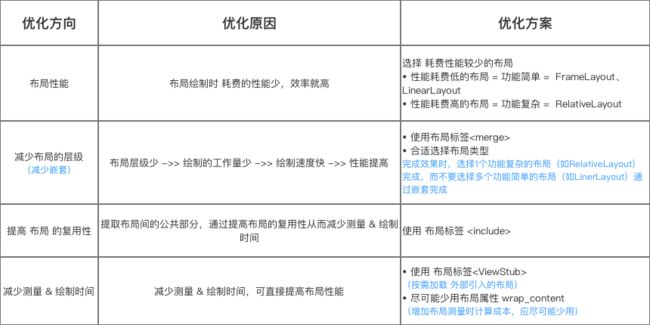
4. 具体优化方案
- 具体如下
- 下面,我将详细分析每种优化方案
4.1 选择 耗费性能较少的布局
- 性能耗费低的布局 = 功能简单 =
FrameLayout、LinearLayout - 性能耗费高的布局 = 功能复杂 =
RelativeLayout
即 布局过程需消耗更多性能(
CPU资源 & 时间)
注:
- 嵌套所耗费的性能 > 单个布局本身耗费的性能
- 即 完成需求时:宁选择 1个耗费性能高的布局,也不采用嵌套多个耗费性能低的布局
4.2 减少布局的层级(嵌套)
- 原理:布局层级少 ->> 绘制的工作量少 ->> 绘制速度快 ->> 性能提高
- 优化方式:使用布局标签
4.2.1 使用布局标签
- 作用
减少 布局层级
配合
标签使用,可优化 加载布局文件时的资源消耗
- 具体使用
  // 使用说明:
    // 1. 作为被引用布局A的根标签
    // 2. 当其他布局通过标签引用布局A时,布局A中的标签内容(根节点)会被去掉,在里存放的是布局A中的标签内容(根节点)的子标签(即子节点),以此减少布局文件的层次
/**
* 实例说明:在上述例子,在布局B中 通过
* 此时:布局层级为 = RelativeLayout ->> Button
* —>> RelativeLayout ->> Button
* ->> TextView
* 现在使用
* 在引用布局C时,布局C中的
* 即
 // 被引用的公共部分:布局C = layout_c.xml
 <?xml version="1.0" encoding="utf-8"?>
<merge xmlns:android="http://schemas.android.com/apk/res/android"
    android:layout_width="match_parent"
    android:layout_height="match_parent" >

    <Button
        android:id="@+id/button"
        android:layout_width="match_parent"
        android:layout_height="@dimen/dp_10"/>

    <TextView
        android:id="@+id/textview"
        android:layout_width="match_parent"
        android:layout_height="@dimen/dp_10"/>

</merge>

// 布局B:layout_b.xml
<?xml version="1.0" encoding="utf-8"?>
<RelativeLayout xmlns:android="http://schemas.android.com/apk/res/android"
    android:layout_width="match_parent"
    android:layout_height="match_parent" >

    <Button
        android:id="@+id/Button"
        android:layout_width="match_parent"
        android:layout_height="match_parent"
        android:layout_marginBottom="@dimen/dp_10" />

    <include layout="@layout/layout_c.xml" />

</RelativeLayout>
4.2.2 合适选择布局类型
- 通过合理选择布局类型,从而减少嵌套
- 即:完成 复杂的
UI效果时,尽可能选择1个功能复杂的布局(如RelativeLayout)完成,而不要选择多个功能简单的布局(如LinerLayout)通过嵌套完成
4.3 提高 布局 的复用性
- 原因
提取布局间的公共部分,通过提高布局的复用性从而减少测量 & 绘制时间 - 优化方案
使用 布局标签
4.3.1 使用 布局标签
-
作用
实现 布局模块化,即 提取布局中的公共部分 供其他布局共用 -
具体使用
// 使用说明:
  // a. 通过标签引入抽取的公共部分布局C
  // b. 标签所需属性 = 公共部分的layout属性,作用 = 指定需引入、包含的布局文件
// 实例说明:抽取 布局A、B中的公共部分布局C & 放入到布局B中使用
/**
* 布局B:layout_b.xml
*/
android:layout_height=“match_parent” >
    <Button
        android:id="@+id/Button"
        android:layout_width="match_parent"
        android:layout_height="match_parent"
        android:layout_marginBottom="@dimen/dp_10" />

    // 通过<include>标签引入抽取的公共部分布局C
    // <include>标签所需属性 = 公共部分的layout属性,作用 = 指定需引入、包含的布局文件
    <include layout="@layout/layout_c.xml" />

</RelativeLayout>

/**
 * 公共部分的布局C:layout_c.xml
 */
 <?xml version="1.0" encoding="utf-8"?>
<RelativeLayout xmlns:android="http://schemas.android.com/apk/res/android"
    android:layout_width="match_parent"
    android:layout_height="match_parent" >

    <Button
        android:id="@+id/button"
        android:layout_width="match_parent"
        android:layout_height="@dimen/dp_10"/>

    <TextView
    android:id="@+id/textview"
    android:layout_width="match_parent"
    android:layout_height="@dimen/dp_10"/>

</RelativeLayout>
4.4 减少初次测量 & 绘制时间
主要优化方案:使用 布局标签wrap_content
4.4.1 使用 布局标签
- 作用
按需加载 外部引入的布局
注:属 轻量级
View、不占用显示 & 位置
- 应用场景
引入 只在特殊情况下才显示的布局(即 默认不显示)
如:进度显示布局、信息出错出现的提示布局等
- 具体使用
  // 使用说明:
    // 1. 先设置好预显示的布局
    // 2. 在其他布局通过标签引入外部布局(类似);注:此时该布局还未被加载显示
    // 3. 只有当ViewStub被设置为可见 / 调用了ViewStub.inflate()时,ViewStub所指向的布局文件才会被inflate 、实例化,最终 显示指向的布局
/**
* 实例说明:在布局A中引入布局B,只有在特定时刻C中才显示
*/
 // 步骤1:先设置好预显示的布局B = layout_b.xml
 <?xml version="1.0" encoding="utf-8"?>
 <RelativeLayout xmlns:android="http://schemas.android.com/apk/res/android"
    android:layout_width="match_parent"
    android:layout_height="match_parent" >

    <Button
        android:id="@+id/button"
        android:layout_width="match_parent"
        android:layout_height="@dimen/dp_10"/>

    <TextView
        android:id="@+id/textview"
        android:layout_width="match_parent"
        android:layout_height="@dimen/dp_10"/>

</RelativeLayout>

// 步骤2:在布局A通过<ViewStub>标签引入布局B(类似<include>);注:此时该布局还未被加载显示
// 布局A:layout_a.xml
<?xml version="1.0" encoding="utf-8"?>
<RelativeLayout xmlns:android="http://schemas.android.com/apk/res/android"
    android:layout_width="match_parent"
    android:layout_height="match_parent" >

    <Button
        android:id="@+id/Button"
        android:layout_width="match_parent"
        android:layout_height="match_parent"
        android:layout_marginBottom="@dimen/dp_10" />

    <ViewStub
        android:id="@+id/Blayout"
        android:layout_width="match_parent"
        android:layout_height="match_parent"
        android:layout="@layout/layout_b" />

</RelativeLayout>

// 步骤3:只有当ViewStub被设置为可见 / 调用了ViewStub.inflate()时,ViewStub所指向的布局文件才会被inflate 、实例化,最终 显示<ViewStub>指向的布局
ViewStub stub = (ViewStub) findViewById(R.id.Blayout);
stub.inflate();
// 特别注意
// 1. ViewStub中的layout布局不能使用merge标签,否则会报错
// 2. ViewStub的inflate只能执行一次,显示了之后,就不能再使用ViewStub控制它了
// 3. 与View.setVisible(View.Gone)的区别:View 的可见性设置为 gone 后,在inflate 时,该View 及其子View依然会被解析;而使用ViewStub就能避免解析其中指定的布局文件,从而节省布局文件的解析时间 & 内存的占用
4.4.2 尽可能少用布局属性 wrap_content
布局属性 wrap_content 会增加布局测量时计算成本,应尽可能少用
在已知宽高为固定值时,不使用
wrap_content
总结
至此,关于布局优化的方案讲解完毕
5. 布局调优工具
- 背景
尽管已经注意到上述的优化策略,但实际开发中难免还是会出现布局性能的问题 - 解决方案
使用 布局调优工具
此处主要介绍 常用的:
hierarchy viewer、Lint、Systrace
5.1 Hierarchy Viewer
-
简介
Android Studio提供的UI性能检测工具。 -
作用
可视化获得UI布局设计结构 & 各种属性信息,帮助我们优化布局设计
即 :方便查看
Activity布局,各个View的属性、布局测量-布局-绘制的时间
- 具体使用
Hierarchy Viewer 使用指南
5.2 Lint
- 简介
Android Studio提供的 代码扫描分析工具 - 作用
扫描、发现代码结构 / 质量问题;提供解决方案
- 该过程不需手写测试用例
Lint发现的每个问题都有描述信息 & 等级(和测试发现 bug 很相似),可方便定位问题 & 按照严重程度进行解决
- 具体使用
Lint 使用指南
5.3 Systrace
- 简介
Android 4.1以上版本提供的性能数据采样 & 分析工具 - 作用
检测Android系统各个组件随着时间的运行状态 & 提供解决方案
- 收集 等运行信息,从而帮助开发者更直观地分析系统瓶颈,改进性能
检测范围包括:Android关键子系统(如WindowManagerService等Framework部分关键模块)、服务、View系统- 功能包括:跟踪系统的
I/O操作、内核工作队列、CPU负载等,在 UI 显示性能分析上提供很好的数据,特别是在动画播放不流畅、渲染卡等问题上
- 具体使用
Systrace 使用指南
6. 总结
- 本文主要讲解
Android性能优化中的 布局优化