java裁剪图片
要做一个裁剪图片的功能,闲来无事,找找看看,记录下成果。
效果图

1:技术概要
bootstrap+jcrop(裁图插件)
jcrop的DEMO地址 http://code.ciaoca.com/jquery/jcrop/demo/,下载下看看案例
2:实现
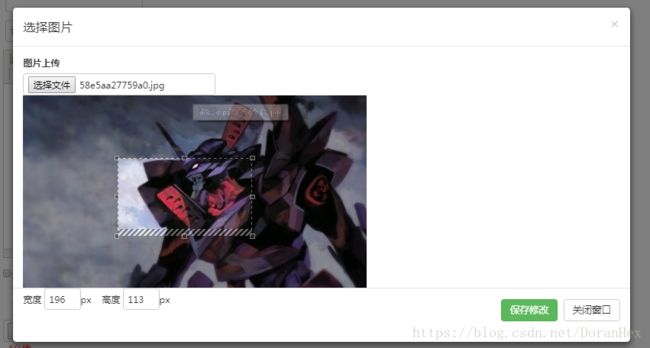
效果是:点击上传图片,尺寸超出900x900像素的图片,弹出裁剪图进行裁剪,如果小于不弹出
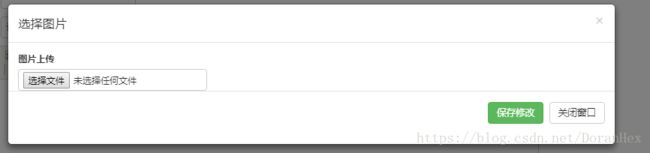
下方代码是bootstrap的模态框,也就是上传图片的画框,(引入bootstrap.js)
点击上传
模态框中的图片上传的onchange事件js:
function uploadPic(){
	    var isAllow = false;
		//上传图片 异步的  	Jquery.form.js
		//判断图片尺寸
        var tes = document.querySelector("#pic");
        testWidthHeight(tes);
	};

    function testWidthHeight(file){
        var isAllow;
        if(file && file.files[0]){
            var fileData = file.files[0];
            //使用FileReader来读取图片,生成img对象,获取img对象中的图片的宽和高
            var reader = new FileReader();

            reader.onload = function (e) {
                //加载图片获取图片真实宽度和高度
                var image = new Image();
                image.οnlοad=function(){
                    var width = image.width;
                    var height = image.height;
                    console.log(width+"------"+height);
                    isAllow = width <= Max_Width && height <= Max_Height
                    if(isAllow == false){
                        toCutPic(image);
                    }else{
                        //小于指定尺寸,进行上传,使用ajax异步提交,这里就不再写了
                    }
                };
                image.src= e.target.result;
            };
             reader.readAsDataURL(fileData);
        }
    }
FileReader是一个HTML5的可以用来读取 [input=file]中的图片的对象,可以进行预览操作。
FileReader的读取图片在onload事件之后是因为兼容IE,还因为读取图片是异步的。还有image的onload 以下是解释

裁剪图片的js:(引入jcrop.js)
var jcrop_api,//jcrop对象
boundx,//图片实际显示宽度(缩放宽度)
boundy;//图片实际显示高度(缩放高度)
var Max_Width = 900; //px
var Max_Height = 900; //px
//初始化裁剪
function toCutPic(image){
var result = image.src
$("#wrapperPic").empty();
var html = ' '
$("#wrapperPic").append(html);
$("#widHei").removeAttr('style')
// img的jquery对象
$target = $('#target');
$target.Jcrop({
onChange: showCoords,
onSelect: showCoords,
onRelease: clearCoords,
//trackDocument:false,
aspectRatio: 0
},function(){
//初始化后回调函数
// 获取图片实际显示的大小
var bounds = this.getBounds();
boundx = bounds[0];//图片实际显示宽度(缩放宽度)
boundy = bounds[1];//图片实际显示高度(缩放高度)
// 保存jcrop_api变量
jcrop_api = this;
});
var boundhtml = '' +
'';
$("#coordsForm").append(boundhtml);
}
//显示裁剪框的宽和高
function showCoords(c) {
$('#x1').val(c.x);
$('#y1').val(c.y);
$('#x2').val(c.x2);
$('#y2').val(c.y2);
$('#w').val(c.w);
$('#h').val(c.h);
};
//清除文本框中的值
function clearCoords(c) {
$('#coords input').val('');
};
'
$("#wrapperPic").append(html);
$("#widHei").removeAttr('style')
// img的jquery对象
$target = $('#target');
$target.Jcrop({
onChange: showCoords,
onSelect: showCoords,
onRelease: clearCoords,
//trackDocument:false,
aspectRatio: 0
},function(){
//初始化后回调函数
// 获取图片实际显示的大小
var bounds = this.getBounds();
boundx = bounds[0];//图片实际显示宽度(缩放宽度)
boundy = bounds[1];//图片实际显示高度(缩放高度)
// 保存jcrop_api变量
jcrop_api = this;
});
var boundhtml = '' +
'';
$("#coordsForm").append(boundhtml);
}
//显示裁剪框的宽和高
function showCoords(c) {
$('#x1').val(c.x);
$('#y1').val(c.y);
$('#x2').val(c.x2);
$('#y2').val(c.y2);
$('#w').val(c.w);
$('#h').val(c.h);
};
//清除文本框中的值
function clearCoords(c) {
$('#coords input').val('');
};完成裁剪发送数据:(引入jquery.form.js,保证ajax异步实现上传文件)
//完成裁剪,保存
function toCompletePic(){
//将原图、缩放后的宽高、以及裁剪框所选x1,y1,x2,y2,w,h发送后台进行裁剪
var options = {
url : "后台的url",
type : "post",
dataType : "json",
success : function(data){
//关闭上传图片对话框(模态框)
$("#avatar-modal").modal("hide");
//回调函数里返回的自己实现
}
};
$("#coordsForm").ajaxSubmit(options);
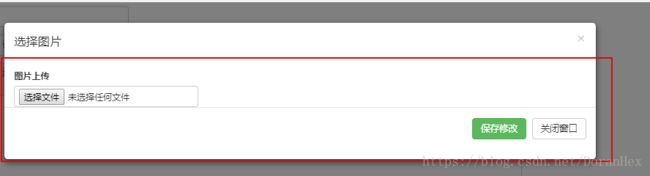
}一个坑:bootstrap的模态框会只加载一次,所以上一次的数据会在第二次打开的时候还存在。找了很多办法,div的局部刷新,bootstrap的关闭删除数据表单数据等,都不行。只能用一个笨办法----->关闭模态框的时候将模态框的body的DOM结构给删除,并填充新的DOM结构。(红框显示的模态框的body)
这里我使用的是Handlebars的模板引擎填充DOM结构
http://handlebarsjs.com/ 官网示例,很简单。贴上我的代码
  //防止模态框(上传图片对话框)只加载一次
	$("#avatar-modal").on("hidden.bs.modal",function() {
        //清除原来的dom结构
        $(".modal-body").children().remove();
        //使用handlebars模板引擎填充清除的dom结构
        var modalTemp = $("#modal-temp").html();
        var content = {pic:"pic",wrapperPic:"wrapperPic",x1:"x1",x2:"x2",y1:"y1",y2:"y2",w:"w",h:"h",widHei:"widHei"}
        var template = Handlebars.compile(modalTemp);
        var htm = template(content);
        $("#modal-body").append(htm);

        //查看模态框的dom结构
        var modalDiv = document.querySelector("#avatar-modal");
        console.log(modalDiv);
    });
用了bootstarp的模态框的关闭事件。
至此,前端页面上的修改已经完毕。将原图,缩放宽高,裁剪框的x1,y1,x2,y2,w,h提交到后台裁剪
jcrop的x1,y1,x2,y2,w,h的解释
将图片的左上角作为原点,往右为x轴,往下为y轴,w,h为裁剪框的宽和高,单位为px

后台代码包含缩放和裁剪两部分。将原图进行缩放,再根据裁剪框在缩放图像的位置进行裁剪
贴上代码:
    @RequestMapping(value = "/uploadPic")
	@ResponseBody
	public String uploadPic(MultipartFile pic,HttpServletRequest request,
			HttpServletResponse response,
			Integer x1,Integer x2,Integer y1,Integer y2,Integer w,Integer h,
            Integer boundx,Integer boundy) throws Exception{

        String path = null;
        String OrgName = pic.getOriginalFilename();
        if(boundx==null){
            //进行普通的上传
            path = uploadService.upload(pic);
        }else{
            //进行缩放及裁剪
            BufferedImage crop = ImageUtils.crop(pic, boundx, boundy, x1, y1, w, h);
            String originalFilename = pic.getOriginalFilename();

           //将BufferedImage进行上传,自行实现

        }

		return  path;

	}
public class ImageUtils {
public static BufferedImage crop(MultipartFile file,
int scaleWidth, int scaleHeight,
int cropX, int cropY,
int targetWidth, int targetHeight
) throws IOException {
BufferedImage source;
String format;
InputStream is = null;
try {
//is = new FileInputStream(file);
is = file.getInputStream();
// 从InputStream中读取图片流信息
ImageInputStream iis = ImageIO.createImageInputStream(is);
Iterator iter = ImageIO.getImageReaders(iis);
// if (!iter.hasNext()) {
// return null;
// }
ImageReader reader = (ImageReader) iter.next();
ImageReadParam param = reader.getDefaultReadParam();
reader.setInput(iis, true, true);
try {
source = reader.read(0, param);
format = reader.getFormatName();
} finally {
reader.dispose();
iis.close();
}
} finally {
IOUtils.closeQuietly(is);
}
//调整放大缩小比率
//int width = Double.valueOf(scale * source.getWidth()).intValue();
//int height = Double.valueOf(scale * source.getHeight()).intValue();
BufferedImage scaled = scale(source, scaleWidth, scaleHeight);
//剪裁图片
ImageFilter filter = new CropImageFilter(cropX, cropY, targetWidth, targetHeight);
Image cropped = Toolkit.getDefaultToolkit().createImage(new FilteredImageSource(scaled.getSource(), filter));
//渲染新图片
BufferedImage image = new BufferedImage(targetWidth, targetHeight, BufferedImage.TYPE_INT_RGB);
Graphics g = image.getGraphics();
g.drawImage(cropped, 0, 0, null);
g.dispose();
float softenFactor = 0.05f;
float[] softenArray = { 0, softenFactor, 0, softenFactor,
1 - (softenFactor * 4), softenFactor, 0, softenFactor, 0 };
Kernel kernel = new Kernel(3, 3, softenArray);
ConvolveOp cOp = new ConvolveOp(kernel, ConvolveOp.EDGE_NO_OP, null);
image = cOp.filter(image, null);
return image;
}
//进行缩放
public static BufferedImage scale(BufferedImage image, int width, int height) {
ResampleOp resampleOp = new ResampleOp(width, height);
resampleOp.setUnsharpenMask(AdvancedResizeOp.UnsharpenMask.Normal);
return resampleOp.filter(image, null);
}
}至此,裁剪图片完成~~~~~~