原生android工程实现RN集成
原生android工程实现RN集成
一.环境准备
- Andorid开发所需的JDK以及IDE,本文使用的开发工具是AndroidStudio
- js服务端的解析环境node.js以及nod.js一块安装的npm
- react-native插件(暂时这样叫吧),用来按设定规则构建所需的bundle文件
- curl工具,在使用离线bundle的时候,可以直接去服务端拉到所需的bundle文件
- 备注1:以下出现的native端均指Andoroid原生的APP端
- 备注2:系统:window10; native端react-native:0.26.3; 手机:三星note4(API=23;Android开发工具:AS
二.准备一个原生的Android工程,并加入RN相关的代码
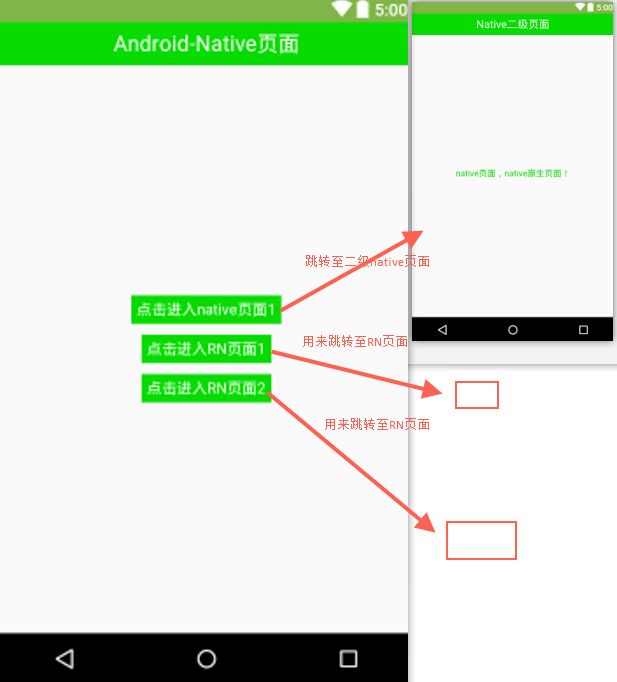
2.1 先生成一个原生的android工程,我们使用一个简单的Demo,界面如下
2.2 在module下的gradle文件中加入facebook RN模块的依赖,以便我们使用相关的API
compile "com.facebook.react:react-native:+" //此处我们使用+标识使用仓库中最新的版本,实际开发中应尽量使用确定版本
当然由于我们最后的RN模块中加载的JS bundle是要经过网络加载的(使用离线bundle除外),我们直接在AndroidManifest.xml中添加网络的使用权限
相对于上一篇使用命令:react-native -init 初始化出来的RN工程直接已经做好了这些工作
2.3 此时重新build工程,以便根据我们刚才修改的gradle文件拉取react-native模块,并作为当前工程的依赖
可能出现以下错误:
1.问题:Manifest merger failed : uses-sdk:minSdkVersion 15 cannot be smaller than version 16 declared in library [com.facebook.react:react-native:0.20.1]
原因即我们依赖的react-native:0.20.1版本的模块中声明的minSdkVersion和我们当前工程的minSdkVersion不符,相对较小
解决:修改我们工程模块下的build.gradle的minSdkVersion和react-native模块的一致,或者按照提示使用tools在Manifest文件中声明强制使用另外一个。
2.4 上一步如工程重新build完毕,则我们可以开始添加关于RN的native端代码了:
该步骤相当于是添加一个RN组件的Native端容器,该容器用来启动React Native的库,并进而加载解析js端代码,并转换为能被native端识别并能加载的数据进而被native端运行,常见的有两种写法:
1.我们直接使用新版本的写法,构建RNActivity如下
import com.facebook.react.shell.MainReactPackage; import java.util.Arrays; import java.util.List; /** * Created by weiyang on 2017/7/31 0031. */ public class RNActivity extends ReactActivity{ //对应JS端暴露出来的模组名称 @Override protected String getMainComponentName() { return "RNFirstComponent"; } //该标志位会直接拉取服务端的数据 @Override protected boolean getUseDeveloperSupport() { return BuildConfig.DEBUG; } //JS端能够直接使用的控件及组件对应的native端的封装包 @Override protected ListgetPackages() { return Arrays. asList( new MainReactPackage() ); } }
顺便我们进到继承的父类ReactActivity.java中可以看到如下的方法
  /**
   * Returns the name of the main module. Determines the URL used to fetch the JS bundle
   * from the packager server. It is only used when dev support is enabled.
   * This is the first file to be executed once the {@link ReactInstanceManager} is created.
   * e.g. "index.android"
   */
    //用来标识去服务端拉取哪一个js端的module,该处决定了,我们一会服务端js端的名字怎么命名,如果和此处不一致,则会找不到
  protected String getJSMainModuleName() {
    return "index.android";
  }

      /**
   * Returns the name of the bundle in assets. If this is null, and no file path is specified for
   * the bundle, the app will only work with {@code getUseDeveloperSupport} enabled and will
   * always try to load the JS bundle from the packager server.
   * e.g. "index.android.bundle"
   */
    //此处声明的是离线bundle的名称,只有在getUseDeveloperSupport()为enabled时有效,并且每次都会先去尝试加载服务端的bundle
  protected @Nullable String getBundleAssetName() {
    return "index.android.bundle";
  };
2.第二种方法,我们不继承ReactActivity,可以新建一个RNSecActivity如下:
package com.yunzhongjun.weiyang.rntransplantdemo;

import android.content.Intent;
import android.net.Uri;
import android.os.Build;
import android.os.Bundle;
import android.provider.Settings;
import android.support.v7.app.AppCompatActivity;
import android.util.Log;
import android.view.KeyEvent;

import com.facebook.react.LifecycleState;
import com.facebook.react.ReactInstanceManager;
import com.facebook.react.ReactRootView;
import com.facebook.react.modules.core.DefaultHardwareBackBtnHandler;
import com.facebook.react.shell.MainReactPackage;

//该Activity不用直接继承ReactActivity,但是实现DefaultHardwareBackBtnHandler接口,以处理相关的手机按键事件
public class RNSceActivity extends AppCompatActivity implements DefaultHardwareBackBtnHandler {

private static final int OVERLAY_PERMISSION_REQ_CODE = 102;
private static final String TAG = "---";
private ReactRootView mReactRootView;//JS对应的Native的根布局
private ReactInstanceManager mReactInstanceManager;//Instance 管理器

@Override
protected void onCreate(Bundle savedInstanceState) {
    super.onCreate(savedInstanceState);
    //setContentView(R.layout.activity_main); //RN中不需要此处填充view 使用解析到的JS端的view填充
    initRNRootView();//初始化RN的rootView,所有解析到的view都按规则添加到该View上
    if (Build.VERSION.SDK_INT >= Build.VERSION_CODES.M) {
        if (!Settings.canDrawOverlays(this)) {
            Intent intent = new Intent(Settings.ACTION_MANAGE_OVERLAY_PERMISSION,
                    Uri.parse("package:" + getPackageName()));
            startActivityForResult(intent, OVERLAY_PERMISSION_REQ_CODE);
        }
    }
}

private void initRNRootView() {
    mReactRootView = new ReactRootView(this);
    mReactInstanceManager = ReactInstanceManager.builder().setApplication(getApplication())
            .setBundleAssetName("index.android.jsbundle")//main.jsbundle
            .setJSMainModuleName("index.android")//index.android
            .addPackage(new MainReactPackage())
            .setUseDeveloperSupport(BuildConfig.DEBUG)//BuildConfig.DEBUG 直接用debug 出现crash ---http://blog.csdn.net/guxiao1201/article/details/50899136
            .setInitialLifecycleState(LifecycleState.RESUMED)
            .build();
    mReactRootView.startReactApplication(mReactInstanceManager, "RNFirstComponent", null);
    setContentView(mReactRootView);
}

@Override
public void invokeDefaultOnBackPressed() {
    super.onBackPressed();
}

@Override
protected void onPause() {
    super.onPause();
    if (mReactInstanceManager != null) {
        mReactInstanceManager.onHostPause();
    }
}

@Override
protected void onResume() {
    super.onResume();
    if (mReactInstanceManager != null) {
        mReactInstanceManager.onHostResume(this, this);
    }
}

@Override
public void onBackPressed() {
    if (mReactInstanceManager != null) {
        mReactInstanceManager.onBackPressed();
    } else {
        super.onBackPressed();
    }
}

@Override
public boolean onKeyUp(int keyCode, KeyEvent event) {
    if (mReactInstanceManager != null && keyCode == KeyEvent.KEYCODE_MENU) {
        mReactInstanceManager.showDevOptionsDialog();
        return true;
    }
    return super.onKeyUp(keyCode, event);
}

@Override
protected void onActivityResult(int requestCode, int resultCode, Intent data) {
    if (requestCode == OVERLAY_PERMISSION_REQ_CODE) {
        if (Build.VERSION.SDK_INT >= Build.VERSION_CODES.M) {
            if (!Settings.canDrawOverlays(this)) {
                // SYSTEM_ALERT_WINDOW permission not granted...
                Log.d(TAG, "onActivityResult: ");
            }
        }
    }
}
}
以上过程我们完成工作如下:
- 1.声明RN的容器
- 第一种方式:声明了一个RNActivity 对应点击首页【进入RN页面1】按钮进入
- 第二种方式:声明了一个RNSecActivity两者实际效果一样,对应点击首页【进入RN页面2】按钮进入
- 2.声明是支持Debug
- 第一种方式:getUseDeveloperSupport() 中返回 BuildConfig.DEBUG
- 第二种方式:ReactInstanceManager.setUseDeveloperSupport(BuildConfig.DEBUG)
- 3.声明要加载的JS模块:
- 第一种方式:我们在ReactActivity中看到默认已经声明好的getJSMainModuleName(),该方法用来声明到服务端加载哪一个JS Module,该module在离线使用时就对应一个bundle文件,可以通过react-native命令生成,然后放到本地assets目录下以供使用
- 第二种方式: ReactInstanceManager.setJSMainModuleName(“index.android”)
- 4.在native端声明对应的js端的组件名称
- 第一种方式:getMainComponentName() 返回 “RNFirstComponent”
- 第二种方式: mReactRootView.startReactApplication(mReactInstanceManager, “RNFirstComponent”, null);
- 5.注册native端要暴漏出去可供JS端调用的组件封装包(此Demo中在js端我们只用到了fc已经提供了的组件,这些组件都在MainReactPackage中封装)
- 第一种方式: getPackages() 返回一个List 包括 new MainReactPackage()
- 第二种方式:ReactInstanceManager.addPackage(new MainReactPackage())
2.5 至此native端已经引入RN模块,关于RN的native端代码也已经完毕
下面先简单说明一下经过以上的配置,我们整个RN页面的启动流程是如何对应到代码上的(具体详细的流程需要查看相关RN的通信调用流程)
- 1.启动我们声明的RNActivity后,按照我们配置的服务端地址(后面面有在debug模式下如何配置),拉取服务端JS 模块(module)即名为index.android的js文件 该文件名是需要该处声明和js服务端统一的。PS:该过程node.js会将该module按规则打包为bundle文件并返回。PPS:按个人理解至此与服务端的交互结束。
- 2.在js 模块(Module)中找到对应注册为 “RNFirstComponent” 的组件,该名字在native段和JS端是需要统一的,即native端通过getMainComponentName()声明其要加载的组件名称,Js端在index.android module中则需要暴露并注册该名字的Component否则不能加载成功,该过程涉及RN在启动中native端和JS端的组件注册
- 3.native端通过react-native模块加载JS端代码,并解析出布局生成View视图,添加到native的视图上,同时把相关事件通过JS端和Native之间的通信进行传递到JS端,处理完成再把结果回传到native端,并在native短对相关视图修改或控件调用。
- 4.以上我们在native端声明了要加载的JS端模块(module)的名字,即对应native端要加载到的js文件名字,另外我们在native端也声明了要展示的js段组件(Component)的标识名字
- 5.以上没有关于自定义组件和控件的相关,js端能使用的native端的组件控件必须是在getPackages()该方法中返回的声明过的MainReactPackage里面的组件(facebook官方封装好的),如果我们想要使用自定义的组件,则需要我们按规则在native端声明并在此处注册后方可在JS端使用
三.初始化一个node.js工程,并进行相关配置(用到node.js和curl)
上一步我们只是按照RN最基本的用法,按不同的方式声明了两个RN 在native端容器Activity,该Activity容器在启动时会去服务端目录下寻找index.android的js文件(ps:该名字不是固定的只需保持一致即可,如果在native端覆写ReactActivity中的相关方法则服务端的js文件名也需要统一为该名字),并会解析该文件中声明的名字为RNFirstComponent的组件并在native端展示
3.1 因此此时我们需要
- 1.一个能够解析JS的服务端
- 2.在该服务端根目录下需要对应有一个index.android的JS文件以供加载
基于此
我们接下来首先要init一个node.js的工程,此处我们我们可以新建一个文件夹workspace_node(文件夹随便建),当然也可以直接把我们生成的android工程的根目录init为一个node.js的工程根目录。此处我们新建一个文件夹worksapce_rn并在该文件夹下打开命令行执行:npm init(npm是我们安装node.js时自动一块安装的一个工具)
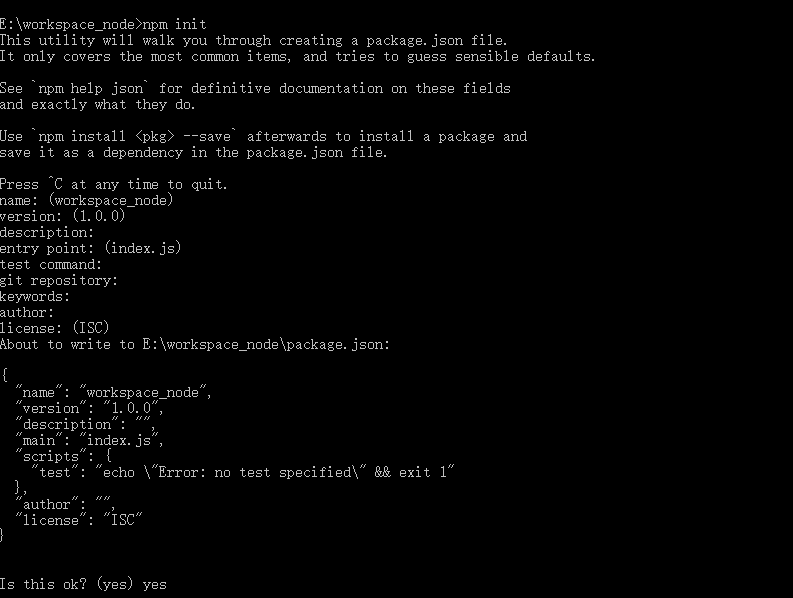
执行结果如下,中间需要我们输入该node.js工程的name version des等信息,此处可以全部忽略,直接按enter,系统会给我们配置默认值
npm init 命令执行:
执行完成后会在该目录下生成一个package.json文件
{
  "name": "workspace_node",//如果在init中输入相关名字,则为输入的名字,否则会给出默认的名字
  "version": "1.0.0",
  "description": "",
  "main": "index.js",
  "scripts": {
    "test": "echo \"Error: no test specified\" && exit 1"
  },
  "author": "",
  "license": "ISC"
}
**因为我们需要解释ract-native的js代码所以需要添加react-native的包依赖,**node.js工程添加依赖的方式为,在init时生成的package.json中进行配置我们需要添加的依赖有”react”:”15.0.2”和react-native的依赖”react-native”:”^0.26.3”,版本号可以自己查询确定。
另外我们需要改写node.js启动入口为react-native的(start命令配置),修改之后的package.json如下:
{
  "name": "workspace_node",
  "version": "1.0.0",
  "description": "first demo",
  "main": "index.js",
  "scripts": {
    "start":"node node_modules/react-native/local-cli/cli.js start",//添加node.js工程启动入口
    "test": "echo \"Error: no test specified\" && exit 1"//测试用(没用过)
  },
  "author": "",
  "license": "ISC",//,不能省略 json的格式需求
   "dependencies":{//配置的工程依赖,这个类似于在native工程添加react-native的依赖
    "react":"15.0.2",//,号不能省略
    "react-native":"^0.26.3"
    }
}
3.2 然后我们在该node.js服务端的根目录下打开命令行执行:npm install
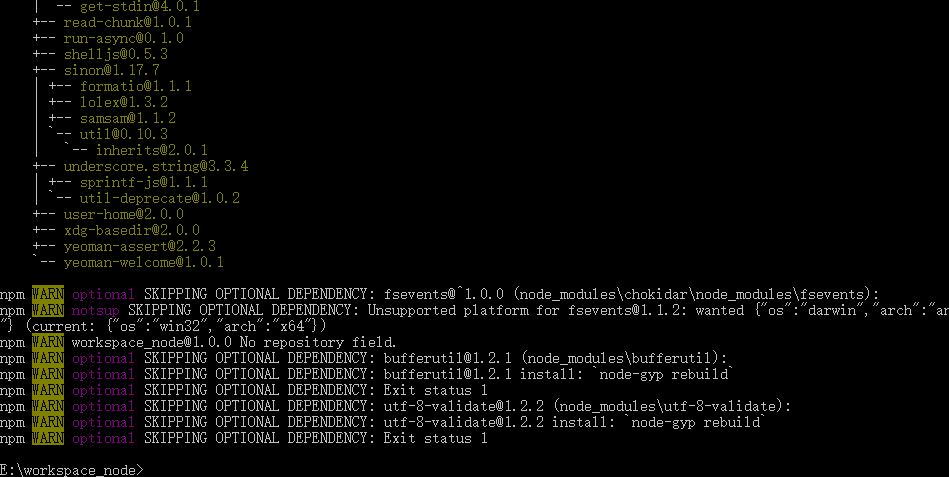
执行完毕后会在根目录下出现 node_modules 的文件夹

ps:以上安装安装react和ract-native的步骤也可以直接执行以下命令即可,无需修改package.json,效果相同安装的版本为最新
npm install --save react react-native //安装React 和React Native
pps:执行中遇到的PYTHON相关错误可以不用处理,但是需要注意语法错误的排除如“,”的缺失
3.3 在该文件夹中有一个react-native里面有一个android文件夹 里面是相关的native端对应的rn版本,为了我们的native端的android工程使用的rn的模块版本和该版本一致,我们可以配置native端工程根目录下的build.gradle(根目录下的,而非app模块下的)文件中的maven仓库,为该目录下的android,具体如下:
allprojects {
repositories {
    jcenter()
    maven{
        url "E:\\workspace_node\\node_modules\\react-native\\android" //本地存在的和JS端一致的版本
    }
}
}
3.4 另外我们也配置一下facebook出品的Flow(关于js代码静态检查的工具)以便我们在该目录下新建我们自己的js文件能够使用到Flow工具来提高代码质量
该工具在执行react-native install的时候已经一块下下来了,具体目录是.\node_modules\react-native\flow,我们只需要再添加一下类似.gitignore的配置,
3.4.1 配置的简单的方法是直接在工程根目录下新建.flowconfig
然后复制https://raw.githubusercontent.com/facebook/react-native/master/.flowconfig 里面的内容到.flowconfig下面即可
ps:在windows下你可能遇到无法创建.开头的文件,此时你需要以管理员身份打开命令行切到该目录下执行创建该文件的命令
3.4.2 如果你已经在windows上安装好了curl工具并配置好了其path则可以直接执行以下命令(window下curl的安装参考上篇笔记)
curl -o .flowconfig https://raw.githubusercontent.com/facebook/react-native/master/.flowconfig
至此,node.js服务端的环境已经配置完毕,下面我们开始创建js端的代码
四.创建js端代码,即native端要展示的RN页面
4.1 创建我们在2.4中声明过的index.android文件(此处在实际中是js端开发和native端的开发协商确定的名字)
我们创建一个简单的内容如下:
'use strict'; //js文件的生命 使用严格模式
import React from 'react'; //导入React的依赖
import { AppRegistry, StyleSheet, Text, View } from 'react-native'; //从react-native包中导入我们需要用的控件,这些控件都是fb官方帮我们在js端封装过的,对应的在native端也已经按照规则暴露并注册过了即在2.4的getPackages()中我们z注册的MainReactPackage

//JS端要暴露出去的组件,需要继承自Reactcomponent
class RNJSFirstComponent extends React.Component {
    render() { //render函数返回要渲染的布局
        return (

            this page is a RN page,you did it when you saw this!
             )
            }
        }
//定义的styleSheet 以便布局中引用
var styles = StyleSheet.create({
                                container: { flex: 1, justifyContent: 'center', },
                                textsty: { fontSize: 20, textAlign: 'center', margin: 10, },
                                    });
//JS端注册要暴漏出去的组件 前边引号内的名字需要与我们在Native端声明的要加载到native端的组件名字(2.4步骤中getMainComponentName)相同
AppRegistry.registerComponent('RNFirstComponent', () => RNJSFirstComponent);
4.2 以上注释中已经标注了js代码简单的语法规则,及与native端的对应关系,也可以大致总体的看到native端是怎么和JS端对应起来的,至此js端环境和一个简单的代码也已经完成
五.启动node.js服务
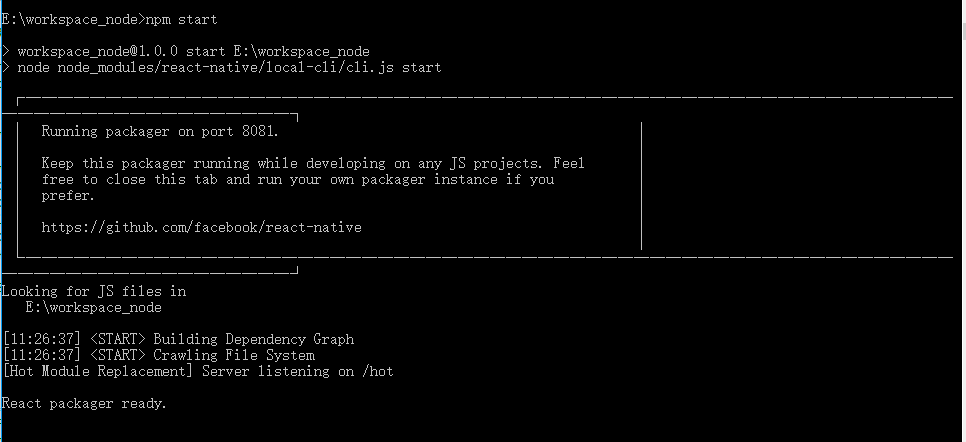
在node.js工程的根目录下,执行 npm start,启动node.js服务
六.启动APP
6.1 编译APP并运行App到手机上(此处使用的是三星 Note4 API:23)启动后首页Native页面如下
6.2 点击中间RN按钮跳转的是2.4中我们声明的RNActivity页面
此时会出现的问题有:
6.2.1 APP直接Crash,报错如下
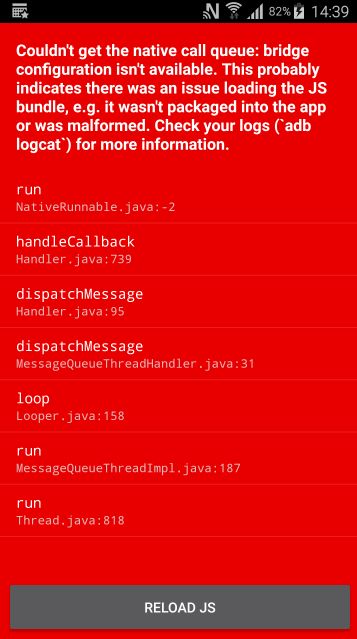
Couldn't get the native call queue: bridge configuration isn't available. This probably indicates there was an issue loading the JS bundle, e.g. it wasn't packaged into the app or was malformed. Check your logs (`adb logcat`) for more information.
原因:正常出现错误信息RN模块会直接hold,并在手机上弹出红屏警告,而此处直接Crash,报错信息为JS bundle 未找到,由于使用的测试机为API=23的,考虑是没有弹出相应的错误提示页面的权限。
解决:所以首先要排除手机系统是否支持该APP在其他应用之上显示页面.我们在RNActivity中添加动态权限申请的代码(针对API>=23的手机),或者直接在手机设置中允许该APP的该项权限(比如小米的手机),动态申请该项权限的代码如下
//动态申请在其他应用之上显示的权限
   @Override
protected void onCreate(Bundle savedInstanceState) {
    super.onCreate(savedInstanceState);
    if(Build.VERSION.SDK_INT>=Build.VERSION_CODES.M){
        if(!Settings.canDrawOverlays(this)){
            Intent intent = new Intent(Settings.ACTION_MANAGE_OVERLAY_PERMISSION, Uri.parse("package:"+getPackageName()));
            startActivityForResult(intent,OVERRLAY_CODE);
        }
    }
}

   @Override
public void onActivityResult(int requestCode, int resultCode, Intent data) {
    //super.onActivityResult(requestCode, resultCode, data);
    if(requestCode==OVERRLAY_CODE){
        if(Build.VERSION.SDK_INT>=Build.VERSION_CODES.M){
            if(!Settings.canDrawOverlays(this)){
                Log.d(TAG, "onActivityResult: ");
            }
        }
    }
}
6.2.2 解决上面的问题之后,error问题,不会再引起crash而是直接在手机上弹出红屏提示如下(信息和上面报的信息一样,不过此处不会再crash):
点击下方的RELOAD JS 出现报如下错误

**原因:**native端的RN模块没有加载到js bundle,报错不同是因为,在加载js bundle时,会首先在本地资源assets目录下找对应的bundle文件,因此会报第一个错误,当我们点击RELOAD JS时,会重新去服务端拉去该bundle,此时报第二个错误信息。
ps:如果本地assets下已经打包进去离线bundle,则此处查找离线bundle时直接命中不会报第一个error,显示页面。但是reload时依然会报第二个error信息
解决:首先保证手机和服务端所在电脑处于同一个个WIFI 局域网下,然后摇晃手机调出RN开发者工具页面,点击Dev Settings 条目,在弹出的页面中点击 Debugging 在弹出的输入框中输入:服务端的地址和端口号 192.168.10.130:8081,实际的IP地址要根据自己服务端电脑在局域网中的IP确定
PS:以本例为例,服务端所在电脑的局域网IP是:192.168.10.130 ,node.js 默认的服务端口号为8081
6.2.3 如果在5.2.2中点击Dev Settting时APP crash,报错如下
原因:没有在manifest文件中声明该DevSettingsActivity
解决:在AndroidManifest文件中声明如下:
6.3 正常设置完服务端的地址之后,摇晃手机调出开发者页面,点击Reload JS 会显示弹窗显示 feaching js bundle

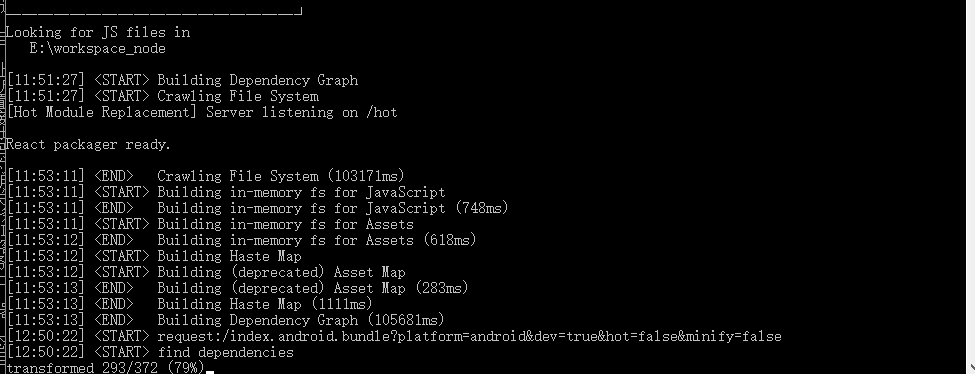
服务端执行npm start 窗口会显示打包bundle的进度如下
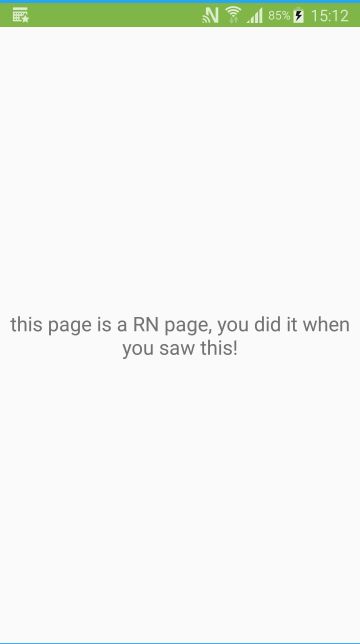
当bundle包转换完成,则APP即可正常显示index.android所生成的页面
6.4 同以上步骤我们可以点击首页的第三个按钮打开另外一种写法的RNsecActivity,由于两者加载的bundle是一样的所以内容相同
6.5 至此,则我们此次的原生集成RN完毕。
七 其他可能遇到的错误
7.1 Method ‘void android.support.v4.net.ConnectivityManagerCompat.()’ is inaccessible to class ‘com.facebook.react.modules.netinfo.NetInfoModule’ 该demo中使用的react-native版本为:0.26.3 没有出现此种情况
参考:https://github.com/facebook/react-native/issues/6152#issuecomment-200759453
解决:修改app module下的build.gradle中dependencies{}的v7包依赖为:23.0.1的版本
dependencies {
compile fileTree(dir: 'libs', include: ['*.jar'])
compile 'com.android.support:appcompat-v7:23.0.1'

//添加react-native的官方模块依赖,版本号为+表示使用最新的版本,在实际项目中我们要使用固定稳定的版本
compile "com.facebook.react:react-native:+"
}
7.2 关于32位和64位SO库混合引入Crash
参考:http://blog.csdn.net/u013531824/article/details/53931307
解决:在app module下的build.gradle中的defaultConfig{}下添加ndk配置
    defaultConfig {
    applicationId "com.yunzhongjun.weiyang.rntransplantdemo"
    minSdkVersion 16
    targetSdkVersion 25
    versionCode 1
    versionName "1.0"
    ndk{
        abiFilters "armeabi-v7a","x86"
    }
    }
并且在gradle.properties中添加如下配置
android.useDeprecatedNdk = true
