【OpenStack学习之旅】三、配置keystone数据库
以下操作均在控制节点(Controller)中执行
1.创建 keystone 数据库
mysql -uroot -p123456[root@controller ~]# mysql -uroot -p123456
Welcome to the MariaDB monitor. Commands end with ; or \g.
Your MariaDB connection id is 11
Server version: 10.1.20-MariaDB MariaDB Server
Copyright (c) 2000, 2016, Oracle, MariaDB Corporation Ab and others.
Type 'help;' or '\h' for help. Type '\c' to clear the current input statement.
create database keystone;MariaDB [(none)]> create database keystone;
Query OK, 1 row affected (0.00 sec)
grant all privileges on keystone.* to keystone@'localhost' identified by '123456';MariaDB [(none)]> grant all privileges on keystone.* to keystone@'localhost' identified by
'123456';
Query OK, 0 rows affected (0.00 sec)
grant all privileges on keystone.* to keystone@'%' identified by '123456';MariaDB [(none)]> grant all privileges on keystone.* to keystone@'%' identified by '123456';
Query OK, 0 rows affected (0.00 sec)
flush privileges;MariaDB [(none)]> flush privileges;
Query OK, 0 rows affected (0.00 sec)
exitMariaDB [(none)]> exit
Bye
2. 安装软件包
yum -y install openstack-keystone openstack-utils python-openstackclient httpd mod_wsgi mod_ssl3. 修改配置文件
先拷贝一份配置文件
cp -a /etc/keystone/keystone.conf /etc/keystone/keystone.conf_bak编辑配置文件
vim /etc/keystone/keystone.conf添加以下内容
memcache_servers = 10.1.1.11:11211
[database]
connection = mysql+pymysql://keystone:[email protected]/keystone
[token]
provider = fernet
driver = memcache
4. 生成数据库表结构
su -s /bin/bash keystone -c "keystone-manage db_sync"注意: 正常没有回显, 执行 echo $? 如果回显 0 说明执行成功
5. 初始化秘钥
 keystone-manage fernet_setup --keystone-user keystone --keystone-group keystone
 keystone-manage credential_setup --keystone-user keystone --keystone-group keystone
6. 定义本机IP
export controller=10.1.1.117. 引导 keystone, adminpassword 替换为自己的密码(注意格式)
keystone-manage bootstrap --bootstrap-password 123456 \
--bootstrap-admin-url http://$controller:35357/v3/ \
--bootstrap-internal-url http://$controller:35357/v3/ \
--bootstrap-public-url http://$controller:5000/v3/ \
--bootstrap-region-id RegionOne
8. 编辑 /etc/httpd/conf/httpd.conf
cp -a /etc/httpd/conf/httpd.conf /etc/httpd/conf/httpd.conf_bak

ServerName controller
9. 创建软连接并启动httpd服务
ln -s /usr/share/keystone/wsgi-keystone.conf /etc/httpd/conf.d/
systemctl start httpd
systemctl enable httpd
10. 创建和加载环境变量
vim ~/keystonerc添加以下内容:
export OS_USERNAME=admin
export OS_PASSWORD=123456
export OS_PROJECT_NAME=admin
export OS_USER_DOMAIN_NAME=Default
export OS_PROJECT_DOMAIN_NAME=Default
export OS_AUTH_URL=http://10.1.1.11:35357/v3
export OS_IDENTITY_API_VERSION=3
修改权限
chmod 600 ~/keystonerc更新环境变量
source ~/keystonerc11. 创建service (注意格式)
openstack project create --domain default \
--description "Service Project" service
12. 创建项目 (注意格式)
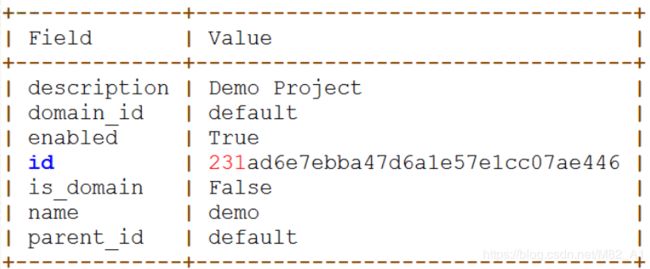
openstack project create --domain default \
--description "Demo Project" demo
13. 创建用户 (注意格式)
openstack user create --domain default \
--password-prompt demo
会让输入密码。
14. 创建角色
openstack role create user15. 赋予用户角色
openstack role add --project demo --user demo user16. 验证
取消环境变量
unset OS_AUTH_URL OS_PASSWORD验证admin (注意格式)
openstack --os-auth-url http://10.1.1.11:35357/v3 \
--os-project-domain-name Default --os-user-domain-name Default \
--os-project-name admin --os-username admin token issue
输入密码后大概格式:
验证demo (注意格式)
openstack --os-auth-url http://10.1.1.11:5000/v3 \
--os-project-domain-name Default --os-user-domain-name Default \
--os-project-name demo --os-username demo token issue
输入密码后大概格式:
17. 写入系统变量中
echo "source ~/keystonerc " >> ~/.bash_profile

source ~/.bash_profile


