Python爬虫之基础篇
关于Python的基本语法就不多说了,这里直接从各个小的程序开始,本文会不断地进行更新,一步步来走进Python~
同时也希望各位可以给点好的建议哈~
一、在Kali Linux中安装sublime text 3:
先下载sublime text 3,然后到下载的目录中执行以下命令即可:dpkg -i ./sublime-text_build-3126_amd64.deb二、Socket模块:
在导入socket时有两种方式,一个是import socket,然后在调用socket()方法的时候需要在前面加上socket.,如果是from socket import socket则不需要添加,因为已经导入了socket模块socket方法;当然另一个方式可以更简单,即from socket import *,导入socket模块所有的方法。
Python支持的套接字:AF_UNIX,AF_NETLINK,AF-INET(常用的基于网络的套接字)。
socket.socket()函数用于创建套接字。
socket.bind()函数用于绑定地址(主机,端口)到套接字。
socket.listen()函数用于开始TCP监听。
socket.accept()函数用于等待接收客户端的连接。
socket.connect()函数用于主动进行TCP连接。
socket.recv()函数用于接收TCP数据。
socket.send()函数用于发送TCP数据。
socket.sendall()函数用于完整发送TCP数据。
socket.close()函数用于关闭套接字。
1、简单模拟C/S模型进行通信:
分为两部分,一个为server端的程序,另一个为client端的程序。
socketserver.py:
#!/usr/bin/python
#coding=utf-8
from  socket import *
from time import ctime

def main():
	s = socket(AF_INET,SOCK_STREAM)
	s.bind(('',1234))
	s.listen(5)
	while True:
		print 'Waiting for connection...'
		c,addr = s.accept()
		print '...connected from:',addr
		while True:
			data = c.recv(1024)
			if not data:
				break
			print 'Client '+data
			rdata = raw_input('Some words to send : ')
			if not rdata:
				break
			time = ctime().split(' ')[4]
			t = time.split(':')[0]+':'+time.split(':')[1]+':'+time.split(':')[2]
			text = t + ' : ' +rdata
			c.send(text)
	c.close()
	s.close()

if __name__ == '__main__':
	main()
简单地说一下,bind()函数的参数是一个地址,是(IP,port)这种形式的,其中IP为空即指定为本机,后面的端口的类型记得是int型才可以,若是通过输入的方式获得则需要通过int()函数来进行类型的转换。其中调用了time库的ctime函数来获取当前时间,对其再调用split()函数来进行切割获得时:分:秒这种形式的显示。
socketclient.py:
#!/usr/bin/python
#coding=utf-8
from socket import *
import sys
from time import ctime

def main():
	try:
		url = sys.argv[1]
		port = int(sys.argv[2])
		addr = (url,port)
		c = socket(AF_INET,SOCK_STREAM)
		c.connect(addr)
		while True:
			text = raw_input('Some words to send : ')
			if not text :
				break
			time = ctime().split(' ')[4]
			t = time.split(':')[0]+':'+time.split(':')[1]+':'+time.split(':')[2]
			txt = t+' : '+text
			c.send(txt)
			data = c.recv(1024)
			if not data:
				break
			print 'Server '+data
		c.close()
	except:
		print 'Usage : ./socketclient.py [URL] [PORT] '

if __name__ == '__main__':
	main()
这里的参数port的输入需要对其调用int()函数来转换类型。
运行结果:2、接着可以进一步将程序改为实现简单的远程控制:
socketserver.py:
#!/usr/bin/python
#coding=utf-8
from  socket import *
from time import ctime
from subprocess import Popen,PIPE

def main():
	s = socket(AF_INET,SOCK_STREAM)
	s.bind(('',1234))
	s.listen(5)
	while True:
		print 'Waiting for connection...'
		c,addr = s.accept()
		print '...connected from:',addr
		while True:
			data = c.recv(1024)
			if not data:
				break
			# print 'Client '+data
			# rdata = raw_input('Some words to send : ')
			# if not rdata:
			# 	break
			time = ctime().split(' ')[4]
			t = time.split(':')[0]+':'+time.split(':')[1]+':'+time.split(':')[2]

			cmd = Popen(['/bin/bash','-c',data],stdin=PIPE,stdout=PIPE)
			rdata = cmd.stdout.read()

			text = '[ ' + t + ' ] : ' +rdata
			c.send(text)
	c.close()
	s.close()

if __name__ == '__main__':
	main()
这里主要用到了一个subprocess库的Popen和PIPE方法,其中subprocess是用来启动一个新的进程并且与之通信,其最简单的用法就是调用shell命令,它定义了一个类: Popen,用来创建进程并与进程进行复杂的交互。调用Popen函数的先是到/bin/bash路径下即bash shell中通过-c参数来说明是传递一条命令进去执行,其中的参数stdin、stdout都设置为管道PIPE,然后再通过调用stdout的read()函数来读取命令执行后的数据,从而整个地实现从后台来执行进程。
socketclient.py:#!/usr/bin/python
#coding=utf-8
from socket import *
import sys
# from time import ctime
def main():
try:
url = sys.argv[1]
port = int(sys.argv[2])
addr = (url,port)
c = socket(AF_INET,SOCK_STREAM)
c.connect(addr)
while True:
text = raw_input('Please enter a command : ')
if not text :
break
# time = ctime().split(' ')[4]
# t = time.split(':')[0]+':'+time.split(':')[1]+':'+time.split(':')[2]
# txt = t+' : '+text
c.send(text)
data = c.recv(1024)
if not data:
break
# print 'Server '+data
print data
c.close()
except:
print 'Usage : ./socketclient.py [URL] [PORT] '
if __name__ == '__main__':
main()运行结果:
三、Requests模块:
该模块没有默认安装,需要输入:pip install requests
发送网络请求:
>>>r = requests.get('http://www.abc.com')
>>>r = requests.post('http://www.abc.com')
>>>r = requests.put('http://www.abc.com')
>>>r = requests.delete('http://www.abc.com')
>>>r = requests.head('http://www.abc.com')
>>>r = requests.options('http://www.abc.com')
为URL传递参数:
>>>payload = {'key1':'value1','key2':'value2'}
>>>r = requests.get('http://www.abc.com',params=payload)
响应内容:
>>>r = requests.get('http://www.abc.com')
>>>r.text
>>>r.encoding 'utf-8'
二进制响应内容:
>>>r = requests.get('http://www.abc.com')
>>>r.content
定制请求头:
>>>url = 'http://www.abc.com'
>>>headers = {'User-Agent':'Mozilla/5.0 (X11; Linux x86_64; rv:52.0) Gecko/20100101 Firefox/52.0'}
>>>r = requests.get(url,headers=headers)
复杂的POST请求:
>>>payload = {'key1':'value1','key2':'value2'}
>>>r = requests.post('http://www.abc.com',data=payload)
响应状态码:
>>>r = requests.get('http://www.abc.com')
>>>r.status_code
响应头:
>>>r = requests.get('http://www.abc.com')
>>>r.headers
Cookies:
>>>r.cookies
>>>r.cookies['cookie name']
超时:
>>>requests.get(‘http://www.sina.com’,timeout=0.001)
错误和异常:
遇到网络问题(如DNS查询失败、拒绝连接等)时,Request会抛出一个ConnectionError异常;
遇到罕见的无效HTTP响应时,Requests则会抛出一个HTTPError异常;
若请求超时,则抛出一个timeout异常。
1、简单模拟HTTP的GET请求:
#!/usr/bin/python
#coding=utf-8
import requests
import sys
from time import time

def saveFile(name,data):
	f = open(name,'w')
	f.write(data)
	f.close()

def resetsys():
	reload(sys)
	sys.setdefaultencoding('utf-8')

def main():
	try:
		url = sys.argv[1]
		resetsys()
		r = requests.get(url)
		text = r.text
		filename = str(time())
		saveFile(filename,text)
		print 'Save successfully. '
	except:
		print 'Usage : ./get.py [URL]'

if __name__ == '__main__':
	main()
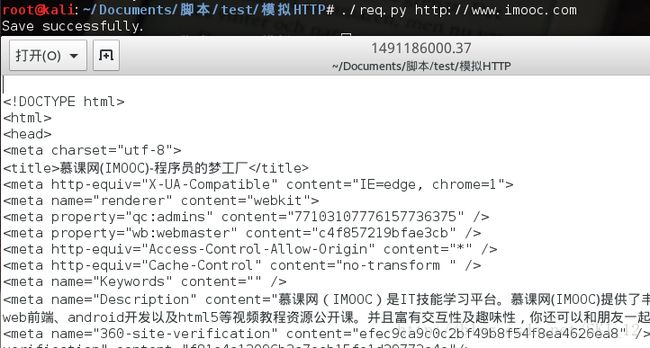
这里将GET请求的内容保存到以时间命名的文件中,因为时间值为int型需要通过str()函数将其转换为字符串的形式,其中会出现错误需要定义一个resetsys()函数来reload重新加载sys库,再将其默认的编码形式改为utf-8即可。
运行结果:
2、简单地通过GET请求获取服务器的信息:
#!/usr/bin/python
#coding=utf-8
import requests
import sys

def main():
	try:
		url = sys.argv[1]
		r = requests.get(url)
		print 'Server : '+r.headers.get('Server')
		print 'X-Powered-By : '+str(r.headers.get('X-Powered-By'))
	except:
		print 'Usage : ./getBSCInfo.py [URL]'

if __name__ == '__main__':
	main()
这里通过Requests的get方法的headers的get()函数来实现获取相关的信息,其中获取Lang信息是需要添加str()函数进行转换类型,因为当查询的网页没有对应的值时该返回值为空会报错,而调用该函数后则会输出None而不是出错。
运行结果:四、OS模块:
os.name():判断现在正在实用的平台,Windows 返回 ‘nt'; Linux 返回’posix'
os.getcwd():得到当前工作的目录
os.listdir():指定所有目录下所有的文件和目录名
os.remove():删除指定文件
os.rmdir():删除指定目录
os.mkdir():创建目录
os.path.isfile():判断指定对象是否为文件。是返回True,否则False
os.path.isdir():判断指定对象是否为目录。是True,否则False
os.path.exists():检验指定的对象是否存在。是True,否则False
os.path.split():返回路径的目录和文件名
os.getcwd():获得当前工作的目录(get current work dir)
os.system():执行shell命令
os.chdir():改变目录到指定目录
os.path.getsize():获得文件的大小,如果为目录,返回0
os.path.abspath():获得绝对路径
os.path.join(path, name):连接目录和文件名
os.path.basename(path):返回文件名
os.path.dirname(path):返回文件路径
到指定路径执行指定脚本文件:
chdir(getcwd() + ‘\\test’)
system(‘./test.py’)
1、通过ssh连接到指定目录指定指定脚本:
#!/usr/bin/python
#coding=utf-8
from os import *
import sys

def main():
	try:
		path = sys.argv[1]
		filename = sys.argv[2]
		chdir(path)
		system('./'+filename)
	except:
		print 'Usage : ./sshOS.py [File Path] [Filename] '

if __name__ == '__main__':
	main()
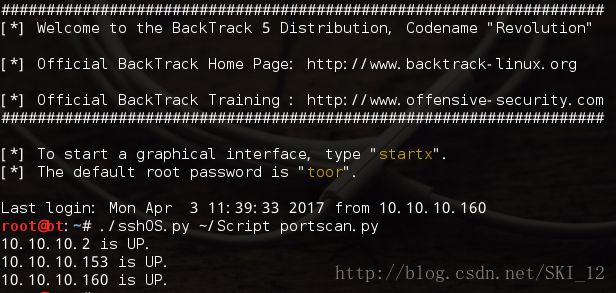
在system()函数中运行Python文件时需要在前面加上“./”来表示运行即可。
先在BT5上开启ssh服务:service ssh start
然后在Kali通过命令ssh连接到BT5上,然后直接运行该脚本并指定参数说明到哪个目录下运行哪个文件,如下:
五、多线程:
线程与进程:进程是程序的一次执行;所有的线程运行在同一个进程中,共享相同的运行环境。
Python多线程的模块有三个,即thread、threading和Queue。
1、thread模块简单实现局域网主机发现ping扫描:
thread模块通过调用start_new_thread(function,args kwargs=None),产生一个新的线程,但缺点是控制不了线程数。#!/usr/bin/python
#coding=utf-8
import thread
from subprocess import Popen,PIPE
import time
def hostscan(ip):
cmd = Popen(['/bin/bash','-c','ping -c 3 '+ip],stdin=PIPE,stdout=PIPE)
txt = cmd.stdout.read()
if 'ttl' in txt:
print ip+' is UP. '
def main():
for i in xrange(1,255):
ip = '10.10.10.'+str(i)
thread.start_new_thread(hostscan,(ip,))
time.sleep(0.1)
if __name__ == '__main__':
main()主要是通过subprocess模块来运行ping命令实现功能的,其中通过判断返回得到数据中是否有ttl即time-to-live值来判断主机是否存活,当然可以将命令换成任意的扫描命令都可以,甚至可以各种命令组合来提高扫描的准确度。需要注意的点就是在调用多线程时需要一个time模块sleep()函数来进行延迟。
运行结果:2、threading模块简单实现局域网主机发现arping扫描:
该模块有两种方式来创建线程:一种是通过继承Thread类,重写其run方法;另一种是创建一个threading.Thread对象,在其初始化函数中将可调用对象作为参数传入。
下面应用threading.Thread对象,其有两个参数,一个为target指定执行的函数,另一个为args指定输入的参数,主要参数输入外部要添加括号。在创建完对象之后还需要调用start()函数来开始线程运行。
#!/usr/bin/python
#coding=utf-8
import threading
from subprocess import Popen,PIPE
import time

def hostscan(ip):
	cmd = Popen(['/bin/bash','-c','arping -c 3 '+ip],stdin=PIPE,stdout=PIPE)
	txt = cmd.stdout.read()
	if 'bytes from' in txt:
			print ip+' is UP. '

def main():
	for i in xrange(1,255):
		ip = '10.10.10.'+str(i)
		t = threading.Thread(target=hostscan,args=(ip,))
		t.start()
		time.sleep(0.1)

if __name__ == '__main__':
	main()
这里将ping命令换成arping命令,即从三层的主机扫描换为二层的主机扫描,其中因为回复的内容不一样,“ttl”需要换为“bytes from”,从结果比较可以看到,不同层次的主机扫描的发现结果是不太一样的。
运行结果:3、Queue模块实现nmap主机发现扫描:
Queue模块主要可以解决生产者-消费者问题,简单地说可以实现队列,即有序地进行线程。
其中Queue模块的一些函数:qsize()、empty()、full()、put()、get()
下面使用Queue模块结合threading模块来实现nmap主机发现扫描,其中需要写一个nmapscan类,对里面的初始化方法__init__和run方法进行重写;在主函数中一个线程数组、线程数和Queue对象,并将nmapscan类调用每个Queue对象的值添加到线程数组中,再通过start()和join()函数来开始并加入队列线程,这样程序就能有序地执行。
#!/usr/bin/python
#coding=utf-8
import threading
from subprocess import Popen,PIPE
import Queue

class nmapscan(threading.Thread):
	def __init__(self,queue):
		threading.Thread.__init__(self)
		self._queue = queue

	def run(self):
		while  not self._queue.empty():
			ip = self._queue.get()
			cmd = Popen(['/bin/bash','-c','nmap -sn '+ip],stdin=PIPE,stdout=PIPE)
			txt = cmd.stdout.read()
			if 'Host is up' in txt:
				print txt

def main():
	threads = []
	threads_count = 10
	queue = Queue.Queue()
	for i in xrange(1,255):
		ip = '10.10.10.'+str(i)
		queue.put(ip)
	for i in range(threads_count):
		threads.append(nmapscan(queue))
	for i in threads:
		i.start()
	for i in threads:
		i.join()

if __name__ == '__main__':
	main()
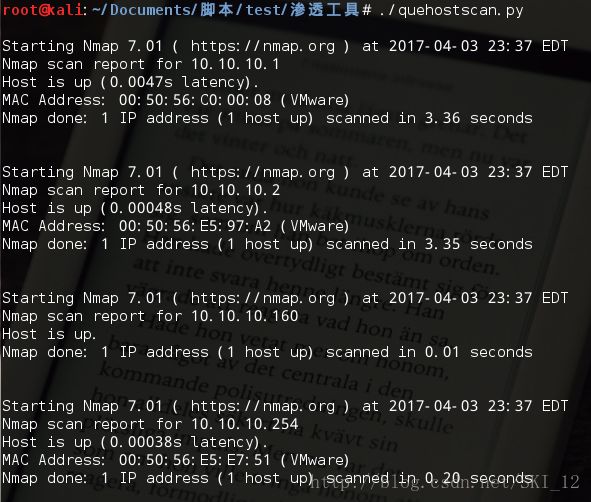
这里直接调用nmap命令-sn参数,即只进行主机发现而不进行端口扫描,从结果可见nmap扫描结果比上面两个命令都准确一些。
运行结果:
六、MySQLdb模块:
该模块没有默认安装,先下载安装MySQLdb模块:https://sourceforge.net/projects/mysql-python/?source=typ_redirect
tar –xfz MySQL−python−1.2.1.tar.gz
cd MySQL-python-1.2.1
apt-get install python-setuptools
apt-get install python-dev
apt-get install libmysqlclient-dev或apt-get install libmariadbclient-dev
python setup.py install
数据库连接对象connection,创建方法:MySQLdb.Connect(参数),其中参数有:
host:MySQL服务器地址,默认是本地主机
use:用户名,默认是当前用户
passwd:密码,默认为空
db:数据库名
port:MySQL服务器端口,默认是3306
charset:连接编码
Connection对象支持的方法:
cursor():使用该连接创建并返回游标
commit():提交当前事务
rollback():回滚当前事务
close():关闭数据库连接
Cursor对象支持的方法:execute(op[,args])、fetchone()、fetchmanv(size)、fetchall()、rowcount、close()
如果忘记了MySQL的用户密码,可以重设:
mysql
use mysql
update user set password=PASSWORD('admin') where User='root';
flush privileges;
service mysql start
1、简单实现连接本地MySQL数据库并执行SQL语句:
#!/usr/bin/python
#coding=utf-8
import MySQLdb
from sys import argv

def main():
	try:
		conn = MySQLdb.connect(
			host = argv[1],
			port = 3306,
			user = argv[2],
			passwd = argv[3],
		)
		cus = conn.cursor()
		sql = 'select concat_ws(char(32,58,32),user(),version(),@@global.version_compile_os)'
		cus.execute(sql)
		print cus.fetchone()
		cus.close()
		conn.close()
	except:
		print 'Usage : ./MysqlDB.py [host] [username] [password] '

if __name__ == '__main__':
	main()
连接MySQL数据库的步骤为:先通过connect()函数建立连接,然后通过curso()函数建立游标对象,接着通过游标的execute()函数执行SQL语句,然后通过其fetchone()函数返回数据,最后将游标和连接都关闭即可。这里SQL语句为查询数据库的当前用户、版本和操作系统的信息。
运行结果:七、re模块:
Python通过re模块提供对正则表达式的支持。正则表达式,简单地说,就是使用单个字符串来描述、匹配一系列符合某个语法规则的字符串。
匹配字符:
一般字符 —— 匹配自己
. —— 匹配任意换行符以外的字符
\ —— 匹配转义字符
[…] —— 字符集,对应位置可以使字符集中任意字符;字符可以逐个列出,也可以给出范围,如[abc]或[a-c];第一个字符如果是^表示取反;所有特殊字符若想有特殊含义就可以在前面加上反斜杠。
\d —— 匹配数字
\D —— 匹配非数字
\s —— 匹配非空字符[<空格>\t\r\f\v]
\S —— 匹配非空白字符
\w —— 匹配单词字符
\W —— 匹配非单词字符
* —— 匹配前一个字符>=0次
+ —— 匹配前一个字符>=1次
? —— 匹配前一个字符0次或1次
{m} —— 匹配前一个字符m次
{m,n} —— 匹配前一个字符m-n次
| —— 代表左右表达式任意匹配一个,总是左先,成功则跳过右边的
(…) —— 被括起来的表达式将作为分组,可以后接数量词
编译选项:
re.I:忽略大小写
re.L:使用预定字符类\w \W \b \B \s \S取决于当前区域设定
re.M:多行模式改变^和$的行为
re.S:.任意匹配模式
re.U:使用预定字符类\w \W \b \B \s \S取决于Unicode定义的字符属性
re.X:详细模式,可以多行,忽略空白字符,并且可以加入注释
贪婪模式:Python默认,尽可能多地匹配字符
非贪婪模式:(.*?)
基本步骤:
1、 先将正则表达式的字符串形式编译为Pattern实例;
2、 使用Pattern实例处理文本并获得匹配结果;
3、 使用实例获得信息,进行其它的操作

当然可以一句话,但前一种方法更快:
八、爬虫的实现:
爬虫,是一种按照一定的规则,自动地爬取万维网信息的程序或脚本,使用其的好处是批量且自动化地获取和处理信息。
下面直接来各种爬虫的例子,期间会运用到各种库来实现爬虫功能。
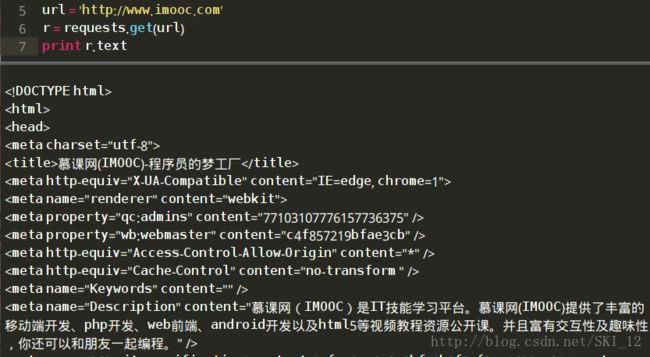
先来看看如何确定相应的网页有没有做了防爬机制,可以写一段小脚本通过requests库的get方法来请求数据,看看回复的内容是不是完整的网页内容或者是处理过的内容:
#!/usr/bin/python
#coding=utf-8
import requests

url = 'http://www.imooc.com'
r = requests.get(url)
print r.text
这里先以慕课网为例,可以看到请求到的内容为网站的源代码的内容,这样的情况就是没有做防爬处理:
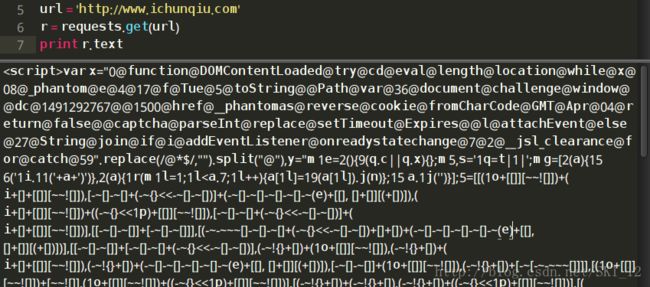
接着以i春秋为例,从结果可以看到是一堆乱码,跟网页源代码不同,很明显是做了防爬处理:
1、通过requests模块和re模块爬取无防爬机制的网页:
这里就通过requests模块和re模块来爬取慕课网所有课程的内容。
先访问慕课网首页,点击课程查看所有课程内容:
接着我们直接点击跳转到尾页,查看其URL:
尾页是28,URL中有个参数page值也为28,即可推断该值为控制页面的参数值,返回首页再确认一下:
没有错,现在page值为1,下面浏览网页的源代码,搜索第一门课即“HTML+CSS基础课程”的关键字,找到相应的代码:
可以看到整个课程名称是在h3标签之中的,该标签还有个class属性,其中值为‘course-card-name’,这样就可以构造正则语句了:
(.*?)
其中(.*?)为非贪婪模式,在前面的正则模块中已经说过了,下面直接上代码即可:
#!/usr/bin/python
#coding=utf-8
import requests
import re
def main():
u = 'http://www.imooc.com/course/list?page='
for i in range(1,29):
url = u+str(i)
r = requests.get(url).text
coursename = re.findall("(.*?)
",r)
for c in coursename:
print c
if __name__ == '__main__':
main()这里通过调用re模块的findall()函数来实现正则的匹配。
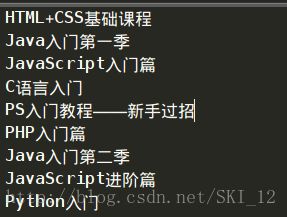
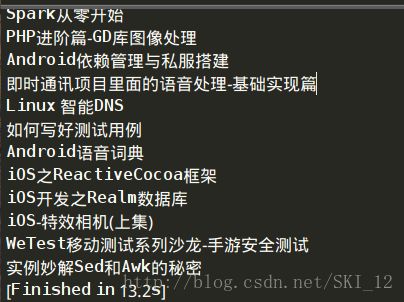
运行结果:
可以看到第一页的第一门课程名和最后一页的最后的课程名都有,爬取已完成。
当然还可以加上课程简介的内容,从上面的源码中可以看到是在
标签下的title属性中有,同样使用正则表达式进行匹配,然后将课程名和标题简介一起打印出来即可:
#!/usr/bin/python
#coding=utf-8
import requests
import re
def main():
u = 'http://www.imooc.com/course/list?page='
for i in range(1,29):
url = u+str(i)
r = requests.get(url).text
coursename = re.findall("(.*?)
",r)
title = re.findall("",r)
for c,t in zip(coursename,title):
print c,':',t
if __name__ == '__main__':
main()
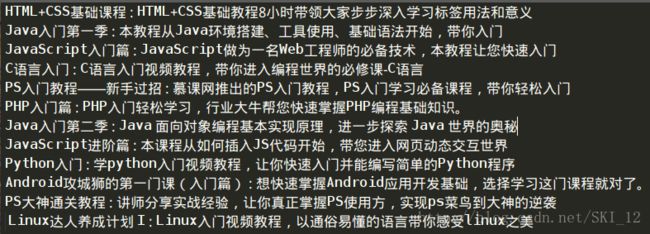
这里通过zip()函数将两个列表合到一起然后在for循环中可以分开进行遍历。
运行结果:
2、通过requests模块和re模块爬取有防爬机制的网页:
这里就爬取i春秋的所有课程为例吧,先访问i春秋的首页,然后点击知识体系,可以看到有所有课程的名称,然后直接点到最后一页,查看其URL和最后的页数:
可看到共有12页,且URL最后的数字为12,接着点首页同样进行查看:
可以确定,URL的页数是通过all-all-0-0-0-2-?中?的数值来确定的。
从前面知道该网站时做了防爬处理的,所以要进行绕过。绕过的原理就是在requests请求的时候加上headers参数,不同网站对爬虫的处理不一样,即对headers检查哪一项不太一样,所以较为可行的方法就是通过Burpsuite抓包,将所有提交的请求包的内容复制上去。
Burpsuite抓包,截取数据包除第一行GET请求外的全部内容:
将其复制到headers中即可。
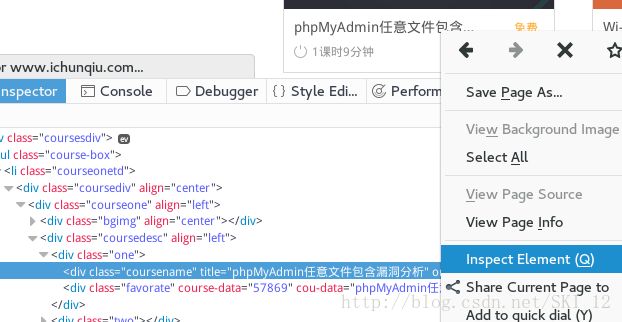
接着查看一下课程名的源代码中有哪些标签,除了上面的查看源代码中查找关键字的方法,还可以通过右键课程名、查看元素来进行查看:
这样,可以确定正则表达式为:
下面直接上代码:
#!/usr/bin/python
#coding=utf-8
import requests
import re
headers = {
'Host': 'www.ichunqiu.com',
'User-Agent': 'Mozilla/5.0 (X11; Linux x86_64; rv:52.0) Gecko/20100101 Firefox/52.0',
'Accept': 'text/html,application/xhtml+xml,application/xml;q=0.9,*/*;q=0.8',
'Accept-Language': 'en-US,en;q=0.5',
'Accept-Encoding': 'gzip, deflate',
'Referer': 'http://www.ichunqiu.com/courses/all-all-0-0-0-2-1',
'Cookie': '__jsluid=1df8a871107a4bfcf48beb3aedc8a6da; Hm_lvt_1a32f7c660491887db0960e9c314b022=1490510433,1490582473,1491296782; Hm_lvt_9104989ce242a8e03049eaceca950328=1487992632,1490510451; pgv_pvi=390411264; chkphone=acWxNpxhQpDiAchhNuSnEqyiQuDIO0O0O; __jsl_clearance=1491296775.651|0|z0NftM%2BKacycOURahDct6gz5h%2B0%3D; ci_session=6889bc23e3e3006d8bde31a428ebf393b4ac720d; Hm_lpvt_1a32f7c660491887db0960e9c314b022=1491296857',
'Connection': 'close',
'Upgrade-Insecure-Requests': '1',
'Cache-Control': 'max-age=0',
}
def main():
u = 'http://www.ichunqiu.com/courses/all-all-0-0-0-2-'
for i in range(1,13):
url = u+str(i)
r = requests.get(url,headers=headers).text
coursename = re.findall('
注意点就是,headers为字典,即需要{}括起来,其中的键值需要分别加上单引号,在每行的最后还需要加上逗号,然后再调用requests库的get方法时将其作为参数传递给headers参数即可。另外还需要注意的是,如果正则表达式中有单引号或双引号,那么findall()函数将其括起来就需要用到不同的引号,即正则内容为单引号时用双引号、正则内容为双引号时用单引号。
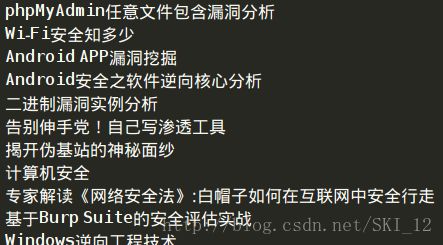
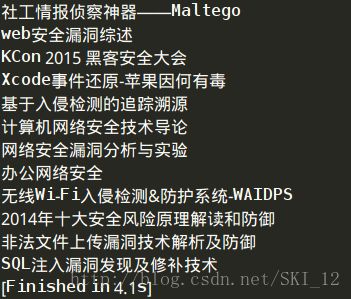
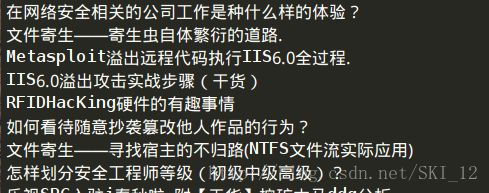
运行结果:
3、BeautifulSoup模块:
BeautifulSoup模块是一个可以从HTML或XML文件中提取数据的 Python 库,使用起来很方便,会提高效率。
安装:pip install beautifulsoup4
插入模块:from bs4 import BeautifulSoup
解析内容:soup = BeautifulSoup(html_doc)
浏览数据:soup.title、soup.title.name、soup.title.string(去掉title标签只显示其中的内容)
正则使用:soup.find_all(name=’x’,attrs={‘xx’:re.compile(‘xxx’)})
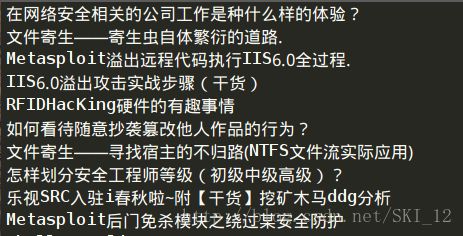
都以抓取i春秋论坛的每日精选文章的题目为例,在这里比较一下不使用与使用BeautifulSoup模块的区别:
先找到相应文章的源代码内容:
(1)使用re模块进行正则匹配来实现的:
#!/usr/bin/python
#coding=utf-8
import requests
import re
def main():
url = 'https://bbs.ichunqiu.com/portal.php'
r = requests.get(url)
names = re.findall('" target="blank" class="ui_colorG" style="color: #555555;">(.*?)',r.content)
for name in names:
print name
if __name__ == '__main__':
main()
运行结果:
(2)使用BeautifulSoup模块来实现:
#!/usr/bin/python
#coding=utf-8
import requests
from bs4 import BeautifulSoup as BS
def main():
url = 'https://bbs.ichunqiu.com/portal.php'
r = requests.get(url)
soup = BS(r.content,'lxml')
names = soup.find_all(name='a',attrs={'class':'ui_colorG'})
for name in names:
print name.string
if __name__ == '__main__':
main()
这里在插入BeautifulSoup模块时添加了as关键字,即将BeautifulSoup另命名为BS让编写更简便;其中在调用BeautifulSoup方法时用lxml来解析HTML内容;在find_all()函数中,标签名设置为a,参数选择class属性并填上查看到的值即可;在最后输出的时候还需要调用.string来实现输出字符串。
运行结果一样:
对比一下可以发现,BeautifulSoup模块只需要将文本所在的标签以及属性填上即可实现查找,就不再需要构造复杂的正则表达式来进行匹配,这样使用起来方便很多。
4、多线程爬虫:
下面以爬取起点中文网的小说名称为例,分别以不使用线程、使用threading模块和使用Queue模块作比较。
先查看小说名所在标签的源码:
这里可以使用re模块来正则匹配,当然也可以使用BeautifulSoup模块来匹配,但是使用BeautifulSoup模块就较为复杂,因为发现h4标签有多个,且不一定为小说名,还有其他的一些信息:
如果直接取a标签的话,a标签有很多且发现其他内容的a标签其属性名都是一样的,所以不能只取a标签来匹配。好的办法就是先匹配h4标签然后再次匹配其中的a标签上的内容,即匹配两次,这样当然可以,但是比较耗时,没有re模块匹配来得快,所以下面就直接使用re模块来完成匹配。
接着找控制页面的参数,通过不同页面的URL比较可以发现是page参数来控制页面的,代码中就直接爬取1-20页的小说名称吧。
没有使用线程:
#!/usr/bin/python
#coding=utf-8
import requests
# from bs4 import BeautifulSoup as BS
import re
'''比较第二页和第三页参数的不同之处,找出控制页数的参数page
size=-1&sign=-1&tag=-1&chanId=-1&subCateId=-1&orderId=&update=-1&page=2&month=-1&style=1&action=-1&vip=-1
size=-1&sign=-1&tag=-1&chanId=-1&subCateId=-1&orderId=&update=-1&page=3&month=-1&style=1&action=-1&vip=-1
'''
def spider(url):
r = requests.get(url)
txt = re.findall('">(.*?)',r.content)
for t in txt:
print t
# soup = BS(r.content,'lxml')
# names = soup.find_all(name='h4')
# names2 = soup2.find_all(name='a')
# for name in names:
# soup2 = BS(str(name),'lxml')
# names2 = soup2.find_all(name='a')
# for n in names2:
# print n.string
def main():
u = 'http://a.qidian.com/?page='
for i in range(1,21):
url = u+str(i)
spider(url)
if __name__ == '__main__':
main()
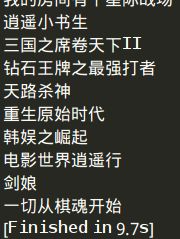
运行结果:
使用threading模块:
#!/usr/bin/python
#coding=utf-8
import requests
# from bs4 import BeautifulSoup as BS
import re
import threading
import time
'''比较第二页和第三页参数的不同之处,找出控制页数的参数page
size=-1&sign=-1&tag=-1&chanId=-1&subCateId=-1&orderId=&update=-1&page=2&month=-1&style=1&action=-1&vip=-1
size=-1&sign=-1&tag=-1&chanId=-1&subCateId=-1&orderId=&update=-1&page=3&month=-1&style=1&action=-1&vip=-1
'''
def spider(url):
r = requests.get(url)
txt = re.findall('">(.*?)',r.content)
for t in txt:
print t
# soup = BS(r.content,'lxml')
# names = soup.find_all(name='h4')
# names2 = soup2.find_all(name='a')
# for name in names:
# soup2 = BS(str(name),'lxml')
# names2 = soup2.find_all(name='a')
# for n in names2:
# print n.string
def main():
u = 'http://a.qidian.com/?page='
for i in range(1,21):
url = u+str(i)
t = threading.Thread(target=spider,args=(url,))
t.start()
time.sleep(0.1)
if __name__ == '__main__':
main()
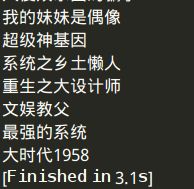
运行结果:
使用Queue模块:
#!/usr/bin/python
#coding=utf-8
import requests
# from bs4 import BeautifulSoup as BS
import re
import threading
from Queue import Queue
'''比较第二页和第三页参数的不同之处,找出控制页数的参数page
size=-1&sign=-1&tag=-1&chanId=-1&subCateId=-1&orderId=&update=-1&page=2&month=-1&style=1&action=-1&vip=-1
size=-1&sign=-1&tag=-1&chanId=-1&subCateId=-1&orderId=&update=-1&page=3&month=-1&style=1&action=-1&vip=-1
'''
class Spider(threading.Thread):
"""docstring for ClassName"""
def __init__(self, queue):
threading.Thread.__init__(self)
self._queue = queue
def run(self):
while not self._queue.empty():
data = self._queue.get_nowait()
spider(data)
def spider(url):
r = requests.get(url)
txt = re.findall('">(.*?)',r.content)
for t in txt:
print t
# soup = BS(r.content,'lxml')
# names = soup.find_all(name='h4')
# for name in names:
# soup2 = BS(str(name),'lxml')
# names2 = soup2.find_all(name='a')
# for n in names2:
# print n.string
def main():
u = 'http://a.qidian.com/?page='
threads = []
threads_count = 10
queue = Queue()
for i in range(1,21):
url = u+str(i)
queue.put(url)
for i in range(threads_count):
threads.append(Spider(queue))
for i in threads:
i.start()
for i in threads:
i.join()
if __name__ == '__main__':
main()
运行结果:
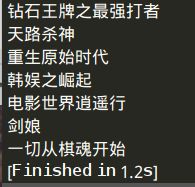
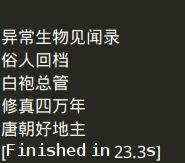
通过比较运行结束的时间知道,使用多线程提高了爬取效率,且Queue模块较threading模块更为快捷且有序执行。
下面是同样使用Queue模块来实现,但是不是通过re模块而是通过BeautifulSoup模块来完成匹配:
可以看到,匹配的复杂化大大降低了爬取的效率,在选择匹配的模块时应根据实际的情况来选择。
5、hackhttp模块:
hackhttp模块支持直接发送 HTTP 原始报文,开发者可以直接将浏览器或者Burpsuite等抓包工具中截获的 HTTP 报文复制后,无需修改报文,可直接使用 hackhttp 进行重放,因而也不需要用到requests模块等来连接,也不用再自定义一个header头信息,让爬虫的实现更为简便。
安装:pip install hackhttp
插入模块:import hackhttp
定义一个hackhttp对象:hh = hackhttp.hackhttp()
将HTTP报文内容赋值给各个变量(状态码、响应头、http响应内容、重定向地址、日志信息):code,head,html,redirect_url,log = hh.http(url)
(1)hackhttp模块与re模块实现GET方法:
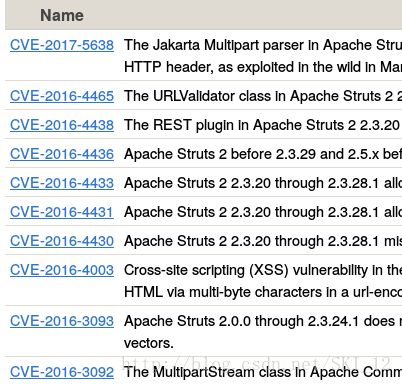
以CVE查询近期热门的Struts漏洞为例,点击Search CVE List,开启Burpsuite代理,在By Keyword(s)中输入近期比较热的漏洞Struts关键字,然后在源代码中通过搜索找出相应的代码:
将Burpsuite中的GET请求的内容全部放进hackhttp模块http函数的raw参数即可。
#!/usr/bin/python
#coding=utf-8
import hackhttp
import re
raw = '''
GET /cgi-bin/cvekey.cgi?keyword=struts HTTP/1.1
Host: cve.mitre.org
User-Agent: Mozilla/5.0 (X11; Linux x86_64; rv:52.0) Gecko/20100101 Firefox/52.0
Accept: text/html,application/xhtml+xml,application/xml;q=0.9,*/*;q=0.8
Accept-Language: en-US,en;q=0.5
Accept-Encoding: gzip, deflate
Cookie: __utma=78438598.986733655.1491798209.1491798209.1491798209.1; __utmb=78438598.6.10.1491798209; __utmz=78438598.1491798209.1.1.utmcsr=baidu|utmccn=(organic)|utmcmd=organic; __utmc=78438598; __utmt=1
Connection: close
Upgrade-Insecure-Requests: 1
Cache-Control: max-age=0'''
def main():
url = 'http://cve.mitre.org/cgi-bin/cvekey.cgi?keyword=struts'
hh = hackhttp.hackhttp()
code,head,html,redirect_url,log = hh.http(url=url,raw=raw)
names = re.findall('name=(.*?)">CVE-',html)
for name in names:
print name
if __name__ == '__main__':
main()
当然这段代码可以将url变量中的keyword参数可以设置为关键字输入,从而输入任意的关键字来实现自动的查询。另外可以加上多线程来提高爬取速率。注意的一点就是raw中最后的3个单引号最好不要单独一行列出来而是紧跟着最后的内容,不然有时候会出现错误。
运行结果:
(2)hackhttp模块与BeautifulSoup模块实现POST方法:
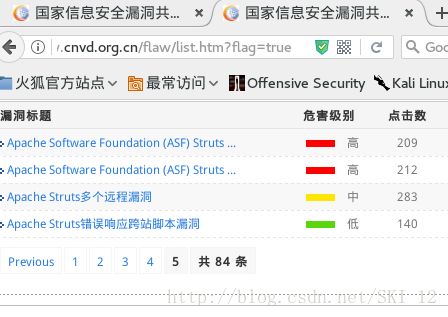
这里以CNVD搜索Struts漏洞为例,在首页的统计查询>高级搜索,开启Burpsuite代理,点击高级搜索输入关键字Struts,然后直接点击到最后一页:
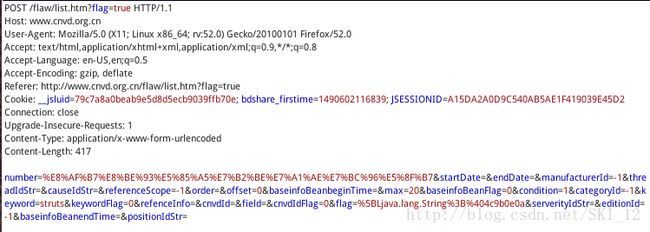
分析抓取的POST请求,发现参数很多难以找到控制页面的参数:
访问第二页,然后将两页的POST请求发到Comparer中去比较:
发现不同之处在于offset参数,且相差20,再点击后面几页对比发现,offset参数确实是控制页数的,且每次递增20,从0开始,一共有5页,那么第五页的offset值就为80。分析完页数控制参数之后,查看源代码的标签相关信息:
可以看到在tbody标签下,名称在其中的a标签下的正文和标题都有,为了方便这里就先通过BeautifulSoup模块获取到tbody标签内的内容,然后再调用一次BeautifulSoup模块来获取a标签下的内容,最后简单地通过获取title信息来获取漏洞名称即可。
#!/usr/bin/python
#coding=utf-8
import hackhttp
from bs4 import BeautifulSoup as BS
import re
raw = '''
POST /flaw/list.htm?flag=true HTTP/1.1
Host: www.cnvd.org.cn
User-Agent: Mozilla/5.0 (X11; Linux x86_64; rv:52.0) Gecko/20100101 Firefox/52.0
Accept: text/html,application/xhtml+xml,application/xml;q=0.9,*/*;q=0.8
Accept-Language: en-US,en;q=0.5
Accept-Encoding: gzip, deflate
Referer: http://www.cnvd.org.cn/flaw/list.htm?flag=true
Cookie: JSESSIONID=D9A7E40FE74DB5BEA1C21993B10AC03D; __jsluid=79c7a8a0beab9e5d8d5ecb9039ffb70e; bdshare_firstime=1490602116839
Connection: close
Upgrade-Insecure-Requests: 1
Content-Type: application/x-www-form-urlencoded
Content-Length: 388
number=%E8%AF%B7%E8%BE%93%E5%85%A5%E7%B2%BE%E7%A1%AE%E7%BC%96%E5%8F%B7&startDate=&endDate=&field=&order=&baseinfoBeanbeginTime=&baseinfoBeanFlag=0&manufacturerId=-1&condition=1&keyword=struts&categoryId=-1&keywordFlag=0&refenceInfo=&threadIdStr=&cnvdId=&causeIdStr=&referenceScope=-1&cnvdIdFlag=0&serverityIdStr=&flag=true&editionId=-1&baseinfoBeanendTime=&positionIdStr=&max=20&offset='''
def main():
url = 'http://www.cnvd.org.cn/flaw/list.htm?flag=true'
for i in xrange(0,81,20):
Raw = raw+str(i)
hh = hackhttp.hackhttp()
code,head,html,redirect_url,log = hh.http(url=url,raw=Raw)
soup = BS(html,'lxml')
body = soup.tbody
soup2 = BS(str(body),'lxml')
datas = soup2.find_all(name='a',attrs={'href':re.compile('/flaw/show/CNVD-.*?')})
for data in datas:
print data['title']
if __name__ == '__main__':
main()
当然代码可以做更多的优化实现更快、更多的功能,这里就不再多写了。
运行结果:
6、urllib模块:
urllib.urlopen(url[,data[,proxies]]):打开一个url的方法并返回一个文件对象,然后可以进行类似文件对象的操作
urlopen返回对象提供方法:
read() , readline() ,readlines() , fileno() , close():使用方式与文件对象相同
info():返回一个httplib.HTTPMessage对象,表示远程服务器返回的头信息
getcode():返回Http状态码
geturl():返回请求的url
urllib.urlretrieve(url[,filename[,reporthook[,data]]]):将url定位到的html文件下载到你本地的硬盘中。如果不指定filename,则会存为临时文件。
urllib.urlcleanup():清除由于urllib.urlretrieve()所产生的缓存
其他的方法网上很多这里就不多说了。
下面直接以爬取煎蛋网无聊图并下载图片到本地为例,前面的查找URL控制页码的参数的步骤就直接跳过了,下面直接查看图片URL所在的标签源码,可以看到图片有静态和动态两种,先看静态的:
再看看动态的即GIF图:
可以看到,静态图的URL在src属性中,而动态图的URL有两个一个在src属性下、另一个在org_src属性下,分别点开可以发现org_src属性的URL才是动态图而另一个则是静态的。所以可以通过判断img标签下是否有org_src属性从而确定是静态图片还是动态图片,然后再进一步分别输出URL即可。但是可以发现就是标签的URL中是没有带有“http:”字符串的,这就需要添加上去。
#!/usr/bin/python
#coding=utf-8
import requests
from bs4 import BeautifulSoup as BS
import threading
import Queue
import urllib
class getPic(threading.Thread):
"""docstring for getPic"""
def __init__(self, queue):
threading.Thread.__init__(self)
self._queue = queue
def run(self):
while not self._queue.empty():
url = self._queue.get_nowait()
self.spider(url)
def spider(self,url):
r = requests.get(url=url)
soup = BS(r.content,'lxml')
data = soup.find_all(name='img',attrs={})
for i in data:
if 'org_src' in str(i):
pic_url ='http:'+i['org_src']
print pic_url
name = i['org_src'].split('/')[-1]
else:
pic_url ='http:'+i['src']
print pic_url
name = i['src'].split('/')[-1]
print name
urllib.urlretrieve(pic_url,filename='/img/'+name)
def main():
queue = Queue.Queue()
threads = []
threads_count = 10
for i in xrange(600,612):
queue.put('http://jandan.net/pic/page-'+str(i))
for i in xrange(threads_count):
threads.append(getPic(queue))
for i in threads:
i.start()
for i in threads:
i.join()
if __name__ == '__main__':
main()
这里主要运用了urllib模块的urlretrieve()方法来实现将URL中的文件下载到本地保存。
运行结果:
可以看到图片下载成功。
7、爬虫闯关练习:
第一关地址:http://www.heibanke.com/lesson/crawler_ex00/
查看源代码:
在URL中添加10963访问,再看看区别:
后面几页的访问格式都是和第二页的一样,也就是说第一页跟后面的显示是有点区别的:第一页的数字后面没有.号,且数字前面是字符串“数字”而其他页面的则是“数字是”。这样可以构造如下的正则表达式:
'数字[\D]*(\d+)[\.<]'
这里解释一下,先是匹配“数字”字符串,然后再匹配非数字的字符,后面用*号表示匹配大于等于0次,即可以没有,这里用*号而不用?号(匹配0或1次)是因为“是”字符其字符位数并不是一位而是两位,用?匹配会出错;接着就是\d匹配数字,+号表示匹配大于等于1次;最后的中括号中,\是用来转义.的,这里的作用是匹配.或者<两个字符中的一个。
#!/usr/bin/python
#coding=utf-8
import requests
import re
def main():
url = 'http://www.heibanke.com/lesson/crawler_ex00/'
pattern = re.compile('数字[\D]*(\d+)[\.<]')
r = requests.get(url)
num = pattern.findall(r.content)
while num:
new_url = url+num[0]
r = requests.get(new_url)
num = pattern.findall(r.content)
print 'Visiting the URL : '+new_url
print 'The second pass URL is : '+new_url
if __name__ == '__main__':
main()
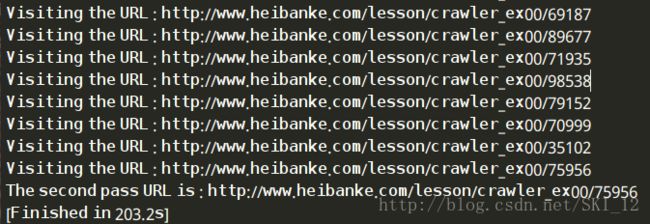
代码中while循环通过判断返回的num即需要输入进入下一页的数字是否为空来实现循环是不是该停止,因为当num为空时说明已经不需要再输入数字继续访问了,也就是到达最后一页即第二关的入口了。另外此次调用re模块为了方便就使用了compile()的方法来赋值给pattern,后面直接调用pattern而不用再重复写正则表达式了。
运行结果:
点击下一关,就进入第二关了:http://www.heibanke.com/lesson/crawler_ex01/
随便输入用户名为a,密码为1:
可以看到,登录失败时会有“密码错误”的字段,基于这个就可以直接判断返回的页面是否包含该字段即可判断是否登录成功。
#!/usr/bin/python
#coding=utf-8
import requests
def main():
url = 'http://www.heibanke.com/lesson/crawler_ex01/'
text = '密码错误'
i = 1;
while True:
data = {'username':1,'password':i}
r = requests.post(url=url,data=data)
if text not in r.content:
print 'The password is : %s'% i
break
else:
print 'Trying : %s'% i
i+=1
if __name__ == '__main__':
main()
因为要提交数据,所以要使用requests模块post方法的data参数,其值是一个字典;这段代码还不用使用正则匹配,较第一关还简单一些。
运行结果:
点击接着第三关:http://www.heibanke.com/lesson/crawler_ex02/
先注册一个账号,然后退出再登录进来:
在这里主要是使用了CSRF的token机制,所以必须要将tooken值带上,下面就是使用BeautifulSoup模块和hackhttp模块结合来实现的:
#!/usr/bin/python
#coding=utf-8
import requests
from bs4 import BeautifulSoup as BS
import hackhttp
import re
text = '您输入的密码错误, 请重新输入'
raw_start = '''POST /lesson/crawler_ex02/ HTTP/1.1
Host: www.heibanke.com
User-Agent: Mozilla/5.0 (X11; Linux x86_64; rv:52.0) Gecko/20100101 Firefox/52.0
Accept: text/html,application/xhtml+xml,application/xml;q=0.9,*/*;q=0.8
Accept-Language: en-US,en;q=0.5
Accept-Encoding: gzip, deflate
Referer: http://www.heibanke.com/lesson/crawler_ex02/
Cookie: csrftoken=GfM8lb3iJAGlXsTOo34sooWsUtpMPred; Hm_lvt_74e694103cf02b31b28db0a346da0b6b=1490620328; Hm_lpvt_74e694103cf02b31b28db0a346da0b6b=1490620554; sessionid=2kwxfb7y8csmfnzrk0616k9qz52o6obl
Connection: close
Upgrade-Insecure-Requests: 1
Content-Type: application/x-www-form-urlencoded
Content-Length: 74
csrfmiddlewaretoken=GfM8lb3iJAGlXsTOo34sooWsUtpMPred&username=a&password='''
for i in range(1,31):
raw = raw_start + str(i)
url = 'http://www.heibanke.com/lesson/crawler_ex02/'
hh = hackhttp.hackhttp()
code,head,html,redirect_url,log = hh.http(url=url,raw=raw)
soup = BS(html,'lxml')
t = soup.find_all(name='div',attrs={'class':'col-xs-12 col-sm-10 col-md-8 col-lg-6'})
pattern = re.compile('(.*?)
')
t2 = pattern.findall(str(t))
if i == 1:
t31 = str(t2)
if t31 not in str(t2):
print '密码是: %s'%i
break
当然这样的写法有些繁琐,网上也有更简便的方法,到时候有更优化的方法再改吧。
运行结果:
这里点击下一关就没有反应了,因为只有3关。
8、百度URL收集:
很多时候,我们都会使用百度通过关键字来搜索相关的信息,当信息量比较大时手动地收集查找就比较麻烦,这时就可以使用爬虫来爬取了。
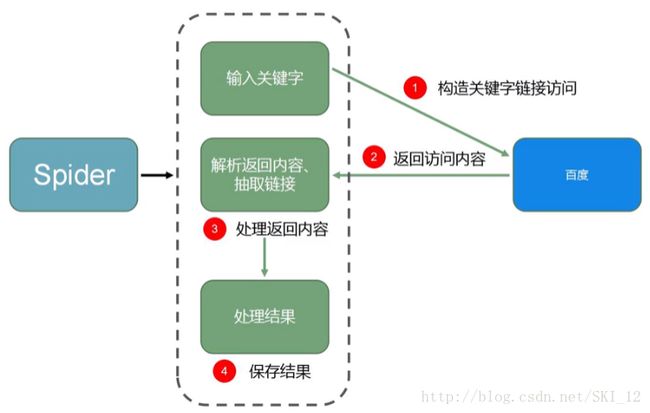
百度URL收集的思路大致如图:
在百度中,可以发现wd变量为搜索的关键字,pn变量为页码且第一页为0、按10递增,最大为750即有76页,当取760时又跳转到第一页,这里以搜索 Kali为例:
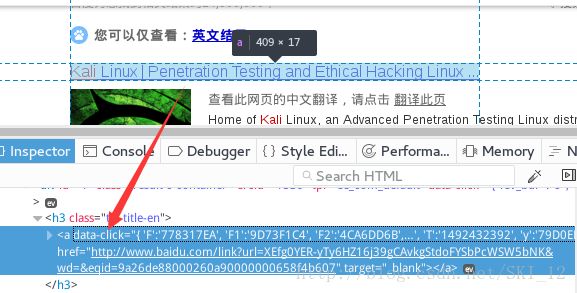
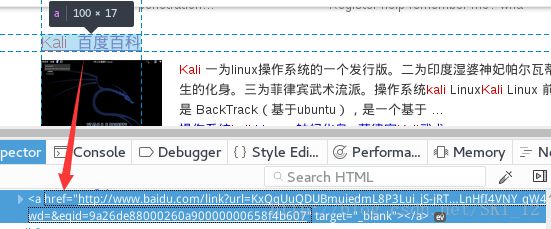
接着来分析每个链接的URL所在的标签的内容,会看到和百度有关的URL都是没有data-click这个属性的,而与百度无关的则有:
在这里为了简便一点,就只收集不包含百度自己相关内容的URL,这里使用BeautifulSoup模块和re模块一起实现匹配,匹配的标签name为a,attrs为data-click,且不为空。
当输出相关内容时,会发现有cache开头的内容:
分析发现,是百度快照的URL:
这里就需要对其进行过滤。可以看到,百度快照的URL中a标签时比正常的URL的a标签多了一个class属性,那么就可以在上述的attrs中添加class属性为空来进行过滤即可。
先上代码吧,然后再一步步进行优化:
#!/usr/bin/python
#coding=utf-8
import requests
from bs4 import BeautifulSoup as BS
import re
headers = {
'User-Agent': 'Mozilla/5.0 (X11; Linux x86_64; rv:52.0) Gecko/20100101 Firefox/52.0'
}
def main():
url1 = 'https://www.baidu.com/s?wd=Kali&pn='
for i in range(0,11,10):
url2 = url1+str(i)
r = requests.get(url=url2,headers=headers)
soup = BS(r.content,'lxml')
data = soup.find_all(name='a',attrs={'data-click':re.compile(('.')),'class':None})
for d in data:
url = requests.get(url=d['href'],headers=headers,timeout=10)
if url.status_code == 200 :
u1 = url.url.split('://')[0]
u2 = url.url.split('/')[2]
u = u1+'://'+u2
print u
if __name__ == '__main__':
main()
因为有防爬机制,且知道为检测User-Agent,所以在headers添加User-Agent即可;收集的URL很多并不是主页,这里就通过调用split()函数来实现切割从而得到主页的URL。
接着就来优化程序吧,使用多线程提高速率,将关键字通过参数的方式输入同时实现将URL保存到本地文件中:
#!/usr/bin/python
#coding=utf-8
import requests
from bs4 import BeautifulSoup as BS
import re
import Queue
import threading
import sys
headers = {
'User-Agent': 'Mozilla/5.0 (X11; Linux x86_64; rv:52.0) Gecko/20100101 Firefox/52.0'
}
class Collect(threading.Thread):
"""docstring for Collect"""
def __init__(self, queue):
threading.Thread.__init__(self)
self._queue = queue
def run(self):
while not self._queue.empty():
url = self._queue.get()
try:
self.spider(url)
except Exception as e:
print e
pass
def spider(self,url):
r = requests.get(url=url,headers=headers)
soup = BS(r.content,'lxml')
data = soup.find_all(name='a',attrs={'data-click':re.compile(('.')),'class':None})
for d in data:
new_url = requests.get(url=d['href'],headers=headers,timeout=10)
if new_url.status_code == 200 :
u1 = new_url.url.split('://')[0]
u2 = new_url.url.split('/')[2]
u = u1+'://'+u2
print u
f = open('out.txt','a+')
f.write(u+'\n')
f.close()
def main(keyword):
queue = Queue.Queue()
threads = []
threads_count = 10
for i in range(0,760,10):
queue.put('https://www.baidu.com/s?wd=%s&pn=%s'%(keyword,str(i)))
for i in range(threads_count):
threads.append(Collect(queue))
for i in threads:
i.start()
for i in threads:
i.join()
if __name__ == '__main__':
f = open('out.txt','w')
f.close()
if len(sys.argv) != 2:
print 'Usage : ./baiduURL.py [Keyword] '
else:
main(sys.argv[1])
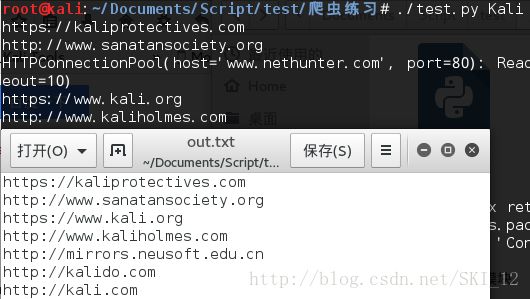
这里使用文件操作的open()、write()和close()函数来实现文件的相关操作,在程序执行主程序main之前打开文件是为了先创建文件,接着再判断是否输入一个参数值即len(sys.argv)是否等于2来决定是输出提示信息还是执行主程序。
运行结果:
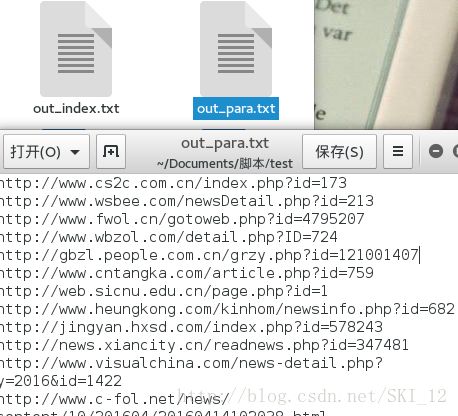
当然可以收集如Google Hacking之类的关键字等,如inurl:php?id=这些,下面代码改进了以下,输出的文件有两个,一个是原本搜索到的网页URL,另一个是该网页的主页URL,以方便以后的测试:
#!/usr/bin/python
#coding=utf-8
import requests
import sys
from Queue import Queue
import threading
from bs4 import BeautifulSoup as BS
import re
headers = {
'User-Agent': 'Mozilla/5.0 (X11; Linux x86_64; rv:52.0) Gecko/20100101 Firefox/52.0'
}
class baiduSpider(threading.Thread):
"""docstring for baiduSpider"""
def __init__(self, queue):
threading.Thread.__init__(self)
self._queue = queue
def run(self):
while not self._queue.empty():
url = self._queue.get()
try:
self.spider(url)
except Exception as e:
print e
pass
def spider(self,url):
r = requests.get(url=url,headers=headers)
soup = BS(r.content,'lxml')
urls = soup.find_all(name='a',attrs={'data-click':re.compile(('.')),'class':None})
for url in urls:
r_url = requests.get(url=url['href'],headers=headers,timeout=8)
if r_url.status_code == 200:
url_para = r_url.url
ht = url_para.split('/')[0]
l_url = url_para.split('/')[2]
main_url = ht + '//' + l_url
print url_para+'\n'+main_url
f1 = open('out_para.txt','a+')
f1.write(url_para+'\n')
f1.close()
with open('out_index.txt') as f:
if not main_url in f.read():
f2 = open('out_index.txt','a+')
f2.write(main_url+'\n')
f2.close()
def main(keyword):
queue = Queue()
for i in range(0,760,10):
queue.put('https://www.baidu.com/s?wd=%s&pn=%s'%(keyword,str(i)))
threads = []
threads_count = 4
for i in range(threads_count):
threads.append(baiduSpider(queue))
for i in threads:
i.start()
for i in threads:
i.join()
if __name__ == '__main__':
f1 = open('out_para.txt','w')
f1.close()
f2 = open('out_index.txt','w')
f2.close()
if len(sys.argv) != 2:
print 'Please input a keyword. '
else:
main(sys.argv[1])
除了保存两个不同URL的不同文件之后,和上面的代码会有点点不同因为是早起写的并没有完全照搬代码。
运行结果:
这样就可以很简便地实现相关信息URL的收集了。
9、zoomeye信息收集:
Zoomeye,即钟馗之眼,是针对网络空间的搜索引擎,有设备类型、固件版本、分布地点、开放端口服务等的信息。对于zoomeye中的信息收集分两种,一种是直接爬取网页,另一种是通过API接口的形式来进行信息收集。后者较稳定,但需要注册账号。
下面先来进行第一种方式即直接爬取网页实现信息收集:
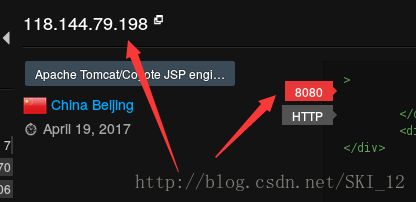
以搜索Struts为例,可以看到有IP地址、端口、国家城市等信息:
翻到第二页,URL如下:https://www.zoomeye.org/search?q=Struts&p=2&t=host
可知q参数表示搜索关键字,p参数表示页数,t参数这里可以不用管它。
因为想获取的重要信息是IP及其端口,那么就直接看IP和端口所在的标签吧:
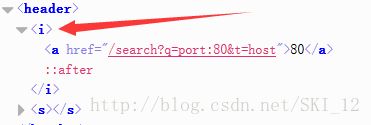
可以看到,IP地址位于a标签下,其中有class属性且值为ip,这里应该就是唯一的了,用BeautifulSoup模块来抓取很方便;端口号也在a标签下,但是只有一个href属性并不好进行匹配,观察到a标签外层还有一个i标签,搜索整个源代码页面,发现只有端口这里有i标签,这样用BeautifulSoup模块也容易实现,下面直接上代码,和上一个百度搜索信息收集的差不多,需要headers来绕过防爬机制,同时实现多线程:
#!/usr/bin/python
#coding=utf-8
import requests
from bs4 import BeautifulSoup as BS
import sys
import threading
import Queue
headers = {
'Host': 'www.zoomeye.org',
'User-Agent': 'Mozilla/5.0 (X11; Linux x86_64; rv:52.0) Gecko/20100101 Firefox/52.0',
'Accept': 'text/html,application/xhtml+xml,application/xml;q=0.9,*/*;q=0.8',
'Accept-Language': 'en-US,en;q=0.5',
'Accept-Encoding': 'gzip, deflate, br',
'Referer': 'https://www.zoomeye.org/',
'Cookie': '__jsluid=74e7c0cf16a799288bad8fbcf4940f86; Hm_lvt_e58da53564b1ec3fb2539178e6db042e=1491379688,1492587142; __jsl_clearance=1492587128.583|0|EHLx1b5pxuVO17wfTRIPUZrpK6M%3D; Hm_lpvt_e58da53564b1ec3fb2539178e6db042e=1492587242',
'Connection': 'close',
'Upgrade-Insecure-Requests': '1',
'Cache-Control': 'max-age=0',
}
class Zoomeye(threading.Thread):
"""docstring for Zoomeye"""
def __init__(self, queue):
threading.Thread.__init__(self)
self._queue = queue
def run(self):
while not self._queue.empty():
url = self._queue.get()
try:
self.spider(url)
except Exception as e:
print e
pass
def spider(self,url):
r = requests.get(url=url,headers=headers)
soup = BS(r.content,'lxml')
ips = soup.find_all(name='a',attrs={'class':'ip'})
ports = soup.find_all(name='i',attrs={'class':None})
for i,p in zip(ips,ports):
print i.string,':',p.string.replace('\n','').replace(' ','')
def main(Keyword):
queue = Queue.Queue()
threads = []
threads_count = 10
# https://www.zoomeye.org/search?q=Struts&p=2&t=host
for i in range(1,11):
queue.put('https://www.zoomeye.org/search?q=%s&p=%s&t=host'%(Keyword,str(i)))
for i in range(threads_count):
threads.append(Zoomeye(queue))
for i in threads:
i.start()
for i in threads:
i.join()
if __name__ == '__main__':
try:
keyword = sys.argv[1]
main(keyword)
except:
print 'Usage : ./zoomeye.py [Keyword] '
运行结果:
接着就是通过API接口的方式来实现查询:
前提是先注册一个Telnet 404的用户。
点击zoomeye首页上面的API:
点击查看相关的阅读文档:
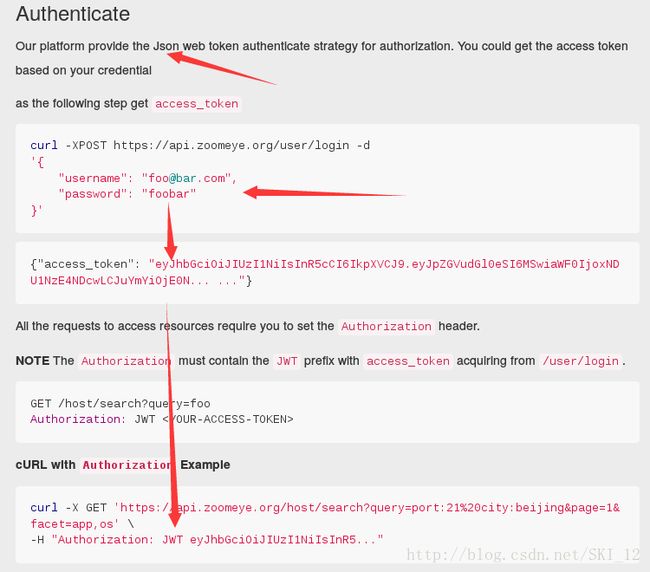
可以看到,该平台是提供基于Json的Web token认证的,也就是说需要导入Json模块及调用其dumps()和loads()函数来实现将HTML格式的文本内容和Json格式的文本内容进行相互转换:
可以看到,这里需要我们先去用POST方法向第一个URL进行登录请求,其中需要提交注册的用户名和密码以获取返回的Json格式的access_token的内容;获取到该内容后,便按照它上面规定的格式构造headers头包含access_token的内容,然后再通过GET方法来请求第二个URL地址,返回的内容为Json格式需要去转换一下即可。
在返回的Json格式中,可以看到是带有matches这个键的:
接着可以看到,IP地址也在其中,所以先获取matches的内容然后再通过ip键获取IP地址即可。
下面直接上代码:
#!/usr/bin/python
#coding=utf-8
import requests
import sys
import json
def login():
login_url = 'https://api.zoomeye.org/user/login'
data = {
"username": "[email protected]",#邮箱用户名
"password": "123456" #邮箱密码
}
data = json.dumps(data)
r = requests.post(url=login_url,data=data)
return json.loads(r.content)['access_token']
def main(keyword):
url = 'https://api.zoomeye.org/host/search?query=%s'%keyword
headers = {
'Authorization': 'JWT '+login()
}
r = requests.get(url=url,headers=headers)
datas = json.loads(r.content)['matches']
for d in datas:
print d['ip']
if __name__ == '__main__':
try:
keyword = sys.argv[1]
main(keyword)
except:
print 'Usage : ./zoomeyeapi.py [Keyword] '
同样是实现了通过输入关键字进行查询。
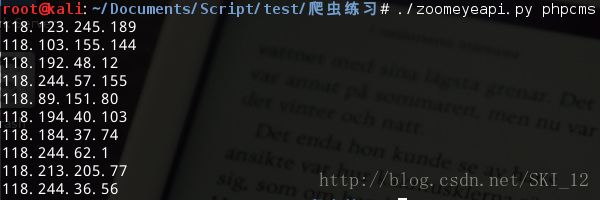
运行结果:
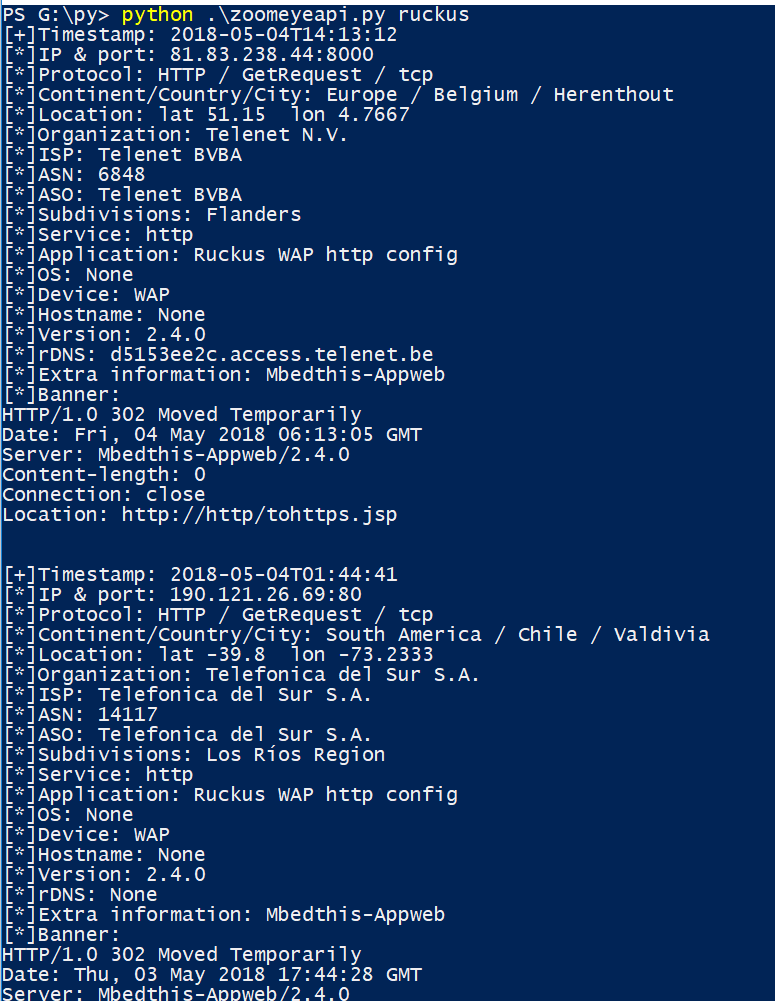
当然可以根据返回json格式的数据来提取更多的信息,只需将main函数中的for循环里输出的内容添加一下即可:
for d in datas:
print "[+]Timestamp:", d['timestamp']
print "[*]IP & port:", str(d['ip']) + ":" + str(d['portinfo']['port'])
print "[*]Protocol:", d['protocol']['application'], "/", d['protocol']['probe'], "/", d['protocol']['transport']
print "[*]Continent/Country/City:", d['geoinfo']['continent']['names']['en'], "/", d['geoinfo']['country']['names']['en'], "/", d['geoinfo']['city']['names']['en']
print "[*]Location:", "lat " + str(d['geoinfo']['location']['lat']), " lon " + str(d['geoinfo']['location']['lon'])
print "[*]Organization:", d['geoinfo']['organization']
print "[*]ISP:", d['geoinfo']['isp']
print "[*]ASN:", d['geoinfo']['asn']
print "[*]ASO:", d['geoinfo']['aso']
print "[*]Subdivisions:", d['geoinfo']['subdivisions']['names']['en']
print "[*]Service:", d['portinfo']['service']
print "[*]Application:", d['portinfo']['app']
print "[*]OS:", d['portinfo']['os'] if len(d['portinfo']['os']) > 0 else "None"
print "[*]Device:", d['portinfo']['device'] if len(d['portinfo']['device']) > 0 else "None"
print "[*]Hostname:", d['portinfo']['hostname'] if len(d['portinfo']['hostname']) > 0 else "None"
print "[*]Version:", d['portinfo']['version'] if len(d['portinfo']['version']) > 0 else "None"
print "[*]rDNS:", d['rdns'] if "rdns" in d else "None"
print "[*]Extra information:", d['portinfo']['extrainfo'] if len(d['portinfo']['extrainfo']) > 0 else "None"
print "[*]Banner:\n", d['portinfo']['banner'].split('\r\n\r\n')[0]
print "\n"
输出结果:
10、Seebug PoC收集:
首先访问并登陆Seebug,点击新漏洞右侧的More:
可以看到,在每项漏洞名称中有一个火箭的图标的就是有PoC:
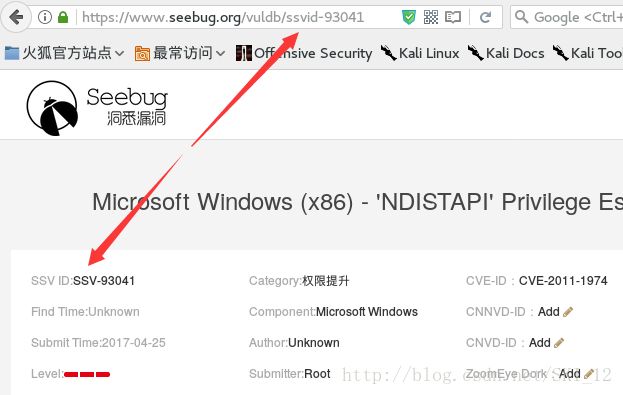
接着查看漏洞名称所在的标签,发现在a标签下,其中有属性class值为vul-title且是唯一的、属性href中含有漏洞的ssvid值:
点击查看具体的漏洞信息,看到其URL中含有漏洞的ssvid值:
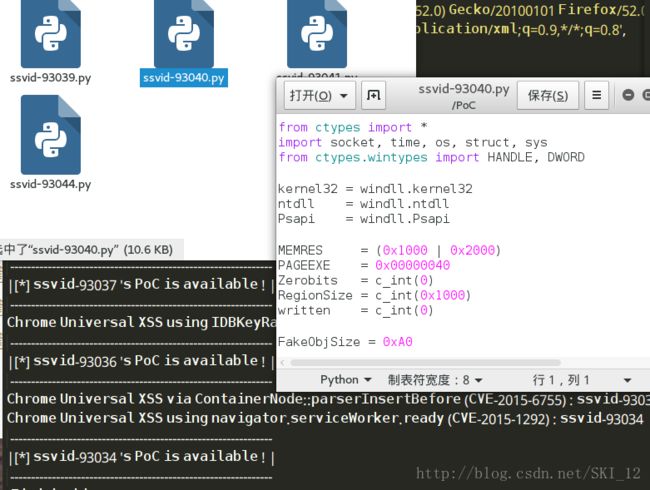
接着下移,看到有PoC的漏洞其PoC中有一个下载的图标:
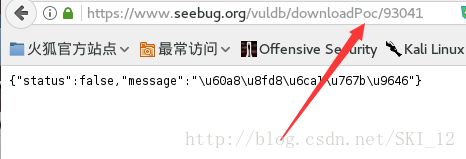
点击进去看到下载时的URL如下,也是含有ssvid值的(因为当时没登录所以显示的是Json格式的内容,message的内容为没有登录):
接着查看没有PoC的漏洞的具体信息,可以看到其Poc一栏显示如图:
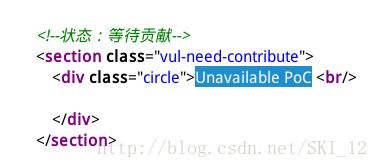
查看源代码相应的区域,可以知道没有PoC的漏洞该页面是含有“Unavailable PoC”字段的:
基于上述的分析可以写出代码如下:
#!/usr/bin/python
#coding=utf-8
import requests
import threading
import Queue
from bs4 import BeautifulSoup as BS
import time
headers = {
'Host': 'www.seebug.org',
'User-Agent': 'Mozilla/5.0 (X11; Linux x86_64; rv:52.0) Gecko/20100101 Firefox/52.0',
'Accept': 'text/html,application/xhtml+xml,application/xml;q=0.9,*/*;q=0.8',
'Accept-Language': 'en-US,en;q=0.5',
'Accept-Encoding': 'gzip, deflate, br',
'Referer': 'https://www.seebug.org/',
'Cookie': '',#这里需要填入cookie信息,可以使用Burpsuite抓取登录后访问Seebug的cookie信息
'Connection': 'close',
'Upgrade-Insecure-Requests': '1',
}
class Seebug(threading.Thread):
"""docstring for Seebug"""
def __init__(self, queue):
threading.Thread.__init__(self)
self._queue = queue
def run(self):
while not self._queue.empty():
url = self._queue.get_nowait()
self.spider(url)
def spider(self,url):
r = requests.get(url=url,headers=headers)
soup = BS(r.content,'lxml')
names = soup.find_all(name='a',attrs={'class':'vul-title'})
for name in names:
print name.string,':',name['href'].split('/')[2]
bug_url = 'https://www.seebug.org/vuldb/'+name['href'].split('/')[2]
text = requests.get(url=bug_url,headers=headers)
if ('Unavailable PoC' not in text.content)&(text.status_code != 403):
print ' ---------------------------------------------------------------'
print '|[*] %s \'s PoC is available ! |'%(name['href'].split('/')[2])
print ' ---------------------------------------------------------------'
download_url = 'https://www.seebug.org/vuldb/downloadPoc/'+name['href'].split('-')[1]
down_r = requests.get(url=download_url,headers=headers)
# print down_r.content
f = open('/PoC/'+name['href'].split('/')[2]+'.py','w')
f.write(down_r.content)
f.close()
time.sleep(2)
def main():
queue = Queue.Queue()
threads = []
threads_count = 5
url_start = 'https://www.seebug.org/vuldb/vulnerabilities?page='
for i in range(1,2):
queue.put(url_start+str(i))
for i in range(threads_count):
threads.append(Seebug(queue))
for i in threads:
i.start()
for i in threads:
i.join()
if __name__ == '__main__':
main()
当然,上述代码将所有的PoC都存为Python文件,因为PoC不全是Python文件所以最好对下载下来的PoC自己再去分类一下即可。
运行结果:
11、代理IP收集:
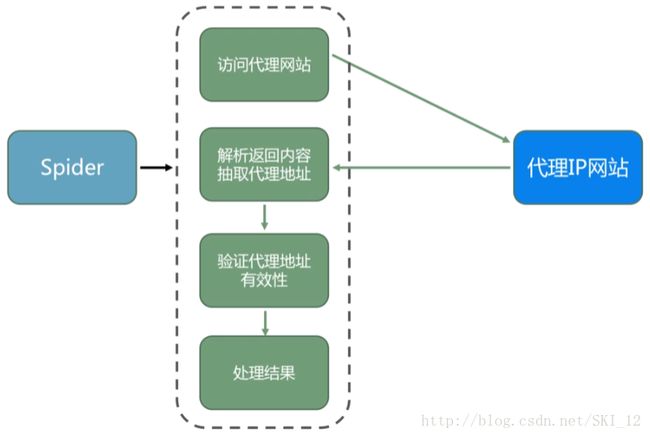
用爬虫实现代理IP收集的思路大致就是先到相应的代理IP网站如http://www.xicidaili.com/来获取代理IP信息,然后再使用代理IP通过查询IP的网页如http://1212.ip138.com/ic.asp显示的IP地址是否与使用的代理IP地址一样来判断该代理IP是否可行。
找的一个流程图:
先到http://www.xicidaili.com/来获取代理IP信息,查看相应的列表标签,可以看到显示IP的都是在tr标签下的,但是规律是有的有class值为odd的属性有的class值为空的属性、 并且是交替的:
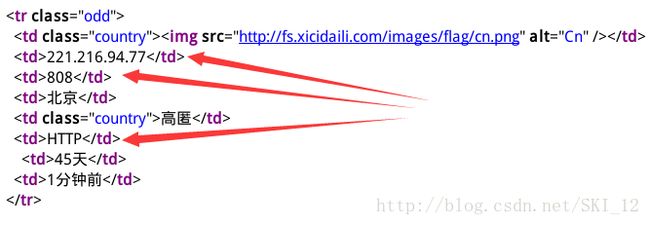
接着点击进去查看一项的具体内容,可以看到IP、端口、协议类型等都在td标签下,且发现它们的规律都是分别位于从0开始数的第1、第2和第5位:
接着到http://www.ip138.com中查询IP,网页中显示有本地的IP:
查看源代码并没有该IP的内容,但是显示了另外一个连接的窗口http://1212.ip138.com/ic.asp:
点击该连接即可查看到本地的IP信息:
查看源代码:
这里就可以使用正则来匹配了,下面就直接上代码。
#!/usr/bin/python
#coding=utf-8
import requests
from bs4 import BeautifulSoup as BS
import re
headers = {
'User-Agent': 'Mozilla/5.0 (X11; Linux x86_64; rv:52.0) Gecko/20100101 Firefox/52.0'
}
def check(ip,port,types):
PROXY = {}
PROXY[types.lower()] = '%s:%s'%(ip,port)
try:
r = requests.get(url='http://1212.ip138.com/ic.asp',proxies=PROXY,timeout=6)
new_ip = re.findall(r'\[(.*?)\]',r.text)[0]
if new_ip == ip:
print '************************************'
print '[*] Successful ! The IP is available ! '
print PROXY
print '************************************'
except Exception,e:
pass
def main():
url = 'http://www.xicidaili.com/'
r = requests.get(url=url,headers=headers)
soup = BS(r.content,'lxml')
datas = soup.find_all(name='tr',attrs={'class':re.compile('|[^odd]')})
for data in datas:
proxy_content = BS(str(data),'lxml')
proxys = proxy_content.find_all(name='td')
i = 0
for p in proxys:
if (i == 1)|(i == 2)|(i == 5 ):
if i == 1:
ip = str(p.string)
if i == 2:
port = str(p.string)
if i == 5:
types = str(p.string)
print '[+] Trying : ',ip,':',port,'[',types,']'
check(ip,port,types)
i += 1
if i > 6:
i = 0
if __name__ == '__main__':
main()
这次的需要注意的点在于types在URL中获取的是大写形式的,在进行利用PROXY进行访问时需要将其转换为小写形式,这里可以使用lower()函数。
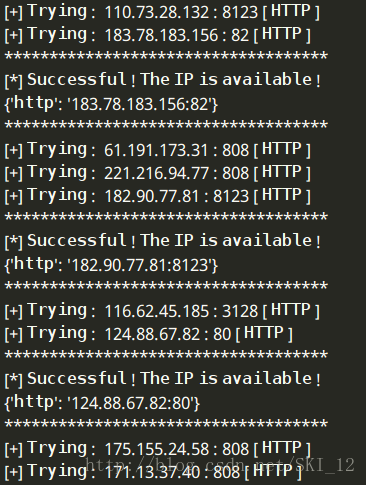
运行结果:
九、基础爬虫框架:
因为前一节的爬虫都是小型的基于个人需求的,因而其代码的实现都是直接写到一块的,为了使逻辑更为清晰、便于后面只需要修改相应一小部分的代码实现其他爬虫的任务,我们可以编写爬虫框架,简单地说就是将爬虫的各个功能模块提取出来为单独的文件,以便后面更方便地理解和修改。
不管是大型爬虫还是小型爬虫,它们都是含有基础模块的。基础爬虫框架主要包括五大模块:爬虫调度器、URL管理器、HTML下载器、HTML解析器、数据存储器。
这里以爬取100条百度百科关于用户输入的需要查询的词条的相关信息为例。
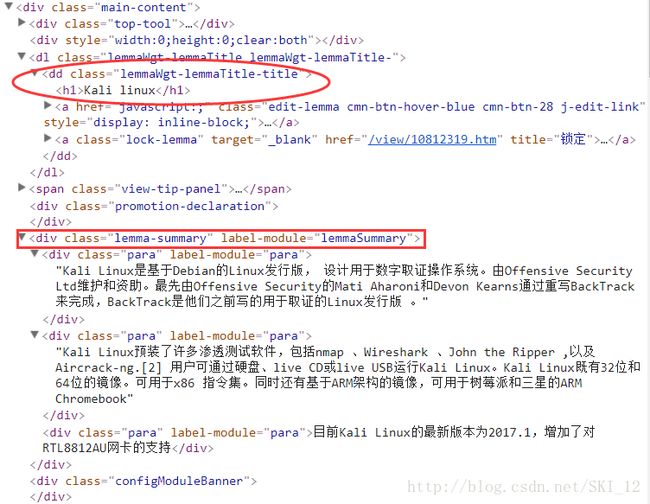
查看一下搜索“Kali Linux”的标签相关内容:
URL管理器UrlManager.py:
#coding=utf-8
class UrlManager(object):
def __init__(self):
self.new_urls = set()
self.old_urls = set()
def has_new_url(self):
return self.new_url_size != 0
def get_new_url(self):
new_url = self.new_urls.pop()
self.old_urls.add(new_url)
return new_url
def add_new_url(self, url):
if url is None:
return
if url not in self.new_urls and url not in self.old_urls:
self.new_urls.add(url)
def add_new_urls(self, urls):
if urls is None or len(urls) == 0:
return
for url in urls:
self.add_new_url(url)
def new_url_size(self):
return len(self.new_urls)
def old_url_size(self):
return len(self.old_urls)
通过Python的set实现内存去重从而实现爬虫的链接去重,同时定义一些方法:是否含有未爬取的URL、获取URL、添加URL、获取未爬取和爬取过的URL的数量。
HTML下载器,HtmlDownloader.py:
#coding=utf-8
import requests
class HtmlDownloader(object):
def download(self, url):
if url is None:
return None
user_agent = "Mozilla/4.0 (compatible; MSIE 5.5; Windows NT)"
headers = {'User-Agent':user_agent}
r = requests.get(url, headers=headers)
if r.status_code == 200:
r.encoding = 'utf-8'
return r.text
return None
就是通过设置UA然后Request请求查看是否返回200,若正常则返回HTML内容。
HTML解析器,HtmlParser.py:
#coding=utf-8
from bs4 import BeautifulSoup as BS
import re
import urlparse
class HtmlParser(object):
def parser(self, page_url, html_cont):
if page_url is None or html_cont is None:
return
soup = BS(html_cont, 'lxml')
new_urls = self._get_new_urls(page_url, soup)
new_data = self._get_new_data(page_url, soup)
return new_urls, new_data
def _get_new_urls(self, page_url, soup):
new_urls = set()
# 抽取符合要求的a标签
links = soup.find_all('a', href=re.compile(r'/item/.*'))
for link in links:
# 提取href属性
new_url = link['href']
# 拼接成完整网址
new_full_url = urlparse.urljoin(page_url, new_url)
new_urls.add(new_full_url)
return new_urls
def _get_new_data(self, page_url, soup):
data = {}
data['url'] = page_url
title = soup.find('dd', class_='lemmaWgt-lemmaTitle-title').find('h1')
data['title'] = title.get_text()
summary = soup.find('div', class_='lemma-summary')
# 获取到tag中包含的所有文版内容包括子孙tag中的内容,并将结果作为Unicode字符串返回
data['summary'] = summary.get_text()
return data
根据前面分析的标签的信息来解析HTML相应的内容来获取a标签的href链接以及该页面的标题和小结等信息。
数据存储器,DataOutput.py:
import codecs
class DataOutput(object):
def __init__(self):
self.datas = []
def store_data(self, data):
if data is None:
return
self.datas.append(data)
def output_html(self):
fout = codecs.open('baike.html', 'w', encoding='utf-8')
fout.write("")
fout.write("")
fout.write("")
fout.write("")
for data in self.datas:
fout.write("")
fout.write("%s " % data['url'])
fout.write("%s " % data['title'])
fout.write("%s " % data['summary'])
fout.write(" ")
fout.write("
")
fout.write("")
fout.write("")
fout.close()
print "\n[*]Save successfully."
该类有两个方法,store_data()函数用来存储爬取的数据,output_html()函数用来将存储的内容保存为HTML文件。
爬虫调度器,SpiderManager.py:
#coding=utf-8
import sys
from HtmlParser import HtmlParser
from HtmlDownloader import HtmlDownloader
from DataOutput import DataOutput
from UrlManager import UrlManager
class SpiderManager(object):
def __init__(self):
self.manager = UrlManager()
self.downloader = HtmlDownloader()
self.parser = HtmlParser()
self.output = DataOutput()
def crawl(self, root_url):
# 添加入口URL
self.manager.add_new_url(root_url)
# 判断URL管理器中是否有新的URL,同时判断抓取了多少个URL
while(self.manager.has_new_url() and self.manager.old_url_size() < 100):
try:
# 从URL管理器获取新的URL
new_url = self.manager.get_new_url()
# HTML下载器下载网页
html = self.downloader.download(new_url)
# HTML解析器解析网页
new_urls, data = self.parser.parser(new_url, html)
# 将抽取到url添加到URL管理器中
self.manager.add_new_urls(new_urls)
# 数据存储器存储文件
self.output.store_data(data)
self.progress()
# print u"已经抓取%s个链接" % self.manager.old_url_size()
except Exception, e:
print "\n[-]Crawl failed."
# 数据存储器将文件输出成指定的格式
self.output.output_html()
# 显示爬取进度条
def progress(self):
percentage = "[*]Crawl Progress: %s%%" % self.manager.old_url_size()
sys.stdout.write('\r' + percentage)
if __name__ == '__main__':
if len(sys.argv) == 2:
url = 'https://baike.baidu.com/item/' + sys.argv[1]
spider_manager = SpiderManager()
spider_manager.crawl(url)
else:
print "[*]Usage: python SpiderManager.py [Search Keyword]"
初始化各个模块,然后通过crawl()函数传入搜索的URL开始调用各个模块进行爬取任务。
运行示例:
这里输入“Kali Linux”,但因为输入参数不能存在空格,所以用空格的URL编码%20来代替:
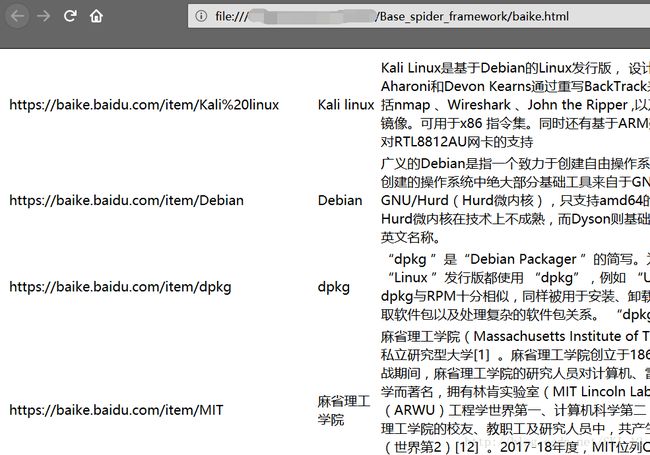
然后用浏览器打开baike.html文件查看结果:
可以看到爬取的内容成功地保存在该文件中。
十、防爬:
这里小结一下防爬的一些方法。
1、最基本的防爬就是检测请求头中的如User-Agent、Referer等字段,针对此类防爬机制只需要添加相应的header字段信息即可绕过。当然,最为简便就是直接将浏览器发送的请求的所有字段都添加到header中。
2、基于用户行为的防爬机制,主要是在后台记录访问的IP的此时,当超过一定限度时就会封锁该IP的访问。针对这种防爬机制可以设置每次请求之后再隔一段时间再进行访问,或者可以使用之前爬取的IP池的IP做代理不断更换IP来访问。
3、基于Java的防爬机制,主要是在相应数据页面之前先返回一段带有Java代码的页面,用于验证访问者是否有Java执行环境从而确定是否是浏览器发送的请求。针对这种防爬机制,需要能够解析执行Java,具体可使用selenium或splinter,通过加载浏览器来实现(这种方式后面会补充)。
未完待续~


