redis主题
01_Redis介绍和安装运行
02_Jedis的介绍和使用
03_Redis数据类型和数据操作的命令
04_Redis集群
Redis集群架构
-
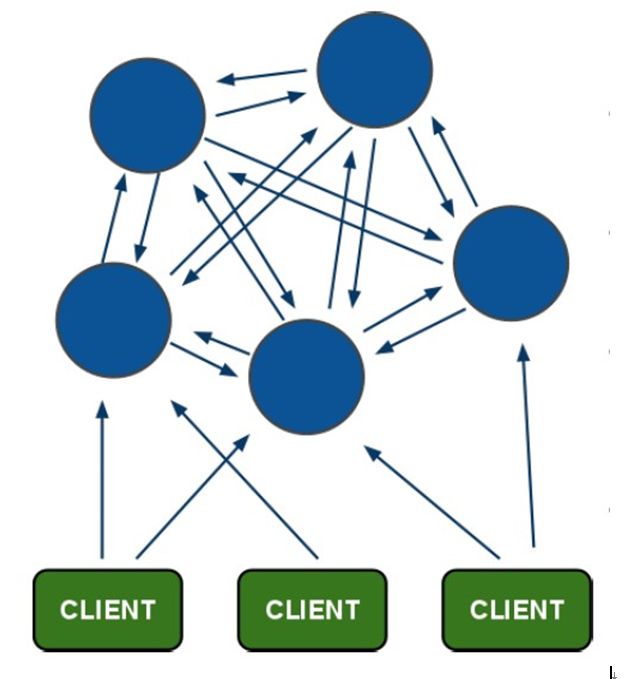
redis-cluster架构图
-
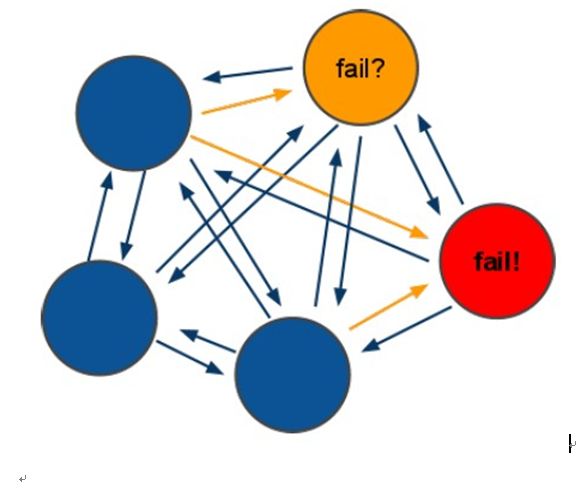
redis-cluster投票-容错机制
- 架构细节:
- 所有的redis节点彼此互联(PING-PONG机制),内部使用二进制协议优化传输速度和带宽.
- 节点的fail是通过集群中超过半数的节点检测失效时才生效.
- 客户端与redis节点直连,不需要中间proxy层.客户端不需要连接集群所有节点,连接集群中任何一个可用节点即可
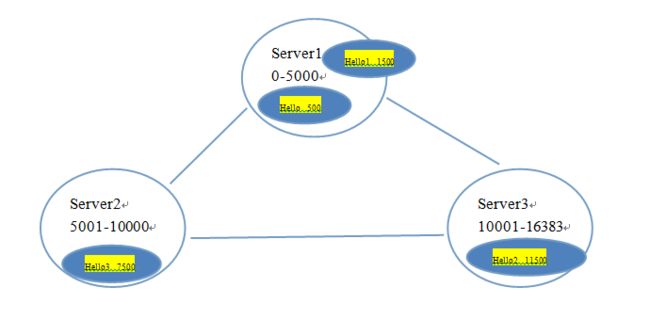
- redis-cluster把所有的物理节点映射到[0-16383]slot上,cluster 负责维护node<->slot<->value
- Redis 集群中内置了 16384 个哈希槽,当需要在 Redis 集群中放置一个 key-value 时,redis 先对 key 使用 crc16 算法算出一个结果,然后把结果对 16384 求余数,这样每个 key 都会对应一个编号在 0-16383 之间的哈希槽,redis 会根据节点数量大致均等的将哈希槽映射到不同的节点
Redis集群的搭建
Redis集群中至少应该有三个节点。要保证集群的高可用,需要每个节点有一个备份机。Redis集群至少需要6台服务器。
搭建伪分布式。可以使用一台虚拟机运行6个redis实例。需要修改redis的端口号7001-7006
- 集群搭建环境
需要6台redis服务器。搭建伪分布式。
需要6个redis实例。
需要运行在不同的端口7001-7006
实践环境步骤
- 配置redis
- 创建目录、复制redis、删除原来数据
[root@training taotao-servers]# mkdir redis-cluster
[root@training taotao-servers]# cp -r redis/ redis-cluster/redis01
[root@training taotao-servers]# cd redis-cluster/redis01/
[root@training redis01]# rm -f dump.rdb
[root@training redis01]# rm -f nodes.conf
- 编辑配置文件
vi redis.conf
- 修改端口为7001
port 7001
- 启动集群模式,一般下面这行是注释掉的,我们打开注释就可以了
cluster-enabled yes
- 保存退出
- 启动6个redis
- 复制6份redis01
[root@training redis01]# cd ../
[root@training redis-cluster]# cp -r redis01/ redis02
[root@training redis-cluster]# cp -r redis01/ redis03
[root@training redis-cluster]# cp -r redis01/ redis04
[root@training redis-cluster]# cp -r redis01/ redis05
[root@training redis-cluster]# cp -r redis01/ redis06
- 端口分别修改为7001-7006
[root@training redis-cluster]# vi redis02/redis.conf
[root@training redis-cluster]# vi redis03/redis.conf
[root@training redis-cluster]# vi redis04/redis.conf
[root@training redis-cluster]# vi redis05/redis.conf
[root@training redis-cluster]# vi redis06/redis.conf
- 创建批处理脚本启动6个redis
[root@training redis-cluster]# vi redis-start-all.sh
添加如下:
cd redis01/
./redis-server redis.conf
cd ../
cd redis02/
./redis-server redis.conf
cd ../
cd redis03/
./redis-server redis.conf
cd ../
cd redis04/
./redis-server redis.conf
cd ../
cd redis05/
./redis-server redis.conf
cd ../
cd redis06/
./redis-server redis.conf
cd ../
保存退出
-
.sh脚本添加执行权限并执行.sh脚本,启动6个redis
[root@training redis-cluster]# chmod +x redis-start-all.sh
[root@training redis-cluster]# ./redis-start-all.sh
[root@training redis-cluster]# ps aux|grep redis
root      2654  0.1  0.1  33936  2052 ?        Ssl  20:20   0:00 ./redis-server *:7001 [cluster]
root      2656  0.1  0.1  33936  2052 ?        Ssl  20:20   0:00 ./redis-server *:7002 [cluster]
root      2658  0.1  0.1  33936  2060 ?        Ssl  20:20   0:00 ./redis-server *:7003 [cluster]
root      2666  0.1  0.1  33936  2056 ?        Ssl  20:20   0:00 ./redis-server *:7004 [cluster]
root      2670  0.1  0.1  33936  2052 ?        Ssl  20:20   0:00 ./redis-server *:7005 [cluster]
root      2672  0.1  0.1  33936  2060 ?        Ssl  20:20   0:00 ./redis-server *:7006 [cluster]
root      2678  0.0  0.0   4360   760 pts/0    S+   20:20   0:00 grep redis
[root@training redis-cluster]#
- 使用ruby脚本搭建集群。需要ruby的运行环境。安装ruby
yum install yum
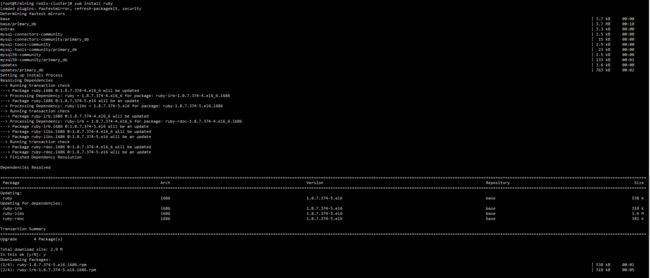
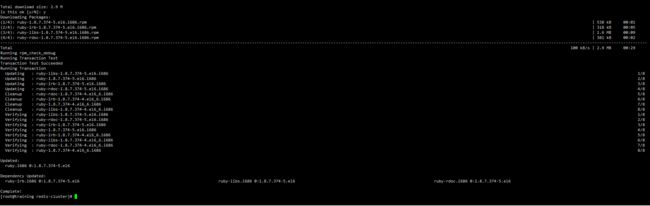
安装ruby进度
- 安装ruby脚本运行的依赖包
- 上传
redis-3.0.0.gem到linux,文件在电脑的G:\Java\JavaEE\10_淘淘商城\参考资料\redis\ruby和redis接口目录下 - 安装gem:
gem install redis-3.0.0.gem
[root@training redis-cluster]# gem install redis-3.0.0.gem
Successfully installed redis-3.0.0
1 gem installed
Installing ri documentation for redis-3.0.0...
Installing RDoc documentation for redis-3.0.0...
- 在
/opt/redis/redis-3.0.0/src目录下,有redis-trib.rb文件,拷贝到集群的目录
[root@training src]# cp redis-trib.rb /usr/local/taotao-servers/redis-cluster/
[root@training src]# cd /usr/local/taotao-servers/redis-cluster/
[root@training redis-cluster]# ls -l
total 136
drwxr-xr-x. 2 root root  4096 May  6 20:26 redis01
drwxr-xr-x. 2 root root  4096 May  6 20:27 redis02
drwxr-xr-x. 2 root root  4096 May  6 20:28 redis03
drwxr-xr-x. 2 root root  4096 May  6 20:28 redis04
drwxr-xr-x. 2 root root  4096 May  6 20:28 redis05
drwxr-xr-x. 2 root root  4096 May  6 20:28 redis06
-rw-r--r--. 1 root root 57856 May  6 20:45 redis-3.0.0.gem
-rwxr-xr-x. 1 root root   270 May  6 20:14 redis-start-all.sh
-rwxr-xr-x. 1 root root 48141 May  6 20:54 redis-trib.rb
[root@training redis-cluster]#
- 执行命令,启动集群
./redis-trib.rb create --replicas 1 192.168.25.175:7001 192.168.25.175:7002 192.168.25.175:7003 192.168.25.175:7004 192.168.25.175:7005 192.168.25.175:7006
进度信息
[root@training redis-cluster]# ./redis-trib.rb create --replicas 1 192.168.25.175:7001 192.168.25.175:7002 192.168.25.175:7003 192.168.25.175:7004 192.168.25.175:7005 192.168.25.175:7006
>>> Creating cluster
Connecting to node 192.168.25.175:7001: OK
Connecting to node 192.168.25.175:7002: OK
Connecting to node 192.168.25.175:7003: OK
Connecting to node 192.168.25.175:7004: OK
Connecting to node 192.168.25.175:7005: OK
Connecting to node 192.168.25.175:7006: OK
>>> Performing hash slots allocation on 6 nodes...
Using 3 masters:
192.168.25.175:7001
192.168.25.175:7002
192.168.25.175:7003
Adding replica 192.168.25.175:7004 to 192.168.25.175:7001
Adding replica 192.168.25.175:7005 to 192.168.25.175:7002
Adding replica 192.168.25.175:7006 to 192.168.25.175:7003
M: 7ce324b94382d489ff18c053358854a440971b80 192.168.25.175:7001
   slots:0-5460 (5461 slots) master
M: 5f0d37c049a60c21931925da315507edcc7e26b6 192.168.25.175:7002
   slots:5461-10922 (5462 slots) master
M: 800e37dcf260acd7e66964af7dc3fae66a3e2ace 192.168.25.175:7003
   slots:10923-16383 (5461 slots) master
S: 7be793782772080d047e1d021be451d488880713 192.168.25.175:7004
   replicates 7ce324b94382d489ff18c053358854a440971b80
S: 0db5ae4287d7c689fb5d6d313c5235c3041814ed 192.168.25.175:7005
   replicates 5f0d37c049a60c21931925da315507edcc7e26b6
S: f8a73e8d2f0aa934aab4557654bd321d3bdff429 192.168.25.175:7006
   replicates 800e37dcf260acd7e66964af7dc3fae66a3e2ace
Can I set the above configuration? (type 'yes' to accept): yes
>>> Nodes configuration updated
>>> Assign a different config epoch to each node
>>> Sending CLUSTER MEET messages to join the cluster
Waiting for the cluster to join.....
>>> Performing Cluster Check (using node 192.168.25.175:7001)
M: 7ce324b94382d489ff18c053358854a440971b80 192.168.25.175:7001
   slots:0-5460 (5461 slots) master
M: 5f0d37c049a60c21931925da315507edcc7e26b6 192.168.25.175:7002
   slots:5461-10922 (5462 slots) master
M: 800e37dcf260acd7e66964af7dc3fae66a3e2ace 192.168.25.175:7003
   slots:10923-16383 (5461 slots) master
M: 7be793782772080d047e1d021be451d488880713 192.168.25.175:7004
   slots: (0 slots) master
   replicates 7ce324b94382d489ff18c053358854a440971b80
M: 0db5ae4287d7c689fb5d6d313c5235c3041814ed 192.168.25.175:7005
   slots: (0 slots) master
   replicates 5f0d37c049a60c21931925da315507edcc7e26b6
M: f8a73e8d2f0aa934aab4557654bd321d3bdff429 192.168.25.175:7006
   slots: (0 slots) master
   replicates 800e37dcf260acd7e66964af7dc3fae66a3e2ace
[OK] All nodes agree about slots configuration.
>>> Check for open slots...
>>> Check slots coverage...
[OK] All 16384 slots covered.
[root@training redis-cluster]#
集群的使用方法
Redis-cli连接集群。
[root@localhost redis-cluster]# redis01/redis-cli -p 7002 -c
-c:代表连接的是redis集群
Jedis
需要把jedis依赖的jar包添加到工程中。Maven工程中需要把jedis的坐标添加到依赖。
推荐添加到服务层。Taotao-content-Service工程中。
- 连接单机版
第一步:创建一个Jedis对象。需要指定服务端的ip及端口。
第二步:使用Jedis对象操作数据库,每个redis命令对应一个方法。
第三步:打印结果。
第四步:关闭Jedis
    @Test
    public void testJedis() throws Exception {
        // 第一步:创建一个Jedis对象。需要指定服务端的ip及端口。
        Jedis jedis = new Jedis("192.168.25.153", 6379);
        // 第二步:使用Jedis对象操作数据库,每个redis命令对应一个方法。
        String result = jedis.get("hello");
        // 第三步:打印结果。
        System.out.println(result);
        // 第四步:关闭Jedis
        jedis.close();
    }
- 连接单机版使用连接池
第一步:创建一个JedisPool对象。需要指定服务端的ip及端口。
第二步:从JedisPool中获得Jedis对象。
第三步:使用Jedis操作redis服务器。
第四步:操作完毕后关闭jedis对象,连接池回收资源。
第五步:关闭JedisPool对象。
@Test
    public void testJedisPool() throws Exception {
        // 第一步:创建一个JedisPool对象。需要指定服务端的ip及端口。
        JedisPool jedisPool = new JedisPool("192.168.25.153", 6379);
        // 第二步:从JedisPool中获得Jedis对象。
        Jedis jedis = jedisPool.getResource();
        // 第三步:使用Jedis操作redis服务器。
        jedis.set("jedis", "test");
        String result = jedis.get("jedis");
        System.out.println(result);
        // 第四步:操作完毕后关闭jedis对象,连接池回收资源。
        jedis.close();
        // 第五步:关闭JedisPool对象。
        jedisPool.close();
    }
- 连接集群版
第一步:使用JedisCluster对象。需要一个Set参数。Redis节点的列表。
第二步:直接使用JedisCluster对象操作redis。在系统中单例存在。
第三步:打印结果
第四步:系统关闭前,关闭JedisCluster对象。
    @Test
    public void testJedisCluster() throws Exception {
        // 第一步:使用JedisCluster对象。需要一个Set参数。Redis节点的列表。
        Set nodes = new HashSet<>();
        nodes.add(new HostAndPort("192.168.25.153", 7001));
        nodes.add(new HostAndPort("192.168.25.153", 7002));
        nodes.add(new HostAndPort("192.168.25.153", 7003));
        nodes.add(new HostAndPort("192.168.25.153", 7004));
        nodes.add(new HostAndPort("192.168.25.153", 7005));
        nodes.add(new HostAndPort("192.168.25.153", 7006));
        JedisCluster jedisCluster = new JedisCluster(nodes);
        // 第二步:直接使用JedisCluster对象操作redis。在系统中单例存在。
        jedisCluster.set("hello", "100");
        String result = jedisCluster.get("hello");
        // 第三步:打印结果
        System.out.println(result);
        // 第四步:系统关闭前,关闭JedisCluster对象。
        jedisCluster.close();
    }
策略模式,连单机和集群
- 添加spring配置文件
applicationContext-jedis.xml
- junt测试类
    @Test
    public void testJedisClientPool() throws Exception {
        ClassPathXmlApplicationContext context = new ClassPathXmlApplicationContext("classpath:spring/applicationContext-jedis.xml");
        JedisClient client = context.getBean(JedisClient.class);

        client.set("jedisclient", "jedisclient_test");
        String value = client.get("jedisclient");
        System.out.println(value);
    }
- 在单机版和集群版切换时,我们只有修改Spring配置文件
applicationContext-jedis.xml就可以,代码完全不需要修改