在Android Studio中使用cmake编译FFmpeg
在Android Studio中使用cmake编译FFmpeg
最进根据公司项目需要,学习FFmpeg音视频编解码做技术储备,项目是运行在android平台上的,所以需要把FFmpeg移植到Android上,之前做过一个Android NDK 编程的Demo,使用的是cmake编译方式,所以在这个项目中仍采用cmake。
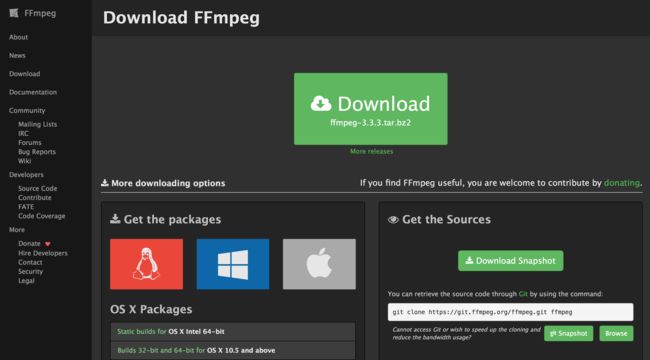
FFmpeg下载
下载地址:https://ffmpeg.org/download.html#releases
如图,点击Download即可下载
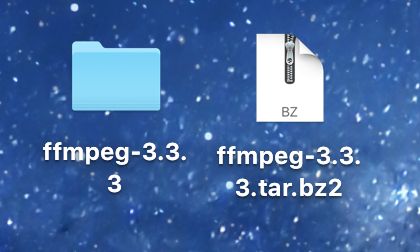
下载好后双击解压,得到ffmpeg-3.3.3文件夹
下载NDK和配置NDK环境
ndk下载
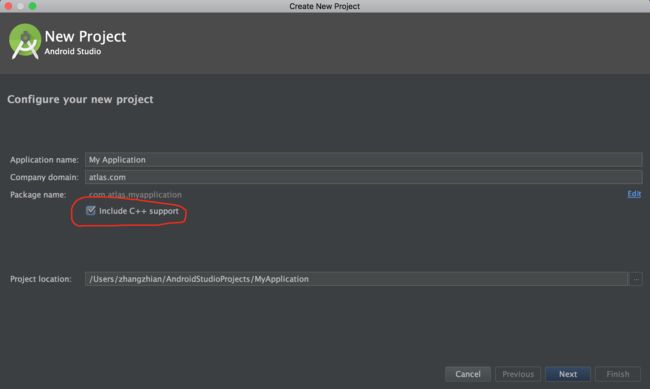
打开Android Studio,勾选include c++ support,创建项目后IDE会自动下载NDK,如下图。
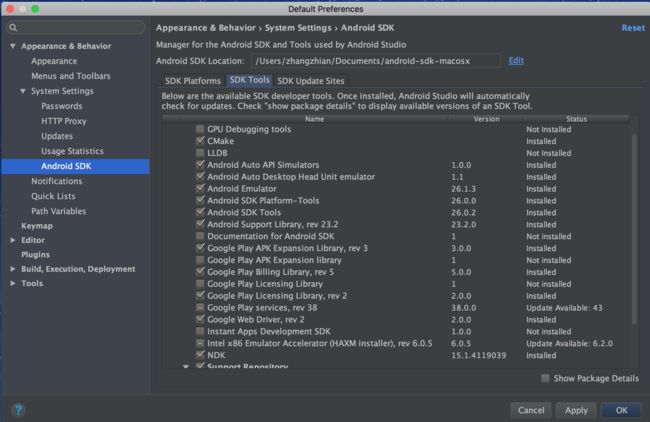
或者,在Preferences下载NDK,如下图。
还有很多方式,可以自行查找。
配置环境变量
- 启动终端Terminal
- 进入当前用户的home目录 ,输入cd ~ 或 /Users/YourUserName
- 创建.bash_profile ,输入touch .bash_profile
- 编辑.bash_profile文件,输入open -e .bash_profile,添加如下代码
export NDK_ROOT=/Users/zhangzhian/Documents/android-sdk-macosx/ndk-bundle
export PATH=$PATH:$NDK_ROOT
- 保存文件,关闭.bash_profile
- 更新刚配置的环境变量 ,输入source .bash_profile
- 看看刚刚设置的环境变量,输入 $PATH 并且按enter键来确认是否编辑成功
注意: NDK_ROOT需要修改成自己开发环境下的NDK地址。
编译FFmpeg
1.在编译前,修改FFmpeg的configure,由于编译出来的动态库文件名的版本号在.so之后(例如“libavcodec.so.5.100.1”),而android不能识别,所以需要修改。在configure文件中找到下面几行代码:
SLIBNAME_WITH_MAJOR='$(SLIBNAME).$(LIBMAJOR)'
LIB_INSTALL_EXTRA_CMD='$$(RANLIB)"$(LIBDIR)/$(LIBNAME)"'
SLIB_INSTALL_NAME='$(SLIBNAME_WITH_VERSION)'
SLIB_INSTALL_LINKS='$(SLIBNAME_WITH_MAJOR)$(SLIBNAME)'
替换为
SLIBNAME_WITH_MAJOR='$(SLIBPREF)$(FULLNAME)-$(LIBMAJOR)$(SLIBSUF)'
LIB_INSTALL_EXTRA_CMD='$$(RANLIB)"$(LIBDIR)/$(LIBNAME)"'
SLIB_INSTALL_NAME='$(SLIBNAME_WITH_MAJOR)'
SLIB_INSTALL_LINKS='$(SLIBNAME)'
2.接下来开始写shell脚本
#!/bin/sh
NDK=/Users/zhangzhian/Documents/android-sdk-macosx/ndk-bundle
SYSROOT=$NDK/platforms/android-21/arch-arm
TOOLCHAIN=$NDK/toolchains/arm-linux-androideabi-4.9/prebuilt/darwin-x86_64
function build_one
{
./configure \
--prefix=$PREFIX \
--enable-shared \
--disable-static \
--disable-doc \
--disable-ffmpeg \
--disable-ffplay \
--disable-ffprobe \
--disable-ffserver \
--disable-avdevice \
--disable-doc \
--disable-symver \
--cross-prefix=$TOOLCHAIN/bin/arm-linux-androideabi- \
--target-os=linux \
--arch=arm \
--enable-cross-compile \
--sysroot=$SYSROOT \
--extra-cflags="-Os -fpic $ADDI_CFLAGS" \
--extra-ldflags="$ADDI_LDFLAGS" \
$ADDITIONAL_CONFIGURE_FLAG
make clean
make
make install
}
CPU=arm
PREFIX=$(pwd)/android/$CPU
ADDI_CFLAGS="-marm"
build_one
注意: 记得改下前三行,对应自己的开发环境
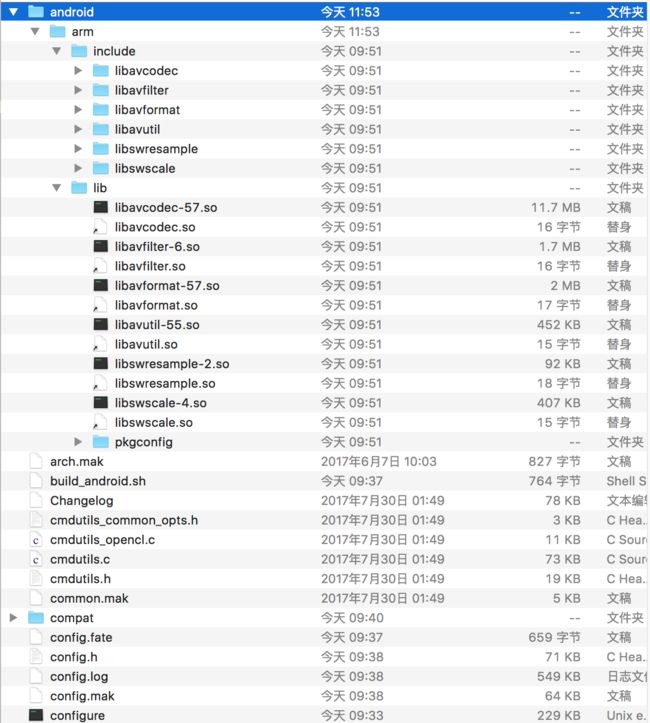
3.执行这个shell脚本,在终端输入 ./ build_android.sh ,然后需要等待一段时间,编译结果如下图,多出来android文件夹即是我们需要的。
在Android中使用FFmpeg
配置FFmpeg
新建工程,然后选中include c++ support,然后下一步直到新建完成为止。
在app的build.gradle的defaultConfig中添加:
ndk {
    abiFilters "armeabi"
}
在android中添加:
sourceSets.main {
    jniLibs.srcDirs = ['libs']
    jni.srcDirs = []
}
修改CMakeLists.txt文件。下图是已经配置好的库文件:
# Sets the minimum version of CMake required to build the native
# library. You should either keep the default value or only pass a
# value of 3.4.0 or lower.

cmake_minimum_required(VERSION 3.4.1)

find_library( # Sets the name of the path variable.
              log-lib

              # Specifies the name of the NDK library that
              # you want CMake to locate.
              log )

set(distribution_DIR ${CMAKE_SOURCE_DIR}/../../../../libs)

add_library( avutil-55
             SHARED
             IMPORTED )
set_target_properties( avutil-55
                       PROPERTIES IMPORTED_LOCATION
                       ../../../../libs/armeabi/libavutil-55.so )

add_library( swresample-2
             SHARED
             IMPORTED )
set_target_properties( swresample-2
                       PROPERTIES IMPORTED_LOCATION
                       ../../../../libs/armeabi/libswresample-2.so )
add_library( avcodec-57
             SHARED
             IMPORTED )
set_target_properties( avcodec-57
                       PROPERTIES IMPORTED_LOCATION
                       ../../../../libs/armeabi/libavcodec-57.so )
add_library( avfilter-6
             SHARED
             IMPORTED)
set_target_properties( avfilter-6
                       PROPERTIES IMPORTED_LOCATION
                       ../../../../libs/armeabi/libavfilter-6.so )
add_library( swscale-4
             SHARED
             IMPORTED)
set_target_properties( swscale-4
                       PROPERTIES IMPORTED_LOCATION
                       ../../../../libs/armeabi/libswscale-4.so )

add_library( avformat-57
             SHARED
             IMPORTED)
set_target_properties( avformat-57
                       PROPERTIES IMPORTED_LOCATION
                       ../../../../libs/armeabi/libavformat-57.so )

set(CMAKE_CXX_FLAGS "${CMAKE_CXX_FLAGS} -std=gnu++11")

add_library( native-lib
             SHARED
             src/main/cpp/native-lib.cpp )

include_directories(libs/include)

#target_include_directories(native-lib PRIVATE libs/include)

target_link_libraries( native-lib swresample-2 avcodec-57 avfilter-6 swscale-4  avformat-57
                       ${log-lib} )
cmake_minimum_required(VERSION 3.4.1):表示cmake的最低版本是3.4.1。
add_library():添加库,分为两种,一种是需要编译为库的代码,一种是已经编译好的库文件。
add_library( avutil-55
             SHARED
             IMPORTED )
这里avutil-55表示库的名称,SHARED表示是共享库,一般.so文件,还有STATIC,一般.a文件。IMPORTED表示引用的不是生成的。
接着是这里用到的需要生产的.so文件
add_library( native-lib
             SHARED
             src/main/cpp/native-lib.cpp )
最后的参数是源码的路径,如果有更多的源码就接下去写上。
set_target_properties:对于已经编译好的so文件需要引入,所以需要设置。
set_target_properties( avutil-55
                       PROPERTIES IMPORTED_LOCATION
                       ../../../../libs/armeabi/libavutil-55.so )
这里avutil-55是名字,然后是PROPERTIES IMPORTED_LOCATION加上库的路径。
include_directories:一般外面引入的库文件需要头文件,所以可以通过这个来引入:
include_directories(libs/include)
target_link_libraries:链接,把需要的so文件链接起来,这里native-lib需要链接ffmpeg的库文件。
target_link_libraries( native-lib swresample-2 avcodec-57 avfilter-6 swscale-4  avformat-57
                       ${log-lib} )
###使用FFmpeg
修改jni部分的代码,也就是native-lib.cpp的代码:
#include
#include

extern "C"
{
#include
#include
#include
}
extern "C"
JNIEXPORT jstring JNICALL
Java_com_yodosmart_ffmpegdemo_MainActivity_stringFromJNI(
		JNIEnv *env,
		jobject /* this */) {
	std::string hello = "Hello from C++";
	return env->NewStringUTF(hello.c_str());
}


extern "C"
JNIEXPORT jstring JNICALL
Java_com_yodosmart_ffmpegdemo_MainActivity_urlprotocolinfo(
		JNIEnv *env, jobject) {
	char info[40000] = {0};
	av_register_all();

	struct URLProtocol *pup = NULL;

	struct URLProtocol **p_temp = &pup;
	avio_enum_protocols((void **) p_temp, 0);

	while ((*p_temp) != NULL) {
		sprintf(info, "%sInput: %s\n", info, avio_enum_protocols((void **) p_temp, 0));
	}
	pup = NULL;
	avio_enum_protocols((void **) p_temp, 1);
	while ((*p_temp) != NULL) {
		sprintf(info, "%sInput: %s\n", info, avio_enum_protocols((void **) p_temp, 1));
	}
	return env->NewStringUTF(info);
}
extern "C"
JNIEXPORT jstring JNICALL
Java_com_yodosmart_ffmpegdemo_MainActivity_avformatinfo(
		JNIEnv *env, jobject) {
	char info[40000] = {0};

	av_register_all();

	AVInputFormat *if_temp = av_iformat_next(NULL);
	AVOutputFormat *of_temp = av_oformat_next(NULL);
	while (if_temp != NULL) {
		sprintf(info, "%sInput: %s\n", info, if_temp->name);
		if_temp = if_temp->next;
	}
	while (of_temp != NULL) {
		sprintf(info, "%sOutput: %s\n", info, of_temp->name);
		of_temp = of_temp->next;
	}
	return env->NewStringUTF(info);
}
extern "C"
JNIEXPORT jstring JNICALL
Java_com_yodosmart_ffmpegdemo_MainActivity_avcodecinfo(
		JNIEnv *env, jobject) {
	char info[40000] = {0};

	av_register_all();

	AVCodec *c_temp = av_codec_next(NULL);

	while (c_temp != NULL) {
		if (c_temp->decode != NULL) {
			sprintf(info, "%sdecode:", info);
		} else {
			sprintf(info, "%sencode:", info);
		}
		switch (c_temp->type) {
			case AVMEDIA_TYPE_VIDEO:
				sprintf(info, "%s(video):", info);
				break;
			case AVMEDIA_TYPE_AUDIO:
				sprintf(info, "%s(audio):", info);
				break;
			default:
				sprintf(info, "%s(other):", info);
				break;
		}
		sprintf(info, "%s[%10s]\n", info, c_temp->name);
		c_temp = c_temp->next;
	}

	return env->NewStringUTF(info);
}
extern "C"
JNIEXPORT jstring JNICALL
Java_com_yodosmart_ffmpegdemo_MainActivity_avfilterinfo(
		JNIEnv *env, jobject) {
	char info[40000] = {0};
	avfilter_register_all();

	AVFilter *f_temp = (AVFilter *) avfilter_next(NULL);
	while (f_temp != NULL) {
		sprintf(info, "%s%s\n", info, f_temp->name);
		f_temp = f_temp->next;
	}
	return env->NewStringUTF(info);
}
注意: extern "C"的添加
java调用代码了
import android.support.v7.app.AppCompatActivity;
import android.os.Bundle;
import android.widget.TextView;

public class MainActivity extends AppCompatActivity {

    // Used to load the 'native-lib' library on application startup.
    static {
        System.loadLibrary("native-lib");
    }

    @Override
    protected void onCreate(Bundle savedInstanceState) {
        super.onCreate(savedInstanceState);
        setContentView(R.layout.activity_main);

        // Example of a call to a native method
        TextView tv = (TextView) findViewById(R.id.sample_text);
        tv.setText(stringFromJNI());
        TextView tv1 = (TextView) findViewById(R.id.sample_text1);
        tv1.setText(urlprotocolinfo());
        TextView tv2 = (TextView) findViewById(R.id.sample_text2);
        tv2.setText(avformatinfo());
        TextView tv3 = (TextView) findViewById(R.id.sample_text3);
        tv3.setText(avcodecinfo());
        TextView tv4 = (TextView) findViewById(R.id.sample_text4);
        tv4.setText(avfilterinfo());

    }

    /**
     * A native method that is implemented by the 'native-lib' native library,
     * which is packaged with this application.
     */
    public native String stringFromJNI();


    public native String urlprotocolinfo();

    public native String avformatinfo();

    public native String avcodecinfo();

    public native String avfilterinfo();

}
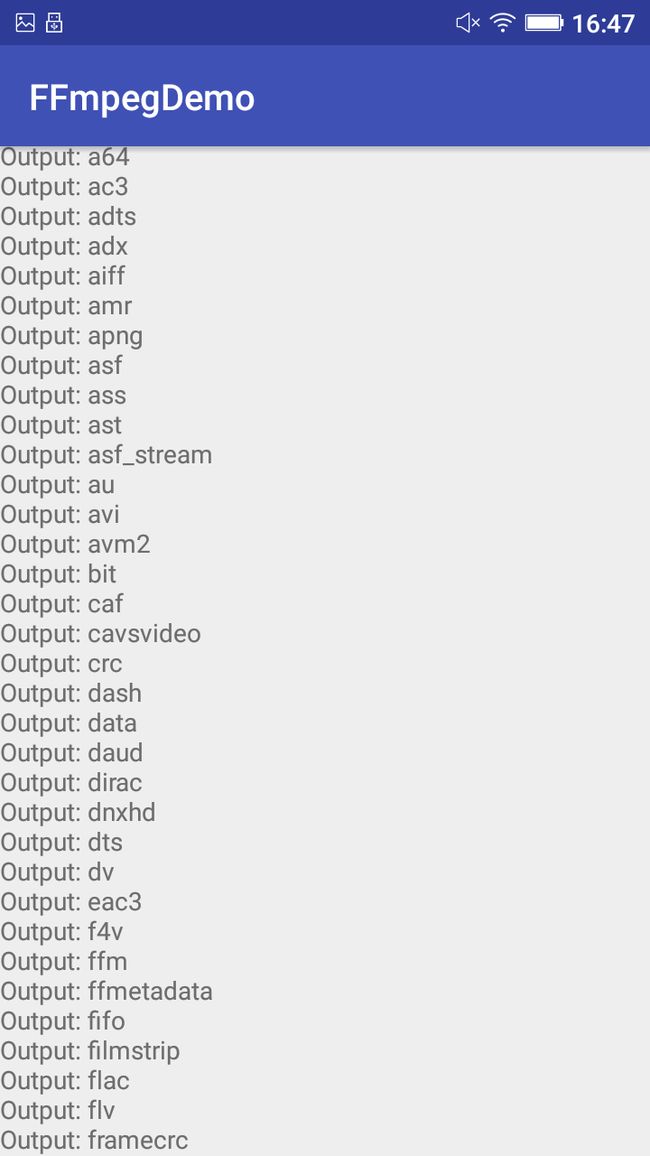
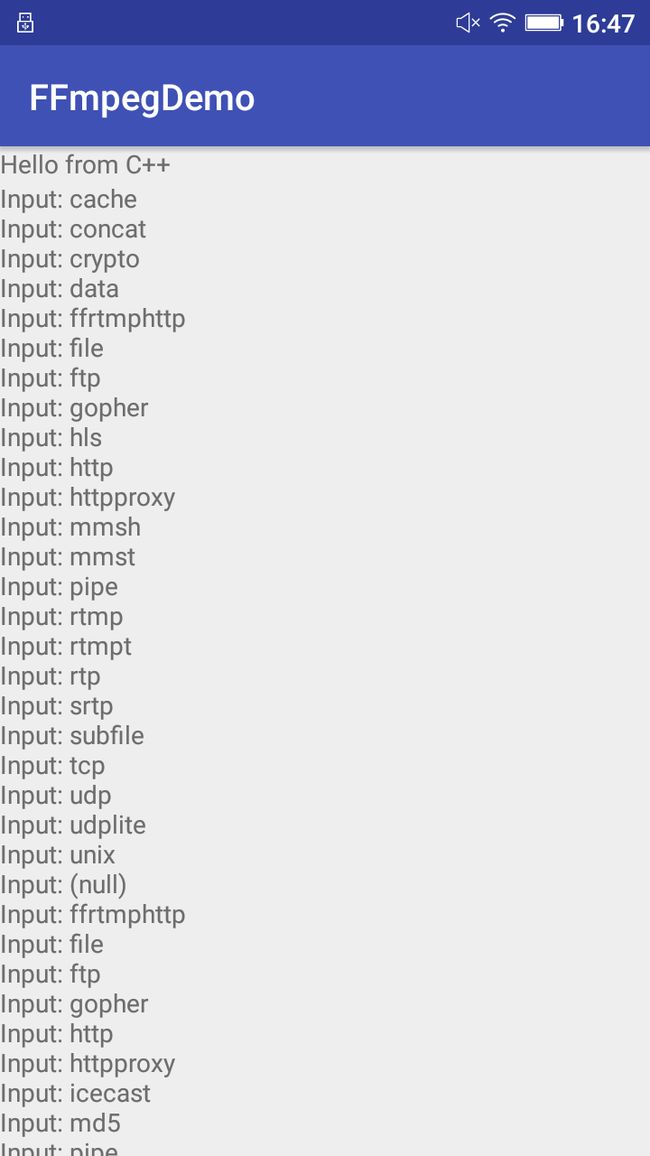
实现效果
下载地址
参考资料
1.http://blog.csdn.net/hejjunlin/article/details/52661331
2.http://blog.csdn.net/eastmoon502136/article/details/52806640
