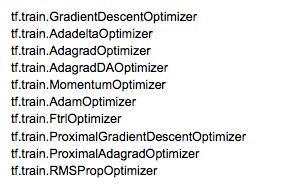
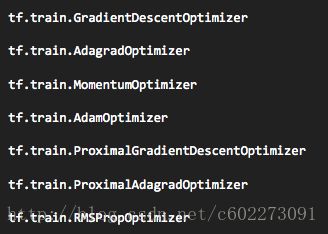
TensorFlow之进阶篇
- linear regression
-
- graph assemble
- 训练模型
- example
- your own optimizer
-
- logistic regression
-
- implementation
-
- loss function
-
- Huber Loss
-
在这一篇中,将会介绍如何使用TensorFlow进行linear regression以及logistic regression,以及loss function的定义。之后的篇章将会进入如何使用TF构建RNN,LSTM网络。
上一个入门就是介绍了TF的数据流模型,数据的表示(常量与变量,使用placeholder,喂数据给Variable),以及一些注意事项(避免lazy loading)。那么接下来就是开始学习如何使用TF完成更加复杂的任务。可以从【1】找到很多example,根据需求进行对照修改。
linear regression
TF的程序执行,无非就是graph assemble(描述模型,描述网络结构)和session execution(喂数据,执行真正的操作)。
graph assemble
- 读取数据
- 为输入数据和标签创建placeholers(考一下,placeholders有什么用)
- 创建weight和bias变量,使用Variable。
- 构造模型去预测。
- 确定loss function。
- 构造优化器,输入learning rate,优化目标。
使用TensorBoard查看graph。
writer = tf.summary.FileWriter('./my_graph/03/linear_reg',sess.graph)
tensorboard --logdir='./my_graph'
训练模型
TF如何知道哪些变量是需要进行更新的呢?
optimizer = tf.train.GradientDescentOptimizer(learning_rate=0.01).minimize(loss)
_, l = sess.run([optimizer, loss], feed_dict={X:x, Y:y})

# session进行数据更新的时候就会把与loss相关的所有trainable variable进行更新
那么如何设置trainable variable呢?
tf.Variable(initial_value=None,trainable=True,collections=None,validate_shape=True,caching_device=None,name=None,variable_def=None,dtype=None,expected_shae=None,import_scope=None)example
为了判断一个地区的偷盗和火灾之间的关系,使用linear regression,Y = X*w + b,X是火灾,Y是偷盗事件。数据集在【3】中。
import numpy as np
import tensorflow as tf
import xlrd
import matplotlib.pyplot as plt

DATA_FILE = "slr05.xls"

# step 1: read in data from the .xls file
book = xlrd.open_workbook(DATA_FILE, encoding_override="utf-8")
sheet = book.sheet_by_index(0)
data = np.asarray([sheet.row_values(i) for i in range(1,sheet.nrows)])
n_samples = sheet.nrows - 1

# print(data)
# print(n_samples)

# step 2: create placeholders for input X(number of fire)
# and label Y(number of theft).
X = tf.placeholder(tf.float32, name="X")
Y = tf.placeholder(tf.float32, name="Y")

# step 3: create weight and bias, initialize to 0
w = tf.Variable(0.0, name="weights")
b = tf.Variable(0.0, name="bias")

# step 4: construct model to predict Y.
Y_predicted = X*w + b

# step 5: use SSE as loss function
loss = tf.square(Y - Y_predicted, name="loss")

# step 6: using gradient descent with learning rate 0.01 to minimize loss
optimizer = tf.train.GradientDescentOptimizer(learning_rate=0.001).minimize(loss)

with tf.Session() as sess:
    # step 7: initialize variable
    sess.run(tf.global_variables_initializer())

    # step 8: train the model
    for i in range(100): # run 100 epochs
        for x, y in data:
            _, loss_v = sess.run([optimizer,loss], feed_dict={X:x, Y:y})
            # print(loss_v)
    w_value, b_value = sess.run([w,b])

print(w_value,b_value)

# step 9: predict with model.
Y_pre = data[:,0]*w_value+b_value
# print(Y_pre)

x_p = np.linspace(0, 40, 1000)
y_p = x_p*w_value + b_value

plt.scatter(data[:,0], data[:,1],label="ground truth")
plt.plot(x_p, y_p,'r',label="prediction")
plt.legend(loc='upper left')
plt.show()
安装xlrd是:
pip install xlrd
安装matplotlib是:
pip install matplotlib
可能遇到的问题比如在virtual environment里面matplot的runtime 问题【4】。
对于matplot的用法,这篇博客不错【5】
当遇到拟合效果很差的时候,可以改变模型,改变loss function,或者是optimizer【6】。

有些时候,我们会生成dummy data来测试模型,比如:
x_input = np.linspace(-1,1,100)
y_input = X_input*3 + np.random.randn(X_input.shape[0])*0.5
在如下代码里面的解释:
optimizer = tf.train.GradientDescentOptimizer(learning_rate = 0.01 ).minimize(loss)
sess.run ( optimizer,feed_dict = { X :  x ,  Y : y })
optimizer是一种operation,居然会在fetch list里面,这是为何?另外TF如何知道哪些变量是需要更新的呢?
在TF设计里面,可以把operation放在fetch list里面,然后这些operation相关的图就会被执行。
那么权值如何被自动更新呢?怎么知道哪些需要更新呢?这里面的话,在TF里面,默认属性trainable=True,如果你不想更新,那么就设置为:
global_step = tf.Variable(0, trainable=False, dtype=tf.int32)

learning_rate = 0.01 * 0.99 ** tf.cast(global_step, tf.float32)

increment_step = global_step.assign_add(1)

optimizer = tf.GradientDescentOptimizer(learning_rate)
# learning rate can be a tensor
tf.Variable的完整定义如下:
tf.Variable ( initial_value = None,trainable = True,collections = None,validate_shape = True,caching_device = None,name=None, variable_def = None,dtype = None,expected_shape = None, import_scope = None)your own optimizer
如何使用自己的optimizer呢?举个例子:
# create an optimizer.
optimizer  =   GradientDescentOptimizer ( learning_rate = 0.1) # compute the gradients for a list of variables.

grads_and_vars  =  opt.compute_gradients ( loss ,   < list of variables >)

# grads_and_vars is a list of tuples (gradient, variable). Do whatever you # need to the 'gradient' part, for example, subtract each of them by 1.
subtracted_grads_and_vars = [( gv [ 0 ]   -   1.0 ,  gv [ 1 ])   for  gv  in  grads_and_vars]

# ask the optimizer to apply the subtracted gradients.
optimizer.apply_gradients(subtracted_grads_and_vars)
计算梯度的时候可以自动计算,但是也有更low-level的API:
tf.gradients ( ys , xs , grad_ys = None , name = 'gradients' , colocate_gradients_with_ops = False , gate_gradients = False , aggregation_method = None )logistic regression
这里是举例识别数字来说明如何进行Logistic regression的做法:
输入的是图片 28x28(784);输出就是标签(0~9)
模型采用logistic regression: logits = X*w + b
Y_predicted = softmax(logits)
loss是cross entropy。
实现的步骤和上诉的步骤一样,先构造graph,再训练模型。
TF Learn的库里可以直接load这个数据集,不用自己下载了。MNIST甚至已经变成了TF的一个datasets object。MNIST.train,MNIST.test, MNIST.validation。
这里的流程和之前的基本上是一样的,所以改成batch learning的方法。
同时placeholder需要改成一样多的维度:
X = tf.placeholder ( tf . float32 ,   [ batch_size ,   784 ],  name = "image" )
Y = tf.placeholder ( tf . float32 ,   [ batch_size ,   10 ],  name = "label")
feed数据的时候可以简化成:
X_batch, Y_batch = mnist.test.next_batch( batch_size)
sess.run( train_op ,  feed_dict ={ X :  X_batch ,  Y : Y_batch })
全部的代码如下:
import time
import numpy as np
import tensorflow as tf
from tensorflow.examples.tutorials.mnist import input_data

# S1: read data
# using TF lear's built in function to load MNIST data to the folder
# data/mnist
MNIST = input_data.read_data_sets("data/mnist", one_hot=True)

# S2: Define parameters for the model.
learning_rate = 0.01
batch_size = 128
n_epochs = 25

# S3: create placeholders for feature and labels.
# each is 1x784 tensor
X = tf.placeholder(tf.float32,[batch_size, 784])
Y = tf.placeholder(tf.float32,[batch_size, 10])

# S4: create weights and bias
# w, b are variables and set to 0.
w = tf.Variable(tf.random_normal(shape=[784, 10], stddev=0.01),name="weights")
b = tf.Variable(tf.zeros([1, 10]),name="bias")

# S5: calculate Y from X, w, b
logits = tf.matmul(X,w) + b

# S6: define loss.
entropy = tf.nn.softmax_cross_entropy_with_logits(logits=logits,labels=Y)
loss = tf.reduce_mean(entropy)

# S7: define optimizer
optimizer = tf.train.GradientDescentOptimizer(learning_rate=learning_rate).minimize(loss)

init = tf.global_variables_initializer()

with tf.Session() as sess:
    sess.run(init)
    n_batches = int(MNIST.train.num_examples/batch_size)
    for i in range(n_batches):
        for _ in range(n_batches):
            X_batch,Y_batch = MNIST.train.next_batch(batch_size)
            _, loss_ = sess.run([optimizer,loss],feed_dict={X:X_batch,Y:Y_batch})
            # print(loss_)
sess.close()

print("Finish training model")

# S8: test model
# n_batches = int(MNIST.test.num_examples/batch_size)
# total_correct_preds = 0
# for i in range(n_batches):
#   X_batch, Y_batch = MNIST.test.next_batch(batch_size)
#   _, loss_batch,logits_batch = #sess.run([optimizer,loss,logits],feed_dict={X:X_batch, Y:Y_batch})
#   preds = tf.nn.softmax(logits_batch)
#   correct_preds = tf.equal(tf.argmax(preds,1),  tf.argmax(Y_batch,1))
#   accuracy = tf.reduce_sum(tf.cast(correct_preds, tf.float32))
#   total_correct_preds += sess.run(accuracy)
# sess.close()
# print(total_correct_preds)
# print(MNIST.test.num_examples)
# print(total_correct_preds / MNIST.test.num_examples)
# print("Accuracy {0}".format(total_correct_preds / #MNIST.test.num_examples))
implementation
留一个小作业,看【7】,实现一些TF的小操作,锻炼一些,还附上了答案。
loss function
Huber Loss
转载请注明出处: http://blog.csdn.net/c602273091/article/details/78917929
Useful Links:
【1】ref slide: http://web.stanford.edu/class/cs20si/lectures/slides_03.pdf
【2】TF Python API: https://www.tensorflow.org/api_docs/python/
【3】Fire & Theft dataset: http://college.cengage.com/mathematics/brase/understandable_statistics/7e/students/datasets/slr/frames/slr05.html
【4】matplot: https://stackoverflow.com/questions/29433824/unable-to-import-matplotlib-pyplot-as-plt-in-virtualenv
【5】matplot的用法: http://python.jobbole.com/85106/
【6】optimizer: https://www.tensorflow.org/api_guides/python/train
【7】TF operation: https://github.com/chiphuyen/stanford-tensorflow-tutorials/tree/master/assignments/exercises


