机器学习与人脸识别8:opencv3 Eigenfaces, Fisherfaces,LBP 人脸识别C++代码实现
OpenCV中有一个FaceRecognizer 类用于人脸识别;
当前实现的算法有
- Eigenfaces (see createEigenFaceRecognizer)
- Fisherfaces (see createFisherFaceRecognizer)
- Local Binary Patterns Histograms (see createLBPHFaceRecognizer)
Eigenfaces:
准备数据
准备几张用于识别的图像,并将图片信息写入csv文件;先手动写入吧 ,稍后用Python写入;
我准备了4张人脸

csv文件中分号前是图片相对路径,分好后是标签;就是说同一个人标签要相同;对应上面src_2.jpg 和 src_5.jpg是同一个人
代码实现:
#include "opencv2/core.hpp"
#include "opencv2/face.hpp"
#include "opencv2/highgui.hpp"
#include "opencv2/imgproc.hpp"
#include
#include
#include
using namespace cv;
using namespace cv::face;
using namespace std;
static Mat norm_0_255(InputArray _src) {
Mat src = _src.getMat();
// Create and return normalized image:
Mat dst;
switch(src.channels()) {
case 1:
cv::normalize(_src, dst, 0, 255, NORM_MINMAX, CV_8UC1);
break;
case 3:
cv::normalize(_src, dst, 0, 255, NORM_MINMAX, CV_8UC3);
break;
default:
src.copyTo(dst);
break;
}
return dst;
}
static void read_csv(const string& filename, vector
std::ifstream file(filename.c_str(), ifstream::in);
if (!file) {
string error_message = "No valid input file was given, please check the given filename.";
CV_Error(Error::StsBadArg, error_message);
}
string line, path, classlabel;
while (getline(file, line)) {
stringstream liness(line);
getline(liness, path, separator);
getline(liness, classlabel);
if(!path.empty() && !classlabel.empty()) {
images.push_back(imread(path, 0));
labels.push_back(atoi(classlabel.c_str()));
}
}
}
int main(int argc, const char *argv[])
{
// 检查有效的命令行参数,打印用法
// 如果没有给出任何参数
if (argc < 2) {
cout << "usage: " << argv[0] << "
exit(1);
}
string output_folder = ".";
if (argc == 3) {
output_folder = string(argv[2]);
}
string fn_csv = string(argv[1]); // 获取CSV的路径.
vector
vector
try {
read_csv(fn_csv, images, labels);
} catch (cv::Exception& e) {
cerr << "Error opening file \"" << fn_csv << "\". Reason: " << e.msg << endl;
exit(1);
}
if(images.size() <= 1) {
string error_message = "This demo needs at least 2 images to work. Please add more images to your data set!";
CV_Error(Error::StsError, error_message);
}
// 获取第一张图片宽和高,后面都设置成相同参数
int height = images[0].rows;
Mat testSample = images[images.size() - 1];
int testLabel = labels[labels.size() - 1];
images.pop_back();
labels.pop_back();
// The following lines create an Eigenfaces model for
// face recognition and train it with the images and
// labels read from the given CSV file.
// This here is a full PCA, if you just want to keep
// 10 principal components (read Eigenfaces), then call
// the factory method like this:
//
// cv::createEigenFaceRecognizer(10);
//
// If you want to create a FaceRecognizer with a
// confidence threshold (e.g. 123.0), call it with:
//
// cv::createEigenFaceRecognizer(10, 123.0);
//
// If you want to use _all_ Eigenfaces and have a threshold,
// then call the method like this:
//
// cv::createEigenFaceRecognizer(0, 123.0);
//
Ptr
model->train(images, labels);
// The following line predicts the label of a given
// test image:
cv::imshow("test", testSample);
cv::waitKey();
int predictedLabel = model->predict(testSample);
//
// To get the confidence of a prediction call the model with:
//
// int predictedLabel = -1;
// double confidence = 0.0;
// model->predict(testSample, predictedLabel, confidence);
//
string result_message = format("Predicted class = %d / Actual class = %d.",
predictedLabel, testLabel);
cout << result_message << endl;
// Here is how to get the eigenvalues of this Eigenfaces model:
Mat eigenvalues = model->getEigenValues();
// And we can do the same to display the Eigenvectors (read Eigenfaces):
Mat W = model->getEigenVectors();
// Get the sample mean from the training data
Mat mean = model->getMean();
// Display or save:
if(argc == 2) {
imshow("mean", norm_0_255(mean.reshape(1, images[0].rows)));
} else {
imwrite(format("%s/mean.png", output_folder.c_str()), norm_0_255(mean.reshape(1, images[0].rows)));
}
// Display or save the Eigenfaces:
for (int i = 0; i < min(10, W.cols); i++) {
string msg = format("Eigenvalue #%d = %.5f", i, eigenvalues.at
cout << msg << endl;
// get eigenvector #i
Mat ev = W.col(i).clone();
// Reshape to original size & normalize to [0...255] for imshow.
Mat grayscale = norm_0_255(ev.reshape(1, height));
// Show the image & apply a Jet colormap for better sensing.
Mat cgrayscale;
applyColorMap(grayscale, cgrayscale, COLORMAP_JET);
// Display or save:
if(argc == 2) {
imshow(format("eigenface_%d", i), cgrayscale);
} else {
imwrite(format("%s/eigenface_%d.png", output_folder.c_str(), i), norm_0_255(cgrayscale));
}
}
// Display or save the image reconstruction at some predefined steps:
for(int num_components = min(W.cols, 10); num_components < min(W.cols, 300); num_components+=15) {
// slice the eigenvectors from the model
Mat evs = Mat(W, Range::all(), Range(0, num_components));
Mat projection = LDA::subspaceProject(evs, mean, images[0].reshape(1,1));
Mat reconstruction = LDA::subspaceReconstruct(evs, mean, projection);
// Normalize the result:
reconstruction = norm_0_255(reconstruction.reshape(1, images[0].rows));
// Display or save:
if(argc == 2) {
imshow(format("eigenface_reconstruction_%d", num_components), reconstruction);
} else {
imwrite(format("%s/eigenface_reconstruction_%d.png", output_folder.c_str(), num_components), reconstruction);
}
}
// Display if we are not writing to an output folder:
if(argc == 2) {
waitKey(0);
}
return 0;
}
创建输出文件夹,保存特征脸;
$mkdir output
运行结果:

预测结果是正确的;
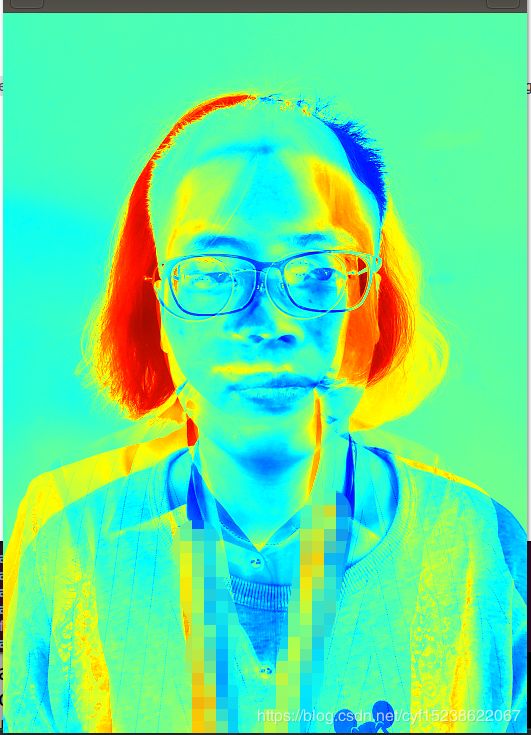
查看输出特征脸:
![]()
其中一张
Eigenfaces的原理
Eigenfaces就是特征脸的意思,是一种从主成分分析(Principal Component Analysis,PCA)中导出的人脸识别和描述技术。特征脸方法的主要思路就是将输入的人脸图像看作一个个矩阵,通过在人脸空间中一组正交向量,并选择最重要的正交向量,作为“主成分”来描述原来的人脸空间。为了更好地理解特征脸方法,需要先了解PCA的主要过程。
PCA主要过程
在很多应用中,需要对大量数据进行分析计算并寻找其内在的规律,但是数据量巨大造成了问题分析的复杂性,因此我们需要一些合理的方法来减少分析的数据和变量同时尽量不破坏数据之间的关联性。于是这就有了主成分分析方法,PCA作用:
数据降维。减少变量个数;确保变量独立;提供一个合理的框架解释。
去除噪声,发现数据背后的固有模式。
PCA的主要过程:
特征中心化:将每一维的数据(矩阵A)都减去该维的均值,使得变换后(矩阵B)每一维均值为0;
计算变换后矩阵B的协方差矩阵C;
计算协方差矩阵C的特征值和特征向量;
选取大的特征值对应的特征向量作为”主成分”,并构成新的数据集;
特征脸方法
特征脸方法就是将PCA方法应用到人脸识别中,将人脸图像看成是原始数据集,使用PCA方法对其进行处理和降维,得到“主成分”——即特征脸,然后每个人脸都可以用特征脸的组合进行表示。这种方法的核心思路是认为同一类事物必然存在相同特性(主成分),通过将同一目标(人脸图像)的特性寻在出来,就可以用来区分不同的事物了。人脸识别嘛,就是一个分类的问题,将不同的人脸区分开来。特征脸方法的过程(先计算特征脸,然后识别人脸):
将训练集中的N个人脸拉成一列(reshape(1,1)),然后组合在一起形成一个大矩阵A。若人脸图像大小为m * m,则矩阵A的维度是m * m * N;
将N个人脸在对应的维度求平均,得到一个“平均脸”;
将矩阵A中N个图像都减去“平均脸”,得到新矩阵B;
计算B的协方差矩阵;
计算协方差矩阵的特征值和特征向量(特征脸);
将训练集图像和测试集图像都投影到特征向量空间中,再使用聚类方法(最近邻或k近邻等)得到里测试集中的每个图像最近的图像,进行分类即可。
在opencv中void EigenFaceRecognizer::train();就是对训练集进行处理最终得到特征向量和阈值的过程,其中的阈值用于后面对测试图像的识别。int EigenFaceRecognizer:: predict(InputArray src) const;是对测试图像进行识别。
特征脸识别的局限性
要让系统准确识别需要保证人脸图像满足:
待识别图像中人脸尺寸接近特征脸中人脸的尺寸;
待识别人脸图像必须为正面人脸图像。
若不满足此条件,识别错误率很高。从PCA方法的过程可以看出,特征脸识别的方法是以每张人脸的一个维度(可以看出是矩阵的一列)为单位进行处理的,求得的特征向量(特征脸)中包含训练集每个纬度的绝大部分信息。但是若测试集中人脸尺寸不同,那么与特征脸中维度的也就没法对应起来。
Fisherfaces:
主成分分析(PCA)是特征脸方法的核心,它找到了最大化数据总方差的特征的线性组合。虽然这显然是表示数据的有效方式,但它不考虑任何类,因此在抛弃组件时可能会丢失大量的判别信息。想象一下这样一种情况:数据的方差是由外部源生成的,让它成为光源。由PCA识别的组件根本不一定包含任何歧视性信息,因此投影的样本被混合在一起并且分类变得不可能(例如,参见http://www.bytefish.de/wiki/pca_lda_with_gnu_octave)。
线性判别分析执行特定类别维数减少,由伟大的统计学家Sir RA Fisher发明。他在1936年的论文中成功地用它来分类花。在分类学问题中使用多种测量方法[53]。为了找到在类之间最佳分离的特征组合,线性判别分析最大化了类之间与类内散布的比率,而不是最大化整体分散。这个想法很简单:相同的类应紧密地聚集在一起,而不同的类在低维表示中尽可能远离彼此。这也被Belhumeur,Hespanha和Kriegman等他们在[11]中将判别分析应用于人脸识别。
代码实现:
#include "opencv2/core.hpp"
#include "opencv2/face.hpp"
#include "opencv2/highgui.hpp"
#include "opencv2/imgproc.hpp"
#include
#include
#include
using namespace cv;
using namespace cv::face;
using namespace std;
static Mat norm_0_255(InputArray _src)
{
Mat src = _src.getMat();
// Create and return normalized image:
Mat dst;
switch(src.channels()) {
case 1:
cv::normalize(_src, dst, 0, 255, NORM_MINMAX, CV_8UC1);
break;
case 3:
cv::normalize(_src, dst, 0, 255, NORM_MINMAX, CV_8UC3);
break;
default:
src.copyTo(dst);
break;
}
return dst;
}
static void read_csv(const string& filename, vector
vector
{
std::ifstream file(filename.c_str(), ifstream::in);
if (!file) {
string error_message = "No valid input file was given, please check the given filename.";
CV_Error(Error::StsBadArg, error_message);
}
string line, path, classlabel;
while (getline(file, line)) {
stringstream liness(line);
getline(liness, path, separator);
getline(liness, classlabel);
if(!path.empty() && !classlabel.empty()) {
images.push_back(imread(path, 0));
labels.push_back(atoi(classlabel.c_str()));
}
}
}
int main(int argc, const char *argv[])
{
if (argc < 2) {
cout << "usage: " << argv[0] << "
exit(1);
}
string output_folder = ".";
if (argc == 3) {
output_folder = string(argv[2]);
}
string fn_csv = string(argv[1]);
vector
vector
try {
read_csv(fn_csv, images, labels);
} catch (cv::Exception& e) {
cerr << "Error opening file \"" << fn_csv << "\". Reason: " << e.msg << endl;
exit(1);
}
if(images.size() <= 1) {
string error_message = "This demo needs at least 2 images to work. "
"Please add more images to your data set!";
CV_Error(Error::StsError, error_message);
}
int height = images[0].rows;
Mat testSample = images[images.size() - 1];
int testLabel = labels[labels.size() - 1];
images.pop_back();
labels.pop_back();
// The following lines create an Fisherfaces model for
// face recognition and train it with the images and
// labels read from the given CSV file.
// If you just want to keep 10 Fisherfaces, then call
// the factory method like this:
//
// cv::createFisherFaceRecognizer(10);
//
// However it is not useful to discard Fisherfaces! Please
// always try to use _all_ available Fisherfaces for
// classification.
//
// If you want to create a FaceRecognizer with a
// confidence threshold (e.g. 123.0) and use _all_
// Fisherfaces, then call it with:
//
// cv::createFisherFaceRecognizer(0, 123.0);
//
Ptr
model->train(images, labels);
// The following line predicts the label of a given
// test image:
cv::imshow("test", testSample);
cv::waitKey();
// int predictedLabel = model->predict(testSample);
//
// To get the confidence of a prediction call the model with:
//
int predictedLabel = -1;
double confidence = 0.0;
model->predict(testSample, predictedLabel, confidence);
string result_message = format("Predicted class = %d / Actual class = %d.",
predictedLabel, testLabel);
cout << result_message << "confidence=" << confidence << endl;
// Here is how to get the eigenvalues of this Eigenfaces model:
Mat eigenvalues = model->getEigenValues();
// And we can do the same to display the Eigenvectors (read Eigenfaces):
Mat W = model->getEigenVectors();
// Get the sample mean from the training data
Mat mean = model->getMean();
// Display or save:
if(argc == 2) {
imshow("mean", norm_0_255(mean.reshape(1, images[0].rows)));
} else {
imwrite(format("%s/mean.png", output_folder.c_str()), norm_0_255(mean.reshape(1, images[0].rows)));
}
// Display or save the first, at most 16 Fisherfaces:
for (int i = 0; i < min(16, W.cols); i++) {
string msg = format("Eigenvalue #%d = %.5f", i, eigenvalues.at
cout << msg << endl;
// get eigenvector #i
Mat ev = W.col(i).clone();
// Reshape to original size & normalize to [0...255] for imshow.
Mat grayscale = norm_0_255(ev.reshape(1, height));
// Show the image & apply a Bone colormap for better sensing.
Mat cgrayscale;
applyColorMap(grayscale, cgrayscale, COLORMAP_BONE);
// Display or save:
if(argc == 2) {
imshow(format("fisherface_%d", i), cgrayscale);
} else {
imwrite(format("%s/fisherface_%d.png", output_folder.c_str(), i), norm_0_255(cgrayscale));
}
}
// Display or save the image reconstruction at some predefined steps:
for(int num_component = 0; num_component < min(16, W.cols); num_component++) {
// Slice the Fisherface from the model:
Mat ev = W.col(num_component);
Mat projection = LDA::subspaceProject(ev, mean, images[0].reshape(1,1));
Mat reconstruction = LDA::subspaceReconstruct(ev, mean, projection);
// Normalize the result:
reconstruction = norm_0_255(reconstruction.reshape(1, images[0].rows));
// Display or save:
if(argc == 2) {
imshow(format("fisherface_reconstruction_%d", num_component), reconstruction);
} else {
imwrite(format("%s/fisherface_reconstruction_%d.png", output_folder.c_str(), num_component), reconstruction);
}
}
// Display if we are not writing to an output folder:
if(argc == 2) {
waitKey(0);
}
return 0;
}
创建输出文件夹:
$mkdir fisher_output
运行命令$ ./face_cog train.csv fisher_out/

上面表示识别正确;
输出图片示例

Fisher线性判别分析(linear discriminant analysis,LDA)
线性判别分析是由Fisher提出的线性判别方法,可以用来处理两类的线性判别问题。两类的线性判别问题可以看做所有的样本投影到一个方向(或者说是一个维度空间中),然后再这个空间中确定一个分类的阈值。过这个阈值点且与投影方向垂直的超平面就是分类面。判别思路是选择投影方向,使得投影后两类相隔尽可能远,类内又尽可能聚集(类间方差最大,类内方差最小)。
它的过程分为:
确定最优的投影方向:
在这个方向上确定分类阈值;
Fisherfaces方法
Fisherfaces方法结合了PCA和LDA的优点,其具体过程如下:
PCA降维:对原始样本进行PCA处理,获取PCA处理之后的新样本;
LDA特征提取:对降维后的样本使用Fisher线性判别方法,确定一个最优的投影方向,构造一个一维的特征空间(这就被称为Fisherfaces),将多维的人脸图像投影到Fisherfaces特征空间,利用类内样本数据形成一组特征向量,这组特征向量就代表了人脸的特征。
在opencv中void FisherFaceRecognizer::train();就是对训练集进行处理最终得到特征向量和阈值的过程,其中的阈值用于后面对测试图像的识别。int FisherFaceRecognizer:: predict(InputArray src) const;是对测试图像进行识别。
Local Binary Patterns Histograms:
特征脸和Fisherfaces采用了一种全面的方法来识别人脸。您将数据视为高维图像空间中的某个向量。我们都知道高维度是坏的,因此识别出较低维度的子空间,其中(可能)保留了有用的信息。特征脸方法最大化总散射,如果方差由外部源生成,则可能导致问题,因为对所有类具有最大方差的组件不一定对分类有用(参见http://www.bytefish.de) /维基/ pca_lda_with_gnu_octave)。因此,为了保留一些判别信息,我们应用了线性判别分析并如Fisherfaces方法中所述进行了优化。Fisherfaces方法效果很好......至少对于我们在模型中假设的约束情景。
现在现实生活并不完美。您无法保证图像中的完美光线设置或人物的10个不同图像。那么如果每个人只有一张图片呢?我们对子空间的协方差估计可能非常错误,识别也是如此。还记得Eigenfaces方法在AT&T Facedatabase上的识别率是96%吗?我们实际需要多少图像才能获得如此有用的估算值?以下是AT&T Facedatabase上的Eigenfaces和Fisherfaces方法的Rank-1识别率,这是一个相当简单的图像数据库:

因此,为了获得良好的识别率,每个人需要至少8(+ - 1)个图像,而Fisherfaces方法在这里并没有真正帮助。上述实验是使用facerec框架执行的10倍交叉验证结果:https://github.com/bytefish/facerec。
因此,一些研究集中于从图像中提取局部特征。我们的想法是不将整个图像看作高维向量,而只描述对象的局部特征。以这种方式提取的功能将隐式具有低维度。一个好主意!但是你很快就会观察到我们给出的图像表示不仅会受到光照变化的影响。想想图像中的缩放,平移或旋转等内容 - 您的本地描述必须至少对这些内容有点强大。就像SIFT一样,Local Binary Patterns方法的根源在于2D纹理分析。局部二值模式的基本思想是通过比较每个像素与其邻域来概括图像中的局部结构。以像素为中心,对邻居进行阈值处理。如果中心像素的强度大于其邻居的强度,则用1表示,如果不是则表示0。你最终会得到每个像素的二进制数,就像
- 因此,对于8个周围像素,您最终会得到2 ^ ^ 8种可能的组合,称为局部二进制模式或有时称为LBP代码。文献中描述的第一个LBP算子实际上使用了一个固定的3 x 3邻域,如下所示:
L代码实现:
#include "opencv2/core.hpp"
#include "opencv2/face.hpp"
#include "opencv2/highgui.hpp"
#include
#include
#include
using namespace cv;
using namespace cv::face;
using namespace std;
static void read_csv(const string& filename, vector
vector
{
std::ifstream file(filename.c_str(), ifstream::in);
if (!file) {
string error_message = "No valid input file was given, please check the given filename.";
CV_Error(Error::StsBadArg, error_message);
}
string line, path, classlabel;
while (getline(file, line)) {
stringstream liness(line);
getline(liness, path, separator);
getline(liness, classlabel);
if(!path.empty() && !classlabel.empty()) {
images.push_back(imread(path, 0));
labels.push_back(atoi(classlabel.c_str()));
}
}
}
int main(int argc, const char *argv[])
{
if (argc != 2) {
cout << "usage: " << argv[0] << "
exit(1);
}
string fn_csv = string(argv[1]);
vector
vector
try {
read_csv(fn_csv, images, labels);
} catch (cv::Exception& e) {
cerr << "Error opening file \"" << fn_csv << "\". Reason: " << e.msg << endl;
exit(1);
}
// Quit if there are not enough images for this demo.
if(images.size() <= 1) {
string error_message = "This demo needs at least 2 images to work. "
"Please add more images to your data set!";
CV_Error(Error::StsError, error_message);
}
Mat testSample = images[images.size() - 1];
int testLabel = labels[labels.size() - 1];
images.pop_back();
labels.pop_back();
// The following lines create an LBPH model for
// face recognition and train it with the images and
// labels read from the given CSV file.
//
// The LBPHFaceRecognizer uses Extended Local Binary Patterns
// (it's probably configurable with other operators at a later
// point), and has the following default values
//
// radius = 1
// neighbors = 8
// grid_x = 8
// grid_y = 8
//
// So if you want a LBPH FaceRecognizer using a radius of
// 2 and 16 neighbors, call the factory method with:
//
// cv::createLBPHFaceRecognizer(2, 16);
//
// And if you want a threshold (e.g. 123.0) call it with its default values:
//
// cv::createLBPHFaceRecognizer(1,8,8,8,123.0)
//
Ptr
model->train(images, labels);
// The following line predicts the label of a given
// test image:
cv::imshow("test", testSample);
cv::waitKey();
int predictedLabel = model->predict(testSample);
//
// To get the confidence of a prediction call the model with:
//
// int predictedLabel = -1;
// double confidence = 0.0;
// model->predict(testSample, predictedLabel, confidence);
//
string result_message = format("Predicted class = %d / Actual class = %d.",
predictedLabel, testLabel);
cout << result_message << endl;
// First we'll use it to set the threshold of the LBPHFaceRecognizer
// to 0.0 without retraining the model. This can be useful if
// you are evaluating the model:
//
model->setThreshold(0.0);
// Now the threshold of this model is set to 0.0. A prediction
// now returns -1, as it's impossible to have a distance below
// it
predictedLabel = model->predict(testSample);
cout << "Predicted class = " << predictedLabel << endl;
// Show some informations about the model, as there's no cool
// Model data to display as in Eigenfaces/Fisherfaces.
// Due to efficiency reasons the LBP images are not stored
// within the model:
cout << "Model Information:" << endl;
string model_info = format("\tLBPH(radius=%i, neighbors=%i, grid_x=%i, grid_y=%i, threshold=%.2f)",
model->getRadius(),
model->getNeighbors(),
model->getGridX(),
model->getGridY(),
model->getThreshold());
cout << model_info << endl;
// We could get the histograms for example:
vector
// But should I really visualize it? Probably the length is interesting:
cout << "Size of the histograms: " << histograms[0].total() << endl;
return 0;
}
运行结果:

识别有点问题;下次再分析原因。