Centos 7.6 Install elk
Nginx安装
https://blog.csdn.net/hanzheng260561728/article/details/90209721Nginx配置实例
https://blog.csdn.net/hanzheng260561728/article/details/80583051Centos 7.6系统下载
http://mirrors.cqu.edu.cn/CentOS/7.6.1810/isos/x86_64/CentOS-7-x86_64-DVD-1810.iso添加官方的源
vi /etc/yum.repos.d/elk6.repo
[elastic-6.x]
name=Elastic repository for 6.x packages
baseurl=https://artifacts.elastic.co/packages/6.x/yum
gpgcheck=1
gpgkey=https://artifacts.elastic.co/GPG-KEY-elasticsearch
enabled=1
autorefresh=1
type=rpm-md
安装基础组件(安装elk端相关组件)
yum install tree wget bash-c* epel* -y
yum install java-1.8.0-openjdk kibana logstash elasticsearch curl wget ntp -y
配置elasticsearch
vi /etc/elasticsearch/elasticsearch.yml
cluster.name: my-application #配置一个名称
#node.name: node-1 #elasticsearch节点的名称
network.host: 0.0.0.0 #允许访问
node.name: elk-server #本节点叫什么名字
path.data: /var/lib/elasticsearch
path.logs: /var/log/elasticsearch
启动
systemctl start elasticsearch.service
systemctl enable elasticsearch.service
检查
curl http://localhost:9200
{
"name" : "elk-server",
"cluster_name" : "my-application",
"cluster_uuid" : "7VVhrbtwSimCPjd3IVJH5w",
"version" : {
"number" : "6.7.2",
"build_flavor" : "default",
"build_type" : "rpm",
"build_hash" : "56c6e48",
"build_date" : "2019-04-29T09:05:50.290371Z",
"build_snapshot" : false,
"lucene_version" : "7.7.0",
"minimum_wire_compatibility_version" : "5.6.0",
"minimum_index_compatibility_version" : "5.0.0"
},
"tagline" : "You Know, for Search"
}
配置kibana
vi /etc/kibana/kibana.yml
server.host: "0.0.0.0" #仅本地可访问
elasticsearch.url: "http://0.0.0.0:9200"
启动
systemctl start kibana.service
systemctl enable kibana.service
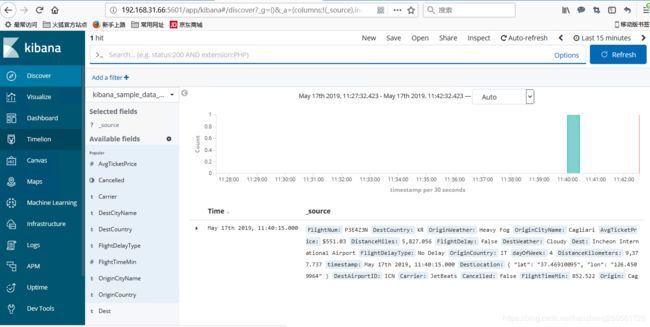
验证,浏览器访问
http://192.168.31.66:5601
配置logstash
vi /etc/logstash/logstash.yml
path.data: /var/lib/logstash #logstash数据存储路径,保持默认即可
path.config: /etc/logstash/conf.d/*.conf #logstash动态加载的配置文件,所有自定义的输入、输出和过滤配置都放置在这个目录中并以.conf结尾
path.logs: /var/log/logstash #logstash日志文件路径,保持默认即可
验证logstash是否能正常工作
/usr/share/logstash/bin/logstash -e 'input {stdin {}} output {stdout{}}' &
查看logstash的主配置文件
ll -alh /etc/logstash/
查看logstash可执行文件路径
ll -alh /usr/share/logstash/
logstash与filebeat联合调试
vi /etc/logstash/conf.d/00-input-5044.conf
input {
beats {
port => 5044
}
}
output {
stdout {
codec => rubydebug { }
}
}
logstash配置:运行logstash
/usr/share/logstash/bin/logstash -f 00-input-5044.conf &
vi /etc/logstash/conf.d/00-filter-wsfnk-nginx-access-5044.conf
filter {
if [type] == "wsfnk-nginx-access" {
###nginx的日志格式是设置为json的---所以需要先用json插件处理
json {
#log端filebeat发送的数据主体信息,标识为"message"
source => "message"
#处理完成后可以删除"message"字段,因为已经交给下面的其他步骤进一步处理了
remove_field => ["message"]
}
###----#下面是处理日志中upstreamtime的信息,由于mutate插件中split与convert存在默认的先后执行顺序
#所以要分开写,迫使先执行分割"split",在转换"convert"
mutate {
split => [ "upstreamtime", "," ]
}
mutate {
convert => [ "upstreamtime", "float" ]
}
###-----------分析经过CDN后,记录到的真实客户端IP归属信息-----###
geoip {
source => "http_x_forwarded_for"
#geoip,输出参数较多,用fields保留需要的字段, "latitude", "longitude"(location能代替前面两个)
fields => ["ip", "country_name", "region_name", "city_name", "timezone", "country_code2", "continent_code", "location"]
}
###----------------分析客户端信息----------------###
#使用logstash-filter-useragent插件来分析日志中nginx日志中的"http_user_agent"字段的客户端信息,系统类别,版本,浏览器等等
#先判断[user_agent] 是不为空的,才执行下面的过滤,[user_agent]这个字段不能改动,是插件内设置的,下面的source才是你nginx关于客户端的记录变量名
if [user_agent] != "-" {
useragent {
#为http_user_agent分析后的信息,打上(browser)浏览器的标记
target => "browser"
source => "http_user_agent"
#删除一些不太准确的字段,注意,下面是表示删除browser下面的"minor, build, os, os_minor"字段
#剩下的name: 浏览器的类别, major: 浏览器版本, os_name: 设备类别(什么系统), os_major: 系统版本
remove_field => ["[browser][minor]", "[browser][build]", "[browser][os]", "[browser][os_minor]"]
#这个客户端浏览器标识已经使用完了,可以删除,也可以不删除,我这里就删除了
remove_field => ["http_user_agent"]
}
}
mutate {
#删除filebeat自动添加的字段(有"tags", "beat"等,其中beat字段下又有"version","name","hostname"等字段,
#某些版本的filebeat还会附带"prospector"字段)
#"host"字段也是beat自动添加的,避免重复数据,将"[host]"删除,保留"[beat][hostname]"
remove_field => ["tags", "[beat][name]", "[host]"]
}
}
}
启动logstash
systemctl start logstash
systemctl enable logstash
================================================================================================
Nginx端安装配置
================================================================================================
log端配置nginx日志格式配置(Nginx配置文件添加)
http{
log_format json '{ "@timestamp": "$time_iso8601", '
#'"server_host":"$server_addr",'
'"server_addr":"192.168.31.66",'
'"http_host":"$http_host",'
'"nginx_version":"$nginx_version",'
'"cdn_ip":"$remote_addr",'
'"remote_user":"$remote_user",'
'"request":"$request",'
'"request_method":"$request_method",'
'"http_user_agent":"$http_user_agent",'
'"size":$body_bytes_sent,'
'"responsetime":$request_time,'
'"upstreamtime":"$upstream_response_time",'
'"upstreamhost":"$upstream_addr",'
'"url":"$uri",'
'"http_x_forwarded_for":"$http_x_forwarded_for",'
'"referer":"$http_referer",'
'"scheme":"$scheme",'
'"server_protocol":"$server_protocol",'
'"status":"$status"}';
access_log /usr/local/nginx/logs/access.log json;
配置yum源(选择版本号为5的,因为版本6的document_type字段好像不能使用了)
vi /etc/yum.repos.d/filebeat.repo
[elastic-5.x]
name=Elastic repository for 5.x packages
baseurl=https://artifacts.elastic.co/packages/5.x/yum
gpgcheck=1
gpgkey=https://artifacts.elastic.co/GPG-KEY-elasticsearch
enabled=1
autorefresh=1
type=rpm-md
安装filebeat
yum install filebeat -y
配置filebeat
vi /etc/filebeat/filebeat.yml
filebeat.prospectors:
- input_type: log
paths:
- /usr/local/nginx/logs/access.log
output.logstash:
# The Logstash hosts
hosts: ["192.168.31.66:5044"]
nginx端配置:编辑filebeat测试配置文件
vi /etc/filebeat/filebeat.yml
filebeat.inputs:
- type: log
enabled: true
paths:
- /web-boke/applog/nginx/access.log
tags: ["wsfnk-nginx-access"]
output.logstash:
hosts: ["192.168.1.10:5044"]
nginx端配置:运行filebeat
filebeat.sh -e -c /etc/filebeat/filebeat.yml -d "Publish" &
启动filebeat
service filebeat start
chkconfig filebeat on
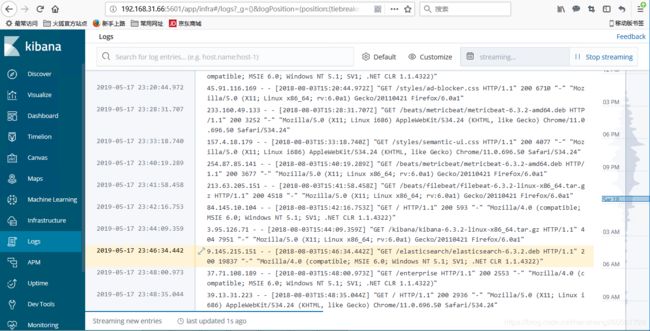
日志监控查看