OpenStack 最小化安装配置(六):Glance服务配置
上一集介绍了Keystone的服务配置,并且已经添加成功。上面创建的服务用户包括了Glance,Nova换言之就是需要上面配置的MySQL还有Keystone后面的服务才可以进行,我们需要MySQL的存储服务,还有Keystone 的认证服务。
接下来需要做的是对镜像服务器的配置,镜像服务器的IP地址为192.168.137.105,内部通信的IP地址为192.168.1.105首先是安装
安装脚本glance_install.sh
apt-get update
apt-get install -y glance glance-api glance-common glance-registry python-glance python-keystone python-mysqldb python-glanceclient
接着要做的是修改配置文件第一个/etc/glance/glance-api.conf
修改的地方有
1.找到[database]
#sqlite_db = /var/lib/glance/glance.sqlite
然后添加MySQL的连接字符串。跟keystone差不多。
connection = mysql://glanceUser:[email protected]/glance2.找到rabbit相关的句子有这样一个集群。
# Configuration options if sending notifications via rabbitmq (these are
# the defaults)
rabbit_host = 192.168.1.103
rabbit_port = 5672
rabbit_use_ssl = false
rabbit_userid = guest
rabbit_password = guest
rabbit_virtual_host = /
rabbit_notification_exchange = glance
rabbit_notification_topic = notifications
rabbit_durable_queues = False
3.找到[keystone_authtoken]下面有个集群要修改
auth_host = 192.168.1.104 #认证服务在的IP
auth_port = 35357  #服务认证的端口
auth_protocol = http #消息提交方式
admin_tenant_name = serviceTenant #服务用户所在的租户
admin_user = glance  #服务用户
admin_password = Glance_Pass #服务用户的密码4.找到[paste_deploy]
# Name of the paste configuration file that defines the available pipelines
config_file = /etc/glance/glance-api-paste.ini

# Partial name of a pipeline in your paste configuration file with the
# service name removed. For example, if your paste section name is
# [pipeline:glance-api-keystone], you would configure the flavor below
# as 'keystone'.
flavor=keystone然后保存,第一个配置文件修改完毕。
二
第二个配置文件修改方式与第一个配置文件一样。/etc/glance/glance-registry.conf
1.找到[database]添加上连接语句。
#sqlite_db = /var/lib/glance/glance.sqlite
然后添加MySQL的连接字符串。跟keystone差不多。
connection = mysql://glanceUser:[email protected]/glance
2.找到[keystone_authtoken]
修改相关信息。
auth_host = 192.168.1.104 #认证服务在的IP
auth_port = 35357  #服务认证的端口
auth_protocol = http #消息提交方式
admin_tenant_name = serviceTenant #服务用户所在的租户
admin_user = glance  #服务用户
admin_password = Glance_Pass #服务用户的密码3.找到[paste_deploy]
# Name of the paste configuration file that defines the available pipelines
config_file = /etc/glance/glance-api-paste.ini

# Partial name of a pipeline in your paste configuration file with the
# service name removed. For example, if your paste section name is
# [pipeline:glance-api-keystone], you would configure the flavor below
# as 'keystone'.
flavor=keystone完毕之后重启服务
root@glance:/home/lan# service glance-api restart && service glance-registry restart
glance-api stop/waiting
glance-api start/running, process 4039
glance-registry stop/waiting
glance-registry start/running, process 4049
ps -e | grep glance4039 ? 00:00:00 glance-api
4049 ? 00:00:00 glance-registry
4056 ? 00:00:00 glance-registry
4059 ? 00:00:00 glance-api
接着同步数据库
glance-manager db-sync如果上面没什么问题这一步应该是没什么问题了。
现在试一下功能。
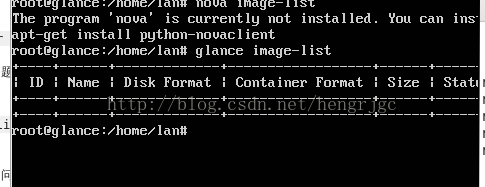
glance image-list #列出镜像注意:这里现在出问题了。
You must provide a username via either --os-username or env[OS_USERNAME]
很遗憾的我们有一些环境变量没有设置。包括keystone,nova重启后也会有环境变量丢失的问题。我们编写一个脚本。export_glance.sh
export OS_TENANT_NAME=serviceTenant
export OS_USERNAME=glance
export OS_PASSWORD=Glance_Pass
export OS_AUTH_URL=http://192.168.1.104:35357/v2.0/
有个空的表。这就是镜像表。镜像服务搭建完成。
