spring-boot应用之Kubernetes微服务实践
一、Kubernetes 安装
简介:
kubernetes 是什么?
首先,它是一个全新的基于容器技术的分部署架构领先方案。这个方法虽然还很新,但它是谷歌十几年依赖大规模应用容器技术的经验积累和升华的一个重要成果。确切的说Kubernetes是谷歌严格保密十几年的秘密武器--Brog的一个开源版本。
1.1 机器配置
| 节点名称 | hostname | 组件 | ip | 操作系统 |
| master | k8smaster | docker-engine,kubeadm,kubectl,kubelet,kubernetes-cni | 10.0.0.104 | Centos7 |
1.2 安装docker-engine
1.2.1 配置docker-engine yum源
新增文件/etc/yum.repos.d/mritd.repo文件内容如下:
[mritdrepo]
name=Mritd Repository
baseurl=https://yum.mritd.me/centos/7/x86_64
enabled=1
gpgcheck=0
gpgkey=https://cdn.mritd.me/keys/rpm.public.key
新增文件/etc/yum.repos.d/kubernetes.repo文件内容如下:
[kubernetes]
name=Kubernetes
baseurl=https://packages.cloud.google.com/yum/repos/kubernetes-el7-x86_64
enabled=1
gpgcheck=1
repo_gpgcheck=1
gpgkey=https://packages.cloud.google.com/yum/doc/yum-key.gpg
       https://packages.cloud.google.com/yum/doc/rpm-package-key.gpg
如果无法访问google可使用阿里云提供的镜像
[kubernetes]
name=Kubernetes
baseurl=https://mirrors.aliyun.com/kubernetes/yum/repos/kubernetes-el7-x86_64/
enabled=1
gpgcheck=0
1.2.2 安装docker
yum install -y docker-engine
1.2.3 安装kubernetes
yum install -y kubeadm kubectl kubelet kubernetes-cni1.2.4 比较重要的关闭selinux关闭防火墙
临时关闭
setenforce 0永久关闭,修改文件/etc/selinux/config的SELINUX=disabled
# SEL# This file controls the state of SELinux on the system.
INUX= can take one of these three values:
#     enforcing - SELinux security policy is enforced.
#     permissive - SELinux prints warnings instead of enforcing.
#     disabled - No SELinux policy is loaded.
SELINUX=disabled
# SELINUXTYPE= can take one of three two values:
#     targeted - Targeted processes are protected,
#     minimum - Modification of targeted policy. Only selected processes are protected.
#     mls - Multi Level Security protection.
SELINUXTYPE=targeted
关闭防火墙
systemctl disable firewalld
systemctl stop firewalld
1.2.5 加入环境变量
export KUBECONFIG=/etc/kubernetes/admin.conf
1.2.6 设置开机运行命令
在文件/etc/rc.d/rc.local 新增下面两个内容
echo 1 > /proc/sys/net/bridge/bridge-nf-call-iptables
echo 1 > /proc/sys/net/bridge/bridge-nf-call-ip6tables
给文件/etc/rc.d/rc.local加可执行权限
chmod +x /etc/rc.d/rc.local重启
reboot
1.2.7 启动docker
systemctl start docker
systemctl enable docker
查看docker info,查看Cgroup Driver的值确定是cgroupfs

修改/etc/systemd/system/kubelet.service.d/10-kubeadm.conf文件
KUBELET_CGROUP_ARGS=--cgroup-driver=cgroupfs
[Service]
Environment="KUBELET_KUBECONFIG_ARGS=--kubeconfig=/etc/kubernetes/kubelet.conf --require-kubeconfig=true"
Environment="KUBELET_SYSTEM_PODS_ARGS=--pod-manifest-path=/etc/kubernetes/manifests --allow-privileged=true"
Environment="KUBELET_NETWORK_ARGS=--network-plugin=cni --cni-conf-dir=/etc/cni/net.d --cni-bin-dir=/opt/cni/bin"
Environment="KUBELET_DNS_ARGS=--cluster-dns=10.96.0.10 --cluster-domain=cluster.local"
Environment="KUBELET_AUTHZ_ARGS=--authorization-mode=Webhook --client-ca-file=/etc/kubernetes/pki/ca.crt"
Environment="KUBELET_CGROUP_ARGS=--cgroup-driver=cgroupfs"
ExecStart=
ExecStart=/usr/bin/kubelet $KUBELET_KUBECONFIG_ARGS $KUBELET_SYSTEM_PODS_ARGS $KUBELET_NETWORK_ARGS $KUBELET_DNS_ARGS $KUBELET_AUTHZ_ARGS $KUBELET_CADVISOR_ARGS $KUBELET_CGROUP_ARGS $KUBELET_EXTRA_ARGS
启动kubelet开机启动
systemctl start kubelet
systemctl enable kubelet
1.2.8初始化kubernetes
kubeadm init --kubernetes-version=v1.7.0
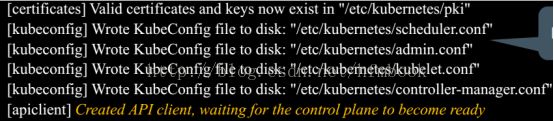
到这里会停住不动很久,这时候在下载相关镜像和网络有关,也可以提前下载好相关镜像
1.2.9 设置master为工作节点
kubectl taint nodes --all node-role.kubernetes.io/master-1.2.10 设置网络环境
kubectl apply -f https://git.io/weave-kube-1.61.2.11 查看k8s启动状态,当所有的Status都是RUNNING的时候说明启动成功了
kubectl get pods --all-namespaces

1.3 kubernetes常用命令
kubectl get pods --all-namespaces
kubectl get nodes # 获取集群所有节点
kubectl get all   # 获取所有的包括pod,deploy,secrets,deployments,replicationcontrollers 等
kubectl get pod  # 获取当前所有的pod
kubectl create -f ***.yaml # 创建资源
kubectl delete -f ***.yaml # 删除资源
kubectl --help 查看更多命令手册二、spring-boot微服务架构
2.1 创建auth-service spring boot工程
rest接口说明:
接口URL:/account/login
访问方式:POST
参数:
username String类型
password String类型
响应数据:Account对象
2.2 创建 eshop-web工程
spring boot + feign
feign 依赖包
9.5.1


			io.github.openfeign
			feign-core
			${openfeign.version}


			io.github.openfeign
			feign-slf4j
			${openfeign.version}


			io.github.openfeign
			feign-hystrix
			${openfeign.version}


			io.github.openfeign
			feign-jackson
			${openfeign.version}
feign 初始化:
@Configuration
public class FeignConfig {
	private static final Logger LOGGER = LoggerFactory.getLogger(CartService.class);

	@Value("${myapp.restserviceurl.account}")
	private String accountrestServiceUrl;

	@Bean
	public AccountService accountService() {
		return buildFeignClient(accountrestServiceUrl, AccountService.class, new AccountService() {

			@Override
			public Account login(String username, String password) {
				LOGGER.warn("Hystrix occured: login ");
				return null;
			}
		});
	}

	private  T buildFeignClient(String restPath, Class service, T fallback) {
		Request.Options options = new Request.Options(5000, 10000);
		T result = HystrixFeign.builder().encoder(new JacksonEncoder()).decoder(new JacksonDecoder()).options(options)
				.target(service, restPath, fallback);
		return result;
	}
}
同时创建接口:
public interface AccountService {

	@Headers({ "Content-Type: application/json" })
	@RequestLine("POST /account/login?username={username}&password={password}")
	Account login(@Param("username") String username, @Param("password") String password);
}
当然这里每个方法,每个类都需要创建一个bean, 如果想简单点可以通过动态代理和spring动态创建bean的方式,后期给出完整实例
动态代理实例:http://hpgary.iteye.com/blog/2386621
Spring动态创建Bean实例:http://hpgary.iteye.com/blog/2367113
Spring boot + feign 微服务实例下载: https://github.com/leader-us/Kubernetes_eShop
三、Spring-boot 分布式Session
spring boot 封装了很多功能,session也不例外,所以有了spring boot分布式session就变得很简单了
1、引入依赖包:
org.springframework.session
spring-session
1.3.0.RELEASE


org.springframework.boot
spring-boot-starter-redis
2、Linux安装redis
http://blog.csdn.net/hfmbook/article/details/70209135
3、docker redis(和2小点选一种方式)
docker run -d -p 6379:6379 -e REDIS_PASS="secret" tutum/redis
4、application.properties 文件中配置:
spring.redis.host=localhost(修改为你虚机的IP)
spring.redis.password=secret
spring.redis.port=6379
5、@EnableRedisHttpSession注解启动redis session , maxInactiveIntervalInSeconds 是session 有效时间,可以自己定长一点

到这里启动应用,分布式session就完成了,
四、eshop建模
文件目录结构如下
.
├── auth-service
│   ├── application.yml
│   ├── Dockerfile
│   ├── eshop-auth.yaml
│   ├── eshop_k8s_auth_service.jar
│   └── start.sh
├── build-images.sh #
├── cart-service
│   ├── application.yml
│   ├── Dockerfile
│   ├── eshop-cart.yaml
│   ├── eshop_k8s_cart-service.jar
│   └── start.sh
├── clean-all.sh
├── configmap
│   ├── auth
│   │   ├── application-auth.yml
│   │   ├── Dockerfile
│   │   ├── eshop-auth-svc-run.sh
│   │   └── eshop-auth.yaml
│   ├── cart
│   │   ├── application-cart.yml
│   │   ├── Dockerfile
│   │   ├── eshop-cart-svc-run.sh
│   │   └── eshop-cart.yaml
│   ├── eshop-build-images.sh
│   ├── eshop-k8s-4-readme.txt
│   ├── eshop-k8s-start.sh
│   ├── eshop-k8s-stop.sh
│   ├── eshop-mysql.yaml
│   ├── eshop-redis.yaml
│   ├── password.txt
│   ├── product
│   │   ├── application-product.yml
│   │   ├── Dockerfile
│   │   ├── eshop-product-svc-run.sh
│   │   └── eshop-product.yaml
│   ├── README.MD
│   └── web
│       ├── application-web.yml
│       ├── Dockerfile
│       ├── eshop-web-svc-run.sh
│       └── eshop-web.yaml
├── eshop-web
│   ├── application.yml
│   ├── Dockerfile
│   ├── eshop_k8s_eshop_web.jar
│   ├── eshop-web.yaml
│   └── start.sh
├── k8s-configmap.yaml
├── mysql-svc.yaml
├── password.txt
├── product-service
│   ├── application.yml
│   ├── Dockerfile
│   ├── eshop_k8s_product-service.jar
│   ├── eshop-product.yaml
│   └── start.sh
├── README.md
├── redis-svc.yaml
├── start-all.sh
├── start-auth.sh
├── start-cart.sh
├── start-eshop-web.sh
├── start-mysql.sh
├── start-product.sh
└── start-redis.sh
4.1 快速构建过程
4.1.1、工程地址:
https://github.com/leader-us/Kubernetes_eShop/tree/master/kubernetes
4.1.2 构建镜像依赖软件环境
JDK1.8 ,maven3.5 ,Linux Centos
4.1.3 构建docker镜像
sh build-images.sh看到如下提示说明构建成功了

查看docker镜像是否构建成功
docker images
看到下面提示,说明镜像构建成功了

4.1.4 启动所有服务
sh start-all.sh查看构建状态
kubectl get all
看到如下提示,说明构建成功
4.2 过程分解
4.2.1 构建Mysql
a、构建mysql root密码保护
创建文件password.txt文件中智能包括密码,不能有回车键,使用命名文件文件, 例如密码是123456
echo "123456" > password.txt
b、构建secret密码保护
kubectl create secret generic mysql-pass --from-file=password.txt
c、创建 mysql-svc.yaml文件、
需要设置环境变量MYSQL_DATABASE(数据库名称),MYSQL_USER(数据库用户),MYSQL_PASSWORD(密码),MYSQL_ROOT_PASSWORD(root密码)这些环境变量
apiVersion: v1
kind: PersistentVolume
metadata:
  name: local-pv-4
  labels:
    type: local
spec:
  capacity:
    storage: 20Gi
  accessModes:
    - ReadWriteOnce
  hostPath:
    path: /data/docker/pv-4
---
apiVersion: v1
kind: Service
metadata:
  name: mysql-svc
  labels:
    app: mysql-svc
spec:
  ports:
    - port: 3306
  selector:
    app: mysql-deploy
    tier: mysql
  clusterIP: None
---
apiVersion: v1
kind: PersistentVolumeClaim
metadata:
  name: mysql-pv-claim
  labels:
    app: mysql
spec:
  accessModes:
    - ReadWriteOnce
  resources:
    requests:
      storage: 20Gi
---
apiVersion: extensions/v1beta1
kind: Deployment
metadata:
  name: mysql-deploy
  labels:
    app: mysql-deploy
spec:
  strategy:
    type: Recreate
  template:
    metadata:
      labels:
        app: mysql-deploy
        tier: mysql
    spec:
      containers:
      - image: mysql:5.7
        name: mysql
        env:
        - name: MYSQL_DATABASE
          value: HPE_APP
        - name: MYSQL_USER
          value: "lession"
        - name: MYSQL_PASSWORD
          value: "mypass"
        - name: MYSQL_ROOT_PASSWORD
          valueFrom:
            secretKeyRef:
              name: mysql-pass
              key: password.txt
        ports:
        - containerPort: 3306
          name: mysql
        volumeMounts:
        - name: mysql-persistent-storage
          mountPath: /var/lib/mysql
      volumes:
      - name: mysql-persistent-storage
        persistentVolumeClaim:
          claimName: mysql-pv-claim
创建mysql-service
kubectl create -f mysql-svc.yaml
4.2.2 构建configmap统一配置中心
kubectl create configmap eshop-configmap --from-file=eshop-auth-conf=auth-service/application.yml --from-file=eshop-web-conf=eshop-web/application.yml --from-file=eshop-cart-conf=cart-service/application.yml --from-file=eshop-product-conf=product-service/application.yml查看构建状态
kubectl get configmap
查看配置内容
kubectl describe configmap eshop-configmap
内容太多,没有全部截图出来

4.2.4 构建用户中心
创建文件auth-service/eshop-auth.yaml
apiVersion: v1
kind: Service
metadata:
  name: eshop-auth-svc
  labels:
    app: eshop-auth-svc
spec:
  ports:
    - port: 8034
  selector:
    app: eshop-auth-deploy
    tier: frontend
  clusterIP: None
---
apiVersion: extensions/v1beta1
kind: Deployment
metadata:
  name: eshop-auth-deploy
  labels:
    app: eshop-auth-deploy
spec:
  strategy:
    type: Recreate
  template:
    metadata:
      labels:
        app: eshop-auth-deploy
        tier: frontend
    spec:
      containers:
      - image: eshop-auth-image:v1
        name: eshop-auth
        volumeMounts:
        - name: config-volume
          mountPath: /opt/app/eshop_service/config  #挂载路径
        ports:
        - containerPort: 8034
      volumes: # 使用configmap配置中心挂载配置
        - name: config-volume
          configMap:
            name: eshop-configmap
            items:
            - key: eshop-auth-conf
              path: application.yml