最详细的zabbix4.0在centos7上配置主机以及windows和centos7环境下zabbix agent配置
本篇文章是经过在服务器上实践无误后,在虚拟机上重新配置的干净系统环境(centos7,windows)一步步截图来的,如果按照步骤来是不会报错的,如果出错,请检查自己的网络配置以及防火墙,杀毒软件等(检查网络配置常用命令:ping;telnet)
1.安装zabbix 监控主机
配置环境:虚拟机上安装的centos7
zabbix官网下载地址
https://www.zabbix.com/cn/download
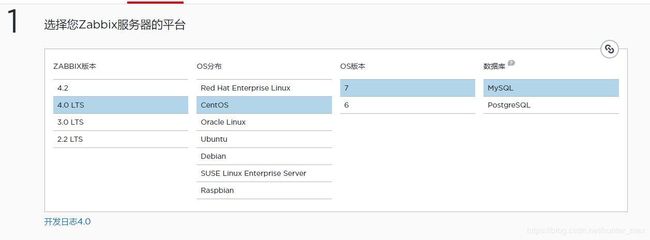
本次安装的版本是4.0版本,以下是安装步骤:
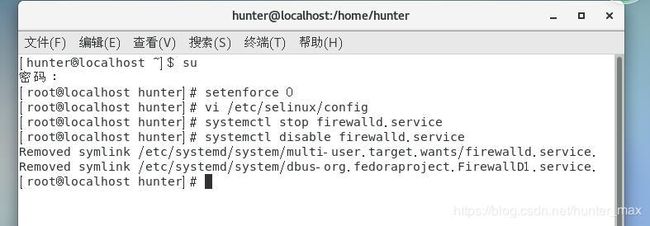
一.关闭selinux和防火墙
检测selinux是否关闭
[hunter@localhost ~]$ getenforce
Disabled
临时关闭
[root@localhost hunter]# setenforce 0
永久关闭
[root@localhost hunter]# vi /etc/selinux/config
将SELINUX=enforcing改为SELINUX=disabled
设置后需要重启才能生效
查看默认防火墙状态
[root@localhost hunter]# firewall-cmd --state
running #关闭后显示not running,开启后显示running
停止firewall
[root@localhost hunter]# systemctl stop firewalld.service
禁止firewall开机启动
[root@localhost hunter]# systemctl disable firewalld.service
Removed symlink /etc/systemd/system/multi-user.target.wants/firewalld.service.
Removed symlink /etc/systemd/system/dbus-org.fedoraproject.FirewallD1.service.
二.Zabbix4.0程序安装
配置zabbix的yum源
yum -y install zabbix-server-mysql zabbix-web-mysql zabbix-agent
安装zabbix程序包,安装mysql、zabbxi-agent
rpm -Uvh https://repo.zabbix.com/zabbix/4.0/rhel/7/x86_64/zabbix-release-4.0-1.el7.noarch.rpm
(此处可能会有下载失败,多次尝试即可)
安装成功
启动mariadb并设置开机启动,创建数据库实例,授权
[root@localhost hunter]# systemctl start mariadb #启动mariadb
[root@localhost hunter]# systemctl enable mariadb #设置开机启动
[root@localhost hunter]# mysql #登入数据库
MariaDB [(none)]> create database zabbix character set utf8 collate utf8_bin; #创建数据库实例
Query OK, 1 row affected (0.00 sec)
MariaDB [(none)]> grant all privileges on zabbix.* to zabbix@'%' identified by 'zabbix'; #授权所有主机访问数据库实例zabbix,用户名/密码:zabbix/zabbix
Query OK, 0 rows affected (0.00 sec)
MariaDB [(none)]> grant all privileges on zabbix.* to zabbix@localhost identified by 'zabbix'; #授权localhost主机名访问数据库实例zabbix,用户名/密码:zabbix/zabbix
Query OK, 0 rows affected (0.00 sec)
MariaDB [(none)]> grant all privileges on zabbix.* to [email protected] identified by 'zabbix'; #授权localhost.localdomain主机访问数据库实例zabbix,用户名/密码:zabbix/zabbix
Query OK, 0 rows affected (0.00 sec)
导入初始模式和数据
[root@localhost hunter]# cd /usr/share/doc/zabbix-server-mysql-4.0.10/ #进入create.sql.gz所在目录
[root@localhost zabbix-server-mysql-4.0.10]# zcat create.sql.gz |mysql -uroot zabbix #导入出事模式
三.启动zabbix-server服务
配置zabbix-server的配置文件zabbix_server.conf
[root@localhost zabbix-server-mysql-4.0.10]# vi /etc/zabbix/zabbix_server.conf
DBHost=localhost # 数据主机名
DBName=zabbix # 数据库实例
DBUser=zabbix # 用户名
DBPassword=zabbix # 密码
启动zabbix-server服务
[root@localhost zabbix-server-mysql-4.0.10]# systemctl start zabbix-server #启动zabbix-server服务
[root@localhost zabbix-server-mysql-4.0.10]# systemctl enable zabbix-server #设置zabbix-server服务开机自启动
编辑Apache的配置文件,消注释设置正确的时区
[root@localhost zabbix-server-mysql-4.0.10]# vi /etc/httpd/conf.d/zabbix.conf
启动httpd服务 ,设置开机启动httpd服务
[root@localhost ~]# systemctl start httpd #启动httpd服务
[root@localhost ~]# systemctl enable httpd #设置开机启动httpd服务
[root@localhost ~]# systemctl start zabbix-agent # 启动zabbix-agent服务
[root@localhost ~]# systemctl enable zabbix-agent # 设置zabbix-agent服务开机自启动
四.Zabbix Web网页安装
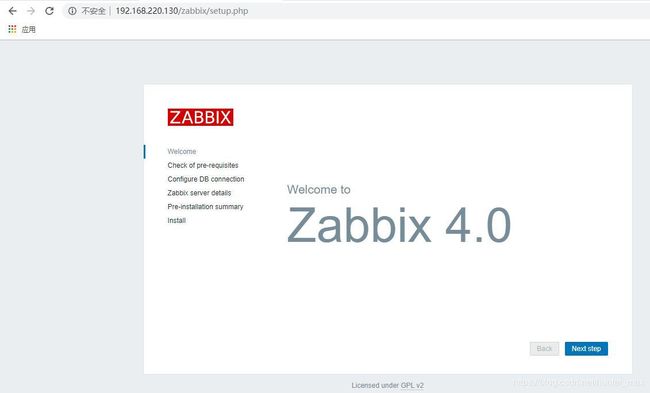
在浏览器输入地址http://服务器ip/zabbix/setup.php,出现欢迎界面,点击下一步;
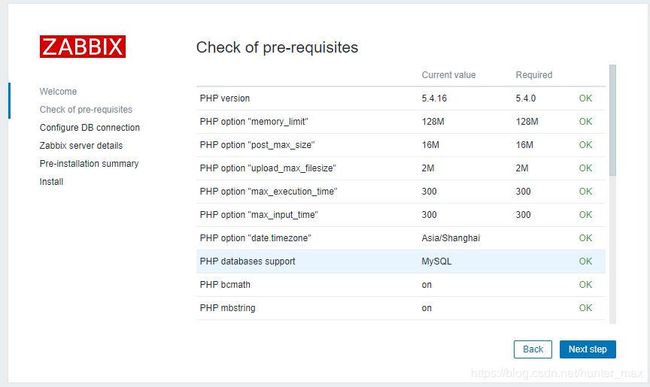
点击Next step,出现必要条件检测界面,正常都是OK,点击Next step
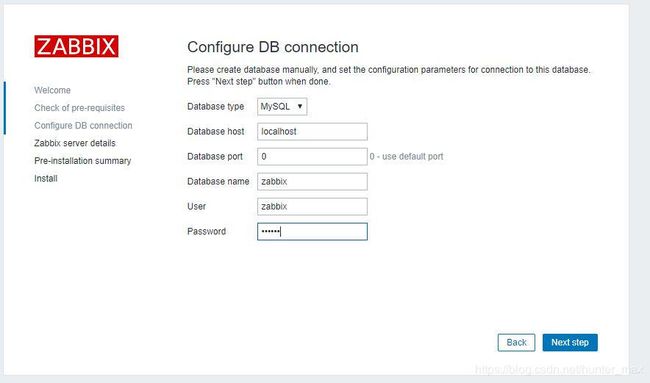
配置DB连接,与zabbix_server.conf文件中主机、数据库名称、用户名、密码保持一致,点击Next step(之前我们设置的密码是zabbix)
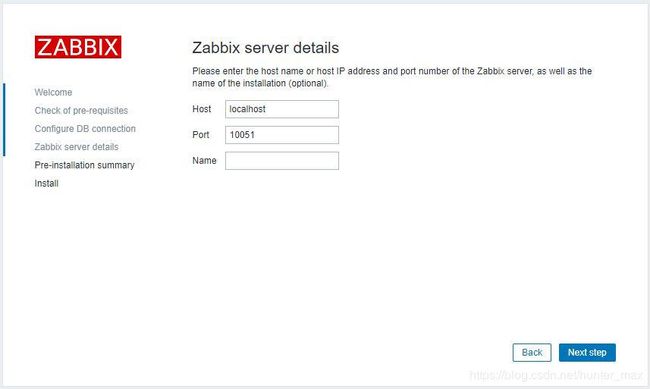
zabbix服务器详细信息,点击Next step(Name是可选项)
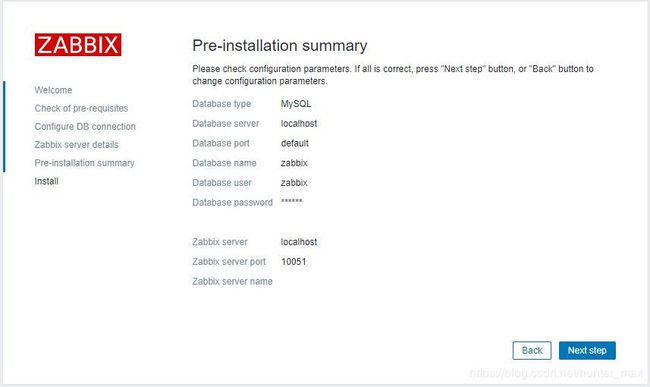
安装前汇总,检查信息无误,点击Next step
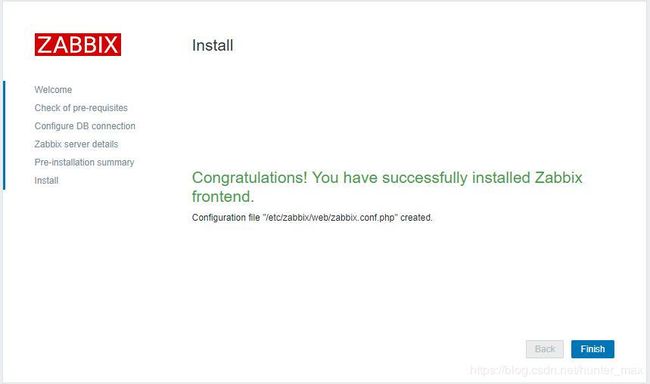
安装成功
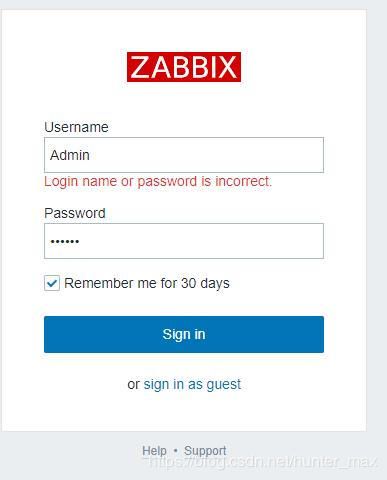
进入登录页面,用户由于没有设置,默认是Admin,根据之前配置,密码是zabbix
登录成功
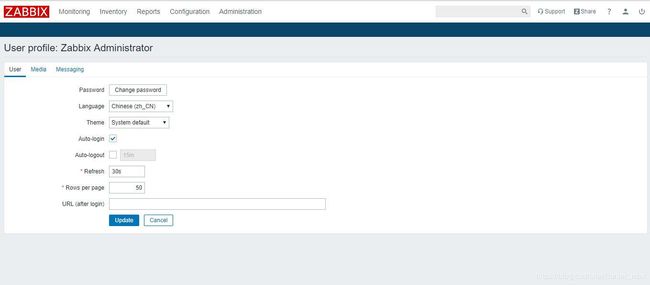
设置里切换语言
至此,zabbix 的主机就安装成功了。
2.在windows7 上安装zabbix agent配置
(windows记得关闭防火墙,控制面板 -->系统和安全 -->Windows defender 防火墙 -->启用或关闭防火墙)
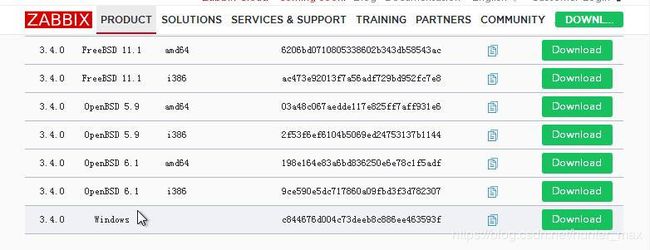
下载zabbix agent
https://www.zabbix.com/download_agents
主机是4.0版本的,客户端我选的是3.4版本的,因为软件一般都是上下兼容,所以3.4是可以用的
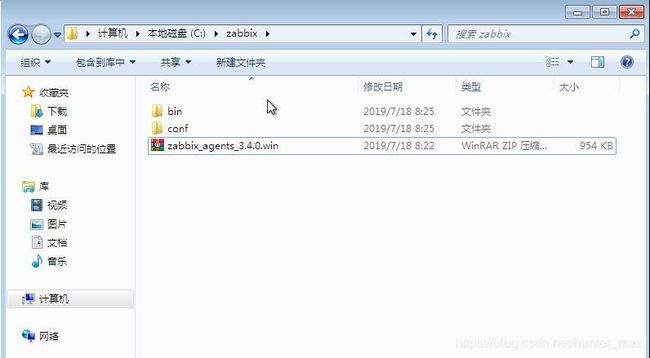
在c盘(其他盘也可以)新建zabbix文件夹,把下载好的文件放进去,解压
进入conf文件夹,修改配置文件zabbix_agentd.win.conf(用记事本或者写字板打开)
LogFile=c:\zabbix\zabbix_agentd.log
Server=192.168.220.130 (填写监控主机ip地址)
ServerActive=192.168.220.130 (填写监控主机ip地址)
Hostname=LAPTOP-E12K29O8(右击我的电脑-属性,看看hostname)
保存。
打开命令提示符界面:(键盘快捷键win+R,输入cmd)
cd \zabbix\bin\win64
zabbix_agentd.exe -i -c C:\zabbix\conf\zabbix_agentd.win.conf(安装zabbix客户端)
zabbix_agentd.exe -s -c C:\zabbix\conf\zabbix_agentd.win.conf(开启zabbix服务)
都返回successfully 则成功
如果失败,可能需要卸载agent,命令:
cd \zabbix\bin\win64
zabbix_agentd.exe -d -c C:\zabbix\conf\zabbix_agentd.win.conf(删除zabbix客户端)
在被监控机上安装好zabbix agent后,下一步则是在主机上配置连接
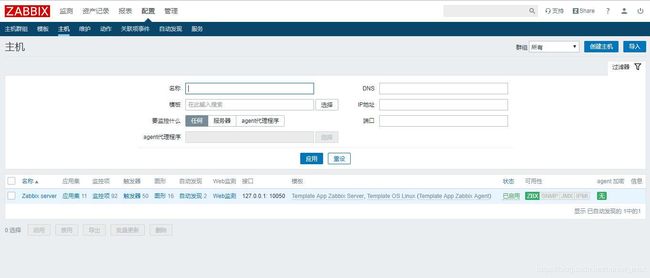
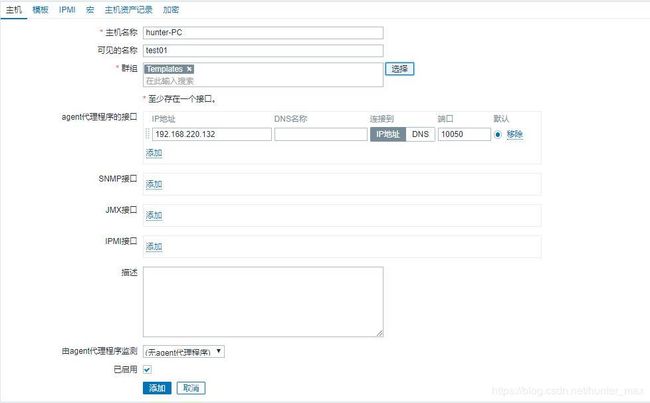
配置------主机---------创建主机
主机名称与在agent里配置的hostname名称要一致
agent代理程序的接口 ip地址填被控机的ip地址
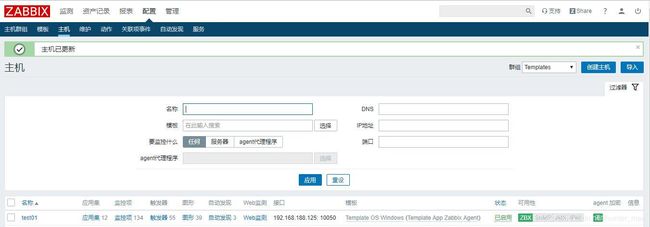
添加 再选择该主机-----模板
添加模板 Template OS Windows
------更新
等待两分钟左右,刷新页面,主机的ZBX变绿,就ok了
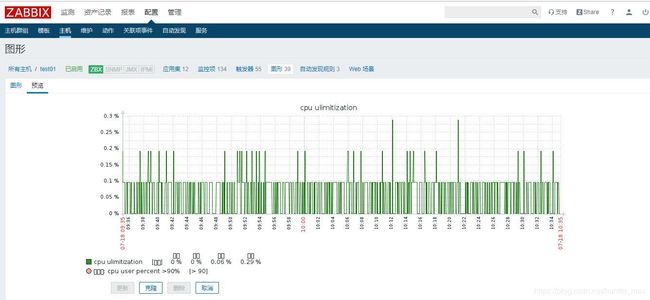
这是监控的cpu ulimitization图像
至此,在windows7 上安装zabbix agent配置已完毕。
3.在centos7 上安装zabbix agent配置
先关闭防火墙和selinux
一.关闭selinux和防火墙
检测selinux是否关闭
[hunter@localhost ~]$ getenforce
Disabled
临时关闭
[root@localhost hunter]# setenforce 0
永久关闭
[root@localhost hunter]# vi /etc/selinux/config
将SELINUX=enforcing改为SELINUX=disabled
设置后需要重启才能生效
查看默认防火墙状态
[root@localhost hunter]# firewall-cmd --state
running #关闭后显示not running,开启后显示running
停止firewall
[root@localhost hunter]# systemctl stop firewalld.service
禁止firewall开机启动
[root@localhost hunter]# systemctl disable firewalld.service
Removed symlink /etc/systemd/system/multi-user.target.wants/firewalld.service.
Removed symlink /etc/systemd/system/dbus-org.fedoraproject.FirewallD1.service.
安装zabbix 软件源
rpm -ivh http://repo.zabbix.com/zabbix/3.2/rhel/7/x86_64/zabbix-release-3.2-1.el7.noarch.rpm
安装zabbix-agent
yum install zabbix-sender zabbix-agent zabbix-get
中途有提示选择y/n 选y
vi /etc/zabbix/zabbix_agentd.conf #修改conf配置
Server=192.168.220.130 #监控主机的ip
ServerActive=192.168.220.130 #监控主机的ip
Hostname=localhost.localdomain #本机的名字
设置启动和开机项
systemctl start zabbix-agent.service
systemctl enable zabbix-agent.service
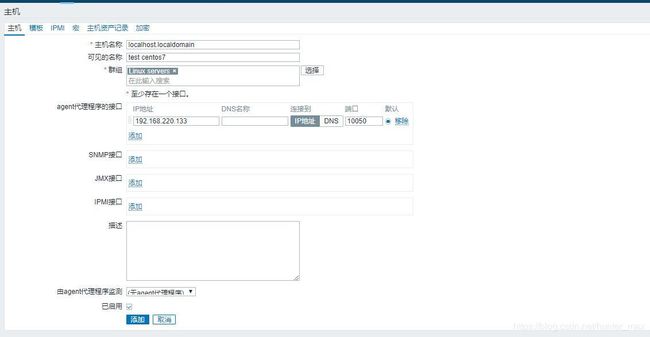
在监控主机web页面上添加主机
主机名是被监控的centos7的主机名(查看主机名命令 hostname)
ip地址是被监控的centos7的ip地址
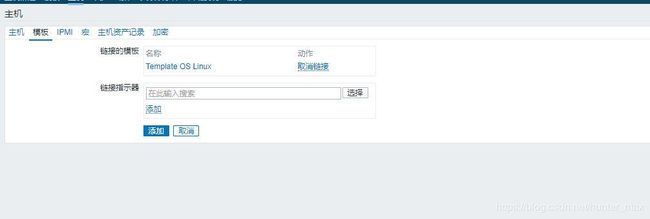
模板选择Template OS Linux
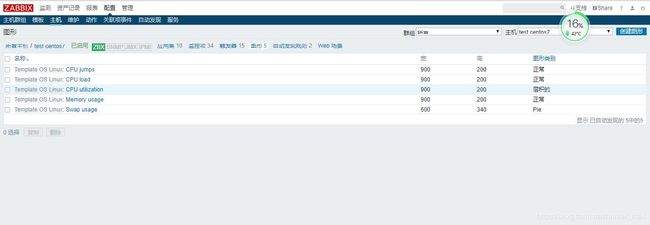
等待几分钟,刷新页面,zbx变成绿色,就ok了
点击图形进入
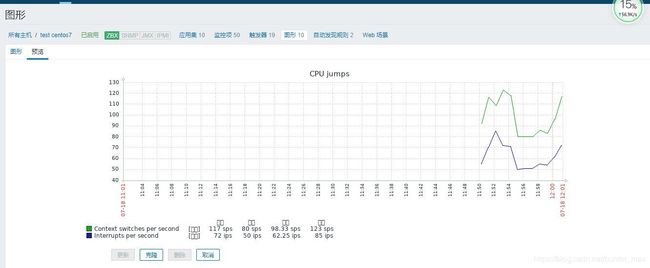
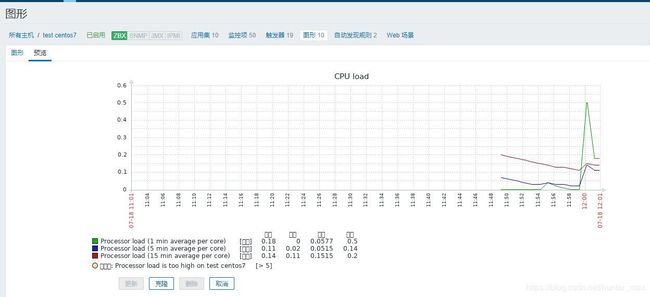
随便选择一个进入,可以发现已经有图像了
至此 在centos7 上安装zabbix agent配置已完毕。
最后,如果我的这篇文章对您有帮助,欢迎关注我的公众号"封神之路",第一时间获取最新干货
