Windows+VS2013环境下简单调试MySQL源码
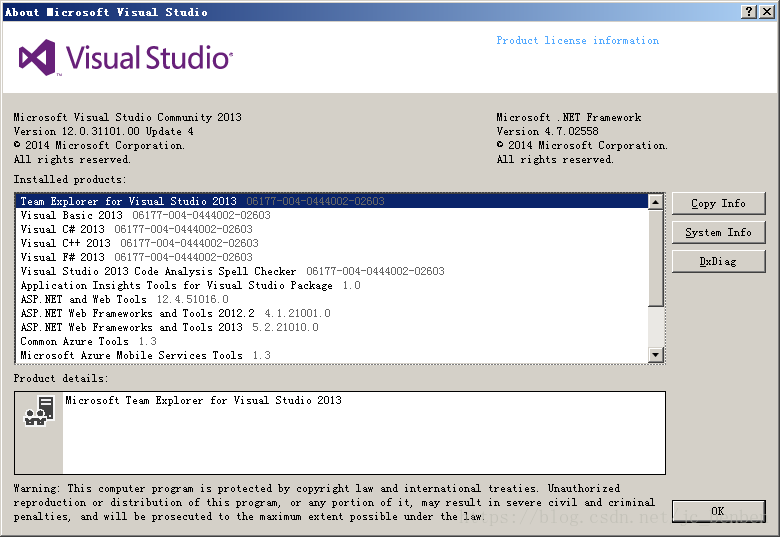
我的系统环境室win7 sp1 64bit,vs版本是2013 community
在安装的时候就确保编译文件没问题,以下是简单的调试步骤:
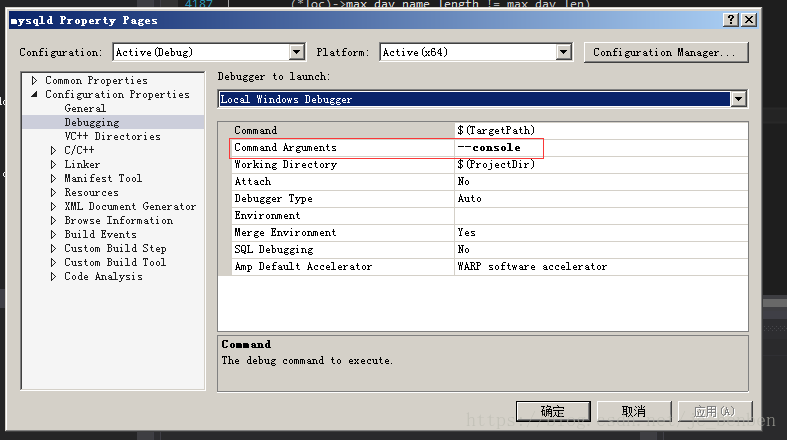
将mysqld工程的Debug的:属性->调试->命令参数,设为--console,如下:
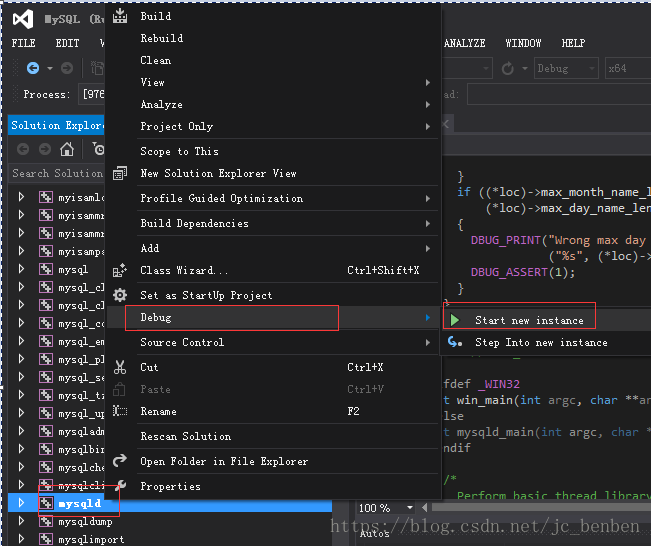
运行实例:
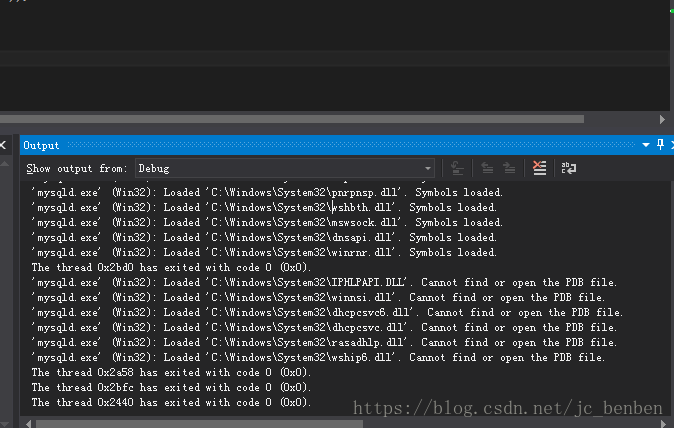
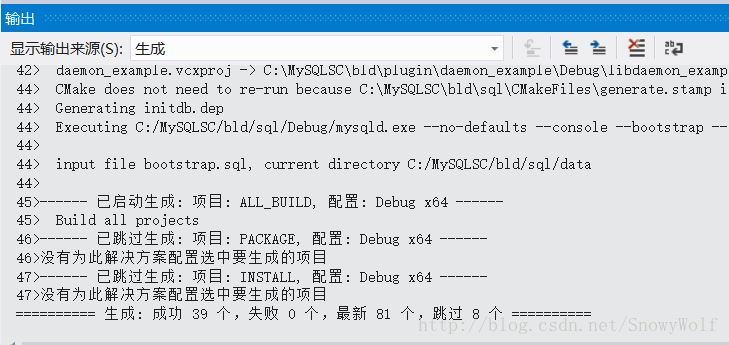
vs的output窗口
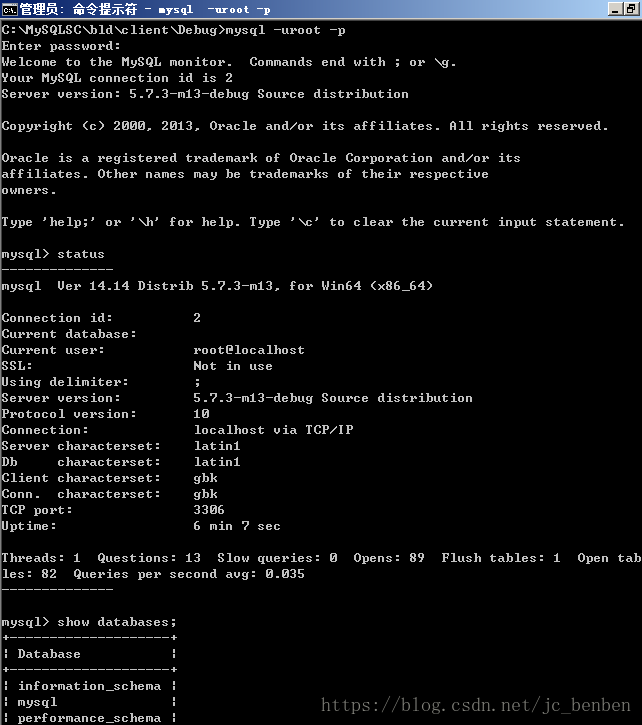
进入客户端访问:
说明:默认的data目录在sql下C:\MySQLSC\bld\sql\data
注意:在编译生成5.7.23版本的工程时候,需要安装boost,这里说明重要的几点
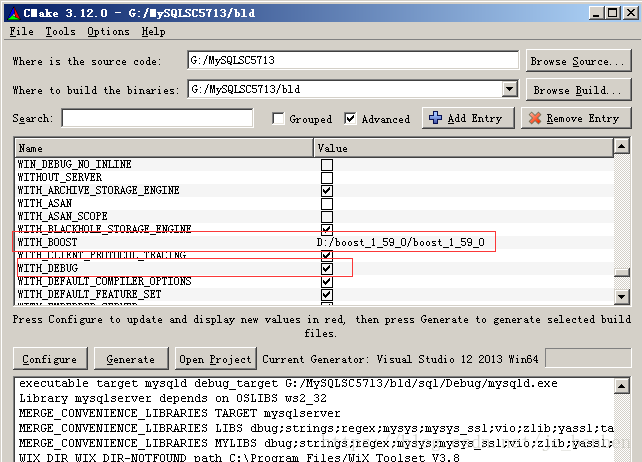
1,下载boost我这里是1_59,不必太高版本,放到一个目录,我这里是D:\boost_1_59_0\boost_1_59_0,cmake也需要3.8以上,下载后进行安装
2,启动CMake (cmake-gui),注意配置boost路径即可,我这里用的是5.7.23的源文件,截图中的source code文件夹路径不用关心
3,其他步骤类似即可
4,启动debug时候出现client连接不上情况,这个时候可以在配置中添加skip-grant-tables选项
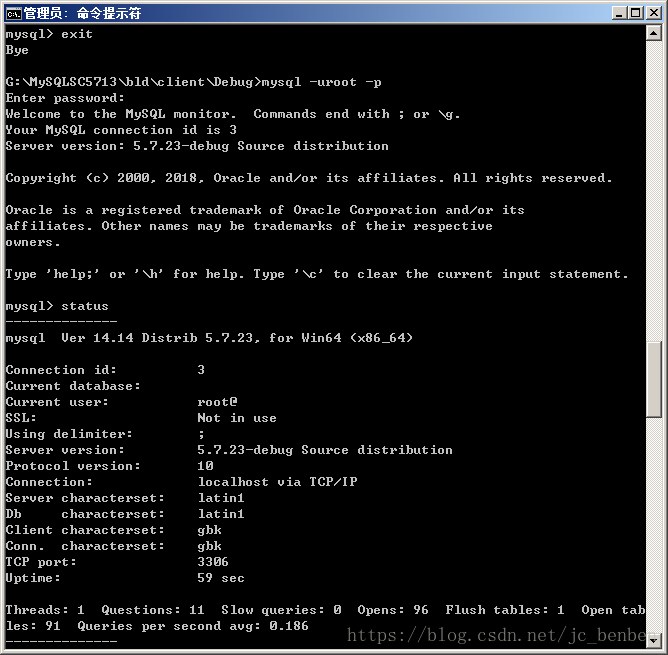
5,最后连接信息如下
以下附上安装过程,参考文章连接:https://blog.csdn.net/snowywolf/article/details/18952643
【相关环境】
操作系统:Win8.1 Pro 64bit
IDE:Visual Studio 2012
【准备工作】
要在Windows环境下编译MySQL的源码,需要做一些准备工作:
1. 在C盘(若其他盘下)建立新的文件夹:MySQLSC
2. 下载MySQL的源码是必须的,我是到MySQL官网下载了:mysql-5.7.3-m13.zip
3. 需要安装几个软件,包括:ActivePerl、CMake、GNUBison、bzr
4. 为便于大家学习,我将需要的软件打包提供,可点下面的链接下载:
===========================================
CSDN资源下载:(分为三个包)
Part1: http://download.csdn.net/detail/snowywolf/6900663
Part2: http://download.csdn.net/detail/snowywolf/6900677
Part3: http://download.csdn.net/detail/snowywolf/6900657
===========================================
下载后可能需要自己修改一下文件名,例如将下载下来的三个文件依次修改为:
安装文件.part1.rar
安装文件.part2.rar
安装文件.part3.rar
然后点【安装文件.part1.rar】解压即可。
5. 下载到C:\MySQLSC目录下,解压缩到当前目录。
【软件安装】
相关软件安装并没有固定的顺序,但安装中有些需要注意的地方,后面我用醒目字体标注出来。
一、安装ActivePerl
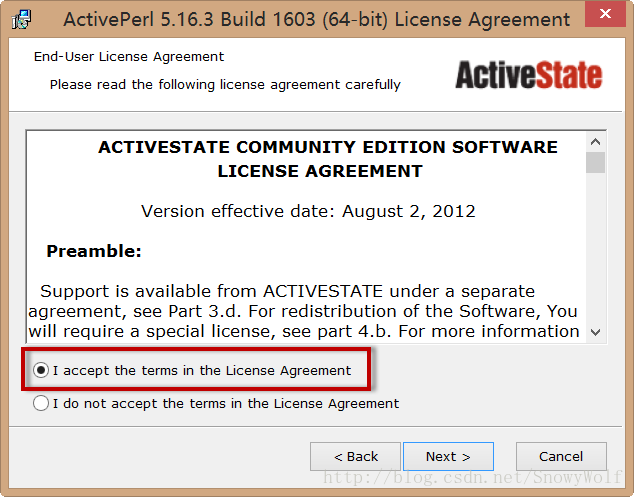
1. 安装 ActivePerl很简单,默认安装即可,可根据自己情况选择32位或64位的进行安装。此处我安装64位的。
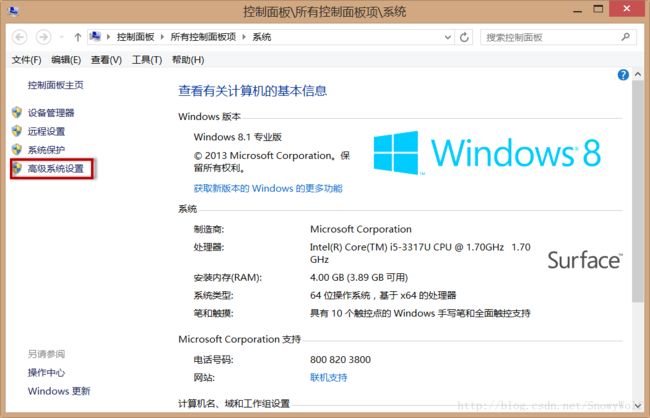
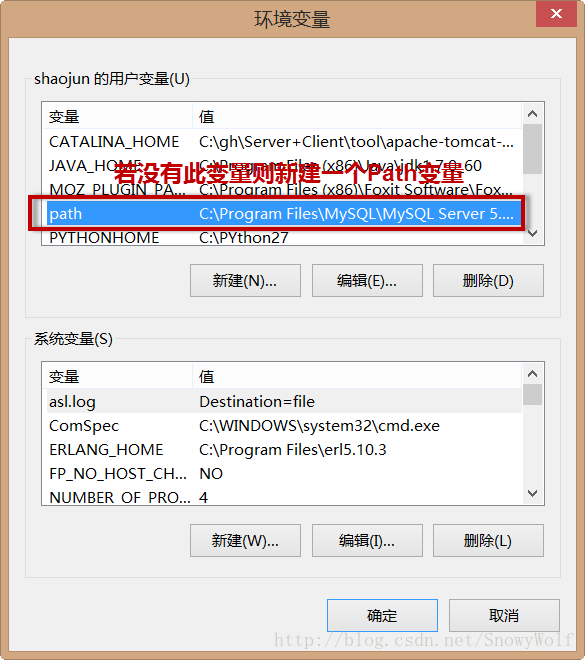
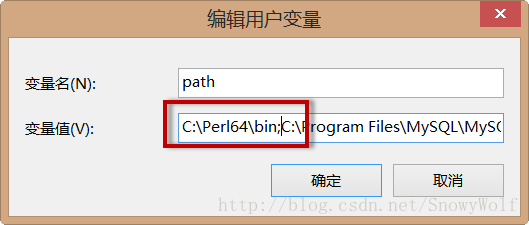
ActivePerl安装完毕后需要手工将其执行路径添加到Path环境变量中。
按[Win]+[PauseBreak]组合键(或以其他方式)调出系统设置的界面:
设置完成,连续点确定后关闭设置窗口。
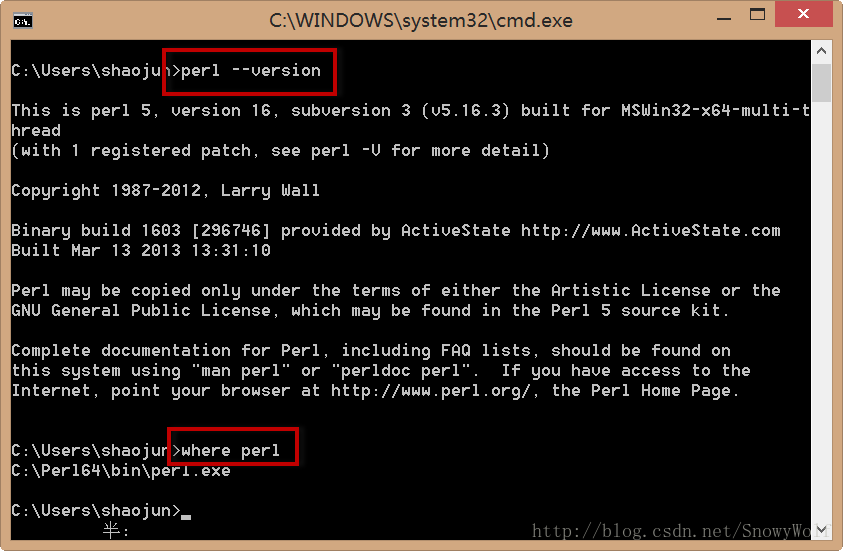
此时新开一个控制台窗口,输入 perl --version及where perl命令,结果如下所示,表明perl安装成功。
二、安装CMake
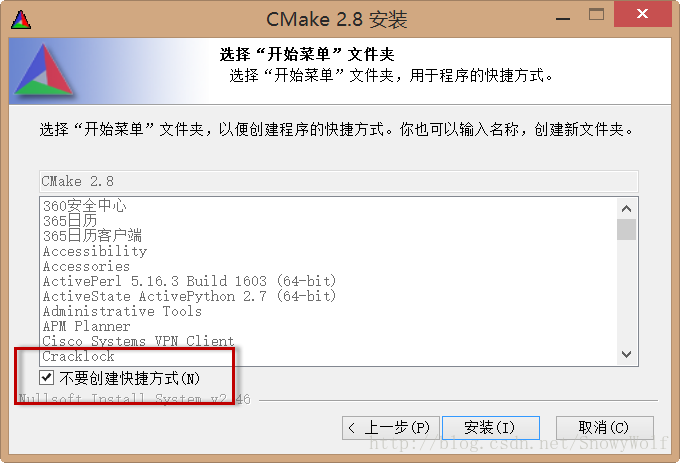
安装CMake比较简单,需要注意的地方我已标出:
如果安装过程出现如下容器,则需要手工将CMake执行路径加到Path环境变量中,操作步骤类似于上一节Perl的环境变量设置,在此不再赘述。
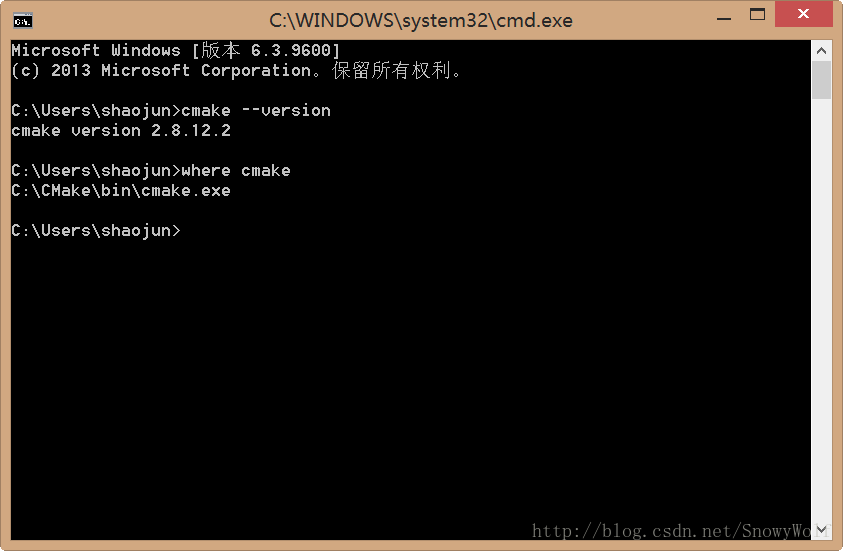
安装完成后可验证一下CMake是否安装成功,如下图所示:
三、安装Bison
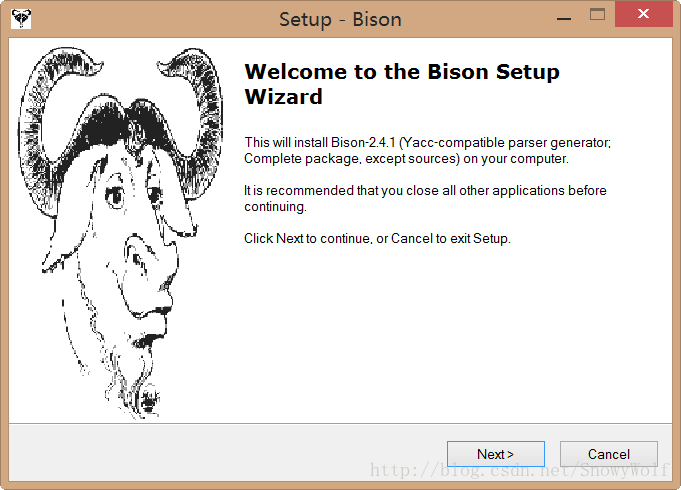
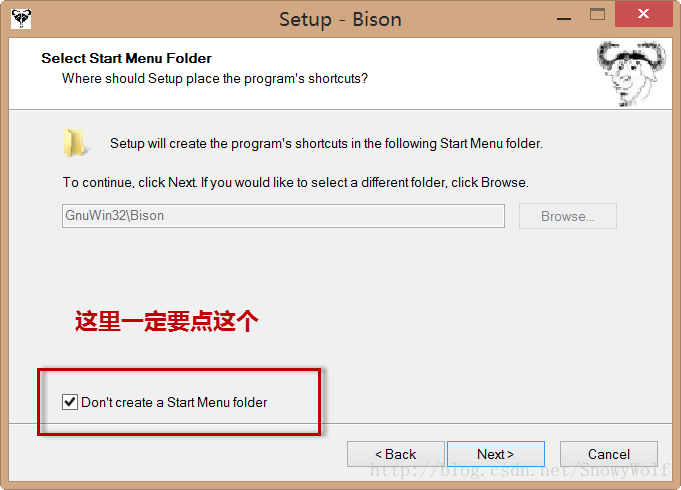
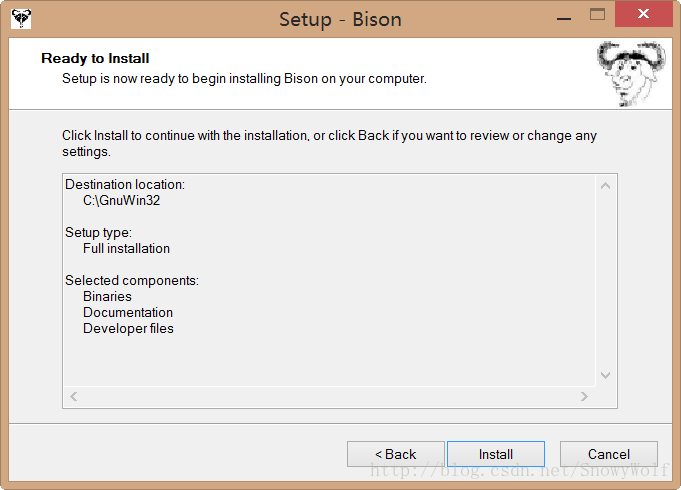
Bison的安装是比较容易出问题的,稍有不慎就会导致后面源码编译的各种不顺利,我在它上面浪费了太多的时间,安装它的时候一定要注意,请严格按照我后面的步骤来操作,路径等等的细节最好也完全一致,切记切记:
安装完毕后,新开控制台,若bison不可用,则同样需要将Bison的执行目录(C:\GnuWin32\bin)加到Path变量中。
设置好之后验证一下bison和m4是否可用及路径是否正确。
四、安装bzr
这个比较简单,没什么讲究,一路默认就行了,原文章有问题,不过照着上面类似安装即可
三、准备工作的最后一步,解压MySQL的源码
将安装文件目录中的mysql-5.7.3-m13.zip解压,将解压目录中的内容剪切至C:\MySQLSC目录下,我的环境是这样的:
好了,准备工作做完了,终于要进入实质阶段了
前面的都是前戏,鸡冻人心的时刻到了。。。
一、创建VS工程
MySQL源码中默认并未提供VS的工程文件,我们需要自己去生成,之后才能在VS中打开。
我的VS环境是VS2012,VS2008和VS2010的操作步骤应该是类似的。
首先,需要在C:\MySQLSC\目录下新建一个文件夹:C:\MySQLSC\bld,用来存放生成的工程文件
现在,果断地双击执行【C:\CMake\bin\cmake-gui.exe】,帮我们生成工程文件就全靠它了。
【下面一段是生成工程的关键步骤】
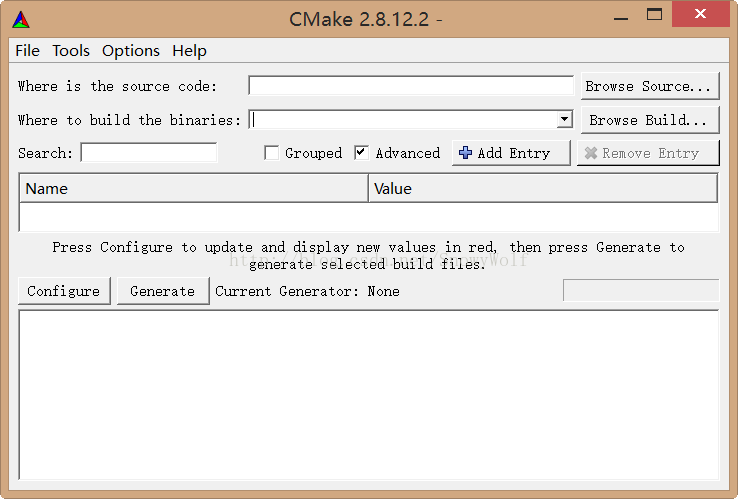
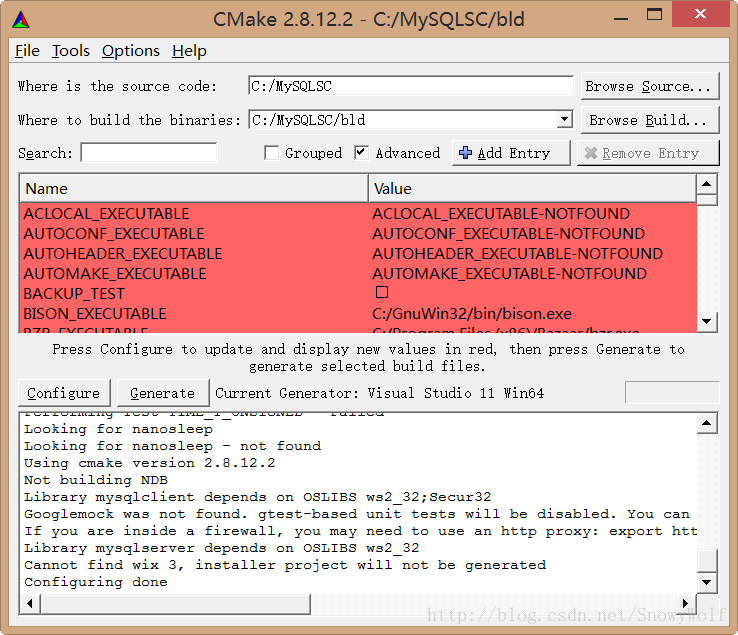
软件启动后的界面是这样的:
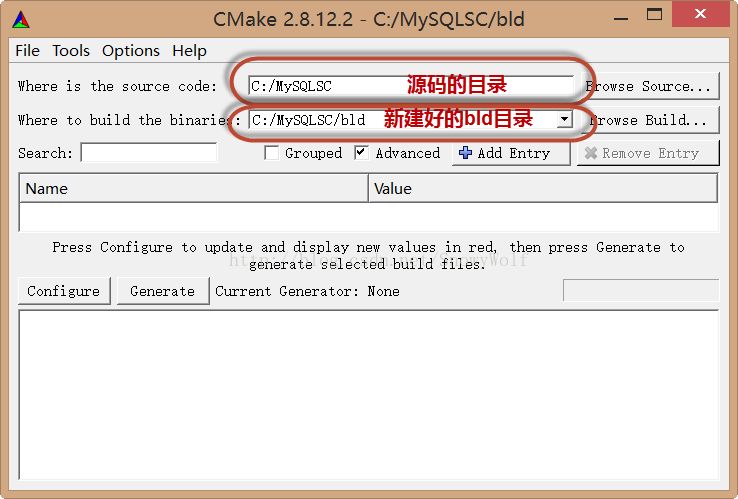
需要设置上面的两个参数,如下图所示:
现在点左下角的【Configure】按钮
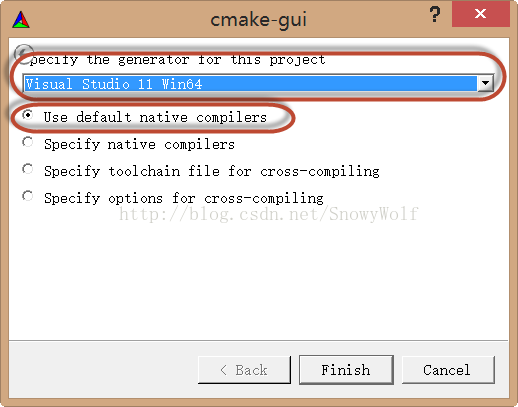
弹出编译环境配置的窗体:
上面的下拉框可以选择VS版本,下面的四个选项确保选择第一个:【Use default native compilers】
VS版本有很多选择项,稍微解释一下:
Visual Studio 7 对应2003
Visual Studio 8对应2005
Visual Studio 9对应2008
Visual Studio 10对应2010
Visual Studio 11对应2012
此外,后面还有Win64、ARM等修饰,分别对应的是64位版本和版本。
可根据自己的环境及目标选择合适的项,我的环境是VS2012,我要编译64位的MySQL,所以选择的是【Visual Studio 11 Win64】,这个参数你选择的可以和我的不一样,根据你的环境决定即可。
点击【finish】按钮后就可以配置了,这里要花一些时间,具体时间长短取决于你机器的性能,我的配置执行结果如下:
具体输出如下:
============================================================
Running cmake version 2.8.12.2
Configuring with MAX_INDEXES = 64U
The C compiler identification is MSVC 17.0.61030.0
The CXX compiler identification is MSVC 17.0.61030.0
Check for working C compiler using: Visual Studio 11 Win64
Check for working C compiler using: Visual Studio 11 Win64 -- works
Detecting C compiler ABI info
Detecting C compiler ABI info - done
Check for working CXX compiler using: Visual Studio 11 Win64
Check for working CXX compiler using: Visual Studio 11 Win64 -- works
Detecting CXX compiler ABI info
Detecting CXX compiler ABI info - done
Performing Test HAVE_GETCURRENTPROCESSORNUMBER
Performing Test HAVE_GETCURRENTPROCESSORNUMBER - Success
Looking for isnan
Looking for isnan - not found
Looking for strcasecmp
Looking for strcasecmp - not found
Looking for strncasecmp
Looking for strncasecmp - not found
Looking for snprintf
Looking for snprintf - not found
Looking for strtok_r
Looking for strtok_r - not found
Looking for strtoull
Looking for strtoull - not found
Looking for vsnprintf
Looking for vsnprintf - found
Looking for stddef.h
Looking for stddef.h - found
Check size of void *
Check size of void * - done
CMake Warning (dev) at CMakeLists.txt:196 (INCLUDE):
Syntax Warning in cmake code at
C:/MySQLSC/cmake/ssl.cmake:252:29
Argument not separated from preceding token by whitespace.
This warning is for project developers. Use -Wno-dev to suppress it.
MySQL 5.7.3-m13
Packaging as: mysql-5.7.3-m13-winx64
Found Threads: TRUE
Looking for ntohll
Looking for ntohll - not found
Looking for inet_ntop
Looking for inet_ntop - found
Check size of time_t
Check size of time_t - done
Performing Test TIME_T_UNSIGNED
Performing Test TIME_T_UNSIGNED - Failed
Looking for nanosleep
Looking for nanosleep - not found
Using cmake version 2.8.12.2
Not building NDB
Library mysqlclient depends on OSLIBS ws2_32;Secur32
Googlemock was not found. gtest-based unit tests will be disabled. You can run cmake . -DENABLE_DOWNLOADS=1 to automatically download and build required components from source.
If you are inside a firewall, you may need to use an http proxy: export http_proxy=http://foo.bar.com:80
Library mysqlserver depends on OSLIBS ws2_32
Cannot find wix 3, installer project will not be generated
Configuring done
==============================================================
输出结果中可以看到,有一些Not Found的警告,以及红色字体的一些警告,不用管它,它不会影响我们的编译大计。
现在我们再点【Configure】右边的【Generate】按钮
稍等片刻,工程就生成了:
输出结果如下:
=======================================================
CMake Warning (dev) in libmysql/CMakeLists.txt:
Policy CMP0022 is not set: INTERFACE_LINK_LIBRARIES defines the link
interface. Run "cmake --help-policy CMP0022" for policy details. Use the
cmake_policy command to set the policy and suppress this warning.
Target "libmysql" has an INTERFACE_LINK_LIBRARIES property which differs
from its LINK_INTERFACE_LIBRARIES properties.
INTERFACE_LINK_LIBRARIES:
ws2_32;clientlib;dbug;strings;vio;mysys;mysys_ssl;zlib;yassl;taocrypt;auth_win_client
LINK_INTERFACE_LIBRARIES:
This warning is for project developers. Use -Wno-dev to suppress it.
Generating done
======================================================
同样会有红色字体的警告,不用管它。
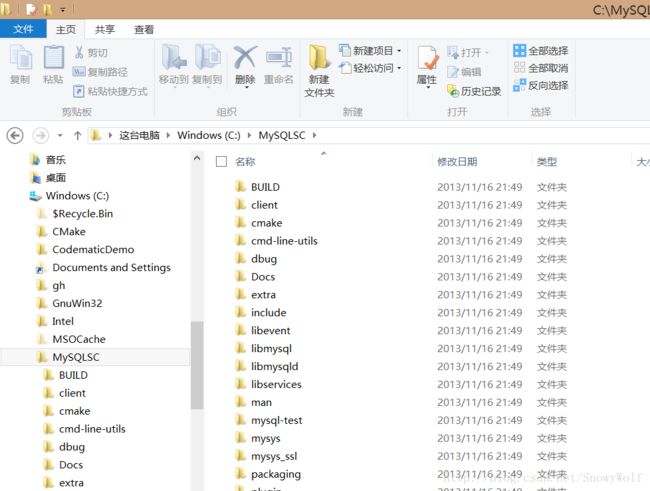
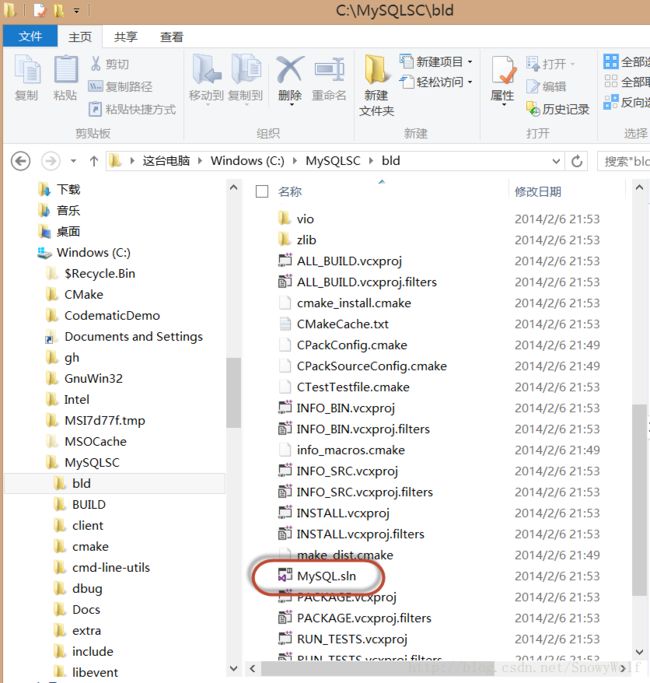
OK,现在我们的工程已经生成了,源码编译大业已经完成了最重要的一步,现在到C:\MySQLSC\bld目录下看一下我们的成果吧:
可以看到我们熟悉的vcxproj和.sln文件了。
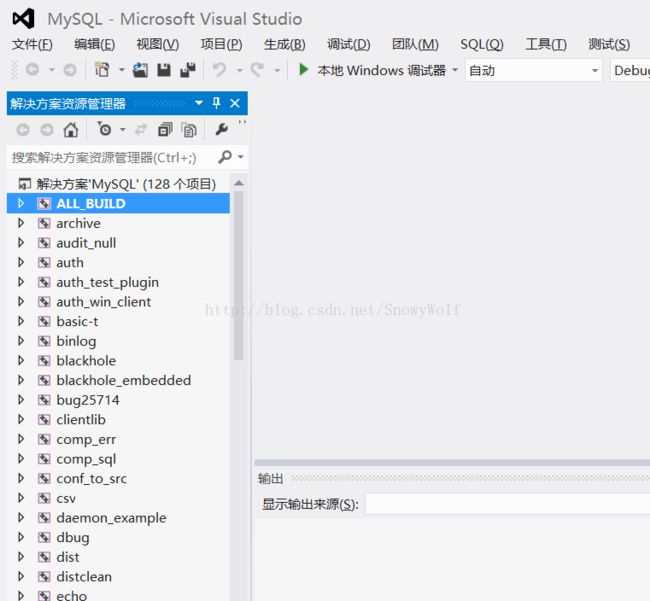
工程和解决方案生成完毕,现在我们可以在VS2012中打开编译了,双击C:\MySQLSC\bld\MySQL.sln以打开解决方案。
工程好多啊,共128个项目。
解决方案中的默认启动项目是【ALL_Build】,不要修改它。
开始编译之前,我们先做一些准备工作,可以有效地减少编译过程中一些不必要的警告和错误。
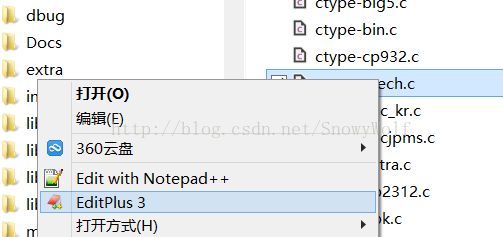
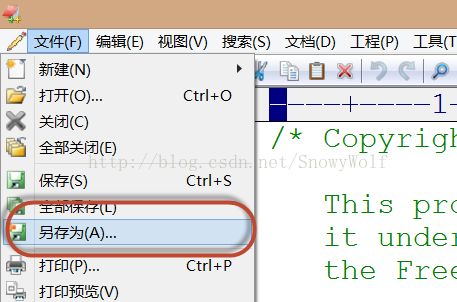
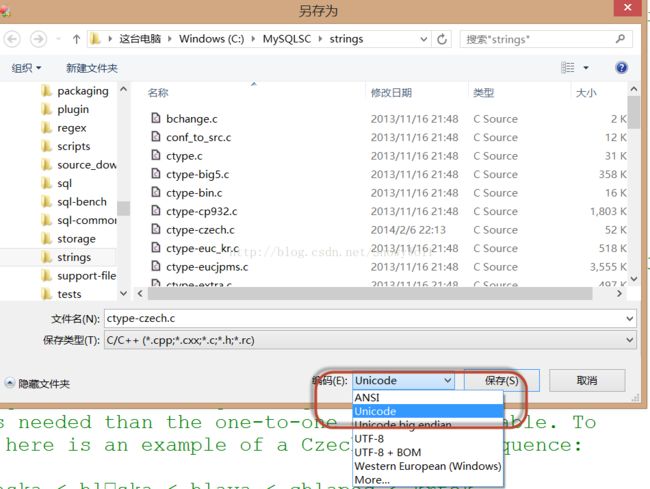
用文本编辑程序,如【EditPlus】或【Notepad++】等(注意不要用Word等字处理软件)打开如下文件,另存为Unicode编码:
=============================
重要:
需要修改编码的文件列表
C:\MySQLSC\strings\ctype-czech.c
C:\MySQLSC\strings\ctype-latin1.c
C:\MySQLSC\strings\decimal.c
C:\MySQLSC\mysys\thr_mutex.c
c:\mysqlsc\storage\innobase\include\ut0mem.h
C:\MySQLSC\sql\sql_locale.cc
需要修改编码的文件列表
=============================
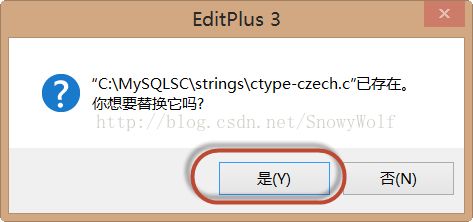
注意,有些文件直接用EditPlus打开有问题的时候,可以先以[UTF-8]编码打开,之后再存为[Unicode]编码。
举例如下:
上面列表中的文件都作类似处理。
OK,我们现在选择【Debug】【x64】,按【F7】开始编译。
编译的过程会有些长,耐心等待吧。
编译整体是顺利的,只有一个地方(编译initial_database项目时)出现了错误,错误信息如下:
==================================================
125>------ 已启动生成: 项目: initial_database, 配置: Debug x64 ------
121> 正在创建库 C:/MySQLSC/bld/plugin/semisync/Debug/semisync_slave.lib 和对象 C:/MySQLSC/bld/plugin/semisync/Debug/semisync_slave.exp
125> Building Custom Rule C:/MySQLSC/sql/CMakeLists.txt
125> CMake does not need to re-run because C:\MySQLSC\bld\sql\CMakeFiles\generate.stamp is up-to-date.
125> Generating initdb.dep
120> 正在创建库 C:/MySQLSC/bld/plugin/semisync/Debug/semisync_master.lib 和对象 C:/MySQLSC/bld/plugin/semisync/Debug/semisync_master.exp
121> semisync_slave.vcxproj -> C:\MySQLSC\bld\plugin\semisync\Debug\semisync_slave.dll
120> semisync_master.vcxproj -> C:\MySQLSC\bld\plugin\semisync\Debug\semisync_master.dll
124> 正在创建库 C:/MySQLSC/bld/plugin/password_validation/Debug/validate_password.lib 和对象 C:/MySQLSC/bld/plugin/password_validation/Debug/validate_password.exp
124> validate_password.vcxproj -> C:\MySQLSC\bld\plugin\password_validation\Debug\validate_password.dll
125> Executing C:/MySQLSC/bld/sql/Debug/mysqld.exe --no-defaults --console --bootstrap --lc-messages-dir=C:/MySQLSC/bld/sql/share --basedir=. --datadir=. --default-storage-engine=MyISAM --default-tmp-storage-engine=MyISAM --loose-skip-ndbcluster --max_allowed_packet=8M --net_buffer_length=16K
125>
125> input file bootstrap.sql, current directory C:/MySQLSC/bld/sql/data
125>
125> CMake Error at C:/MySQLSC/bld/sql/create_initial_db.cmake:103 (MESSAGE):
125> Could not create initial database
125>
125>
125> Assertion failed: 0, file ..\..\sql\mysqld.cc, line 4191
125>
125> R6010
125>
125> - abort() has been called
125>
125> 14:37:36 UTC - mysqld got exception 0x80000003 ;
125>
125> This could be because you hit a bug. It is also possible that this binary
125>
125> or one of the libraries it was linked against is corrupt, improperly built,
125>
125> or misconfigured. This error can also be caused by malfunctioning
125> hardware.
125>
125> We will try our best to scrape up some info that will hopefully help
125>
125> diagnose the problem, but since we have already crashed,
125>
125> something is definitely wrong and this may fail.
125>
125>
125>
125> key_buffer_size=0
125>
125> read_buffer_size=131072
125>
125> max_used_connections=0
125>
125> max_threads=151
125>
125> thread_count=0
125>
125> connection_count=0
125>
125> It is possible that mysqld could use up to
125>
125> key_buffer_size + (read_buffer_size + sort_buffer_size)*max_threads = 59679
125> K bytes of memory
125>
125> Hope that's ok; if not, decrease some variables in the equation.
125>
125>
125>
125> Thread pointer: 0x0
125>
125> Attempting backtrace. You can use the following information to find out
125>
125> where mysqld died. If you see no messages after this, something went
125>
125> terribly wrong...
125>
125> 7ff7447ecfd5 mysqld.exe!my_sigabrt_handler()[my_thr_init.c:448]
125>
125> 7ff744dc94fc mysqld.exe!raise()[winsig.c:593]
125>
125> 7ff744dd5140 mysqld.exe!abort()[abort.c:82]
125>
125> 7ff744dc6a9b mysqld.exe!_wassert()[assert.c:355]
125>
125> 7ff74429cdf3 mysqld.exe!test_lc_time_sz()[mysqld.cc:4191]
125>
125> 7ff74429d19e mysqld.exe!win_main()[mysqld.cc:4399]
125>
125> 7ff74429da92 mysqld.exe!mysql_service()[mysqld.cc:4752]
125>
125> 7ff74429e36f mysqld.exe!mysqld_main()[mysqld.cc:4949]
125>
125> 7ff74429102f mysqld.exe!main()[main.cc:26]
125>
125> 7ff744dc111c mysqld.exe!__tmainCRTStartup()[crt0.c:241]
125>
125> 7ff744dc125e mysqld.exe!mainCRTStartup()[crt0.c:164]
125>
125> 7ff8310f15cd KERNEL32.DLL!BaseThreadInitThunk()
125>
125> 7ff831cb43d1 ntdll.dll!RtlUserThreadStart()
125>
125> The manual page at http://dev.mysql.com/doc/mysql/en/crashing.html contains
125>
125> information that should help you find out what is causing the crash.
125>
125>
125>
125>C:\Program Files (x86)\MSBuild\Microsoft.Cpp\v4.0\V110\Microsoft.CppCommon.targets(172,5): error MSB6006: “cmd.exe”已退出,代码为 1。
=============================================================
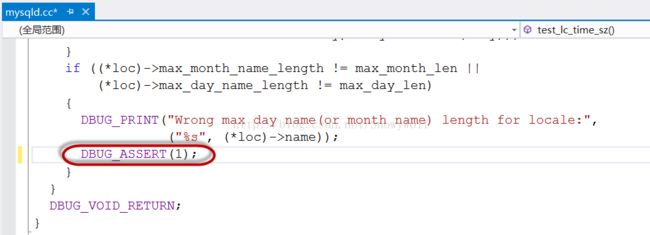
这个编译错误的原因非常简单,是由于代码中的一个DEBUG断言引致的(我在上面已经高亮标识出来了),修改也非常简单,在VS2012中定位到sql工程下mysqld.cc文件的4191行
将
DBUG_ASSERT(0);
改为
DBUG_ASSERT(1);
即可。
再次编译,这回非常OK,没有错误信息了。
下一回,我们就可以运行我们编译出来的MySQL,并试着调试它了。
