版本记录
| 版本号 | 时间 |
|---|---|
| V1.0 | 2018.01.18 |
前言
在iOS中不管是画图或者动画,都需要指名路径,我们经常用的就是
UIBezierPath贝塞尔路径,接下来这几篇我们就详细的介绍下这个类和基本用法。感兴趣可以看上面写的几篇。
1. UIBezierPath类详细解析(一) —— 基本概览
2. UIBezierPath类详细解析(二) —— 基本使用(一)
路径信息 - Path info
关于路径信息主要是这几个属性和方法。
@property(readonly,getter=isEmpty) BOOL empty;
@property(nonatomic,readonly) CGRect bounds;
@property(nonatomic,readonly) CGPoint currentPoint;
- (BOOL)containsPoint:(CGPoint)point;
1. @property(readonly,getter=isEmpty) BOOL empty;
这是一个只读属性。
    UIBezierPath *path = [UIBezierPath bezierPath];
    [path moveToPoint:CGPointMake(200, 10)];
    [path addLineToPoint:CGPointMake(200, 400)];

    BOOL status = path.isEmpty;
    NSLog(@"是否为空 = %d", status);
看一下输出结果
2018-01-18 17:15:19.692788+0800 JJLayer_demo1[41376:27182748] 是否为空 = 0
这就说明路径不为空,下面我们修改成下面的代码
    UIBezierPath *path = [UIBezierPath bezierPath];
    BOOL status = path.isEmpty;
    NSLog(@"是否为空 = %d", status);
下面看输出结果
2018-01-18 17:16:07.454364+0800 JJLayer_demo1[41396:27187586] 是否为空 = 1
这就说明路径为空,也不能绘制。
2. @property(nonatomic,readonly) CGRect bounds;
这个也是一个只读属性。
下面看一下代码
    UIBezierPath *path = [UIBezierPath bezierPath];
    [path moveToPoint:CGPointMake(200, 10)];
    [path addLineToPoint:CGPointMake(200, 400)];
    CGRect rect = path.bounds;
    NSLog(@"rect = %lf,%lf,%lf,%lf", rect.origin.x, rect.origin.y, rect.size.width, rect.size.height);
下面看一下输出结果
2018-01-18 17:20:57.721579+0800 JJLayer_demo1[41478:27211036] rect = 200.000000,10.000000,0.000000,390.000000
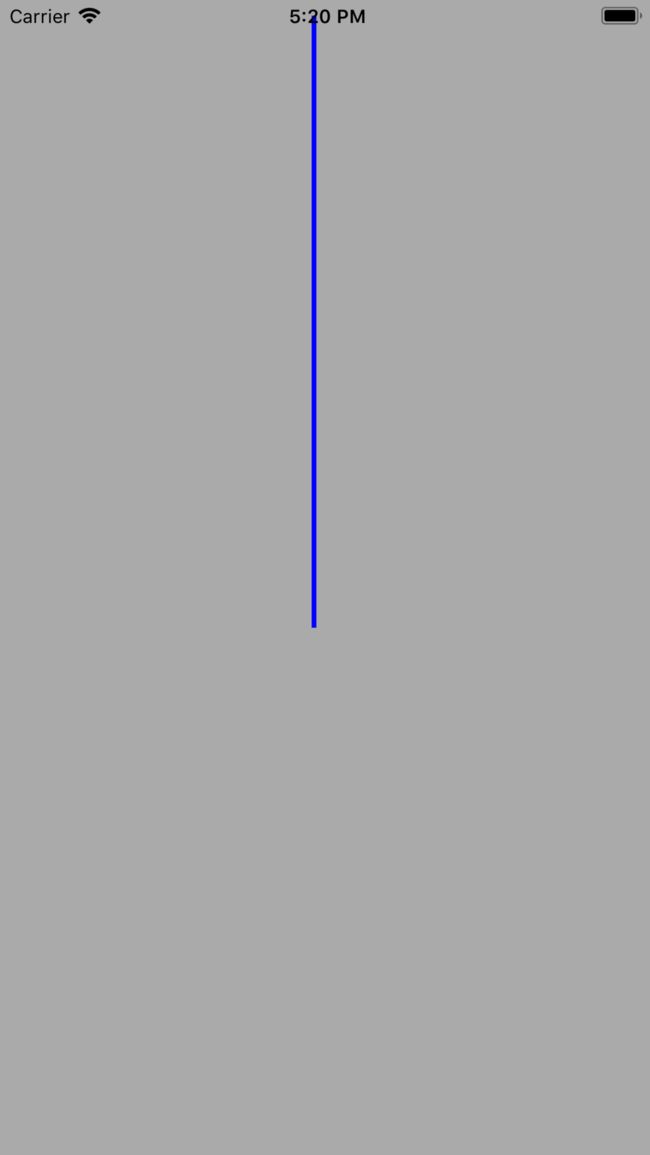
这里,可以注意到宽度一直为0.0,具体效果如下所示。
3. @property(nonatomic,readonly) CGPoint currentPoint;
该属性还是只读属性,目的就是获取绘制结束后的当前点的位置,下面看一下代码。
    UIBezierPath *path = [UIBezierPath bezierPath];
    [path moveToPoint:CGPointMake(200, 10)];
    [path addLineToPoint:CGPointMake(200, 400)];
    CGPoint point = path.currentPoint;
    NSLog(@"point = %lf,%lf", point.x, point.y);
下面我们就看一下输出结果
2018-01-18 17:23:22.079304+0800 JJLayer_demo1[41511:27230619] point = 200.000000,400.000000
这个还是很好理解的。
4. - (BOOL)containsPoint:(CGPoint)point;
该方法的作用就是用于判断路径是否包含某一点。
    UIBezierPath *path = [UIBezierPath bezierPath];
    [path moveToPoint:CGPointMake(200, 10)];
    [path addLineToPoint:CGPointMake(200, 400)];
    BOOL value1 = [path containsPoint:CGPointMake(200.0, 200.0)];
    NSLog(@"是否包含 = %d", value1);
    BOOL value2 = [path containsPoint:CGPointMake(300.0, 200.0)];
    NSLog(@"是否包含 = %d", value2);
下面看输出结果
2018-01-18 17:26:14.161382+0800 JJLayer_demo1[41545:27246352] 是否包含 = 1
2018-01-18 17:26:14.161528+0800 JJLayer_demo1[41545:27246352] 是否包含 = 0
这个方法也是很好理解的。
绘制属性 - Drawing properties
相关的属性和方法如下所示。
@property(nonatomic) CGFloat lineWidth;
@property(nonatomic) CGLineCap lineCapStyle;
@property(nonatomic) CGLineJoin lineJoinStyle;
@property(nonatomic) CGFloat miterLimit; // Used when lineJoinStyle is kCGLineJoinMiter
@property(nonatomic) CGFloat flatness;
@property(nonatomic) BOOL usesEvenOddFillRule; // Default is NO. When YES, the even-odd fill rule is used for drawing, clipping, and hit testing.

- (void)setLineDash:(nullable const CGFloat *)pattern count:(NSInteger)count phase:(CGFloat)phase;
- (void)getLineDash:(nullable CGFloat *)pattern count:(nullable NSInteger *)count phase:(nullable CGFloat *)phase;
1. @property(nonatomic) CGFloat lineWidth;
线宽,这个就不多说了。
2. @property(nonatomic) CGLineCap lineCapStyle;
线头的样式,是一个枚举,在CAShapeLayer类解析(二) —— 基本使用中讲述过。不同的是那里是字符串,这里是枚举。但是样式都是一样的,感兴趣的可以参考那一篇文章。
/* Line cap styles. */

typedef CF_ENUM(int32_t, CGLineCap) {
    kCGLineCapButt,
    kCGLineCapRound,
    kCGLineCapSquare
};
3. @property(nonatomic) CGLineJoin lineJoinStyle;
线连接点的样式,是一个枚举,在CAShapeLayer类解析(二) —— 基本使用中讲述过。不同的是那里是字符串,这里是枚举。但是样式都是一样的,感兴趣的可以参考那一篇文章。
/* Line join styles. */

typedef CF_ENUM(int32_t, CGLineJoin) {
    kCGLineJoinMiter,
    kCGLineJoinRound,
    kCGLineJoinBevel
};
4. @property(nonatomic) CGFloat miterLimit;
这个只有在kCGLineJoinMiter时才会生效。在CAShapeLayer类解析(二) —— 基本使用中讲述过。
5. @property(nonatomic) CGFloat flatness;
弯曲路径的渲染精度,默认为0.6,越小精度越高,相应的更加消耗性能。这个精度和性能不好测量,就不给大家展示效果图了。
6. @property(nonatomic) BOOL usesEvenOddFillRule;
用于判断一个闭合path的填充区域,是否使用奇偶填充原则。默认是NO, 当“YES”时,奇偶填充规则用于绘图,裁剪和命中测试。与奇偶填充原则对应的还有一个就是non-zero原则。
non-zero字面意思是“非零”。按该规则,要判断一个点是否在图形内,从该点作任意方向的一条射线,然后检测射线与图形路径的交点情况。从0开始计数,路径从左向右穿过射线则计数加1,从右向左穿过射线则计数减1。得出计数结果后,如果结果是0,则认为点在图形外部,否则认为在内部。
even-odd字面意思是“奇偶”。按该规则,要判断一个点是否在图形内,从该点作任意方向的一条射线,然后检测射线与图形路径的交点的数量。如果结果是奇数则认为点在内部,是偶数则认为点在外部。
Default is NO. When YES, the even-odd fill rule is used for drawing, clipping, and hit testing.
If YES, the path is filled using the even-odd rule. If NO, it is filled using the non-zero rule. Both rules are algorithms to determine which areas of a path to fill with the current fill color. A ray is drawn from a point inside a given region to a point anywhere outside the path’s bounds. The total number of crossed path lines (including implicit path lines) and the direction of each path line are then interpreted as follows:
For the even-odd rule, if the total number of path crossings is odd, the point is considered to be inside the path and the corresponding region is filled. If the number of crossings is even, the point is considered to be outside the path and the region is not filled.
For the non-zero rule, the crossing of a left-to-right path counts as +1 and the crossing of a right-to-left path counts as -1. If the sum of the crossings is nonzero, the point is considered to be inside the path and the corresponding region is filled. If the sum is 0, the point is outside the path and the region is not filled.
7. - (void)setLineDash:(nullable const CGFloat *)pattern count:(NSInteger)count phase:(CGFloat)phase;
下面我们看一下这几个参数:
-
pattern:这是C类型的浮点型数组,里面包含的数字依次是线宽,空白的间隔,线宽,空白的间隔... -
count:pattern中数组元素个数。 -
phase:开始绘制时给出的偏移量,例如,如果设置为6,pattern数组为5-2-3-2,那么就会跳过第一个5的线段,从空格2中间的部分开始绘制。
用于绘制虚线的一个方法,下面直接看一下代码。
#import "JJCustomView.h"

@implementation JJCustomView

- (void)drawRect:(CGRect)rect
{
    UIBezierPath *path = [UIBezierPath bezierPath];
    [path addArcWithCenter:CGPointMake(200.0, 200.0) radius:100.0 startAngle:0.0 endAngle:M_PI * 2 clockwise:YES];
    CGFloat dashStyle[] = {5.0, 2.0, 3.0, 2.0};
    [path setLineDash:dashStyle count:4 phase:1.0];
    [[UIColor blueColor] setStroke];
    [path stroke];
}
@end
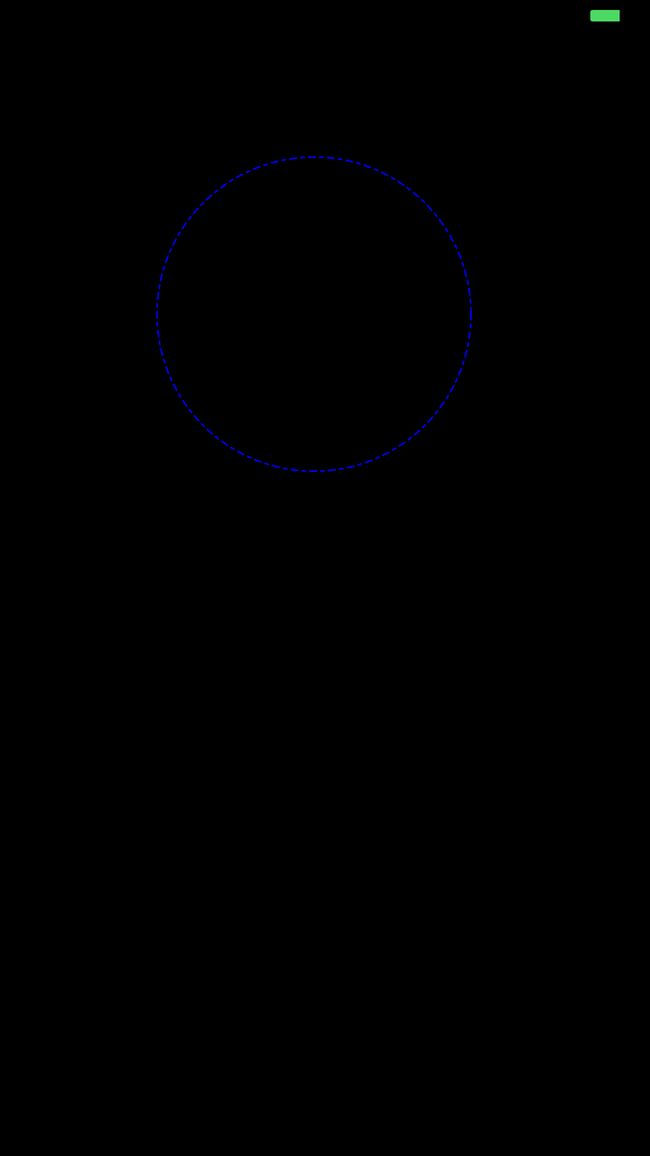
上面是自定义的UIView,下面看一下效果
上面在方法- (void)drawRect:(CGRect)rect里面绘制,因为有默认的上下文,如果你想在别的地方进行绘制就要定义新的上下文。
8. - (void)getLineDash:(nullable CGFloat *)pattern count:(nullable NSInteger *)count phase:(nullable CGFloat *)phase;
下面先看一下这几个参数:
-
pattern:在输入时,一个C风格的浮点值数组,或者如果不需要模式值,则为nil。 在输出中,此数组包含线段和间隙的长度(以点为单位)。 数组中的值交替出现,从第一个线段长度开始,接着是第一个间隙长度,接着是第二个线段长度,依此类推。 -
count:输入时,指向一个整数,如果你不想要整个条目的数量就传nil。 输出时,写入pattern的条目数。 -
phase:输入时,指向浮点值的指针,如果不需要phase,则为nil。 在输出中,此值包含开始绘制图案的偏移量,沿着虚线图案以点测量。 例如,pattern 5-2-3-2中的phase 值为6将导致绘图在第一个间隙的中间开始。
pattern参数中的数组必须足够大,以保存pattern中的所有返回值。 如果您不确定可能有多少个值,则可以调用此方法两次。 第一次调用它时,不要为pattern传递一个值,而是使用count参数中的返回值来分配一个浮点数的数组,然后可以在第二次传递过去。
在当前的上下文中操作路径
主要涉及的是两个方法
// Path operations on the current graphics context

- (void)fill;
- (void)stroke;
这两个方法前面一直在用,一个是填充,一个是描边,就不具体举例了。
不影响当前上下文的混合模式以及透明度
主要涉及到下面几个方法
// These methods do not affect the blend mode or alpha of the current graphics context
- (void)fillWithBlendMode:(CGBlendMode)blendMode alpha:(CGFloat)alpha;
- (void)strokeWithBlendMode:(CGBlendMode)blendMode alpha:(CGFloat)alpha;

- (void)addClip;
1. - (void)strokeWithBlendMode:(CGBlendMode)blendMode alpha:(CGFloat)alpha;
这里先看一下混合模式这个枚举
/* Blend modes.

   The blend modes from kCGBlendModeNormal to kCGBlendModeLuminosity are
   supported in Mac OS X 10.4 and later. The Porter-Duff blend modes (from
   kCGBlendModeClear to kCGBlendModePlusLighter) are supported in Mac OS X
   10.5 and later. The names of the Porter-Duff blend modes are historical.

   Note that the Porter-Duff blend modes are not necessarily supported in
   every context. In particular, they are only guaranteed to work in
   bitmap-based contexts, such as those created by CGBitmapContextCreate. It
   is your responsibility to make sure that they do what you want when you
   use them in a CGContext. */

typedef CF_ENUM (int32_t, CGBlendMode) {
    /* Available in Mac OS X 10.4 & later. */
    kCGBlendModeNormal,
    kCGBlendModeMultiply,
    kCGBlendModeScreen,
    kCGBlendModeOverlay,
    kCGBlendModeDarken,
    kCGBlendModeLighten,
    kCGBlendModeColorDodge,
    kCGBlendModeColorBurn,
    kCGBlendModeSoftLight,
    kCGBlendModeHardLight,
    kCGBlendModeDifference,
    kCGBlendModeExclusion,
    kCGBlendModeHue,
    kCGBlendModeSaturation,
    kCGBlendModeColor,
    kCGBlendModeLuminosity,

    /* Available in Mac OS X 10.5 & later. R, S, and D are, respectively,
       premultiplied result, source, and destination colors with alpha; Ra,
       Sa, and Da are the alpha components of these colors.

       The Porter-Duff "source over" mode is called `kCGBlendModeNormal':
         R = S + D*(1 - Sa)

       Note that the Porter-Duff "XOR" mode is only titularly related to the
       classical bitmap XOR operation (which is unsupported by
       CoreGraphics). */

    kCGBlendModeClear,                  /* R = 0 */
    kCGBlendModeCopy,                   /* R = S */
    kCGBlendModeSourceIn,               /* R = S*Da */
    kCGBlendModeSourceOut,              /* R = S*(1 - Da) */
    kCGBlendModeSourceAtop,             /* R = S*Da + D*(1 - Sa) */
    kCGBlendModeDestinationOver,        /* R = S*(1 - Da) + D */
    kCGBlendModeDestinationIn,          /* R = D*Sa */
    kCGBlendModeDestinationOut,         /* R = D*(1 - Sa) */
    kCGBlendModeDestinationAtop,        /* R = S*(1 - Da) + D*Sa */
    kCGBlendModeXOR,                    /* R = S*(1 - Da) + D*(1 - Sa) */
    kCGBlendModePlusDarker,             /* R = MAX(0, (1 - D) + (1 - S)) */
    kCGBlendModePlusLighter             /* R = MIN(1, S + D) */
};
下面我们就看一下代码
#import "JJCustomView.h"

@implementation JJCustomView

- (void)drawRect:(CGRect)rect
{
    UIBezierPath *path = [UIBezierPath bezierPath];
    [path addArcWithCenter:CGPointMake(200.0, 200.0) radius:100.0 startAngle:0.0 endAngle:M_PI * 2 clockwise:YES];
    CGFloat dashStyle[] = {5.0, 2.0, 3.0, 2.0};
    [path setLineDash:dashStyle count:4 phase:1.0];
    [[UIColor blueColor] setStroke];
    [path strokeWithBlendMode:kCGBlendModeLighten alpha:0.5];
}
@end
看一下实现效果
2. - (void)fillWithBlendMode:(CGBlendMode)blendMode alpha:(CGFloat)alpha;
还是先看一下代码。
#import "JJCustomView.h"

@implementation JJCustomView

- (void)drawRect:(CGRect)rect
{
    UIBezierPath *path = [UIBezierPath bezierPath];
    [path addArcWithCenter:CGPointMake(200.0, 200.0) radius:100.0 startAngle:0.0 endAngle:M_PI * 2 clockwise:YES];
    CGFloat dashStyle[] = {5.0, 2.0, 3.0, 2.0};
    [path setLineDash:dashStyle count:4 phase:1.0];
    [[UIColor blueColor] setFill];
    [path fillWithBlendMode:kCGBlendModeLighten alpha:0.3];
}
@end
下面看一下实现效果
效果还是很明显的。
3. - (void)addClip;
UIBezierPath中的addClip功能,可以实现裁剪:
This method modifies the visible drawing area of the current graphics context. After calling it, subsequent drawing operations result in rendered content only if they occur within the fill area of the specified path.
简单的说,就是一个path调用addClip之后,它所在的context的可见区域就变成了它的fill area,接下来的绘制,如果在这个区域外都会被无视。
将接收器路径所包围的区域与当前图形上下文的剪切路径相交,并将生成的形状作为当前剪切路径。
此方法修改当前图形上下文的可见绘图区域。 在调用它之后,只有在指定路径的填充区域内出现渲染内容时,后续的绘制操作才会生成渲染内容。
重要:如果需要删除剪辑区域以执行后续绘制操作,则必须在调用此方法之前保存当前的图形状态(使用saveGState()函数)。 当不再需要剪切区域时,可以使用restoreGState()函数恢复以前的图形属性和剪切区域。
usesEvenOddFillRule属性用于确定是否使用偶数或非零规则来确定路径所包含的区域。
我们先看一段代码。
#import "JJCustomView.h"

@implementation JJCustomView

- (void)drawRect:(CGRect)rect
{
    UIBezierPath *piePath = [UIBezierPath bezierPath];
    [piePath moveToPoint:CGPointMake(200.0, 200.0)];
    [piePath addArcWithCenter:CGPointMake(200.0, 200.0)  radius:200.0  startAngle:0  endAngle:M_PI * 0.5  clockwise:YES];
    [piePath closePath];

    UIBezierPath *anotherPath = [UIBezierPath bezierPath];
    [anotherPath moveToPoint:CGPointMake(50.0, 50.0)];
    [anotherPath addLineToPoint:CGPointMake(250.0, 50.0)];

    [piePath appendPath:anotherPath];


    [[UIColor blueColor] setStroke];
    [piePath stroke];
}

@end
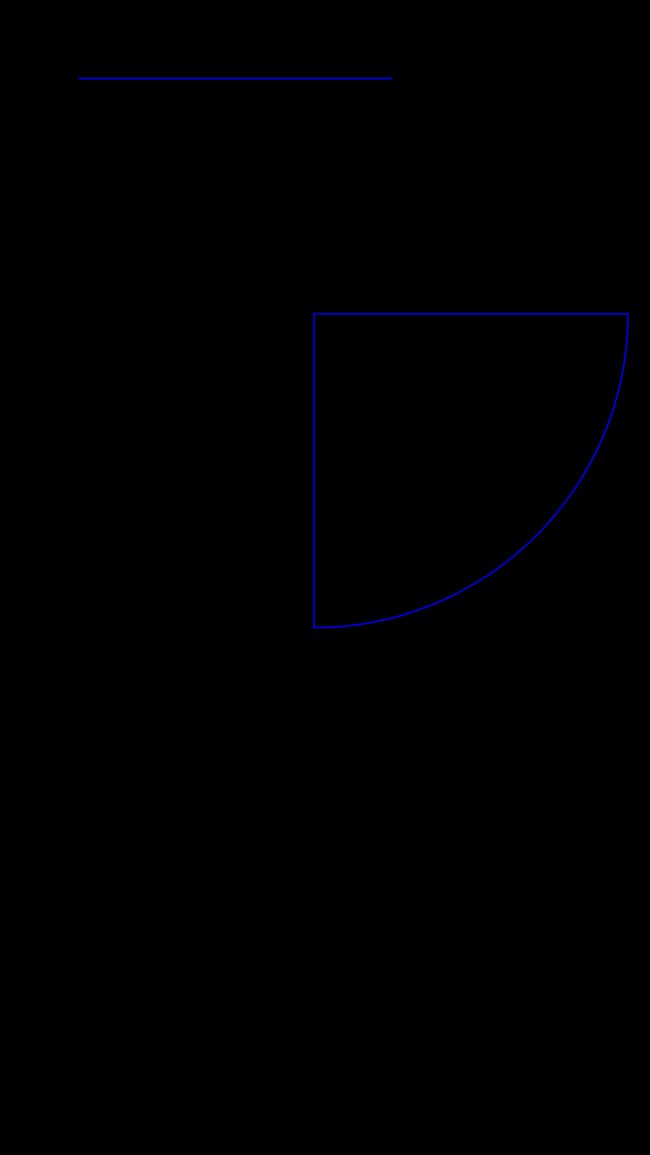
这个是没调用- (void)addClip;方法的代码,看一下输出效果
可以看见,现在的路径是扇形加上一条直线,下面我们就调用- (void)addClip;方法,看一下代码。
#import "JJCustomView.h"

@implementation JJCustomView

- (void)drawRect:(CGRect)rect
{
    UIBezierPath *piePath = [UIBezierPath bezierPath];
    [piePath moveToPoint:CGPointMake(200.0, 200.0)];
    [piePath addArcWithCenter:CGPointMake(200.0, 200.0)  radius:200.0  startAngle:0  endAngle:M_PI * 0.5  clockwise:YES];
    [piePath closePath];

    UIBezierPath *anotherPath = [UIBezierPath bezierPath];
    [anotherPath moveToPoint:CGPointMake(50.0, 50.0)];
    [anotherPath addLineToPoint:CGPointMake(250.0, 50.0)];

    [piePath appendPath:anotherPath];

    [piePath addClip];
    [[UIColor blueColor] setStroke];
    [piePath stroke];
}

@end
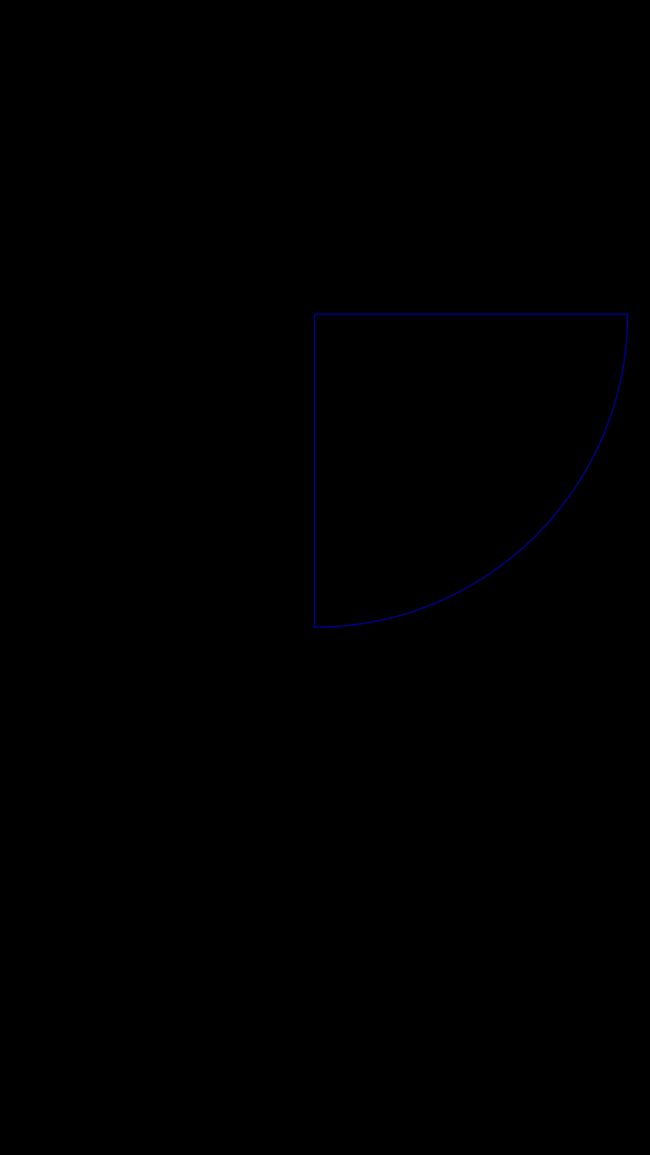
下面看一下输出效果
可以看见横线没有了,这是为什么?这是因为[piePath addClip];,那么当前上下文大小就和路径piePath的fill area填充区域一样大了,由于直线是在填充区域外面,所以被剪切掉了就不会显示了。相信大家对这个方法的使用已经了解了。
后记
本篇已结束,后续还会增加相关知识~~~


