OSGI实现服务注册于发现
发布和使用服务
由于 OSGi 框架能够方便的隐藏实现类,所以对外提供接口是很自然的事情,OSGi 框架提供了服务的注册和查询功能。好的,那么我们实际操作一下,就在 Hello world 工程的基础上进行。
我们需要进行下列的步骤:
- 定义一个服务接口,并且 export 出去供其它 bundle 使用;
- 定义一个缺省的服务实现,并且隐藏它的实现;
- Bundle 启动后,需要将服务注册到 felix 框架;
- 从框架查询这个服务,并且测试可用性。
直接上代码,主pom的xml文件
  4.0.0

  com.renming.osgi.helloworld
  helloworld
  1.0.0

    server
    client

  pom

  helloworld
  http://maven.apache.org


    UTF-8


        com.renming.osgi.helloworld
        server
        ${project.version}


        org.eclipse
        osgi
        3.9.1-v20130814-1242
        provided


        junit
        junit
        3.8.1
        test
server的pom文件
        helloworld
        com.renming.osgi.helloworld
        1.0.0

    4.0.0

    server
    bundle

    server
    http://maven.apache.org


        UTF-8


            org.eclipse
            osgi


            junit
            junit
            3.8.1
            test


                org.apache.felix
                maven-bundle-plugin
                2.4.0
                true


                        ${project.version}
                        $(replace;${project.artifactId};-;_)

                            com.renming.osgi.helloworld.server.inter;version="${project.version}"

                        org.osgi.framework
                        com.renming.osgi.helloworld.Activator


                org.apache.maven.plugins
                maven-compiler-plugin

                    1.6
                    1.6
client的pom文件
        helloworld
        com.renming.osgi.helloworld
        1.0.0

    4.0.0

    client
    bundle

    client
    http://maven.apache.org


        UTF-8


            com.renming.osgi.helloworld
            server


            org.eclipse
            osgi


            junit
            junit
            3.8.1
            test


                org.apache.felix
                maven-bundle-plugin
                2.4.0
                true


                        ${project.version}
                        $(replace;${project.artifactId};-;_)

                            org.osgi.framework,com.renming.osgi.helloworld.server.inter;version="${project.version}"

                        com.renming.osgi.helloworld.Activator


                org.apache.maven.plugins
                maven-compiler-plugin

                    1.6
                    1.6
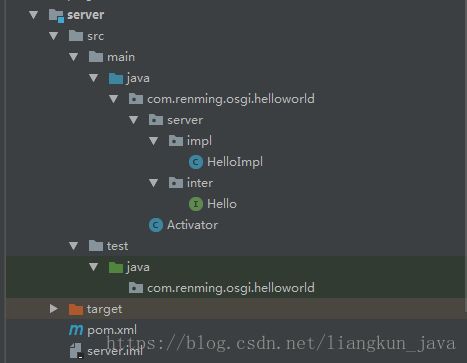
server的java代码目录如下:
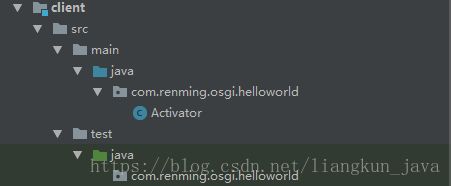
clent的java代码目录如下:
其中server中的Activator的java代码如下:
package com.renming.osgi.helloworld;

import java.util.ArrayList;
import java.util.List;

import com.renming.osgi.helloworld.server.impl.HelloImpl;
import com.renming.osgi.helloworld.server.inter.Hello;
import org.osgi.framework.BundleActivator;
import org.osgi.framework.BundleContext;
import org.osgi.framework.ServiceRegistration;

public class Activator implements BundleActivator {

    private List registrations = new ArrayList();

    private static BundleContext context;

    static BundleContext getContext() {
        return context;
    }

    @Override
    public void start(BundleContext bundleContext) throws Exception {
        Activator.context = bundleContext;
        System.out.println("----------------hello start---------------------");
        //注册hello接口中的服务
        registrations.add(bundleContext.registerService(Hello.class.getName(), new HelloImpl("Hello, OSGi"), null));
        System.out.println("----------------hello start---------------------");
    }

    @Override
    public void stop(BundleContext bundleContext) throws Exception {
        Activator.context = null;
        for (ServiceRegistration registration : registrations) {
            System.out.println("unregistering: " + registration);
            registration.unregister();
        }

    }

}
clent中的Activator的java代码如下:
package com.renming.osgi.helloworld;


import com.renming.osgi.helloworld.server.inter.Hello;
import org.osgi.framework.BundleActivator;
import org.osgi.framework.BundleContext;
import org.osgi.framework.ServiceReference;

public class Activator implements BundleActivator {

    @Override
    public void start(BundleContext ctx) {
        System.out.println("----------------hello client start---------------------");
        ServiceReference ref = ctx.getServiceReference(Hello.class.getName());
        if (ref != null) {
            Hello hello = null;
            try {
                hello = (Hello) ctx.getService(ref);
                if (hello != null) {
                    hello.sayHello();
                }else {
                    System.out.println("Service:Hello---object null");
                }
            } catch (RuntimeException e) {
                e.printStackTrace();
            } finally {
                ctx.ungetService(ref);
                hello = null;
            }
        } else {
            System.out.println("Service:Hello---not exists");
        }
        System.out.println("----------------hello client start---------------------");
    }

    @Override
    public void stop(BundleContext ctx) throws Exception {

    }

}
server中主要是对某个服务进行注册的操作,其中注册的方法主要如下:
 //注册hello接口中的服务
        registrations.add(bundleContext.registerService(Hello.class.getName(), new HelloImpl("Hello, OSGi"), null));
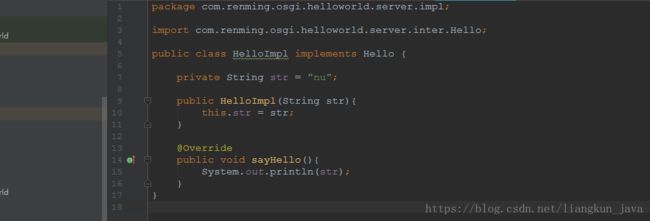
实际注册的是hello接口的实现类HelloImpl
OSGI的运行:
这里我们采用的是felix的具体实现的OSGI
下载felix https://mirrors.tuna.tsinghua.edu.cn/apache//felix/org.apache.felix.main.distribution-6.0.0.zip
拷贝bin、bundle、conf到当前工程,也可自行建目录。
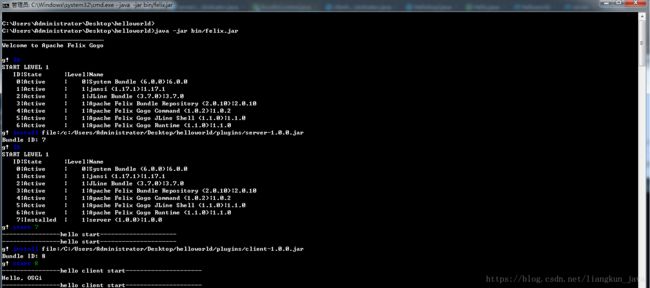
运行felix项目:java -jar bin/felix.jar
若未报错并出现g!。然后执行命令行 lb 得到如下控制台输出信息。
安装如上项目打包好的文件 server-1.0.0.jar、clent-1.0.0.jar
最后控制台输出Hello, OSGI。由此一个简单的基于OSGI框架的服务注册和发现。


