Qt Creator plugin动手实践(2)自己动手写qt creator插件,实现自定义工具栏按钮
一、环境准备
自己动手写qt creator插件之前,需要先编译Qt Creator源码。详情见博客:
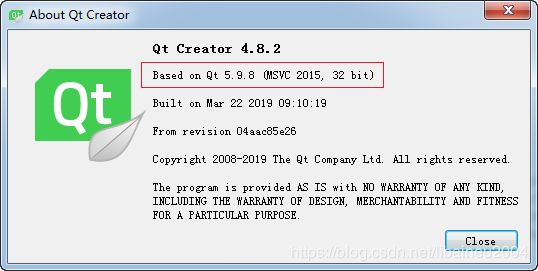
使用Qt Creator IDE+MSVC2015编译器组合,编译Qt Creator源码4.8.2版本
二、编译器使用MSVC2015 32bit,qt creator源码编译完成,会生成很多exe,lib和dll。我们需要重点关注以下几个lib。因为qt creator插件会依赖它们。
Debug\lib\qtcreator\Aggregationd4.lib
Debug\lib\qtcreator\Cored4.lib
Debug\lib\qtcreator\ExtensionSystemd4.lib
Debug\lib\qtcreator\Utilsd4.lib
Release\lib\qtcreator\Aggregation4.lib
Release\lib\qtcreator\Core4.lib
Release\lib\qtcreator\ExtensionSystem4.lib
Release\lib\qtcreator\Utils4.lib
三、新建qt creator插件工程
参考Qt官方文档 https://doc-snapshots.qt.io/qtcreator-extending/first-plugin.html
工程.pro文件设置如下:
DEFINES += FIRECAT_TOOLBAR_LIBRARY

# firecat_Toolbar files

SOURCES += \
        firecat_toolbarplugin.cpp

HEADERS += \
        firecat_toolbarplugin.h \
        firecat_toolbar_global.h \
        firecat_toolbarconstants.h

# Qt Creator linking

## Either set the IDE_SOURCE_TREE when running qmake,
## or set the QTC_SOURCE environment variable, to override the default setting
#isEmpty(IDE_SOURCE_TREE): IDE_SOURCE_TREE = $$(QTC_SOURCE)#必须注释掉这句话
isEmpty(IDE_SOURCE_TREE): IDE_SOURCE_TREE = "D:/temp/qt-creator-opensource-src-4.8.2"#指向Qt Creator源码路径

## Either set the IDE_BUILD_TREE when running qmake,
## or set the QTC_BUILD environment variable, to override the default setting
#isEmpty(IDE_BUILD_TREE): IDE_BUILD_TREE = $$(QTC_BUILD)#必须注释掉这句话
#isEmpty(IDE_BUILD_TREE): IDE_BUILD_TREE = "D:/temp/build_plugins"#必须注释掉这句话
Debug:isEmpty(IDE_BUILD_TREE): IDE_BUILD_TREE = "D:/temp/build_plugins/debug/"#自定义Debug生成路径
Release:isEmpty(IDE_BUILD_TREE): IDE_BUILD_TREE = "D:/temp/build_plugins/release/"#自定义Release生成路径

## uncomment to build plugin into user config directory
## /plugins/
##    where  is e.g.
##    "%LOCALAPPDATA%\QtProject\qtcreator" on Windows Vista and later
##    "$XDG_DATA_HOME/data/QtProject/qtcreator" or "~/.local/share/data/QtProject/qtcreator" on Linux
##    "~/Library/Application Support/QtProject/Qt Creator" on OS X
#USE_USER_DESTDIR = yes #必须注释掉这句话,否则插件会生成在默认的路径,即C:\Users\firecat\AppData\Local\QtProject\QtCreator\plugins\4.8.2

###### If the plugin can be depended upon by other plugins, this code needs to be outsourced to
###### _dependencies.pri, where  is the name of the directory containing the
###### plugin's sources.

QTC_PLUGIN_NAME = firecat_Toolbar
QTC_LIB_DEPENDS += \
    # nothing here at this time

QTC_PLUGIN_DEPENDS += \
    coreplugin

QTC_PLUGIN_RECOMMENDS += \
    # optional plugin dependencies. nothing here at this time

###### End _dependencies.pri contents ######

include($$IDE_SOURCE_TREE/src/qtcreatorplugin.pri)

RESOURCES += \
    res.qrc
注意:路径指向一定要搞正确,否则编译失败
1、IDE_SOURCE_TREE指的是Qt Creator的源码路径
2、IDE_BUILD_TREE指的是插件生成的路径,必须明确,否则会跑到默认路径:
C:\Users\<用户名>\AppData\Local\QtProject\QtCreator\plugins\4.8.2
3、include($$IDE_SOURCE_TREE/src/qtcreatorplugin.pri)
4、插件编译请选择release,因为debug没有意义,没有用处。
四、编写插件代码,我的目的是想把自己常用的功能加入到左边的工具栏中:
第一个新增按钮是计算器,点击之后会调用微软计算器;
第二个新增按钮是忽略部署直接运行;
第三个新增按钮是忽略部署直接开始调试。
bool firecat_ToolbarPlugin::initialize(const QStringList &arguments, QString *errorString)
{
    // Register objects in the plugin manager's object pool
    // Load settings
    // Add actions to menus
    // Connect to other plugins' signals
    // In the initialize function, a plugin can be sure that the plugins it
    // depends on have initialized their members.

    Q_UNUSED(arguments)
    Q_UNUSED(errorString)

    //我们把RunWithoutDeploy这个方法提携到工具栏,方便使用
    const char id1[] = "ProjectExplorer.RunWithoutDeploy";//这个id对应的是Qt Creator源码的const char RUNWITHOUTDEPLOY[]
    QAction *act1 = Core::ActionManager::command(id1)->action();//对应Qt Creator源码的m_runWithoutDeployAction
    if (act1 == NULL)
    {
        return false;
    }
    const Utils::Icon CLASSIC1(":/image/mode_run.png");//32位图片,34*34像素
    const Utils::Icon FLAT1({{":/image/mode_run_mask.png", Utils::Theme::IconsRunToolBarColor}});//8位图片,34*34像素
    const Utils::Icon FLAT_ACTIVE1({{":/image/mode_run_mask.png", Utils::Theme::IconsModeWelcomeActiveColor}});
    act1->setIcon(Utils::Icon::modeIcon(CLASSIC1, FLAT1, FLAT_ACTIVE1));
    //act1->setIcon(Utils::Icon::sideBarIcon(CLASSIC1, FLAT1));
    act1->setVisible(true);
    Core::ModeManager::addAction(act1, 130);

    //我们把DebugWithoutDeploy这个方法提携到工具栏,方便使用
    const char id2[] = "Debugger.DebugWithoutDeploy";
    QAction *act2 = Core::ActionManager::command(id2)->action();//对应Qt Creator源码的m_debugWithoutDeployAction
    if (act2 == NULL)
    {
        return false;
    }
    const Utils::Icon CLASSIC2(":/image/mode_debug.png");
    const Utils::Icon FLAT2({{":/image/mode_debug_mask.png", Utils::Theme::IconsRunToolBarColor}});
    const Utils::Icon FLAT_ACTIVE2({{":/image/mode_debug_mask.png", Utils::Theme::IconsModeWelcomeActiveColor}});
    act2->setIcon(Utils::Icon::modeIcon(CLASSIC2, FLAT2, FLAT_ACTIVE2));
    //act2->setIcon(Utils::Icon::sideBarIcon(CLASSIC2, FLAT2));
    act2->setVisible(true);
    Core::ModeManager::addAction(act2, 120);

    //我们把微软计算器提携到工具栏,方便使用
#if defined(Q_OS_WIN32)
    QAction *act3 = new QAction(tr("calc"), this);
    const Utils::Icon CLASSIC3(":/image/mode_calc.png");
    const Utils::Icon FLAT3({{":/image/mode_calc_mask.png", Utils::Theme::IconsRunToolBarColor}});
    const Utils::Icon FLAT_ACTIVE3({{":/image/mode_calc_mask.png", Utils::Theme::IconsModeWelcomeActiveColor}});
    act3->setIcon(Utils::Icon::modeIcon(CLASSIC3, FLAT3, FLAT_ACTIVE3));
    //act3->setIcon(Utils::Icon::sideBarIcon(CLASSIC3, FLAT3));
    act3->setVisible(true);
    //QStandardPaths::standardLocations(QStandardPaths::DesktopLocation);//Qt自身没有提供System32的路径
    wchar_t szPath[MAX_PATH] ={0};
    GetSystemDirectory(szPath, MAX_PATH);
    QString path = QString::fromWCharArray(szPath);
    connect(act3, &QAction::triggered, this, [=]() {
        QProcess *poc = new QProcess;
        poc->start(path + "\\calc.exe");//即"C:\\Windows\\system32\\calc.exe"
    });

    Core::ModeManager::addAction(act3, 150);
#endif

    // 因为Qt Creator源码有定义位置摆放的优先级
    // Action priorities
    //const int  P_ACTION_RUN            = 100;
    //const int  P_ACTION_BUILDPROJECT   = 80;
    //const int  P_ACTION_DEBUG          = 90; // Priority for the modemanager.
    //ModeManager::addAction(cmd->action(), Constants::P_ACTION_RUN);

    return true;
}
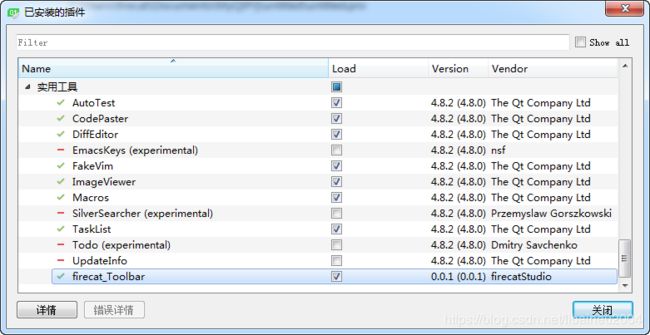
release编译生成firecat_Toolbar4.dll,然后放入到官方Qt Creator的安装路径即可。
D:\Qt\Qt5.9.8\Tools\QtCreator\lib\qtcreator\plugins\
注意,Qt官方发布的Windows版本Qt Creator IDE就是使用MSVC2015 32bit编译出来的。
大功告成(#^.^#)
五、完整的工程源码及库文件下载链接:
https://download.csdn.net/download/libaineu2004/11131466
上传的源码有一处需要调整一下,源文件夹有firecat_Toolbar.json.in文件,把它修改为:
{
    \"Name\" : \"firecat_Toolbar\",
    \"Version\" : \"$$QTCREATOR_VERSION$$VERSION_SUFFIX\",
    \"CompatVersion\" : \"$$QTCREATOR_COMPAT_VERSION\",
    \"Vendor\" : \"firecatStudio\",
    \"Copyright\" : \"firecatStudio\",
    \"License\" : \"\",
    \"Description\" : \"\",
    \"Url\" : \"\",
    $$dependencyList
}
这样可以自适应QtCreator版本号
![]()
六、如果想知道Qt Creator插件的工作原理,请参见我的下一篇博客:
Qt Creator plugin动手实践(3)C++ 类ModeManager源码分析
---
ico图标下载
https://icons8.com/
https://www.easyicon.net/


