nginx在k8s上的安装部署和使用教程
网易公开课,开课啦!
主讲内容:docker/kubernetes 云原生技术,大数据架构,分布式微服务,自动化测试、运维。
腾讯课堂:点击进入
网易课堂:点击进入
7月1号-7月29号 8折优惠!!!
7月1号-7月29号 8折优惠!!!
7月1号-7月29号 8折优惠!!!
全栈工程师开发手册 (作者:栾鹏)
架构系列文章
k8s部署nginx
对于nginx来说,需要持久化的数据主要有两块:
1、nginx配置文件和日志文件
2、网页文件
一、部署pod
apiVersion: v1
kind: ReplicationController
metadata:
  name: nginx-test
  labels:
    name: nginx-test
spec:
  replicas: 1
  selector:
    name: nginx-test
  template:
    metadata:
      labels:
       name: nginx-test
    spec:
      containers:
      - name: nginx-test
        image: docker.io/nginx
#        volumeMounts:
#        - mountPath: /usr/share/nginx/html
#          name: nginx-data
#        - mountPath: /etc/nginx
#          name: nginx-etc
        ports:
        - containerPort: 80
#      volumes:
#      - name: nginx-data
#        persistentVolumeClaim:
#         claimName: nfs-data
#      - name: nginx-etc
#        persistentVolumeClaim:
#         claimName: nfs-nginx-etc
其中nfs-data存储网页文件,nfs-nginx-etc存储配置文件和日志文件
2、sevice配置文件如下
apiVersion: v1
kind: Service
metadata:
  name: nginx-test
  labels:
   name: nginx-test
spec:
  type: NodePort
  ports:
  - port: 80
    protocol: TCP
    targetPort: 80
    name: http
    nodePort: 30088
  selector:
    name: nginx-test
如果你使用了pvc,可以在挂载目录下面创建
echo 'Hello, Welcome to my website...' > index.html
如果没有使用pvc,则在pod的/usr/share/nginx/html目录下面创建测试html.
打开nginx首页就可以访问index.html文件了
nginx简介
nginx有一个主进程和几个工作进程。 主进程的主要目的是读取和评估配置,并维护工作进程。 工作进程对请求进行实际处理。 nginx采用基于事件的模型和依赖于操作系统的机制来有效地在工作进程之间分配请求。 工作进程的数量可在配置文件中定义,并且可以针对给定的配置进行修改,或者自动调整到可用CPU内核的数量(请参阅worker_processes)。
在配置文件中确定nginx及其模块的工作方式。 默认情况下,配置文件名为nginx.conf,并放在目录:/usr/local/nginx/conf, /etc/nginx, 或 /usr/local/etc/nginx 中。
上面的部署 ,配置文件在/etc/nginx/nginx.conf中
nginx基本操作
1. 启动,停止和重新加载Nginx配置
要启动nginx,请运行可执行文件。 当nginx启动后,可以通过使用-s参数调用可执行文件来控制它。 使用以下语法:
nginx -s signal
信号(signal)的值可能是以下之一:
stop- 快速关闭服务quit- 正常关闭服务reload- 重新加载配置文件reopen- 重新打开日志文件
例如,要通过等待工作进程完成服务当前请求来停止nginx进程,可以执行以下命令:
nginx -s quit
注:该命令应该在启动nginx的同一用户下执行。
在将重新配置命令的命令发送到nginx或重新启动之前,配置文件中的更改将不会被应用。 要重新加载配置文件,请执行:
nginx -s reload
当主进程收到要重新加载配置的信号,它将检查新配置文件的语法有效性,并尝试应用其中提供的配置。 如果这是成功的,主进程将启动新的工作进程,并向旧的工作进程发送消息,请求它们关闭。 否则,主进程回滚更改,并继续使用旧配置。 老工作进程,接收关闭命令,停止接受新连接,并继续维护当前请求,直到所有这些请求得到维护。 之后,旧的工作进程退出。
还可以借助Unix工具(如kill utility)将信号发送到nginx进程。 在这种情况下,信号直接发送到具有给定进程ID的进程。 默认情况下,nginx主进程的进程ID写入目录/usr/local/nginx/logs或/var/run中的nginx.pid。 例如,如果主进程ID为1628,则发送QUIT信号导致nginx的正常关闭,请执行:
kill -s QUIT 1628
要获取所有运行的nginx进程的列表,可以使用ps命令,例如,以下列方式:
ps -ax | grep nginx
2. 配置文件的结构
nginx由配置文件中指定的指令控制的模块组成。 指令分为简单指令和块指令。 一个简单的指令由空格分隔的名称和参数组成,并以分号(;)结尾。 块指令具有与简单指令相同的结构,但不是以分号结尾,而是以大括号({和})包围的一组附加指令结束。 如果块指令可以在大括号内部有其他指令,则称为上下文(例如:events,http,server和location)。
配置文件中放置在任何上下文之外的伪指令都被认为是主上下文。 events 和http指令驻留在主上下文中,server在http中的,而location在http块中。
#号之后的一行的部分被视为注释。
验证配置文件是否正确nginx -t
我们来看一下自带的配置文件,在/etc/nginx/nginx.conf
user  nginx;
worker_processes  1;

error_log  /var/log/nginx/error.log warn;
pid        /var/run/nginx.pid;


events {
    worker_connections  1024;
}


http {
    include       /etc/nginx/mime.types;
    default_type  application/octet-stream;

    log_format  main  '$remote_addr - $remote_user [$time_local] "$request" '
                      '$status $body_bytes_sent "$http_referer" '
                      '"$http_user_agent" "$http_x_forwarded_for"';

    access_log  /var/log/nginx/access.log  main;

    sendfile        on;
    #tcp_nopush     on;

    keepalive_timeout  65;

    #gzip  on;

    include /etc/nginx/conf.d/*.conf;

    server {
    }
}
其中通过include 又加载了其他的配置文件, 在/etc/nginx/conf.d/文件夹下有default.conf文件,内容为
server {
    listen       80;
    server_name  localhost;

    #charset koi8-r;
    #access_log  /var/log/nginx/host.access.log  main;

    location / {
        root   /usr/share/nginx/html;
        index  index.html index.htm;
    }

    #error_page  404              /404.html;

    # redirect server error pages to the static page /50x.html
    #
    error_page   500 502 503 504  /50x.html;
    location = /50x.html {
        root   /usr/share/nginx/html;
    }

    # proxy the PHP scripts to Apache listening on 127.0.0.1:80
    #
    #location ~ \.php$ {
    #    proxy_pass   http://127.0.0.1;
    #}

    # pass the PHP scripts to FastCGI server listening on 127.0.0.1:9000
    #
    #location ~ \.php$ {
    #    root           html;
    #    fastcgi_pass   127.0.0.1:9000;
    #    fastcgi_index  index.php;
    #    fastcgi_param  SCRIPT_FILENAME  /scripts$fastcgi_script_name;
    #    include        fastcgi_params;
    #}

    # deny access to .htaccess files, if Apache's document root
    # concurs with nginx's one
    #
    #location ~ /\.ht {
    #    deny  all;
    #}
}
location 定义了默认的转发机制.
3. 提供静态内容服务(静态网站)
一个重要的Web服务器任务是提供文件(如图像或静态HTML页面)。这里我们来学习如何实现一个示例,根据请求,文件将从不同的本地目录提供:/data/www(可能包含HTML文件)和/ data/images(包含图像)。这将需要编辑配置文件,并使用两个位置块在http块内设置服务器块。
首先,创建/data/www目录,并将一个包含任何文本内容的index.html文件放入其中,并创建/data/images目录并在其中放置一些图像。创建两个目录 -
[root@localhost ~]# mkdir -p /data/www
[root@localhost ~]# mkdir -p /data/images
[root@localhost ~]#
分别在上面创建的两个目录中放入两个文件:/data/www/index.html 和 /data/images/logo.png,/data/www/index.html文件的内容就一行,如下 -
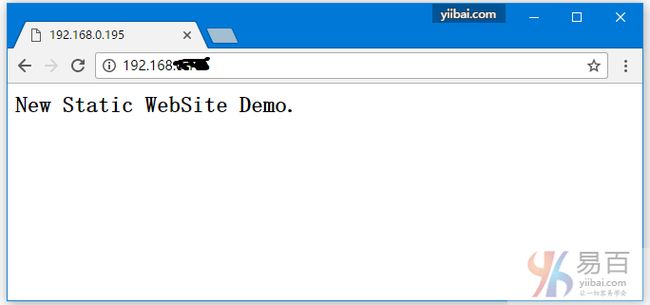
New Static WebSite Demo.
配置方式有两种,一直直接在主配置文件中修改, 一种是直接在文件夹下添加配置, 在主配置中引用. 这里我们直接在主配置文件中修改
接下来,打开配置文件(/etc/nginx/nginx.conf)。 默认的配置文件已经包含了服务器块的几个示例,大部分是注释掉的。我们注释掉include /etc/nginx/conf.d/*.conf; .并启动一个新的服务器块. 因为多个配置文件中如果都匹配相同的路由规则,则会使用最先的配置文件:
http {
    server {
    }
}
通常,配置文件可以包括服务器监听的端口和服务器名称区分的几个server块。当nginx决定哪个服务器处理请求后,它会根据服务器块内部定义的location指令的参数测试请求头中指定的URI。
将以下location块添加到服务器(server)块:
http {
    server {
        location / {
            root /data/www;
        }
    }
}
该location块指定与请求中的URI相比较的“/”前缀。 对于匹配请求,URI将被添加到root指令中指定的路径(即/data/www),以形成本地文件系统上所请求文件的路径。 如果有几个匹配的location块,nginx将选择具有最长前缀来匹配location块。 上面的location块提供最短的前缀长度为1,因此只有当所有其他location块不能提供匹配时,才会使用该块。
接下来,添加第二个location块:
http {
    server {
        location / {
            root /data/www;
            index  index.html index.htm;    # 表示默认的主页为index.html   或则index.htm
        }
        location /images/ {
            root /data;
        }
    }
}
它将是以/images/(位置/也匹配这样的请求,但具有较短前缀,也就是“/images/”比“/”长)的请求来匹配。
server块的最终配置应如下所示:
server {
# 如果路由使用该匹配项,  则 路由对应的相对目录是root表示的根目录来说的.  也就是网址/index.html  返回的是/data/www/index.html文件
    location / {
        root /data/www;
        index  index.html index.htm;    # 表示默认的主页为index.html   或则index.htm
    }
# 如果路由使用该匹配项,  则 路由对应的相对目录是root表示的根目录来说的.  也就是网址/images/logo.jpg 返回的是/data/images/logo.jpg文件
    location /images/ {
        root /data;
    }
}
这已经是一个在标准端口80上侦听并且可以在本地机器上访问的服务器( http://localhost/ )的工作配置。 响应以/images/开头的URI的请求,服务器将从/data/images目录发送文件。 例如,响应http://localhost/images/logo.png请求,nginx将发送服务上的/data/images/logo.png文件。 如果文件不存在,nginx将发送一个指示404错误的响应。 不以/images/开头的URI的请求将映射到/data/www目录。 例如,响应http://localhost/about/example.html请求时,nginx将发送/data/www/about/example.html文件。
要应用新配置,如果尚未启动nginx或者通过执行以下命令将重载信号发送到nginx的主进程:
[root@localhost ~]# nginx -t
nginx: the configuration file /usr/local/nginx/conf/nginx.conf syntax is ok
nginx: configuration file /usr/local/nginx/conf/nginx.conf test is successful
[root@localhost ~]# nginx -s reload
如果错误或异常导致无法正常工作,可以尝试查看目录
/usr/local/nginx/logs或/var/log/nginx中的access.log和error.log文件中查找原因。
打开浏览器或使用CURL访问Nginx服务器如下所示 -
完整的nginx.conf文件配置内容如下:
#user  nobody;
worker_processes  1;

#error_log  logs/error.log;
#error_log  logs/error.log  notice;
#error_log  logs/error.log  info;

#pid        logs/nginx.pid;

events {
    worker_connections  1024;
}

http {
    include       mime.types;
    default_type  application/octet-stream;

    #log_format  main  '$remote_addr - $remote_user [$time_local] "$request" '
    # '$status $body_bytes_sent "$http_referer" '
    # '"$http_user_agent" "$http_x_forwarded_for"';
    #access_log  logs/access.log  main;
    sendfile        on;
    #tcp_nopush     on;
    #keepalive_timeout  0;
    keepalive_timeout  65;
    #gzip  on;

    ## 新服务(静态网站)
    server {
        location / {
            root /data/www;
            index  index.html index.htm;    # 表示默认的主页为index.html   或则index.htm
        }
        location /images/ {
            root /data;
        }
    }
}
4. 设置简单的代理服务器
nginx的一个常见用途是将其设置为代理服务器,这意味着它可作为一个接收请求的服务器,将其传递给代理服务器,从代理服务器中检索响应,并将其发送给客户端。
我们将配置一个基本的代理服务器,它为来自本地目录的文件提供图像请求,并将所有其他请求发送到代理的服务器。 在此示例中,两个服务器将在单个nginx实例上定义。
首先,通过向nginx配置文件添加一个server块来定义代理服务器,其中包含以下内容:
server {
    listen 8080;
    root /data/up1;      # 可以将根目录设置在location外面,进行统一设置

    location / {
    }
}
这将是一个监听端口8080的简单服务器(以前,由于使用了标准端口80,所以没有指定listen指令),并将所有请求映射到本地文件系统上的/data/up1目录。 创建此目录并将index.html文件放入其中。 请注意,root指令位于server块上下文中。 当选择用于服务请求的location块不包含自己的root指令时,将使用此root指令。
注意: 如果监听新的端口,记得为容器或者k8s中开放端口,不然访问不了的.
在上面创建的目录/data/up1中放入一个文件:/data/up1/index.html,文件的内容就一行,如下 -
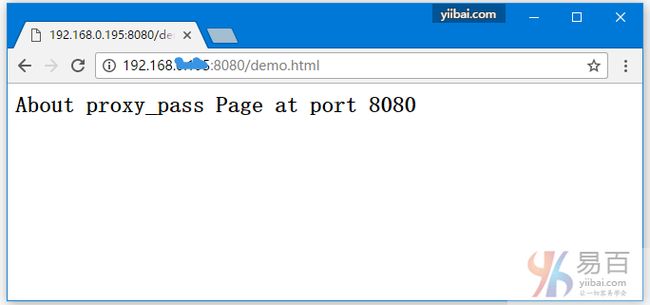
About proxy_pass Page at port 8080
接下来,使用上一节中的服务器配置进行修改,使其成为代理服务器配置。 在第一个位置块中,将proxy_pass指令与参数中指定的代理服务器的协议,名称和端口(在本例中为http://localhost:8080):
server {
    location / {
        proxy_pass http://172.17.0.6:8080/;    # 配置成要代理的容器的ip
    }

    location /images/ {
        root /data;
    }
}
我们将修改当前使用/images/prefix将请求映射到/data/images目录下的文件的第二个location块,使其与典型文件扩展名的图像请求相匹配。 修改后的位置块如下所示:
location ~ \.(gif|jpg|png)$ {
    root /data/images;
}
该参数是一个正则表达式,匹配所有以.gif,.jpg或.png结尾的URI。正则表达式之前应该是~字符。 相应的请求将映射到/data/images目录。
当nginx选择一个location块来提供请求时,它首先检查指定前缀的location指令,记住具有最长前缀的location,然后检查正则表达式。 如果与正则表达式匹配,nginx会选择此location,否则选择之前记住的那一个。
代理服务器的最终配置将如下所示:
server {
    location / {
        proxy_pass http://172.17.0.6:8080/;    # 配置成要代理的容器的ip
    }

    location ~ \.(gif|jpg|png)$ {
        root /data/images;
    }
}
此服务器将过滤以.gif,.jpg或.png结尾的请求,并将它们映射到/data/images目录(通过向root指令的参数添加URI),并将所有其他请求传递到上面配置的代理服务器。
要应用新配置,如果尚未启动nginx或者通过执行以下命令将重载信号发送到nginx的主进程:
[root@localhost ~]# /usr/local/nginx/sbin/nginx -t
nginx: the configuration file /usr/local/nginx/conf/nginx.conf syntax is ok
nginx: configuration file /usr/local/nginx/conf/nginx.conf test is successful
[root@localhost ~]# /usr/local/nginx/sbin/nginx -s reload
首先测试上面配置的 8080 端口的服务,访问服务的8080端口,得到以下结果:

完整的配置nginx.conf文件内容如下 -
#user  nobody;
worker_processes  1;

#error_log  logs/error.log;
#error_log  logs/error.log  notice;
#error_log  logs/error.log  info;

#pid        logs/nginx.pid;

events {
    worker_connections  1024;
}

http {
    include       mime.types;
    default_type  application/octet-stream;

    #log_format  main  '$remote_addr - $remote_user [$time_local] "$request" '
    #                  '$status $body_bytes_sent "$http_referer" '
    #                  '"$http_user_agent" "$http_x_forwarded_for"';

    #access_log  logs/access.log  main;

    sendfile        on;
    #tcp_nopush     on;

    #keepalive_timeout  0;
    keepalive_timeout  65;

    #gzip  on;

    ## 新服务(服务处理)
    server {
        listen 8080;
        root /data/up1;

        location / {
        }
    }

    ## 代理配置,数据转发
    server {
        location / {
            proxy_pass http://172.17.0.6:8080/;    # 配置成要代理的容器的ip
        }

        location ~ \.(gif|jpg|png)$ {
            root /data/images;
        }
    }
}
5. 设置FastCGI代理
nginx可用于将请求路由到运行使用各种框架和PHP等编程语言构建的应用程序的FastCGI服务器。
使用FastCGI服务器的最基本nginx配置包括使用fastcgi_pass指令(而不是proxy_pass指令),以及fastcgi_param指令来设置传递给FastCGI服务器的参数。 假设FastCGI服务器可以在localhost:9000上访问。 以上一节的代理配置为基础,用fastcgi_pass指令替换proxy_pass指令,并将参数更改为localhost:9000。 在PHP中,SCRIPT_FILENAME参数用于确定脚本名称,QUERY_STRING参数用于传递请求参数。 最终的配置将是:
server {
    location / {
        fastcgi_pass  localhost:9000;
        fastcgi_param SCRIPT_FILENAME $document_root$fastcgi_script_name;
        fastcgi_param QUERY_STRING    $query_string;
    }

    location ~ \.(gif|jpg|png)$ {
        root /data/images;
    }
}
这将设置一个服务器,将除静态图像请求之外的所有请求路由到通过FastCGI协议在localhost:9000上运行的代理服务器。
