TensorFlow目标检测——通过鼠标点击图片即输出label
AI最常见是应用是在图像识别上,即输入一张图像,输出该图像对应的类别。
Google开源了一些TensorFlow Object Detection API,下面以ssd_mobilenet_v1_coco_2017_11_17模型为例,介绍如何在TensorFlow中进行目标检测。
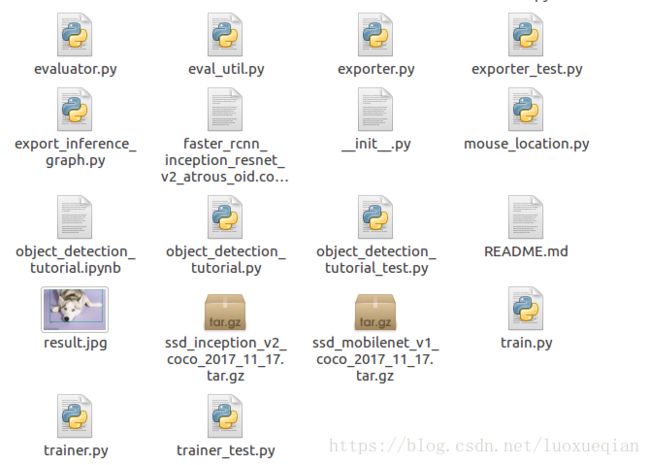
目标检测的代码结构如下:
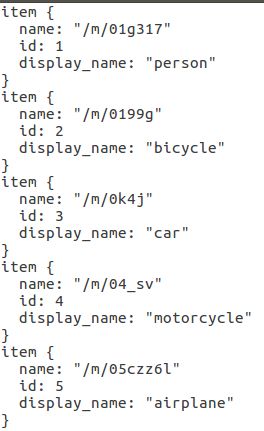
目标检测的数据集是COCO数据集,包含90种可检测的目标,存储在mscoco_label_map.pbtxt文件中
打开如下:
首先打开模型及label文件
# What model to download.
MODEL_NAME = 'ssd_mobilenet_v1_coco_2017_11_17'   #使用模型
MODEL_FILE = MODEL_NAME + '.tar.gz'
#DOWNLOAD_BASE = 'http://download.tensorflow.org/models/object_detection/'     模型下载地址

# Path to frozen detection graph. This is the actual model that is used for the object detection.
PATH_TO_CKPT = MODEL_NAME + '/frozen_inference_graph.pb'

# List of the strings that is used to add correct label for each box.
PATH_TO_LABELS = os.path.join('data', 'mscoco_label_map.pbtxt')

NUM_CLASSES = 90    #识别类型个数

#opener = urllib.request.URLopener()
#opener.retrieve(DOWNLOAD_BASE + MODEL_FILE, MODEL_FILE)
tar_file = tarfile.open(MODEL_FILE)
for file in tar_file.getmembers():
  file_name = os.path.basename(file.name)
  if 'frozen_inference_graph.pb' in file_name:
    tar_file.extract(file, os.getcwd())      #.pb文件为训练出的模型

#load graph
detection_graph = tf.Graph()
with detection_graph.as_default():
  od_graph_def = tf.GraphDef()
  with tf.gfile.GFile(PATH_TO_CKPT, 'rb') as fid:
    serialized_graph = fid.read()
    od_graph_def.ParseFromString(serialized_graph)
    tf.import_graph_def(od_graph_def, name='')

label_map = label_map_util.load_labelmap(PATH_TO_LABELS)   #PATH_TO_LABELS文件中包含90种标签
categories = label_map_util.convert_label_map_to_categories(label_map, max_num_classes=NUM_CLASSES, use_display_name=True)   #获取90种可识别的种类
category_index = label_map_util.create_category_index(categories)   #包含90个字典1:{'id':1, 'name':'dog'}
定义函数load_image_into_numpy_array,将图片转换成矩阵
#将图片转换成矩阵
def load_image_into_numpy_array(image):
  (im_width, im_height) = image.size    #获取输入图片的大小,即长宽
  return np.array(image.getdata()).reshape(
      (im_height, im_width, 3)).astype(np.uint8)    #图片转换成矩阵
定义函数verification_box_label,用来分辨鼠标所点击的坐标处属于哪种类型
#分别输入鼠标坐标,图片中box的坐标(有多少目标会生成多少个box)及box所对应的标签
#此函数只考虑box不相交的情况
#mouse_position[0]为鼠标点击处x坐标,mouse_position[1]为鼠标点击处y坐标
def verification_box_label(mouse_position, boxes_position, class_label):
    boxes_num = len(boxes_position)    #计算box的个数
    #print(boxes_position)
    #print(boxes_position[0][0])
    flage = 1
    class_null = "no result"
    for i in range(boxes_num):    #用循环计算坐标点属于哪个box
        if (mouse_position[0] >= boxes_position[i][0] and mouse_position[0] <= boxes_position[i][1] and mouse_position[1] >= boxes_position[i][2] and mouse_position[1] <= boxes_position[i][3]):
            flage = 0
            class_out = class_label[i]
    if flage:
        return class_null
    else:
        return class_out
文件mouse_location.py,实现点击鼠标,输出鼠标所在处的坐标
import matplotlib.pyplot as plt
import numpy as np
from PIL import Image
import cv2

#im = Image.open("result.jpg")
#plt.imshow(im)
#pos=plt.ginput(1)
#print(pos)
#x_position = pos[0][0]
#y_position = pos[0][1]
#print(pos[0][0])
#print(pos[0][1])
#box_position = np.zeros((2))

def mouse_event(event, x, y, flags, param):
    global box_position
    # 通过event判断具体是什么事件,这里是左键按下
    font = cv2.FONT_HERSHEY_SIMPLEX  # 定义字体
    if event == cv2.EVENT_LBUTTONDOWN:
        print((x, y))
        box_position = np.array([x, y])

def box(img):
    cv2.namedWindow("img")          #构建窗口
    cv2.setMouseCallback("img", mouse_event)   #回调绑定窗口
    cv2.imshow("img",img)        #显示图像
    #if cv2.EVENT_RBUTTONDOWN:
        #cv2.waitKey(1000)
    cv2.waitKey(0)  # 等待鼠标操作
    #print(box_position)
    cv2.destroyAllWindows()         #关闭窗口
实现目标识别
PATH_TO_TEST_IMAGES_DIR = 'test_images'
img_count = 0
ls = os.listdir(PATH_TO_TEST_IMAGES_DIR)
for i_num in ls:
    if os.path.isfile(os.path.join(PATH_TO_TEST_IMAGES_DIR, i_num)):
        img_count += 1  # 统计文件夹中图片的张数

#测试图片路径
TEST_IMAGE_PATHS = [ os.path.join(PATH_TO_TEST_IMAGES_DIR, 'image{}.jpg'.format(i)) for i in range(1, img_count+1) ]

# Size, in inches, of the output images.
IMAGE_SIZE = (12, 8)

#run
with detection_graph.as_default():
  with tf.Session(graph=detection_graph) as sess:
    # Definite input and output Tensors for detection_graph
    image_tensor = detection_graph.get_tensor_by_name('image_tensor:0')
    # Each box represents a part of the image where a particular object was detected.方框
    detection_boxes = detection_graph.get_tensor_by_name('detection_boxes:0')
    # Each score represent how level of confidence for each of the objects.百分数
    # Score is shown on the result image, together with the class label.识别出来的类别
    detection_scores = detection_graph.get_tensor_by_name('detection_scores:0')
    detection_classes = detection_graph.get_tensor_by_name('detection_classes:0')
    num_detections = detection_graph.get_tensor_by_name('num_detections:0')
    for image_path in TEST_IMAGE_PATHS:
      image = Image.open(image_path)
      # the array based representation of the image will be used later in order to prepare the
      # result image with boxes and labels on it.调用函数,将图片转换成矩阵
      image_np = load_image_into_numpy_array(image)    #矩阵形式的图片
      # Expand dimensions since the model expects images to have shape: [1, None, None, 3]
      image_np_expanded = np.expand_dims(image_np, axis=0)
      # Actual detection.
      (boxes, scores, classes, num) = sess.run(
          [detection_boxes, detection_scores, detection_classes, num_detections],
          feed_dict={image_tensor: image_np_expanded})
      # Visualization of the results of a detection.
      #box_location = visualization_utils.box_size
      image_box, box_location, class_nn = visualization_utils.visualize_boxes_and_labels_on_image_array(
          image_np,
          np.squeeze(boxes),
          np.squeeze(classes).astype(np.int32),
          np.squeeze(scores),
          category_index,
          use_normalized_coordinates=True,
          line_thickness=8)
      #print(class_nn)   #分别表示left, right, top, bottom
      (r, g, b)=cv2.split(image_box)
      image_box=cv2.merge([b,g,r])
      mouse_location.box(image_box)
      x_y_position = mouse_location.box_position   #表示鼠标的横纵坐标
      #调用函数识别鼠标点击坐标所属类别
      mouse_position_label = verification_box_label(x_y_position, box_location, class_nn)
      print(mouse_position_label)
      #cv2.imshow('capture.jpg', image_box)
      #cv2.waitKey(0)    #等待鼠标操作
      #cv2.imwrite('result.jpg', image_box)
cv2.destroyAllWindows()
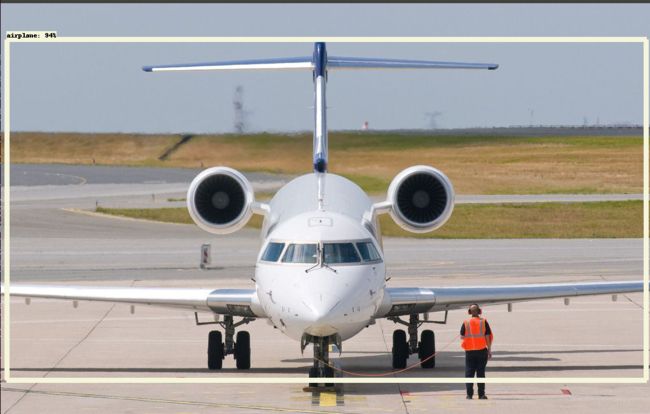
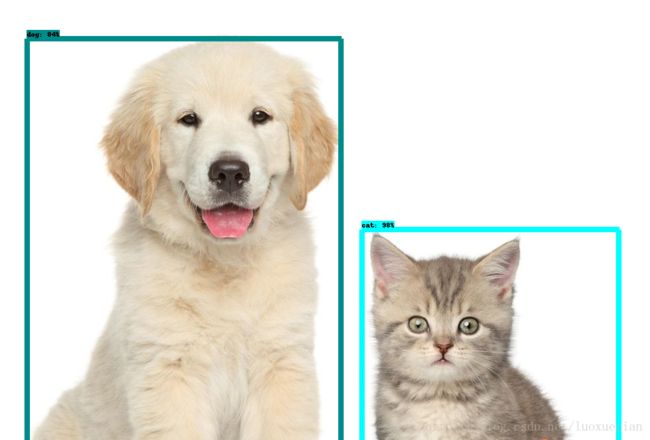
检测结果:
点击猫所在的方框,输出结果为鼠标坐标及label
ssd模型运行速度快,但对于一张图上多种目标,可能会出现漏识别的现象
下一篇介绍ImageNet图像识别模型


