这篇文章其实早在8月份就写出来了,一直没发表出来,这期间也有好几位朋友来问我关于 Apple watch 相关的问题。我也将这篇文章的 md 发给他们了,现在将这篇文章发表出来,让更多想了解 Apple watch 开发的小伙伴能有一个简单的入门吧。
相关文章文章推荐
喵神 Apple WatchKit 初探
喵神 WWDC15 Session笔记 - 30 分钟开发一个简单的 watchOS 2 app
Apple Watch和iOS App之间的通信&Apple Watch自定义Cell
Kiss小锦 Apple watch开发些列
Apple Watch三个月开发的一些收获总结
Apple Watch应用优化的一些心得技巧总结
如何设计Apple Watch上的App
Apple Watch音频录制,.wav转换.mp3,获取音频文件时长
Apple Watch开发中遇到的那些问题(WatchOS 2)
Apple watch 人机交互指南(译)
WatchKit开发的博客
Apple Watch开发总结
watchKit相关编程问题
Apple watch开发指南
配置
Glance以及Notification需要自己手动的配置,编辑它们的Scheme就可以了。
生命周期
界面初始化调用顺序(OneController,TwoController)
| push | modal |
|---|---|
| OneController init | OneController init |
| OneController awakeWithContext: | OneController awakeWithContext: |
| OneController willActivate | OneController willActivate |
| OneController didAppear | OneController didAppear |
点击事件之后...
| push | modal |
|---|---|
| OneController willDisappear | TwoController init |
| TwoController init | TwoController awakeWithContext: |
| TwoController awakeWithContext: | OneController willDisappear |
| TwoController willActivate | TwoController willActivate |
| OneController didDeactivate | TwoController didAppear |
| TwoController didAppear | OneController didDeactivate |
返回事件之后...
| pop | dismiss |
|---|---|
| TwoController willDisappear | TwoController willDisappear |
| OneController willActivate | OneController willActivate: |
| TwoController didDeactivate | OneController didAppear |
| OneController didAppear | TwoController didDeactivate |
生命周期总结:(摘抄至喵神的blog)
每个 WKInterfaceController 对象必然会被调用的生命周期方法有三个,分别是该对象被初始化时的-initWithContext:,将要呈现时的 -willActivate 以及呈现结束后的 -didDeactivate,同样类比 UIViewController 的话,可以将它们理解为分别对应-viewDidLoad,viewWillAppear: 以及 -viewDidDisappear:
我们一般在 -initWithContext: 和 -willActivate 中配置“视图元素”的属性,在 -didDeactivate 中停用像是 NSTimer 之类的会 hold 住 self 的对象。需要特别注意的是,在 -didDeactivate 中对“视图元素”属性进行设置是无效的,因为当前的 WKInterfaceController 已经非活跃。
关于界面控件布局
带你玩- AppleWatch开发二:界面布局
带你玩-AppleWatch开发四:Table视图
一个控件只能对应一个action
tableView的点击事件,注意不要去给cell拉线
#pragma mark - Table Row Select
-(void)table:(WKInterfaceTable *)table didSelectRowAtIndex:(NSInteger)rowIndex
{
    NSLog(@"did select rowIndex = %i",rowIndex);
    /** 设置传指数据(正向传指) */
    NSDictionary *contextDic = @{@"PicName":@"picture",@"index":[NSNumber numberWithInteger:rowIndex]};
//    [self presentControllerWithName:@"detail" context:contextDic];
    [self pushControllerWithName:@"detail" context:contextDic];
}
MenuController
Apple watch独有的,类似iPhone的3DTouch,也是根据重力感应来弹出菜单
带你玩-AppleWatch开发五:Menu菜单
经过测试,最多只能添加四个,不管添加多少个,只会显示前4个。
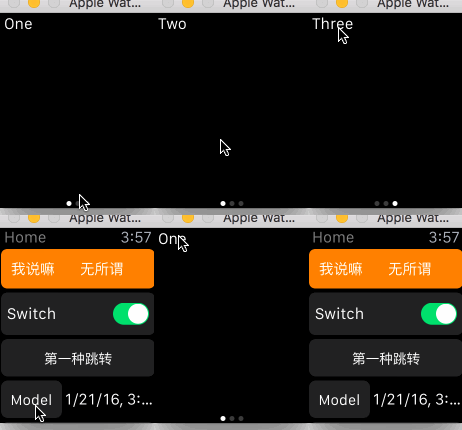
导航方式(层级式,分页式)
push或者Modal之后返回只有一个返回箭头
注意点
针对 Watch 的开发不能使用代码的方式。首先,所有的 WKInterfaceObject 对象都必须要设计的时候经由 StoryBoard 进行添加,运行时我们无法再向界面上添加或者移除元素 (如果有移除需要的,可以使用隐藏);其次 WKInterfaceObject 与布局相关的某些属性,比如行高行数等,不能够在运行时进行变更和设定。基本来说在运行时我们只能够改变视图的内容,以及通过隐藏某些视图元素来达到有限地改变布局 (其他视图元素会试图填充被隐藏的元素)。
控制器跳转
- (void)pushControllerWithName:(NSString *)name context:(nullable id)context;

- (void)presentControllerWithName:(NSString *)name context:(nullable id)context;
/** present多个控制器,类似next Page */
- (void)presentControllerWithNames:(NSArray *)names contexts:(nullableNSArray*)contexts;
控制器之间传值
正向传值
- (void)pushControllerWithName:(NSString *)name context:(nullable id)context;
- (void)presentControllerWithName:(NSString *)name context:(nullable id)context;
- (void)presentControllerWithNames:(NSArray *)names contexts:(nullableNSArray*)contexts;
在上面的三个方法中的末尾都有一个context:参数,这个参数就是用于在我们跳转控制器的时候传值,这点比iOS端方便多了。
Segue传值
//tableView
- (NSArray *)contextsForSegueWithIdentifier:(NSString *)segueIdentifier inTable:(WKInterfaceTable *)table rowIndex:(NSInteger)rowIndex {
    return nil;//传值内容
}

- (id)contextForSegueWithIdentifier:(NSString *)segueIdentifier {
    return nil;//传值内容
}

- (NSArray *)contextsForSegueWithIdentifier:(NSString *)segueIdentifier {
    return nil;//传值内容
}
//tableView
- (id)contextForSegueWithIdentifier:(NSString *)segueIdentifier inTable:(WKInterfaceTable *)table rowIndex:(NSInteger)rowIndex {
    return nil;//传值内容
}
数据接收
在控制器的awakeWithContext:方法接收数据
- (void)awakeWithContext:(id)context {
    [super awakeWithContext:context];
    NSLog(@"receive = %@",context);

    // Configure interface objects here.
}
多媒体
官方编程文档
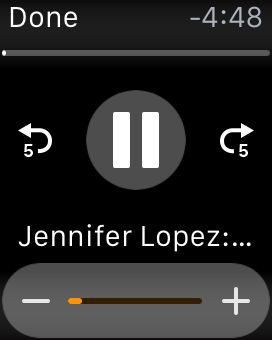
MP3/MP4播放
    //.mp3 or .mp4
    NSURL *url = [[NSBundle mainBundle] URLForResource:@"Jennifer Lopez - Feel the Light" withExtension:@".mp3"];
    NSDictionary *options = @{WKMediaPlayerControllerOptionsAutoplayKey:@YES};
    [self presentMediaPlayerControllerWithURL:url options:options completion:^(BOOL didPlayToEnd, NSTimeInterval endTime, NSError * _Nullable error) {
        if (error) {
            NSLog(@"error = %@",error);
            return ;
        }
        NSLog(@"endTime = %f",endTime);
    }];
音频录制
Apple watch有自带的录音控制器,我们只需要配置好就可以。支持.wav, .mp4, and .m4a格式
 NSDictionary *recorderOptions = @{
                                      /** 录制好之后的标题 */
                                    WKAudioRecorderControllerOptionsActionTitleKey:@"发送",
                                    /** 是否自动录制 */
                                    WKAudioRecorderControllerOptionsAutorecordKey:@YES,
                                    /** 时间 NSTimeInterval */
                                    WKAudioRecorderControllerOptionsMaximumDurationKey:@30
                                    };

    [self presentAudioRecorderControllerWithOutputURL:_recorderUrl preset:WKAudioRecorderPresetHighQualityAudio options:recorderOptions completion:^(BOOL didSave, NSError * _Nullable error) {
        NSLog(@"didSave = %@",didSave?@"YES":@"NO");
        if (error) {
            NSLog(@"error = %@",error);
        }
    }];
注意点:
OutputURL 这个URL不是沙盒URL,而是App Groups的URL。
在模拟器上使用沙盒路径,录制播放都没有问题。
但是,使用手表的话就会出现一录音这个控制器就直接dismiss掉了。
App Groups 的路径
/** Identifier 要跟App Groups 一致 */
NSURL *url =  [[NSFileManager defaultManager] containerURLForSecurityApplicationGroupIdentifier:@"group.com.LaiYoung.NextPage1111"];
NSURL *fileUrl = [url URLByAppendingPathComponent:@"record.wav"];
相关文章 Apple Watch音频录制,.wav转换.mp3,获取音频文件时长
Glance界面(没有交互响应,点击任何位置都会跳转到应用内部)
这是一个类似简介的东西
开始没有选择,如何新增一个Glance,在storyboard拖一个Glance Interface Controller,然后新增一个Scheme,命名为ClanceXXX,选择Edit Scheme...,Executable选择XXX Watch App.app,Watch Interface则选择对应的Glance,close即可
UI:Glance都是基于特定模版的,苹果提供了一系列的模版,包括了屏幕顶部和底部的设计。在Glance Interface Controller Scene的第四个选择器选择。
UI界面不能添加带有事件操作性的控件,例如Button,Switch等等,但是可以添加Label,Image这样的控件。避免使用table和map
Notifications
Apple watch的通知有两种,分别是short looks和long looks
short looks:短版本
从上图看,内容很简单,一个App的icon,应用的名字,一条消息。 和
Glance的UI界面一样不能添加带有操作性的控件。至于哪些能添加哪些不能添加,最直接的办法就是拖一个控件到
Static Notification interface controller 或者
Dynamic Notification interface controller 不报错就说明这个控件是可以添加的。
long looks:长版本,长版本相对于短版本来说多了不少东西
从上图看首先它的UI是可以滚动的
将它分为3个部分,分别是sash,content,actions
sash:包括了应用的名称和icon,这部分默认的颜色是透明的,可以自己自定义颜色(修改颜色,选择Static Notification interface controller的入口,第四个选择器)
content:这部分就是推送的详细内容
action:操作按钮(最多可以添加4个),然后Dismiss按钮是系统一直会有的,不需要我们添加
模拟long looks
我们创建好一个Apple watch应用或者为已有项目添加一个target的时候默认会选择Notification Scene,然后我们的Notification InterfaceController就会是上面的样子,可能和storyboard中的有点不一样,上面的图我是在官方文档中找到的,可能官方还没来的及更改吧。只要明白意思就好...
Static interface是必须的,而dynamic interface是可选的。
在推送到消息的时候一般默认都是选择的dynamic interface,只有当dynamic interface不可用、没有足够的电力保证显示动态界面、明确指出不能用动态界面的时候才会显示Static interface
配置自定义界面的类目(Category)
官方文档 Notifications
相关文章 Notifications概述
关于审核:
关于Watch App审核,如果你选择了某个功能,但没有实现,那么一定会被拒绝的,大家注意一下这点,坑就来那里~
坑:
- 使用代码设置图片
Apple watch和iPhone开发不一样,所以图片尺寸要求也不一样
找到Apple watch的Assets.xcassets选择图片之后点击第三个选择器Devices勾选watchOS,会发现对于的2x/38 mm 2x/42 mm 2x都 没有图片,所以导致代码设置不会出来。 -
watchOS 2.0不再支持App Groups,watchOS 2.0可以使用WCSession进行通讯,WCSession具体怎么使用可以看我之前的这片文章 Apple Watch和iOS App之间的通信&Apple Watch自定义Cell
Error
Apple watch的Bundle versions string,short和Bundle version都要和iOS 里面的一致,不然会build fail
小技巧
- 修改controller title的颜色
选择要修改的控制器,右侧的选择器,选择第一个选择器下面的Global Tint
网络请求
不要使用NSURLConnection send...方法,应该使用NSURLSession方法


