基于phantomJs的Java后台网页截图技术
基于PhantomJs的Java后台网页截图技术
公司之前做的某一手机应用,里面有一需求是一键出图(有一统计信息类的网页,需要在不打开网页的情况下实时对网页进行截图然后保存到服务器上),手机上便可以查看该图片了。刚开始拿到需求发现比较棘手,参考了很多文章解决方案大楷有以下几种:
- Robot
- 利用JNI,调用第三方C/C++组件
- DJNativeSwing组件
参考文章:http://blog.csdn.net/cping1982/article/details/5353049
经过试验Robot失败,DJNativeSwing组件截图成功,但由于网页css的复杂性导致图片失真严重而达不到预期效果。然后继续寻找解决方案,PlantomJs是最完美的解决方案。
PlantomJs是一个基于javascript的webkit内核无头浏览器 也就是没有显示界面的浏览器,你可以在基于 webkit 浏览器做的事情,它都能做到。PlantomJs提供了如 CSS 选择器、DOM操作、JSON、HTML5、Canvas、SVG 等。PhantomJS 的用处很广泛,如网络监控、网页截屏、页面访问自动化、无需浏览器的 Web 测试等,而博主只需要一很小的功能就是网页截屏。
- PhantomJS官方地址:http://phantomjs.org/。
- PhantomJS官方API:http://phantomjs.org/api/。
- PhantomJS官方示例:http://phantomjs.org/examples/。
- PhantomJS GitHub:https://github.com/ariya/phantomjs/。
实现思路
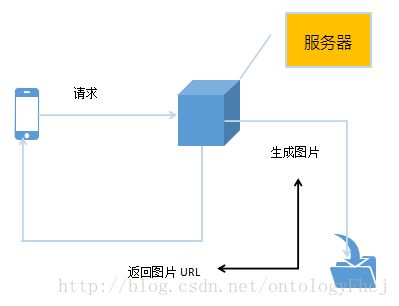
手机发送请求到服务器,服务器截取网页为图片保存到硬盘,生成可访问的URL返回手机上,示意图如下:
下载
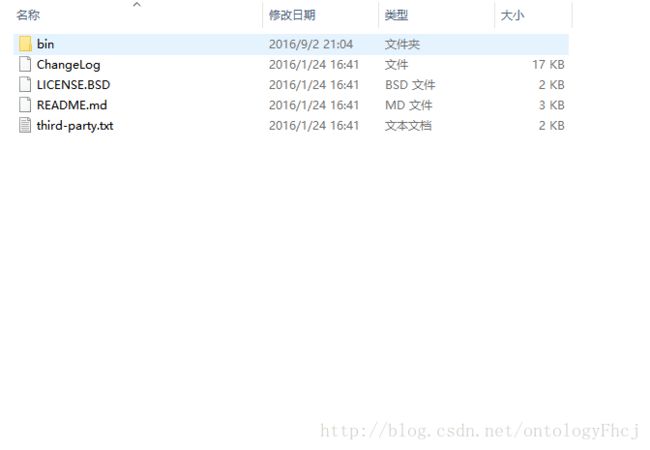
直接进入官网下载http://phantomjs.org/download.html,目前官方支持三种操作系统,包括windows\Mac OS\Linux,
而博主服务器基于windows,所以下载https://bitbucket.org/ariya/phantomjs/downloads/phantomjs-2.1.1-windows.zip,解压后得到以下目录:
编写截图JavaScript
参考文章http://www.cnblogs.com/jasondan/p/4108263.html
负责截图脚本screenshot.js如下:
/**
 * phantomJs 脚本
 */
var page = require('webpage').create(), system = require('system'), address, output, size;

if (system.args.length < 3 || system.args.length > 5) {
    phantom.exit(1);
} else {
    address = system.args[1];
    output = system.args[2];
    //定义宽高
    page.viewportSize = {
        width : 800,
        height : 600
    };
    page.open(address, function(status) {
        var bb = page.evaluate(function() {
            return document.getElementsByTagName('html')[0].getBoundingClientRect();
        });
        page.clipRect = {
            top : bb.top,
            left : bb.left,
            width : bb.width,
            height : bb.height
        };
        window.setTimeout(function() {
            page.render(output);
            page.close();
            console.log('渲染成功...');
        }, 1000);
    });
}
address = system.args[1];//传入的URL地址
output = system.args[2];//保存的图片路径以上是screenshot.js 的脚本内容
编写服务器Java代码
    public static void main(String[] args) throws IOException {
        String BLANK = "  ";
        Process process = Runtime.getRuntime().exec(
                "D:/develop_software/phantomjs/bin/phantomjs.exe" + BLANK //你的phantomjs.exe路径
                + "D:/screenshot.js" + BLANK //就是上文中那段javascript脚本的存放路径
                + "http://www.baidu.com" + BLANK //你的目标url地址
                + "D:/baidu.png");//你的图片输出路径

        InputStream inputStream = process.getInputStream();
        BufferedReader reader = new BufferedReader(new InputStreamReader(inputStream));
        String tmp = "";
        while ((tmp = reader.readLine()) != null) {
            if (reader != null) {
                reader.close();
            }
            if (process != null) {
                process.destroy();
                process = null;
            }
            System.out.println("渲染成功...");
        }
    }
运行以上java代码,会在d盘下生成baidu.png的图片截图成功如下图:

至此一个demo完成!
代码封装(实际项目)
1、screenshot.js处理
实际应用中类似于screenshot.js 一般不放在固定目录,一般放在应用根目录下
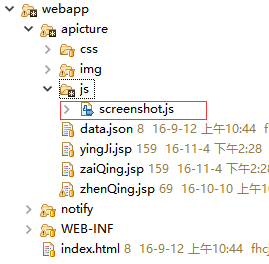
在tomcat启动时就把screenshot.js 路径缓存起来
/**
  * 获取【网页快照截图脚本】文件的路径
  *
  * @return
  */
private String getFullJsPath() {
    return AppContext.getAbsPath() + "/apicture/js/screenshot.js";
}
2、phantomjs.exe处理
把phantomjs.exe的路径配置化,不直接像demo中那样写死到程序中,在web应用中一般都有一个总的applicationConfig.xml来存放诸如这种东西,于是在applicationConfig.xml中加入如下xml节点:
...
<phantomJs>
    <bin>D:/develop_software/phantomjs/bin/phantomjs.exebin>
    <imagePath>apicture/pubimagePath>
phantomJs>
...
通过jaxb工具包将配置转化到对象中
import javax.xml.bind.annotation.XmlAccessType;
import javax.xml.bind.annotation.XmlAccessorType;
import javax.xml.bind.annotation.XmlElement;
import javax.xml.bind.annotation.XmlRootElement;

/**
 * phantomJs 配置
 *
 * @author Fhcj
 *         2016年8月26日
 * @since
 * @version
 */
@XmlAccessorType(XmlAccessType.FIELD)
@XmlRootElement(name = "phantomJs")
public class PhantomJsConifg {

    @XmlElement(name = "bin")
    private String bin;
    @XmlElement(name = "imagePath")
    private String imagePath;

    public String getBin() {
        return bin;
    }

    public void setBin(String bin) {
        this.bin = bin;
    }

    public String getImagePath() {
        return imagePath;
    }

    public void setImagePath(String imagePath) {
        this.imagePath = imagePath;
    }

}
3、编写action
博主用的是nutz mvc作为action层,同理可用servlet或者spring mvc、struts2等
import java.io.BufferedReader;
import java.io.File;
import java.io.IOException;
import java.io.InputStream;
import java.io.InputStreamReader;

import org.nutz.mvc.annotation.At;
import org.nutz.mvc.annotation.Ok;
import org.nutz.mvc.annotation.Param;
import org.slf4j.Logger;
import org.slf4j.LoggerFactory;

import com.rbp.rt.web.result.ObjectResult;
import com.*.eqma.AppContext;
import com.*.eqma.config.PhantomJsConifg;
import com.*.eqma.web.servlet.YingJiJspServlet;
import com.*.eqma.web.servlet.ZaiQingJspServlet;
import com.*.eqma.web.servlet.ZhenQingJspServlet;
import com.*.utils.DateUtils;
import com.*.utils.JsonUtils;
import com.*.utils.StringUtils;

/**
 *
 * 一张图访问服务
 *
 * @author Fhcj
 *         2016年9月2日
 * @since
 * @version
 */
@Ok("json")
public class APictureAction {

    private static final Logger LOG = LoggerFactory.getLogger(APictureAction.class);
    private static final String BLANK = " ";
    private static PhantomJsConifg pjc;

    private String BIN_PATH;
    private String IMAGE_PUB_PATH;

    /**
     * 应急一张图
     *
     * @param evt_id
     *            事件id
     * @return
     */
    @SuppressWarnings("unused")
    @At("/apicture/yingJi")
    public String yingJiPicture(@Param("evt_id") String evt_id) {
        ObjectResult responseResult = new ObjectResult();

        if (StringUtils.isEmpty(evt_id)) {
            responseResult.setNote("地震事件Id为空,无法渲染图片");
            responseResult.setStatus(-1);
            return JsonUtils.obj2Json(responseResult);
        }


        String pictureName = evt_id + "_yingJi.png";
        try {
            String imgageFullPath = getFullImagePath(pictureName);// 得到图片完整路径
            // 如果该事件的一张图存在则不用渲染
            if (new File(imgageFullPath).exists()) {
                LOG.info("事件ID为【{}】的【应急一张图】已经存在,将不会重新渲染:{}", evt_id, imgageFullPath);
                responseResult.setValue(getPictureVisitURL(pictureName));
                responseResult.setStatus(1);
                return JsonUtils.obj2Json(responseResult);
            }

            String url = YingJiJspServlet.getURL() + "?id=" + evt_id;// 应急一张图访问接口URL

            Process process = Runtime.getRuntime().exec(cmd(imgageFullPath, url));

            InputStream inputStream = process.getInputStream();
            BufferedReader reader = new BufferedReader(new InputStreamReader(inputStream));
            String tmp = "";
            while ((tmp = reader.readLine()) != null) {
                close(process, reader);

                LOG.info("事件ID为【{}】的【应急一张图】渲染成功:{}", evt_id, imgageFullPath);
                LOG.info("事件ID为【{}】的【应急一张图】访问路径为:{}", evt_id, getPictureVisitURL(pictureName));
                responseResult.setValue(getPictureVisitURL(pictureName));
                responseResult.setStatus(1);
                return JsonUtils.obj2Json(responseResult);
            }
        } catch (Exception e) {
            responseResult.setStatus(-1);
            responseResult.setNote("事件ID为【{}】的【应急一张图】渲染失败");
            LOG.error("事件ID为【{}】的【应急一张图】渲染失败:", e);
        }

        return JsonUtils.obj2Json(responseResult);
    }

    /**
     * 灾情一张图
     *
     * @param evt_id
     *            事件id
     * @return
     */
    @SuppressWarnings("unused")
    @At("/apicture/zaiQing")
    public String zaiQingPicture(@Param("evt_id") String evt_id) {
        ObjectResult responseResult = new ObjectResult();

        if (StringUtils.isEmpty(evt_id)) {
            responseResult.setNote("地震事件Id为空,无法渲染图片");
            responseResult.setStatus(-1);
            return JsonUtils.obj2Json(responseResult);
        }

        String pictureName = evt_id + "_zaiQing.png";
        try {
            String imgageFullPath = getFullImagePath(pictureName);

            // 如果该事件的一张图存在则不用渲染
            if (new File(imgageFullPath).exists()) {
                LOG.info("事件ID为【{}】的【灾情一张图】已经存在,将不会重新渲染:{}", evt_id, imgageFullPath);
                responseResult.setValue(getPictureVisitURL(pictureName));
                responseResult.setStatus(1);
                return JsonUtils.obj2Json(responseResult);
            }

            String url = ZaiQingJspServlet.getURL() + "?id=" + evt_id;// 灾情一张图访问接口URL
            Process process = Runtime.getRuntime().exec(cmd(imgageFullPath, url));

            InputStream inputStream = process.getInputStream();
            BufferedReader reader = new BufferedReader(new InputStreamReader(inputStream));
            String tmp = "";
            while ((tmp = reader.readLine()) != null) {
                close(process, reader);

                LOG.info("事件ID为【{}】的【灾情一张图】渲染成功:{}", evt_id, imgageFullPath);
                LOG.info("事件ID为【{}】的【灾情一张图】访问路径为:{}", evt_id, getPictureVisitURL(pictureName));
                responseResult.setValue(getPictureVisitURL(pictureName));
                responseResult.setStatus(1);
                return JsonUtils.obj2Json(responseResult);
            }
        } catch (Exception e) {
            responseResult.setStatus(-1);
            responseResult.setNote("事件ID为【{}】的【灾情一张图】渲染失败");
            LOG.error("事件ID为【{}】的【灾情一张图】渲染失败:", e);
        }

        return JsonUtils.obj2Json(responseResult);
    }
    /**
     * 震情一张图
     *
     * @param lng
     *            经度
     * @param lat
     *            纬度
     * @return
     */
    @SuppressWarnings("unused")
    @At("/apicture/zhenQing")
    public String zhenQingPicture(@Param("lng") String lng, @Param("lat") String lat) {
        ObjectResult responseResult = new ObjectResult();
        String pictureName = DateUtils.formatCurrentDate("yyyyMMddHHmmssSSS") + "_zhenQing.png";
        try {

            String imgageFullPath = getFullImagePath(pictureName);

            String url = ZhenQingJspServlet.getURL() + "?lng=" + lng + "&lat=" + lat;// 震情一张图访问接口URL

            Process process = Runtime.getRuntime().exec(cmd(imgageFullPath, url));

            InputStream inputStream = process.getInputStream();
            BufferedReader reader = new BufferedReader(new InputStreamReader(inputStream));
            String tmp = "";
            while ((tmp = reader.readLine()) != null) {
                close(process, reader);

                LOG.info("【震情一张图】渲染成功:{}", imgageFullPath);
                LOG.info("【震情一张图】访问路径为:{}", getPictureVisitURL(pictureName));
                responseResult.setValue(getPictureVisitURL(pictureName));
                responseResult.setStatus(1);
                return JsonUtils.obj2Json(responseResult);
            }
        } catch (Exception e) {
            responseResult.setStatus(-1);
            responseResult.setNote("【震情一张图】渲染失败");
            LOG.error("【震情一张图】渲染失败:", e);
        }

        return JsonUtils.obj2Json(responseResult);
    }

    /**
     * 获取执行JS脚本的window cmd 命令
     *
     * @param imgageFullPath
     *            图片完整路径
     * @param url
     *            截图网页的URL
     * @return
     */
    private String cmd(String imgageFullPath, String url) {
        return getBinPath() + BLANK + getFullJsPath() + BLANK + url + BLANK + imgageFullPath;
    }

    /**
     * 关闭进程
     *
     * @param process
     * @param bufferedReader
     * @throws IOException
     */
    private void close(Process process, BufferedReader bufferedReader) throws IOException {
        if (bufferedReader != null) {
            bufferedReader.close();
        }
        if (process != null) {
            process.destroy();
            process = null;
        }
    }

    /**
     * 通过图片名获取最终【客户端】访问的URL
     *
     * @param pictureName
     * @return
     */
    private String getPictureVisitURL(String pictureName) {
        return AppContext.getDomain() + "/" + pjc.getImagePath() + "/" + pictureName;
    }

    /**
     * 通过图片名获取最终完整路径
     *
     * @param pictureName
     * @return
     */
    private String getFullImagePath(String pictureName) {
        return getPictureRootPath() + "/" + pictureName;
    }

    /**
     * 获取【网页快照截图脚本】文件的路径
     *
     * @return
     */
    private String getFullJsPath() {
        return AppContext.getAbsPath() + "/apicture/js/screenshot.js";
    }

    /**
     * 获取图片生成的根路径
     *
     * @return
     */
    private String getPictureRootPath() {
        ensurePhantomJsConfig();
        IMAGE_PUB_PATH = AppContext.getAbsPath() + "/" + pjc.getImagePath();
        return IMAGE_PUB_PATH;
    }

    /**
     * 获取phantomjs.exe所在路径
     *
     * @return
     */
    private String getBinPath() {
        ensurePhantomJsConfig();
        BIN_PATH = pjc.getBin();
        return BIN_PATH;
    }

    /**
     * 确保配置存在
     */
    private void ensurePhantomJsConfig() {
        if (pjc == null) {
            pjc = AppContext.getApplicationConfig().getPhantomJsConifg();
        }
    }
}
于是访问http://localhost:8080/xxx/apicture/zhenQing便会返回图片的URL,手机端便可查看展示如下:
