Spring Boot 电商系统之秒杀实战 -- 1.基础环境搭建
记录学习总结
目标:
1.掌握Spring Boot环境搭建
2.掌握Lombok的集成使用
2.掌握Thymeleaf集成,Result结果封装
3.掌握Mybatis+Druid集成
4.掌握Jedis集成+通用缓存Key封装
文章总体目录
文章目录
- Spring Boot项目搭建
- Spring Boot环境搭建
- 集成Lombok
- 集成Mybatis+Druid
- 集成Thymeleaf
- 集成Jedis
- Result结果封装
- 通用缓存Key封装
- 测试验证
Spring Boot项目搭建
Spring Boot环境搭建
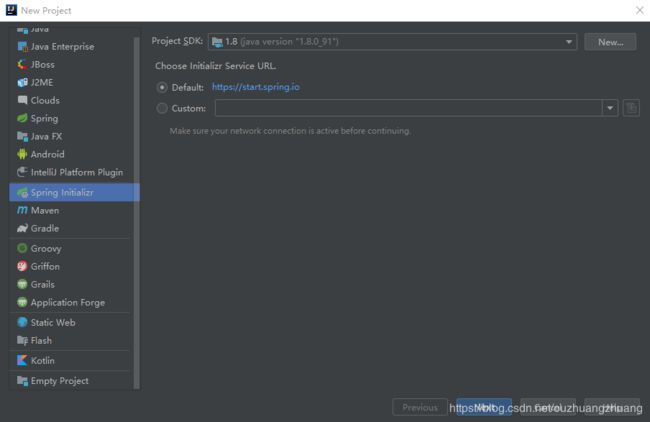
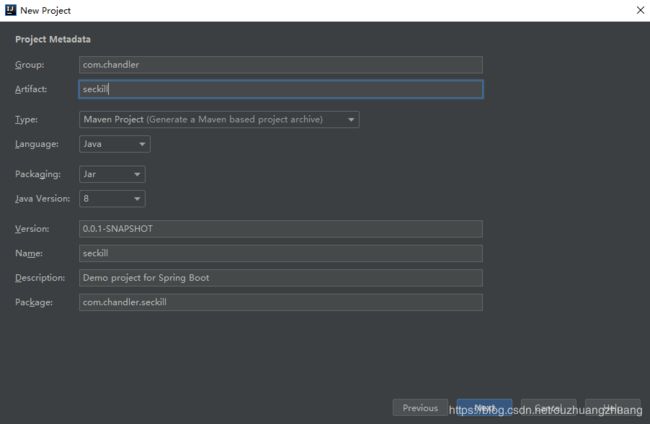
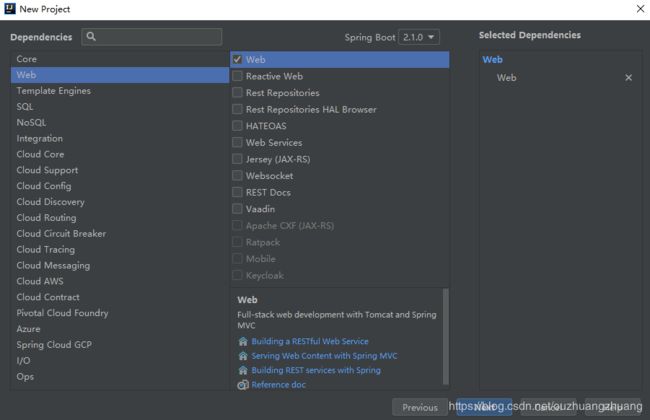
这里使用 IDEA 来进行项目开发,提供了很方便了模板。
集成Lombok
1.菜单栏File > Settings > Plugins > Browse repositories
2.搜索 Lombok Plugin 安装后,重启IDEA即可生效

3.添加lombok依赖
            org.projectlombok
            lombok
            1.18.2
            true
4.编写一个实体类 User,使用@Data注解(包含了set和get方法)
@Data
public class User {
    private int id;
    private String name;

}
其他的Lombok用法这里不多说,大家可以自行查阅
集成Mybatis+Druid
1.在 pom.xml 添加依赖
    mysql
    mysql-connector-java


    com.alibaba
    druid
    1.1.10
2.在 application.properties 中添加相关配置
# mybatis
mybatis.type-aliases-package=com.chandler.seckill.domain
mybatis.configuration.map-underscore-to-camel-case=true
mybatis.configuration.default-fetch-size=100
mybatis.configuration.default-statement-timeout=3000
mybatis.mapperLocations = classpath:com/chandler/seckill/dao/*.xml
# druid
spring.datasource.url=jdbc:mysql://localhost:3306/seckill?useUnicode=true&characterEncoding=utf-8&allowMultiQueries=true&useSSL=false
spring.datasource.username=root
spring.datasource.password=root
spring.datasource.driver-class-name=com.mysql.jdbc.Driver
spring.datasource.type=com.alibaba.druid.pool.DruidDataSource
spring.datasource.filters=stat
spring.datasource.maxActive=2
spring.datasource.initialSize=1
spring.datasource.maxWait=60000
spring.datasource.minIdle=1
spring.datasource.timeBetweenEvictionRunsMillis=60000
spring.datasource.minEvictableIdleTimeMillis=300000
spring.datasource.validationQuery=select 'x'
spring.datasource.testWhileIdle=true
spring.datasource.testOnBorrow=false
spring.datasource.testOnReturn=false
spring.datasource.poolPreparedStatements=true
spring.datasource.maxOpenPreparedStatements=20
3.在DAO中添加相关注解
@Mapper
public interface UserDao {
    @Select("select * from user where id = #{id}")
    public User getById(@Param("id")int id);

    @Insert("insert into user(id,name) values(#{id},#{name})")
    public int insert(User user);
}
集成Thymeleaf
1.在 pom.xml 添加依赖
    org.springframework.boot
    spring-boot-starter-thymeleaf
2.在 application.properties 中添加相关配置
# thymeleaf
spring.thymeleaf.prefix=classpath:/templates/
spring.thymeleaf.suffix=.html
spring.thymeleaf.cache=false
spring.thymeleaf.servlet.content-type=text/html
spring.thymeleaf.enabled=true
spring.thymeleaf.encoding=UTF-8
spring.thymeleaf.mode=HTML5
集成Jedis
1.在 pom.xml 添加依赖
    redis.clients
    jedis
2.在 application.properties 中添加相关配置
#redis
redis.host=192.168.25.128
redis.port=6379
redis.timeout=3
redis.password=123456
redis.poolMaxTotal=10
redis.poolMaxIdle=10
redis.poolMaxWait=3
Result结果封装
很多时候都是需要返回JSON对象,根据需求事先先封装好一个结果对象,方便复用。
因为希望的返回结果形式为:
{
    code:0,
    msg:success,
    name:chandler
}
所有最终设计的Result结果类为:
@Data
public class Result {

    private int code;
    private String msg;
    private T data;

    /**
     * 成功时的调用
     * @param data
     * @param
     * @return
     */
    public static  Result success(T data){
        return new Result(data);
    }

    /**
     * 失败时候的调用
     * @param cm
     * @param
     * @return
     */
    public static  Result error(CodeMsg cm){
        return new Result(cm);
    }

    public Result(T data) {
        this.code = 0;
        this.msg = "success";
        this.data = data;
    }

    public Result(CodeMsg cm) {
        if (cm == null) {
            return;
        }
        this.code = cm.getCode();
        this.msg = cm.getMsg();
    }
}
@Data
@AllArgsConstructor
public class CodeMsg {

    private int code;
    private String msg;

    //通用异常

    public static CodeMsg SUCCESS = new CodeMsg(0,"success");
    public static CodeMsg SERVER_ERROR = new CodeMsg(500100,"服务端异常");

    //TODO其他异常

}
通用缓存Key封装
我们还需要创建一个 Redis 服务方便进行缓存操作
先定义一个读取application.properties文件中 redis 配置的类
    @Component
    @Data
    @ConfigurationProperties(prefix = "redis")
    public class RedisConfig {
        private String host;
        private int port;
        private int timeout;//秒
        private String password;
        private int poolMaxTotal;
        private int poolMaxIdle;
        private int poolMaxWait;//秒

    }
有了配置文件中的信息我们在来创建一个工厂类,方便初始化 redis 连接池
    @Service
    public class RedisPoolFactory {

        @Autowired
        RedisConfig redisConfig;
        //注册bean对象
        @Bean
        public JedisPool jedisPoolFactory(){
            JedisPoolConfig jedisPoolConfig = new JedisPoolConfig();
            jedisPoolConfig.setMaxIdle(redisConfig.getPoolMaxIdle());
            jedisPoolConfig.setMaxTotal(redisConfig.getPoolMaxTotal());
            jedisPoolConfig.setMaxWaitMillis(redisConfig.getPoolMaxWait());
            JedisPool jp = new JedisPool(jedisPoolConfig,redisConfig.getHost(),redisConfig.getPort(),redisConfig.getTimeout() * 1000,redisConfig.getPassword(),0);
            return jp;
        }
    }
为了方便我们在读取 key 值的时候能够显示的读取相关值且存入的key值 在不同模块间不同名重复和后期拓展,我们这里稍微对读取和存储 key 值进行一点加工设计,实现了 KeyPrefix 接口和 BasePrefix 基础抽象类,这样其他模块的添加只需要继承基础抽象类即可。
- 接口扩展类
    public interface KeyPrefix {
        public int expireSeconds();
        public String getPrefix();
    }
- 基础抽象类
    @AllArgsConstructor
    public abstract class BasePrefix implements KeyPrefix{
        private int expireSeconds;
        private String prefix;

        public BasePrefix(String prefix) {
            //0代表永不过期
            this(0,prefix);
        }

        @Override
        public int expireSeconds(){
            return expireSeconds;
        }

        @Override
        public String getPrefix() {
            String className = getClass().getSimpleName();
            return className+":"+prefix;
        }
    }
- 业务相关类
    public class OrderKey extends BasePrefix {
        public OrderKey(int expireSeconds, String prefix) {
            super(expireSeconds, prefix);
        }
    }


    public class UserKey extends BasePrefix {
        public UserKey(String prefix) {
            super(prefix);
        }
        public static UserKey getById = new UserKey("id");
        public static UserKey getByName = new UserKey("name");
    }
- 最后是比较关键的RedisService 服务类,缓存相关操作都封装在这个类中
@Service
    public class RedisService {

        @Autowired
        JedisPool jedisPool;

        /**
         * 获取单个对象
         *
         * @param prefix
         * @param key
         * @param clazz
         * @param
         * @return
         */
        public  T get(KeyPrefix prefix, String key, Class clazz) {
            Jedis jedis = null;
            try {
                jedis = jedisPool.getResource();
                String realKey = prefix.getPrefix() + key;
                String str = jedis.get(realKey);
                T t = stringToBean(str, clazz);
                return t;
            } finally {
                returnToPool(jedis);
            }
        }

        /**
         * 设置对象
         * @param prefix
         * @param key
         * @param value
         * @param
         * @return
         */
        public  boolean set(KeyPrefix prefix,String key,T value){
            Jedis jedis = null;
            try {
                jedis = jedisPool.getResource();
                String str = beanToString(value);
                if (str == null || str.length() <= 0) {
                    return false;
                }
                String realKey = prefix.getPrefix() + key;
                int seconds = prefix.expireSeconds();
                if (seconds <= 0){
                    jedis.set(realKey,str);
                } else {
                    jedis.setex(realKey,seconds,str);
                }
                return true;
            } finally {
                returnToPool(jedis);
            }
        }

        /**
         * 判断 key 是否存在
         * @param prefix
         * @param key
         * @param
         * @return
         */
        public  boolean exists(KeyPrefix prefix,String key){
            Jedis jedis = null;
            try {
                jedis = jedisPool.getResource();
                String realKey = prefix.getPrefix() + key;
                return jedis.exists(realKey);
            } finally {
                returnToPool(jedis);
            }
        }

        /**
         * 执行原子增加 key 值
         * @param prefix
         * @param key
         * @param
         * @return
         */
        public  Long incr(KeyPrefix prefix,String key){
            Jedis jedis = null;
            try {
                jedis = jedisPool.getResource();
                String realKey = prefix.getPrefix() + key;
                return jedis.incr(realKey);
            } finally {
                returnToPool(jedis);
            }
        }

        /**
         * 减少 key 值
         * @param prefix
         * @param key
         * @param
         * @return
         */
        public  Long decr(KeyPrefix prefix,String key){
            Jedis jedis = null;
            try {
                jedis = jedisPool.getResource();
                String realKey = prefix.getPrefix() + key;
                return jedis.decr(realKey);
            } finally {
                returnToPool(jedis);
            }
        }

        private  String beanToString(T value) {
            if (value == null) {
                return null;
            }
            Class clazz = value.getClass();
            if (clazz == int.class || clazz == Integer.class){
                return ""+value;
            } else if (clazz == Long.class || clazz == long.class){
                return "" + value;
            } else if (clazz == String.class){
                return (String) value;
            } else {
                return JSON.toJSONString(value);
            }
        }

        private  T stringToBean(String str, Class clazz) {
            if (str == null || str.length() <= 0 || clazz == null) {
                return null;
            }
            if (clazz == int.class || clazz == Integer.class) {
                return (T) Integer.valueOf(str);
            } else if (clazz == String.class) {
                return (T) str;
            } else if (clazz == Long.class || clazz == long.class) {
                return (T) Long.valueOf(str);
            } else {
                return JSON.toJavaObject(JSON.parseObject(str), clazz);
            }
        }

        private void returnToPool(Jedis jedis) {
            if (jedis != null) {
                jedis.close();
            }
        }
    }
测试验证
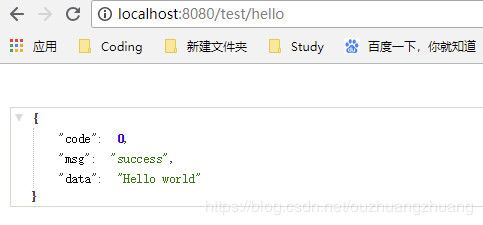
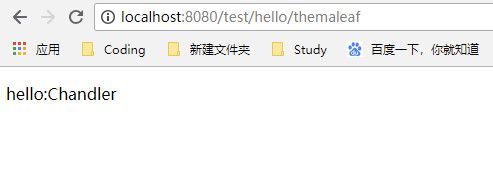
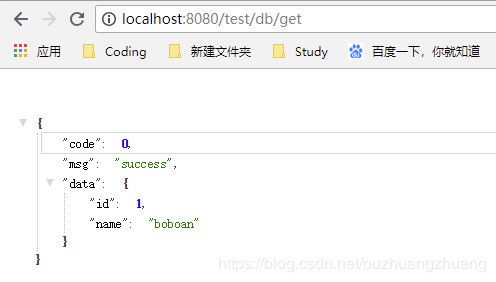
环境都搭建配置之后测试是必不可少的环节,开始动手搞起来。
1.创建测试 TestController 类
@Controller
@RequestMapping("/test")
public class TestController {

    @Autowired
    UserService userService;

    @Autowired
    RedisService redisService;

    @RequestMapping("/hello")
    @ResponseBody
    public Result home(){
        return Result.success("Hello world");
    }

    @RequestMapping("/error")
    @ResponseBody
    public Result error(){
        return Result.error(CodeMsg.SERVER_ERROR);
    }

    @RequestMapping("/hello/themaleaf")
    public String themaleaf(Model model){
        model.addAttribute("name","Chandler");
        return "hello";
    }

    @RequestMapping("/db/get")
    @ResponseBody
    public Result dbGet(){
        User user = userService.getById(1);
        return Result.success(user);
    }

    @RequestMapping("/redis/get")
    @ResponseBody
    public Result redisGet(){
        User user = redisService.get(UserKey.getById,""+1,User.class);
        return Result.success(user);
    }
    @RequestMapping("/redis/set")
    @ResponseBody
    public Result redisSet(){
        User user =new User();
        user.setId(1);
        user.setName("Chandler");
        redisService.set(UserKey.getById,""+1,user);
        return Result.success(true);
    }
}
这样大概的环境流程验证OK,接下来就可以开始实现功能开发了~~
