Android Studio 通过NDK调用OpenCV
所用as版本为2.0 ndk版本为r10d 安卓版本为5.0 系统为win10 opencv版本为3.1
首先新建一个工程
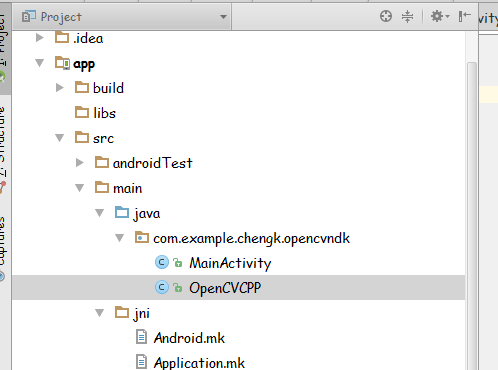
然后在app/src/main文件夹下新建一个文件夹 叫做jni 再在这个文件夹里新建两个文件 Application.mk Android.mk
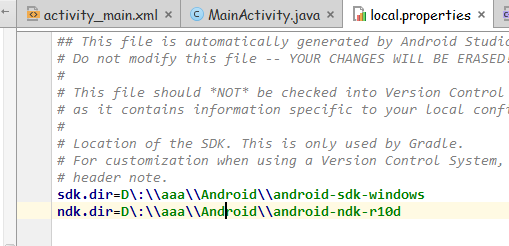
接着修改一下gradle.properties文件和local.properties文件

gradle.properties内添加
android.useDeprecatedNdk=true然后修改build.gradle,在android下添加
sourceSets.main.jni.srcDirs = []
    //禁止自带的ndk功能
    sourceSets.main.jniLibs.srcDirs = ['src/main/libs','src/main/jniLibs']
    //重定向so目录为src/main/libs和src/main/jniLibs,原来为src/main/jniLibs

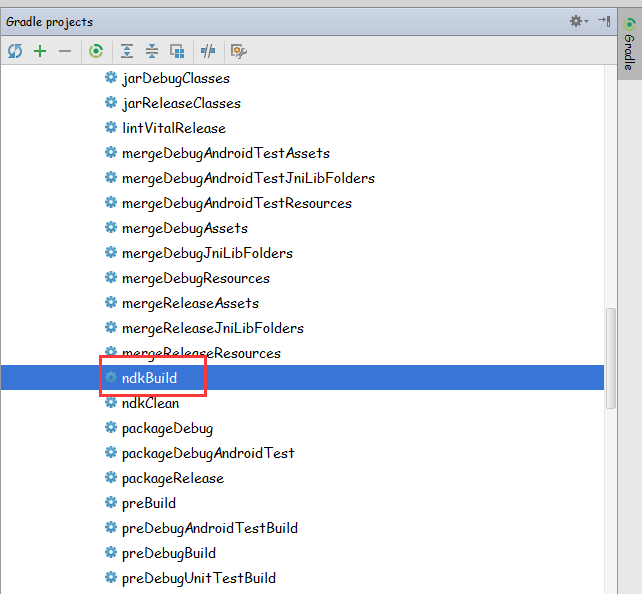
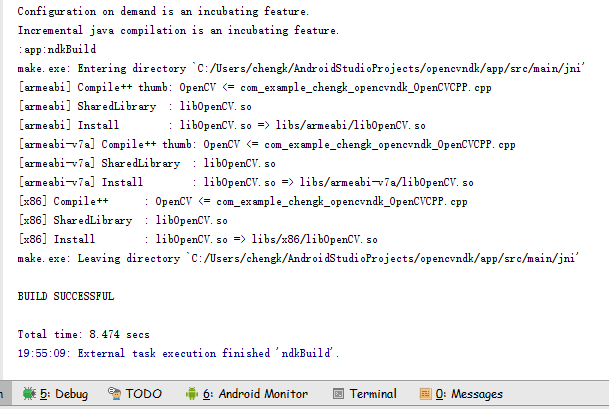
    task ndkBuild(type: Exec, description: 'Compile JNI source with NDK') {
        Properties properties = new Properties()
        properties.load(project.rootProject.file('local.properties').newDataInputStream())
        def ndkDir = properties.getProperty('ndk.dir')

        if (org.apache.tools.ant.taskdefs.condition.Os.isFamily(org.apache.tools.ant.taskdefs.condition.Os.FAMILY_WINDOWS)) {
            commandLine "$ndkDir/ndk-build.cmd", '-C', file('src/main/jni').absolutePath
        } else {
            commandLine "$ndkDir/ndk-build", '-C', file('src/main/jni').absolutePath
        }
    }

    tasks.withType(JavaCompile) {
        compileTask -> compileTask.dependsOn ndkBuild
    }

    task ndkClean(type: Exec, description: 'Clean NDK Binaries') {
        Properties properties = new Properties()
        properties.load(project.rootProject.file('local.properties').newDataInputStream())
        def ndkDir = properties.getProperty('ndk.dir')

        if (org.apache.tools.ant.taskdefs.condition.Os.isFamily(org.apache.tools.ant.taskdefs.condition.Os.FAMILY_WINDOWS)) {
            commandLine "$ndkDir/ndk-build.cmd",'clean', '-C', file('src/main/jni').absolutePath
        } else {
            commandLine "$ndkDir/ndk-build",'clean', '-C', file('src/main/jni').absolutePath
        }
    }

    clean.dependsOn 'ndkClean'
修改完后如下
apply plugin: 'com.android.application'

android {
    compileSdkVersion 23
    buildToolsVersion "23.0.3"

    defaultConfig {
        applicationId "com.example.chengk.opencvndk"
        minSdkVersion 21
        targetSdkVersion 23
        versionCode 1
        versionName "1.0"
    }
    buildTypes {
        release {
            minifyEnabled false
            proguardFiles getDefaultProguardFile('proguard-android.txt'), 'proguard-rules.pro'
        }
    }


    sourceSets.main.jni.srcDirs = []
    //禁止自带的ndk功能
    sourceSets.main.jniLibs.srcDirs = ['src/main/libs','src/main/jniLibs']
    //重定向so目录为src/main/libs和src/main/jniLibs,原来为src/main/jniLibs

    task ndkBuild(type: Exec, description: 'Compile JNI source with NDK') {
        Properties properties = new Properties()
        properties.load(project.rootProject.file('local.properties').newDataInputStream())
        def ndkDir = properties.getProperty('ndk.dir')

        if (org.apache.tools.ant.taskdefs.condition.Os.isFamily(org.apache.tools.ant.taskdefs.condition.Os.FAMILY_WINDOWS)) {
            commandLine "$ndkDir/ndk-build.cmd", '-C', file('src/main/jni').absolutePath
        } else {
            commandLine "$ndkDir/ndk-build", '-C', file('src/main/jni').absolutePath
        }
    }

    tasks.withType(JavaCompile) {
        compileTask -> compileTask.dependsOn ndkBuild
    }

    task ndkClean(type: Exec, description: 'Clean NDK Binaries') {
        Properties properties = new Properties()
        properties.load(project.rootProject.file('local.properties').newDataInputStream())
        def ndkDir = properties.getProperty('ndk.dir')

        if (org.apache.tools.ant.taskdefs.condition.Os.isFamily(org.apache.tools.ant.taskdefs.condition.Os.FAMILY_WINDOWS)) {
            commandLine "$ndkDir/ndk-build.cmd",'clean', '-C', file('src/main/jni').absolutePath
        } else {
            commandLine "$ndkDir/ndk-build",'clean', '-C', file('src/main/jni').absolutePath
        }
    }

    clean.dependsOn 'ndkClean'
}

dependencies {
    compile fileTree(dir: 'libs', include: ['*.jar'])
    testCompile 'junit:junit:4.12'
    compile 'com.android.support:appcompat-v7:23.3.0'
}
package com.example.chengk.opencvndk;

/**
 * Created by chengk on 2016/5/25.
 */
public class OpenCVCPP {
    static {
        System.loadLibrary("OpenCV");
    }
    public static native int[] gray(int[] buf, int w, int h);
}
然后使用javah创建一个头文件 使用刚才创建的那个java类
![]()
我这里需要转到classes下的debug文件夹才能成功创建
javah -classpath . -jni com.example.chengk.opencvndk.OpenCVCPP创建好后把那个文件复制到jni文件夹中
再在jni文件夹中创建一个cpp文件

代码为
//
// Created by chengk on 2016/5/25.
//
#include "com_example_chengk_opencvndk_OpenCVCPP.h"
#include 接着在Android.mk中添加
LOCAL_PATH := $(call my-dir)

include $(CLEAR_VARS)


OpenCV_INSTALL_MODULES := on
OpenCV_CAMERA_MODULES := off

OPENCV_LIB_TYPE :=STATIC

ifeq ("$(wildcard $(OPENCV_MK_PATH))","")
include ..\..\..\..\native\jni\OpenCV.mk
else
include $(OPENCV_MK_PATH)
endif

LOCAL_MODULE := OpenCV

LOCAL_SRC_FILES :=

LOCAL_LDLIBS +=  -lm -llog
LOCAL_SRC_FILES := com_example_chengk_opencvndk_OpenCVCPP.cpp

include $(BUILD_SHARED_LIBRARY)
倒数第二行是所需编译的cpp文件名
在Application.mk中添加
APP_STL := gnustl_static
APP_CPPFLAGS := -frtti -fexceptions
APP_ABI := armeabi armeabi-v7a x86
APP_PLATFORM := android-8用来测试的代码
public class MainActivity extends AppCompatActivity {

    @Override
    protected void onCreate(Bundle savedInstanceState) {
        super.onCreate(savedInstanceState);
        setContentView(R.layout.activity_main);
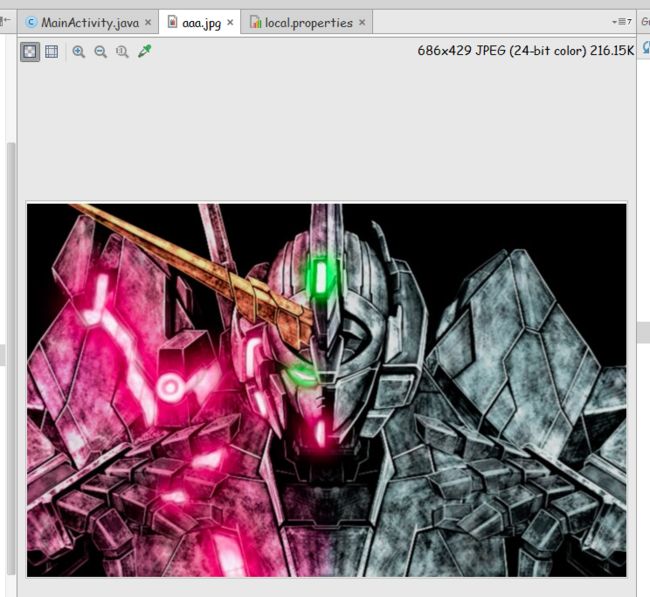
        Bitmap bitmap = ((BitmapDrawable) getResources().getDrawable(
                R.drawable.aaa)).getBitmap();
        int w = bitmap.getWidth(), h = bitmap.getHeight();
        int[] pix = new int[w * h];
        bitmap.getPixels(pix, 0, w, 0, 0, w, h);
        int [] resultPixes=OpenCVCPP.gray(pix,w,h);
        Bitmap result = Bitmap.createBitmap(w,h, Bitmap.Config.RGB_565);
        result.setPixels(resultPixes, 0, w, 0, 0,w, h);
        ImageView img=(ImageView)findViewById(R.id.imageView);
        img.setImageBitmap((result));
    }
}
这样做安装包的体积还可以 不算上x86的支持的话不到10M


