Ubuntu16.04LTS Anaconda安装与使用tips
Ubuntu16.04LTS Anaconda安装与使用tips
Anaconda安装:
清华镜像源download link: https://mirrors.tuna.tsinghua.edu.cn/anaconda/archive/
如上图,随便选个较新的就行linux版本就行,然后我是64位机。
下载.完sh文档,所在文件夹下打开终端,然后执行必要的话sudo执行:
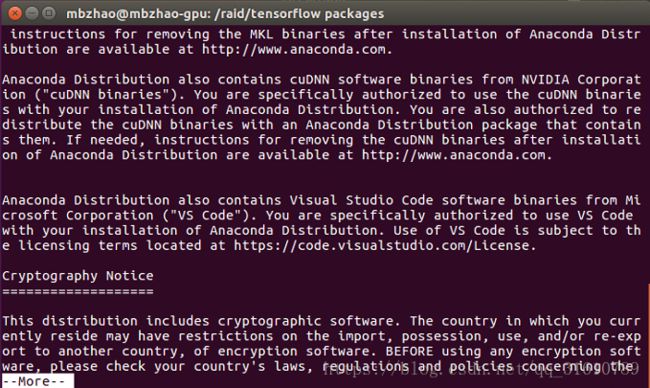
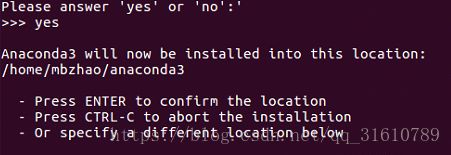
bash Anaconda3-xxxxxxxxxx.sh一直回车到安装结束。好多回车到yes,会提醒是否修改环境保存路径,我就使用默认的就行了。
然后提醒环境变量自动添加,显然我们得选择是。
然后提醒是否要装VScode,选择不用,一般用不到。
然后就结束啦,重启终端,检查安装:
conda --versionsudo gedit ~/.bashrc检查末尾是否已经添加如下变量,没有自己添加:
export PATH="/home/用户名/anaconda3/bin:$PATH"下载太慢?
为了能快点下载东西,建议境内的主机将清华镜像源添加进conda的源:
官方教程:https://mirrors.tuna.tsinghua.edu.cn/help/anaconda/
conda config --add channels https://mirrors.tuna.tsinghua.edu.cn/anaconda/pkgs/free/
conda config --add channels https://mirrors.tuna.tsinghua.edu.cn/anaconda/pkgs/main/
conda config --set show_channel_urls yespip 也可以使用清华软件源:
官方教程: https://mirrors.tuna.tsinghua.edu.cn/help/pypi/
临时使用:
pip install -i https://pypi.tuna.tsinghua.edu.cn/simple some-package修改 ~/.config/pip/pip.conf (Linux), %APPDATA%\pip\pip.ini (Windows 10) 或 $HOME/Library/Application Support/pip/pip.conf (macOS) (没有就创建一个), 修改 index-url至tuna,例如
[global]
index-url = https://pypi.tuna.tsinghua.edu.cn/simple环境创建,软件安装:以tensorflow为例
conda create -n jz python==3.6激活环境:
source activate jzconda安装:
conda install tensorflow-gpuconda install tensorflow-gpu==1.5第一行默认最新的gpu版,第二行则指定版本
pip 安装:
pip install tensorflow-gpupip install tensorflow-gpu==1.5或者使用清华镜像源:
一种方法:
pip install -i https://pypi.tuna.tsinghua.edu.cn/simple tensorflow-gpu推荐另一种到镜像源网站寻找更靠谱:https://mirror.tuna.tsinghua.edu.cn/help/tensorflow/
直接复制里面的指令
pip install \
  -i https://pypi.tuna.tsinghua.edu.cn/simple/ \
  https://mirrors.tuna.tsinghua.edu.cn/tensorflow/linux/gpu/tensorflow_gpu-1.5.0-cp36-cp36m-linux_x86_64.whl
环境卸载:
conda remove -n yourname --all注:由于anaconda在linux下是安装在一个文件夹里/root/anaconda ,如果安装过程中出错问题,或者想更新另一个版本,删除anaconda也很方便,执行下面命令
rm -rf ~/anaconda


