安卓开发之前端
安卓开发之前端界面的搭建
前段时间因为网络编程这门课要做一个课程project,题目是本地服务器的开发,需要开发一个安卓客户端,于是就把去年小学期学的那点安卓知识捡起来了(心累)
想到去年小学期学的那点安卓真的不算什么,就是一些很简单的东西,所以为了做好这次前端,努力学了很多安卓的前端搭建知识,毕竟是数媒人,在前端上可不能输给其他专业的(哼~)
这次的安卓开发需求比较简单,要求的功能不多因此界面也没有几个。
界面清单
- 连接服务器界面
- 登录界面
- 注册界面
- 首页界面
- 消息界面
- 社区界面
- 设置界面
- 联系人界面
- 添加好友界面
- 好友聊天界面
- 社区消息编辑界面
- 添加联系人界面
有些界面其实差不多,基本上要用到以下一些组件:
- 按钮Button
- 文本显示TextView
- 文本域Text Field
- 图表charts
- 工具条toolbar
- 浮动按钮fab
- 列表ListView
- 页面切换Tab
- 刷新
接下来我就介绍一些组件的使用
一、开发环境
Android Studio2.0
Android Studio 是一个Android集成开发工具,基于IntelliJ IDEA. 类似 Eclipse ADT,Android Studio 提供了集成的 Android 开发工具用于开发和调试。
我以前用的是eclipse with ADT进行开发的,现在安卓开发基本上主流的就是这两种IDE,eclipse是老牌的java IDE,自然也支持安卓开发。我用eclipse的时候觉得他对界面的可视化编辑比较差,而且开模拟器会很卡,然后这次决定采用AS进行开发,AS对界面的可视化编辑支持比较好,模拟器比较快(我一般是用真机调试)但是打代码的时候总有一种我在写C++的错觉…
还有要说的一点是,eclipse和AS的项目结构是不一样的!在eclipse里面一个project就是一个app,但是在AS里面project不是app的意思,而是一个项目的意思,这个项目底下可以有多个app同时存在,当你运行的时候要选择运行哪个app。AS在侧边栏可以支持多种文件结构视图,通常我是看Android 视图,这样子看起来就和eclipse的结构差不多了。
关于文件结构、文件功能我就不多说了,网上有很多入门资料。
二、定制自己的ToolBar
通常新建一个项目安卓会自动的给你界面加上一个丑丑的toolbar,而且不好改他的功能,因为有时候我们需要在toolbar加上按钮来跳转,所以为了解决这个问题我们可以定制自己的toolbar。
先看一下效果:
这是统一模板:建立一个layout文件,layout_common_toolbar.xml
代码如下:
可以看到我在这个统一模板里面设定了三个按钮可供跳转:左边的按钮通常用来退出,右边有两个按钮可以根据具体需要只用一个或两个,当然你也可以多加几个
为了在每个页面调用这个统一模板,我们需要写一个java文件,CustomToolBar
package com.example.bpapp.view;

import android.content.Context;
import android.content.res.TypedArray;
import android.util.AttributeSet;
import android.view.View;
import android.widget.Button;
import android.widget.LinearLayout;
import android.widget.RelativeLayout;
import android.widget.TextView;

import com.example.bpapp.bpapp.R;

/**
 * Created by ningrun on 2017/5/31.
 */
public class CustomToolBar extends LinearLayout {
    private Boolean isLeftBtnVisible;
    private int leftResId;

    private Boolean isLeftTvVisible;
    private String leftTvText;

    private Boolean isRightBtnVisible;
    private int rightResId;

    private Boolean isRightTvVisible;
    private String rightTvText;

    private Boolean isRightBtnVisible2;
    private int rightResId2;

    private Boolean isRightTvVisible2;
    private String rightTvText2;

    private Boolean isTitleVisible;
    private String titleText;

    private int backgroundResId;

    public CustomToolBar(Context context) {
        this(context, null);
    }

    public CustomToolBar(Context context, AttributeSet attrs) {
        this(context, attrs, 0);
    }

    public CustomToolBar(Context context, AttributeSet attrs, int defStyleAttr) {
        super(context, attrs, defStyleAttr);
        initView(attrs);
    }

    /**
     * 初始化属性
     * @param attrs
     */
    public void initView(AttributeSet attrs) {

        TypedArray typedArray = getContext().obtainStyledAttributes(attrs, R.styleable.CustomToolBar);
        /**-------------获取左边按钮属性------------*/
        isLeftBtnVisible = typedArray.getBoolean(R.styleable.CustomToolBar_left_btn_visible, false);
        leftResId = typedArray.getResourceId(R.styleable.CustomToolBar_left_btn_src, -1);
        /**-------------获取左边文本属性------------*/
        isLeftTvVisible = typedArray.getBoolean(R.styleable.CustomToolBar_left_tv_visible, false);
        if (typedArray.hasValue(R.styleable.CustomToolBar_left_tv_text)) {
            leftTvText = typedArray.getString(R.styleable.CustomToolBar_left_tv_text);
        }
        /**-------------获取右边按钮属性------------*/
        isRightBtnVisible = typedArray.getBoolean(R.styleable.CustomToolBar_right_btn_visible, false);
        rightResId = typedArray.getResourceId(R.styleable.CustomToolBar_right_btn_src, -1);
        /**-------------获取右边文本属性------------*/
        isRightTvVisible = typedArray.getBoolean(R.styleable.CustomToolBar_right_tv_visible, false);
        if (typedArray.hasValue(R.styleable.CustomToolBar_right_tv_text)) {
            rightTvText = typedArray.getString(R.styleable.CustomToolBar_right_tv_text);
        }

        /**-------------获取右边按钮2属性------------*/
        isRightBtnVisible2 = typedArray.getBoolean(R.styleable.CustomToolBar_right_btn_visible2, false);
        rightResId2 = typedArray.getResourceId(R.styleable.CustomToolBar_right_btn_src2, -1);
        /**-------------获取右边文本2属性------------*/
        isRightTvVisible2 = typedArray.getBoolean(R.styleable.CustomToolBar_right_tv_visible2, false);
        if (typedArray.hasValue(R.styleable.CustomToolBar_right_tv_text2)) {
            rightTvText2 = typedArray.getString(R.styleable.CustomToolBar_right_tv_text2);
        }
        /**-------------获取标题属性------------*/
        isTitleVisible = typedArray.getBoolean(R.styleable.CustomToolBar_title_visible, false);
        if (typedArray.hasValue(R.styleable.CustomToolBar_title_text)) {
            titleText = typedArray.getString(R.styleable.CustomToolBar_title_text);
        }
        /**-------------背景颜色------------*/
        backgroundResId = typedArray.getResourceId(R.styleable.CustomToolBar_barBackground, -1);

        typedArray.recycle();

        /**-------------设置内容------------*/
        View barLayoutView = View.inflate(getContext(), R.layout.layout_common_toolbar, null);
        Button leftBtn = (Button) barLayoutView.findViewById(R.id.toolbar_left_btn);
        TextView leftTv = (TextView) barLayoutView.findViewById(R.id.toolbar_left_tv);
        TextView titleTv = (TextView) barLayoutView.findViewById(R.id.toolbar_title_tv);
        Button rightBtn = (Button) barLayoutView.findViewById(R.id.toolbar_right_btn);
        TextView rightTv = (TextView) barLayoutView.findViewById(R.id.toolbar_right_tv);
        Button rightBtn2 = (Button) barLayoutView.findViewById(R.id.toolbar_right_btn2);
        TextView rightTv2 = (TextView) barLayoutView.findViewById(R.id.toolbar_right_tv2);
        RelativeLayout barRlyt = (RelativeLayout) barLayoutView.findViewById(R.id.toolbar_content_rlyt);

        if (isLeftBtnVisible) {
            leftBtn.setVisibility(VISIBLE);
        }
        if (isLeftTvVisible) {
            leftTv.setVisibility(VISIBLE);
        }
        if (isRightBtnVisible) {
            rightBtn.setVisibility(VISIBLE);
        }
        if (isRightTvVisible) {
            rightTv.setVisibility(VISIBLE);
        }
        if (isRightBtnVisible2) {
            rightBtn2.setVisibility(VISIBLE);
        }
        if (isRightTvVisible2) {
            rightTv2.setVisibility(VISIBLE);
        }
        if (isTitleVisible) {
            titleTv.setVisibility(VISIBLE);
        }
        leftTv.setText(leftTvText);
        rightTv.setText(rightTvText);
        rightTv2.setText(rightTvText2);
        titleTv.setText(titleText);

        if (leftResId != -1) {
            leftBtn.setBackgroundResource(leftResId);
        }
        if (rightResId != -1) {
            rightBtn.setBackgroundResource(rightResId);
        }
        if (rightResId2 != -1) {
            rightBtn2.setBackgroundResource(rightResId2);
        }
        if (backgroundResId != -1) {
            barRlyt.setBackgroundColor(getResources().getColor(R.color.bg_toolbar));
        }
        //将设置完成之后的View添加到此LinearLayout中
        addView(barLayoutView, 0);
    }
}
接下来我们就可以在每个页面调用这个统一模板并设定不同的按钮和文本
首先是登录界面:只需要在最外层的layout里面加上
登录界面的内容放在CustomToolBar结点里面,CustomToolBar结点以app:开头的属性是可以根据需要添加的,但是会被统一模板限制
效果:
再来看另一个界面:
效果:
三、下拉刷新组件SwipeRefreshLayout
以前做下拉刷新的时候是要自己写一个刷新组件的,但是后来安卓开发包升级了,内置了刷新组件,我们只要调用它就可以了(知乎的刷新就是直接用这个的)
在每个布局文件中加入
而且一定要加在最外层layout的第一层子结点
然后在Activity中加入代码:要implements SwipeRefreshLayout.OnRefreshListener
 private SwipeRefreshLayout swipeLayout;
 swipeLayout = (SwipeRefreshLayout) findViewById(R.id.id_swipe_ly);
 swipeLayout.setOnRefreshListener(this);
 @Override
   public void onRefresh() {

       mHandler.sendEmptyMessageDelayed(1, 2000);//刷新完成
   }
这里要注意的一个问题是,如果一个界面中同时有SwipeRefreshLayout和需要滚动的ListView的话,他可能会出现这样的现象,
就是我只是想下拉滚动ListView,并不想刷新,但是却调用了刷新组件,也就是说下拉刷新组件的优先级大于ListView了,这时我们要在代码中设定一下:
当ListView当前Item为最顶部的Item,下拉事件才对刷新组件生效
listView.setOnScrollListener(new AbsListView.OnScrollListener() {
            @Override
            public void onScrollStateChanged(AbsListView view, int scrollState) {

            }

            @Override
            public void onScroll(AbsListView view, int firstVisibleItem, int visibleItemCount, int totalItemCount) {
                if (firstVisibleItem == 0)
                    swipeLayout.setEnabled(true);
                else
                    swipeLayout.setEnabled(false);
            }
        });
四、浮动按钮FloatingActionButton
其实这个按钮的作用就和普通按钮作用一样,只不过他是一直悬浮在界面上,还可以实现当我们往上滑的时候隐藏这个按钮(可以参考一下知乎的界面)
首先要记得在build.gradle里面加入design包(不用下载),后面的版本号根据你的appcompat的版本来
compile 'com.android.support:design:23.4.0'
在布局文件中加入:
一定要在根节点下才能悬浮在界面上,而且最外层的layout只能是FrameLayout或android.support.design.widget.CoordinatorLayout
不能是LinearLayout
上滑隐藏事件:SrollAwareFABBehavior.java
package com.example.bpapp.view;

import android.content.Context;
import android.support.design.widget.CoordinatorLayout;
import android.support.design.widget.FloatingActionButton;
import android.support.v4.view.ViewCompat;
import android.util.AttributeSet;
import android.view.View;

/**
 * Created by CLara1 on 2017/6/2.
 */
public class ScrollAwareFABBehavior extends FloatingActionButton.Behavior {
    public ScrollAwareFABBehavior(Context context, AttributeSet attrs) {
        super();
    }

    @Override
    public boolean onStartNestedScroll(CoordinatorLayout coordinatorLayout, FloatingActionButton child,
                                       View directTargetChild, View target, int nestedScrollAxes) {
        return nestedScrollAxes == ViewCompat.SCROLL_AXIS_VERTICAL ||
                super.onStartNestedScroll(coordinatorLayout, child, directTargetChild, target,
                        nestedScrollAxes);
    }

    @Override
    public void onNestedScroll(CoordinatorLayout coordinatorLayout, FloatingActionButton child,
                               View target, int dxConsumed, int dyConsumed, int dxUnconsumed, int dyUnconsumed) {
        super.onNestedScroll(coordinatorLayout, child, target, dxConsumed, dyConsumed, dxUnconsumed, dyUnconsumed);
        if (dyConsumed > 0 && child.getVisibility() == View.VISIBLE) {
            child.hide();
        } else if (dyConsumed < 0 && child.getVisibility() != View.VISIBLE) {
            child.show();
        }
    }
}
五、图表的绘制
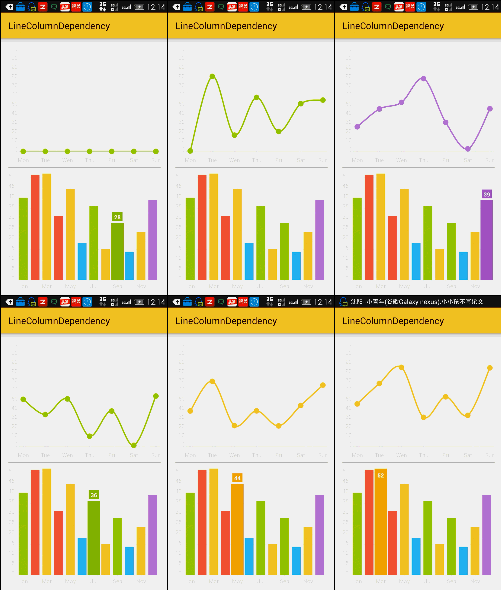
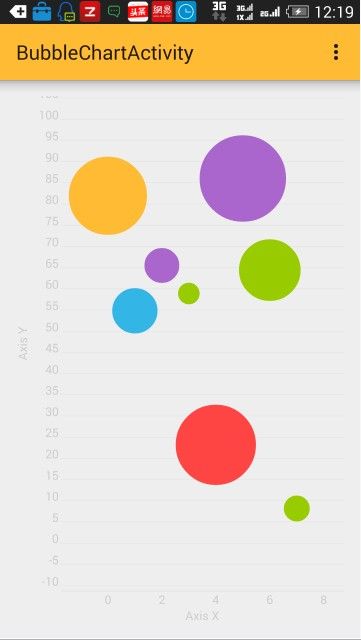
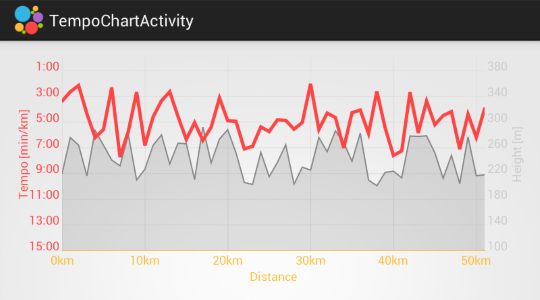
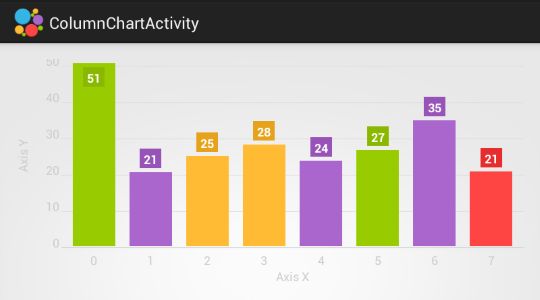
这里我用到了一个第三方库hellocharts
现在HelloCharts支持以下chart类型:
Line chart(cubic lines, filled lines, scattered points)(线图)
Column chart(grouped, stacked, negative values)(柱形图)
Pie chart(饼图)
Bubble chart(泡泡图)
Combo chart(columns/lines)(柱图和线图的组合图)
Preview charts(for column chart and line chart)
首先要下载hellocharts-library-1.5.8.jar ,下载地址
把它放到你的app的libs下面(没有libs文件夹就新建一个),然后要add to liberary,在build.gradle里面加入
compile files('libs/hellocharts-library-1.5.8.jar')
具体使用方法可以参考这篇博文
这里说一下我用的折线图的代码:
在布局文件中加入:
在对应的activity中加入:
String[] date =null;
int[] highpressure_score=null;
int[] lowpressure_score=null;
int[] heartbeat_score=null;
private List mPointValues = new ArrayList();
private List mAxisXValues = new ArrayList();


/**
 * 初始化图表
 */
private void initChart(int type) {
    getAxisXLables();//获取x轴的标注
    getAxisPoints(type);//获取坐标点
    initLineChart(type);//初始化折线图
}


/**
 * 设置X轴的显示
 */
private void getAxisXLables() {
    // TODO Auto-generated method stub
    mAxisXValues.clear();
    for (int i = 0; i < date.length; i++) {
        mAxisXValues.add(new AxisValue(i).setLabel(date[i]));
    }
}

/**
    * 图表每个点的显示
    */
   private void getAxisPoints(int type) {
       // TODO Auto-generated method stub
       mPointValues.clear();
       switch(type){
           case 0:
               for (int i = 0; i < highpressure_score.length; i++) {
                   mPointValues.add(new PointValue(i, highpressure_score[i]));
               }
               break;
           case 1:
               for (int i = 0; i < lowpressure_score.length; i++) {
                   mPointValues.add(new PointValue(i, lowpressure_score[i]));
               }
               break;
           case 2:
               for (int i = 0; i < heartbeat_score.length; i++) {
                   mPointValues.add(new PointValue(i, heartbeat_score[i]));
               }
               break;
           default:
               for (int i = 0; i < highpressure_score.length; i++) {
                   mPointValues.add(new PointValue(i, highpressure_score[i]));
               }
               break;

       }

   }

/**
    * 初始化折线图的显示
    */
   private void initLineChart(int type) {
       // TODO Auto-generated method stub

       Line line = new Line(mPointValues).setColor(Color.parseColor("#DB7093"));  //折线的颜色(橙色)
       List lines = new ArrayList();
       line.setShape(ValueShape.CIRCLE);//折线图上每个数据点的形状  这里是圆形 (有三种 :ValueShape.SQUARE  ValueShape.CIRCLE  ValueShape.DIAMOND)
       line.setCubic(false);//曲线是否平滑,即是曲线还是折线
       line.setFilled(false);//是否填充曲线的面积
       line.setHasLabels(true);//曲线的数据坐标是否加上备注
//      line.setHasLabelsOnlyForSelected(true);//点击数据坐标提示数据(设置了这个line.setHasLabels(true);就无效)
       line.setHasLines(true);//是否用线显示。如果为false 则没有曲线只有点显示
       line.setHasPoints(true);//是否显示圆点 如果为false 则没有原点只有点显示(每个数据点都是个大的圆点)
       lines.add(line);
       LineChartData data =new LineChartData();
       data.setLines(lines);

       //坐标轴
       Axis axisX = new Axis(); //X轴
       axisX.setHasTiltedLabels(true);  //X坐标轴字体是斜的显示还是直的,true是斜的显示
       axisX.setTextColor(Color.BLACK);  //设置字体颜色
       axisX.setName("日期");  //表格名称
       axisX.setTextSize(10);//设置字体大小
       axisX.setMaxLabelChars(8); //最多几个X轴坐标,意思就是你的缩放让X轴上数据的个数7<=x<=mAxisXValues.length
       axisX.setValues(mAxisXValues);  //填充X轴的坐标名称
       data.setAxisXBottom(axisX); //x 轴在底部
       //data.setAxisXTop(axisX);  //x 轴在顶部
       axisX.setHasLines(true); //x 轴分割线

       // Y轴是根据数据的大小自动设置Y轴上限(在下面我会给出固定Y轴数据个数的解决方案)
       Axis axisY = new Axis();  //Y轴
       if(type==0){
           axisY.setName("高血压值");//y轴标注
       }else if(type==1){
           axisY.setName("低血压值");//y轴标注
       }else if(type==2){
           axisY.setName("心率值");//y轴标注
       }
       axisY.setTextSize(10);//设置字体大小
       axisY.setTextColor(Color.BLACK);  //设置字体颜色
       data.setAxisYLeft(axisY);  //Y轴设置在左边
       //data.setAxisYRight(axisY);  //y轴设置在右边


       //设置行为属性,支持缩放、滑动以及平移
       lineChart.setInteractive(true);
       lineChart.setZoomType(ZoomType.HORIZONTAL);
       lineChart.setMaxZoom((float) 2);//最大方法比例
       lineChart.setContainerScrollEnabled(true, ContainerScrollType.HORIZONTAL);
       lineChart.setLineChartData(data);
       lineChart.setVisibility(View.VISIBLE);
       /**注:下面的7,10只是代表一个数字去类比而已
        * 当时是为了解决X轴固定数据个数。见(http://forum.xda-developers.com/tools/programming/library-hellocharts-charting-library-t2904456/page2);
        */
       Viewport v = new Viewport(lineChart.getMaximumViewport());
       v.left = 0;
       v.right= 7;
       lineChart.setCurrentViewport(v);
   }
如果要动态更新图表的数据的话,只要每次在初始化X轴的值和Y轴的值之前把那些数据点都清除一下就可以了
mAxisXValues.clear();
mPointValues.clear();
六、切换页面TabWidget
参考这篇博文
下面贴出我的代码:
main_frame.xml
MainActivity.java
package com.example.bpapp.activity;


import android.app.TabActivity;
import android.content.Intent;
import android.content.res.Resources;
import android.os.Bundle;
import android.widget.TabHost;
import android.widget.TabHost.TabSpec;

import com.example.bpapp.bpapp.R;


/**
 * 主页面Activity
 * Created by clara on 2017/5/28.
 */
public class MainActivity extends TabActivity {

    @Override
    protected void onCreate(Bundle savedInstanceState) {
        super.onCreate(savedInstanceState);
        setContentView(R.layout.main_frame);
        Resources res = getResources(); // Resource object to get Drawables
        TabHost tabHost = getTabHost();  // The activity TabHost
        TabSpec spec;
        Intent intent;  // Reusable Intent for each tab

        //第一个Tab
        intent = new Intent(this,IndexActivity.class);//新建一个Intent用作Tab1显示的内容
        spec = tabHost.newTabSpec("index")//新建一个 Tab
                .setIndicator("首页", res.getDrawable(android.R.drawable.ic_media_play))//设置名称以及图标
                .setContent(intent);//设置显示的intent,这里的参数也可以是R.id.xxx
        tabHost.addTab(spec);//添加进tabHost

        //第二个Tab
        intent = new Intent(this,MessageActivity.class);//第二个Intent用作Tab1显示的内容
        spec = tabHost.newTabSpec("message")//新建一个 Tab
                .setIndicator("消息", res.getDrawable(android.R.drawable.ic_menu_edit))//设置名称以及图标
                .setContent(intent);//设置显示的intent,这里的参数也可以是R.id.xxx
        tabHost.addTab(spec);//添加进tabHost

        //第三个Tab
        intent = new Intent(this,SocialActivity.class);//第二个Intent用作Tab1显示的内容
        spec = tabHost.newTabSpec("social")//新建一个 Tab
                .setIndicator("社区", res.getDrawable(android.R.drawable.ic_menu_help))//设置名称以及图标
                .setContent(intent);//设置显示的intent,这里的参数也可以是R.id.xxx
        tabHost.addTab(spec);//添加进tabHost

        tabHost.setCurrentTab(0);//设置当前的选项卡,这里为index
    }
}


