pytorch学习笔记-数据加载与处理
前言
初学pytorch,计划边学边做做笔记。深度学习的问题中,经常要处理数据,pytorch自带一些数据集,对于普通的数据集,需要我们自己进行处理。
1、头文件介绍
- os: python处理文件和目录的模块
- torch: pytorch 1.0, 深度学习库
- pandas: 用于更好的处理csv数据
- skimage: scikit-image, 用于图像输入输出和转换
- numpy: 一个运行速度很快的数学库
- matplotlib: 数据可视化工具
- torchvision: 包含常用的数据集、模型和图片转换函数
import os
import torch
import pandas as pd
from skimage import io, transform
import numpy as np
import matplotlib.pyplot as plt
from torch.utils.data import Dataset, DataLoader
from torchvision import transforms, utils
2、数据集
2.1 下载数据
点击下载
下载文件中包括脸部数据集,和一个注释文件 face_landmarks.csv 第一列是图片名,后面的对应的是N个脸部特征标记点,如图:

2.2 处理注释数据
将坐标点处理成[x,y]的形式
#处理注释文件,每个坐标点由两个横纵坐标组成
landmarks_frame = pd.read_csv('faces/face_landmarks.csv')
n = 65
img_name = landmarks_frame.iloc[n,0] # 获取第一列的图片名
landmarks = landmarks_frame.iloc[n,1:].values # 获取所有坐标 shape:(136,)
landmarks = landmarks.astype('float').reshape(-1,2) #转换为(x,y) shape:(68,2)

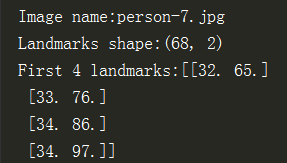
print('Image name:{}'.format(img_name))
print('Landmarks shape:{}'.format(landmarks.shape))
print('First 4 landmarks:{}'.format(landmarks[:4]))
2.3 展示图像和特征点
# 把图像和对应的特征点标记展示出来
def show_landmarks(image, landmarks):
    plt.imshow(image)
    # A scatter plot of y vs x with varying marker size and/or color.
    plt.scatter(landmarks[:, 0], landmarks[:, 1], s=10, marker='.', c='r')

plt.figure()
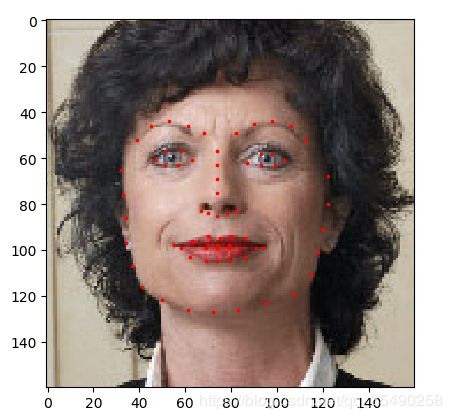
show_landmarks(io.imread(os.path.join('faces/',img_name)),landmarks)
plt.show()
3、Dataset类介绍
3.1 原理
torch.utils.data.Dataset是一个PyTorch用来表示数据集的抽象类。我们用来处理自己的数据集的时候必须继承Dataset,然后重写下面的函数:
__len__: 使得len(dataset)返回数据集的大小__getitem__:使得dataset[i]能够返回第i个数据样本
3.2 创建数据集
__init__函数中完成csv文件的读取- 在类的
__getitem__函数中完成图片的读取。在需要时才读入图片,减小内存开销 - 接收一个可选参数transform,用来对图片进行改变
- 返回的样本数据是一个字典形式,如下:
{'image':image,'landmarks':landmarks}
脸部图像类的定义:
class FaceLandmarksDataset(Dataset):
    def __init__(self, csv_file, root_dir, transform=None):
        '''

        :param csv_file: Path to the csv.
        :param root_dir: Directory with all the images.
        :param transform(optional): Optional transform to be applied on a sample.
        '''
        self.landmarks_frame = pd.read_csv(csv_file)
        self.root_dir = root_dir
        self.transform = transform

    def __len__(self):
        return len(self.landmarks_frame)

    def __getitem__(self, idx):
        img_name = os.path.join(self.root_dir, self.landmarks_frame.iloc[idx, 0])
        image = io.imread(img_name)
        landmarks = self.landmarks_frame.iloc[idx, 1:].values
        landmarks = landmarks.astype('float').reshape(-1, 2)
        sample = {'image': image, 'landmarks': landmarks}

        if self.transform:
            sample = self.transform(sample)

        return sample
实例化:
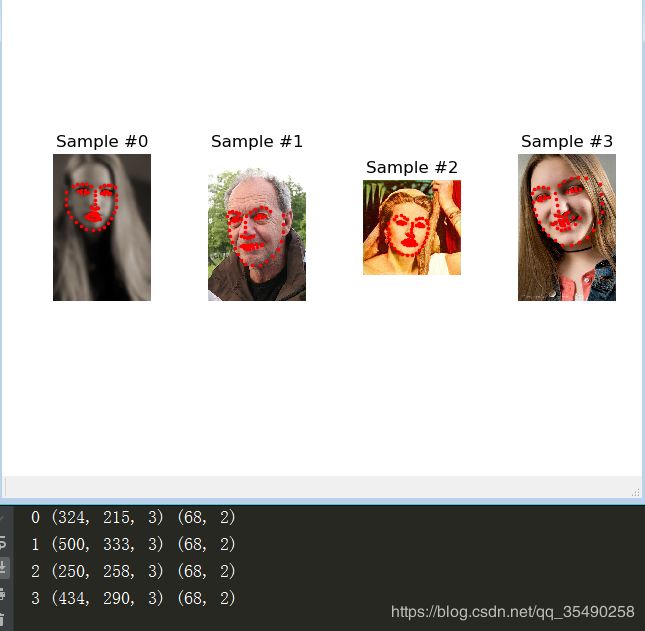
fig = plt.figure()
for i in range(len(face_dataset)):
    sample = face_dataset[i]
    print(i,sample['image'].shape,sample['landmarks'].shape)

    ax = plt.subplot(1,4,i+1) # 绘制多个子图
    plt.tight_layout() # 密制布局
    ax.set_title('Sample #{}'.format(i))
    ax.axis('off') # 去掉坐标轴
    show_landmarks(**sample)

    if i==3:
        plt.show()
        break
4、图像预处理
图片集中的每张图片大小都不一样,在神经网络中的输入图像我们往往希望是相对固定的大小。此外,对图片进行crop处理,可以对数据进行增强,提高训练的准确率。
4.1 实现三个常用的变换功能
Rescale: 重新调整图像大小(Pytorch1.0调整图像大小函数用Resize)RandomCrop: 随机从图像中截取一部分(常用的还有FiveCrop、TenCrop)ToTensor: 将numpy类型表示的图像转换成torch类型
只需要实现每个类的__call__函数和__init__函数:
class Rescale(object):
    def __init__(self, output_size):
        '''

        :param output_size(tuple or int): If tuple,output is matched to output_size.
            If int, smaller of image edges is matched to output_size keeping
            aspect ratio(宽高比) the same.
        '''
        assert isinstance(output_size, (int, tuple))
        self.output_size = output_size

    def __call__(self, sample):
        image, landmarks = sample['image'], sample['landmarks']
        h, w = image.shape[:2]
        if isinstance(self.output_size, int):
            if h > w:
                new_h, new_w = self.output_size * h / w, self.output_size
            else:
                new_h, new_w = self.output_size, self.output_size * w / h

        else:
            new_h, new_w = self.output_size

        new_h, new_w = int(new_h), int(new_w)
        img = transform.resize(image, (new_h, new_w))
        landmarks = landmarks * [new_w / w, new_h / h]

        return {'image': img, 'landmarks': landmarks}


class RandomCrop(object):
    def __init__(self, output_size):
        '''

        :param output_size(tuple or int):Desired output size.If int ,square crop is made.
        '''
        assert isinstance(output_size, (int, tuple))
        if isinstance(output_size, int):
            self.output_size = (output_size, output_size)
        else:
            assert len(output_size) == 2
            self.output_size = output_size

    def __call__(self, sample):
        image, landmarks = sample['image'], sample['landmarks']

        h, w = image.shape[:2]
        new_h, new_w = self.output_size

        top = np.random.randint(0, h - new_h)
        left = np.random.randint(0, w - new_w)
        image = image[top:top + new_h, left:left + new_w]
        landmarks = landmarks - [left, top]
        return {'image': image, 'landmarks': landmarks}


class ToTensor(object):
    def __call__(self, sample):
        image, landmarks = sample['image'], sample['landmarks']
        # numpy image:H * W * C
        # torch image:C * H * W
        image = image.transpose((2, 0, 1))
        return {'image': torch.from_numpy(image),
                'landmarks': torch.from_numpy(landmarks)}
4.2 组合使用变换功能
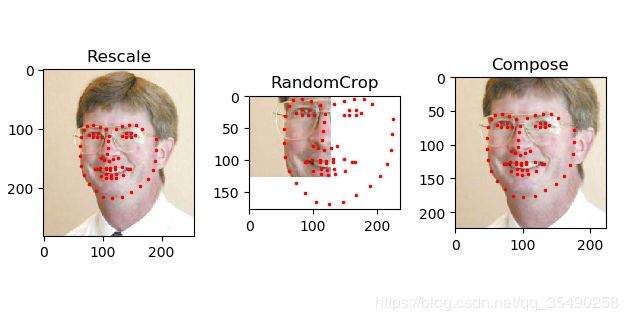
假设我们需要将图像的较短边调整到256,然后从中随机截取224的正方形图像。我们就可以调用torchvision.transforms.Compose组合使用Rescale和RandCrop
scale = Rescale(256)
crop = RandomCrop(128)
composed = transforms.Compose([Rescale(256),
                               RandomCrop(224)])

fig = plt.figure()
sample = face_dataset[64]
for i, tsfrm in enumerate([scale, crop, composed]):
    transformed_sample = tsfrm(sample)s
    ax = plt.subplot(1, 3, i + 1)
    plt.tight_layout()
    ax.set_title(type(tsfrm).__name__)
    show_landmarks(**transformed_sample)

plt.show()
5、集成transform
现在,将前面的所有内容集成到一起。抽取样本时,我们将做随机选取的操作,起到了数据增强的效果。
将Transform的部分作为形参传入dataset,然后用for循环来依次获得数据集样本。
transformed_dataset = FaceLandmarksDataset(csv_file='faces/face_landmarks.csv',
                                           root_dir='faces/',
                                           transform=transforms.Compose([
                                               Rescale(256),
                                               RandomCrop(224),
                                               ToTensor()
                                            ]))
# 循环获取数据集样本
for i in range(len(transformed_dataset)):
    sample = transformed_dataset[i]
    print(i,sample['image'].size(),sample['landmarks'].size())

    if i==3:
        break;
6、DataLoader
利用torch.utils.data.DataLoader类可以
- 获取批量数据(batch_size)
- 打乱数据顺序(shuffle)
- 用多线程
multiprocessing来加载数据(num_workers指定线程数)
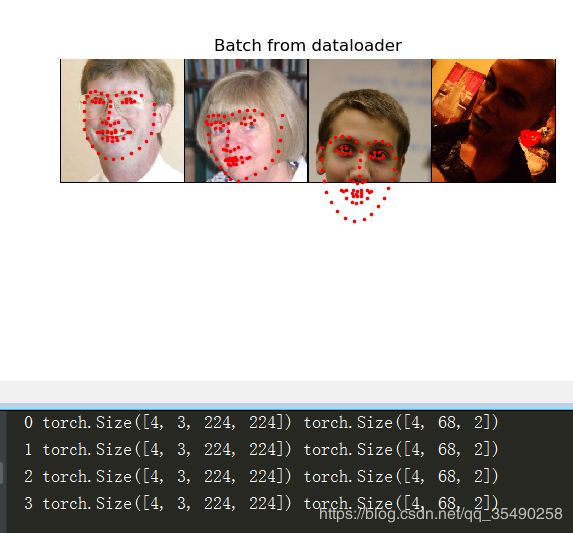
如下,使用DataLoader函数,并写了一个函数进行批量样本的展示
dataloader = DataLoader(transformed_dataset,batch_size=4,
                        shuffle=True,num_workers=4)

# show a batch
def show_landmarks_batch(sample_batch):
    images_batch,landmarks_batch = \
        sample_batch['image'],sample_batch['landmarks']
    batch_size = len(images_batch)
    im_size = images_batch.size(2)

    grid = utils.make_grid(images_batch)
    plt.imshow(grid.numpy().transpose((1,2,0)))

    for i in range(batch_size):
        plt.scatter(landmarks_batch[i,:,0].numpy()+i*im_size,
                    landmarks_batch[i,:,1].numpy(),
                    s=10,marker='.',c='r')
        plt.title('Batch from dataloader')

if __name__=='__main__':
    for i_batch, sample_batched in enumerate(dataloader):
        print(i_batch, sample_batched['image'].size(),
              sample_batched['landmarks'].size())

        if i_batch == 3:
            plt.figure()
            show_landmarks_batch(sample_batched)
            plt.axis('off')
            plt.show()
            break
