- springboot+vue项目实战一-创建SpringBoot简单项目
苹果酱0567
面试题汇总与解析springboot后端java中间件开发语言
这段时间抽空给女朋友搭建一个个人博客,想着记录一下建站的过程,就当做笔记吧。虽然复制zjblog只要一个小时就可以搞定一个网站,或者用cms系统,三四个小时就可以做出一个前后台都有的网站,而且想做成啥样也都行。但是就是要从新做,自己做的意义不一样,更何况,俺就是专门干这个的,嘿嘿嘿要做一个网站,而且从零开始,首先呢就是技术选型了,经过一番思量决定选择-SpringBoot做后端,前端使用Vue做一
- Spring Boot中实现跨域请求
BABA8891
springboot后端java
在SpringBoot中实现跨域请求(CORS,Cross-OriginResourceSharing)可以通过多种方式,以下是几种常见的方法:1.使用@CrossOrigin注解在SpringBoot中,你可以在控制器或者具体的请求处理方法上使用@CrossOrigin注解来允许跨域请求。在控制器上应用:importorg.springframework.web.bind.annotation.
- 博客网站制作教程
2401_85194651
javamaven
首先就是技术框架:后端:Java+SpringBoot数据库:MySQL前端:Vue.js数据库连接:JPA(JavaPersistenceAPI)1.项目结构blog-app/├──backend/│├──src/main/java/com/example/blogapp/││├──BlogApplication.java││├──config/│││└──DatabaseConfig.java
- SpringBoot和SpringMVC是什么关系?SpringBoot替代SpringMVC了吗?
瑞金彭于晏
springboot后端javaMVCspring数据库
SpringBoot和SpringMVC都是SpringFramework生态系统中的一部分,但它们各自扮演着不同的角色和提供不同的功能集。理解它们之间的关系,首先需要了解SpringFramework本身。SpringFrameworkSpringFramework是一个全面的、开源的应用程序开发框架,它提供了广泛的功能来支持企业应用开发的几乎所有方面。SpringFramework的核心特性之
- Java -jar 如何在后台运行项目
vincent_hahaha
撸了今年阿里、头条和美团的面试,我有一个重要发现.......>>>说到运行jar包通常我们都会以下面的方式运行:java-jarspringboot-0.0.1-SNAPSHOT.jar这样运行的话会有一个问题,就是我们一关闭当前窗口就会停止运行项目,要想解决这个问题,就需要在后台运行。nohupjava-jarbabyshark-0.0.1-SNAPSHOT.jar >log.file 2>&
- 探索Zebra4J:构建高效企业级Web应用的微服务框架
叶准鑫Natalie
探索Zebra4J:构建高效企业级Web应用的微服务框架ZebraZebra4J/Zebra4Js基于SpringBoot的JavaWeb/Nodejs框架项目地址:https://gitcode.com/gh_mirrors/zebra/Zebra项目介绍在当今快速发展的技术环境中,构建高效、可扩展的企业级Web应用是每个开发团队的追求。Zebra4J作为一款基于SpringBoot的全新微服务
- Sentinel实时监控不展示问题
朱杰jjj
sentinelsentinel
问题官方插件Endpoint支持,可以实时统计出SpringBoot的健康状况和请求的调用信息在使用Endpoint特性之前需要在Maven中添加spring-boot-starter-actuator依赖,并在配置中允许Endpoints的访问。SpringBoot1.x中添加配置management.security.enabled=false。暴露的endpoint路径为/sentinelS
- 36. MyBatis如何支持多数据库操作?如何配置不同的数据源?
这孩子叫逆
Mybatis笔记mybatis数据库
在许多企业级应用中,可能需要访问多个数据库。MyBatis可以通过配置多个数据源和动态切换数据源来支持多数据库操作。下面介绍如何在MyBatis中配置和使用多个数据源。1.多数据源的基本配置1.1配置多个数据源要支持多个数据源,首先需要在Spring或SpringBoot中配置不同的数据源。假设我们要连接两个数据库db1和db2,可以通过以下步骤进行配置。SpringBoot示例:applicat
- SpringBoot整合ES搜索引擎 实现网站热搜词及热度计算
码踏云端
springbootElasticsearchspringbootelasticsearch后端热搜词热度计算java
博主简介:历代文学网(PC端可以访问:https://literature.sinhy.com/#/literature?__c=1000,移动端可微信小程序搜索“历代文学”)总架构师,15年工作经验,精通Java编程,高并发设计,Springboot和微服务,熟悉Linux,ESXI虚拟化以及云原生Docker和K8s,热衷于探索科技的边界,并将理论知识转化为实际应用。保持对新技术的好奇心,乐于
- java 技术 架构 相关文档
圣心
java架构开发语言
在Java中,有许多不同的技术和架构,这里我将列举一些常见的Java技术和架构,并提供一些相关的文档资源。SpringFrameworkSpring是一个开源的Java/JavaEE全功能框架,以Apache许可证形式发布,提供了一种实现企业级应用的方法。官方文档:SpringFrameworkSpringBootSpringBoot是Spring的一个子项目,旨在简化创建生产级的Spring应用
- java获取applicationcontext,SpringBoot获取ApplicationContext的3种方式
花儿街参考
ApplicationContext是什么?简单来说就是Spring中的容器,可以用来获取容器中的各种bean组件,注册监听事件,加载资源文件等功能。ApplicationContext获取的几种方式1直接使用Autowired注入@ComponentpublicclassBook1{@AutowiredprivateApplicationContextapplicationContext;pub
- SpringBoot 设置传入参数非必要
loveLifeLoveCoding
springbootspringbootjavaspring
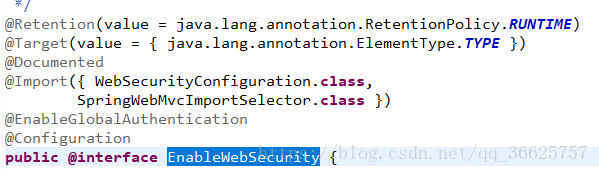
查看RequestParam源码packageorg.springframework.web.bind.annotation;importjava.lang.annotation.Documented;importjava.lang.annotation.ElementType;importjava.lang.annotation.Retention;importjava.lang.annotat
- SpringBoot 获取 ApplicationContext
loveLifeLoveCoding
springbootspringbootjavaspring
1.概念ApplicationContext是什么?简单来说就是Spring中的容器,可以用来获取容器中的各种bean组件,注册监听事件,加载资源文件等功能2.获取ApplicationContext的方式2.1.创建工具类通过此工具类,可以方便的获取bean组件,获取配置信息等importorg.springframework.beans.BeansException;importorg.spr
- 关于项目中使用shiro进行安全管理的总结
一颗大青柠
JavaShirojavaspring
关于项目中使用shiro进行安全管理的总结关于SpringBoot下使用shiro进行用户认证与权限管理对于安全框架有一定了解的开发者一定对于shiro这款安全框架有一定的了解,这里我们不再对该框架进行其设计与知识的介绍,仅对于我的个人项目中所使用到的进行一个总结,并放上代码。使用该框架的第一步,进行配置:packagecom.libvirtjava.demo.vm.util.config;imp
- Spring Boot 请求处理流程:从负载均衡到多实例并发 - 电子商务网站实例
烟雨国度
springboot负载均衡后端
SpringBoot请求处理流程:从负载均衡到多实例并发-电子商务网站实例SpringBoot请求处理流程:从负载均衡到多实例并发SpringBoot作为一个强大的Java应用开发框架,能够有效地处理高并发请求。本文将基于三个关键流程图,详细分析SpringBoot应用如何从负载均衡到请求处理,再到多实例并发处理的整个过程。1.负载均衡和多实例处理首先,让我们看一下描述负载均衡和多实例处理的流程图
- 微服务架构 | nacos - [自动刷新配置方式 & 失效排查]
问仙长何方蓬莱
微服务java技术SpringCloud微服务javanacos
INDEX§1配置方式§1.1springboot配置§1.2springcloud配置§2失效排查§2.1常见失效场景§2.1.1配置不配套§2.1.2自动刷新未开启§2.1.3依赖冲突§2.1.4改错了配置文件§2.2未知情况关键排查点§1配置方式nacos的配置中心主要有两套配置方式,配置方式不互相共通,需要配套配置springbootspringcloud§1.1springboot配置依
- 【免费】springboot项目申报管理系统|毕业设计|Javaweb项目
计算机学姐来啦
springbootssmjavaspringboot课程设计后端毕设毕业设计java-ee
收藏点赞不迷路关注作者有好处编号:springboot375springboot项目申报管理系统开发语言:Java数据库:MySQL技术:Spring+SpringMVC+MyBatis工具:IDEA/Ecilpse、Navicat、Maven1.万字文档展示(部分)2.系统图片展示第5章系统详细设计5.1管理员功能模块的实现5.1.1项目列表如图5.1显示的就是项目列表页面,此页面提供给管理员的
- springboot与日志
最后的夏t
日志1、日志框架小张;开发一个大型系统;1、System.out.println("");将关键数据打印在控制台;去掉?写在一个文件?2、框架来记录系统的一些运行时信息;日志框架;zhanglogging.jar;3、高大上的几个功能?异步模式?自动归档?xxxx?zhanglogging-good.jar?4、将以前框架卸下来?换上新的框架,重新修改之前相关的API;zhanglogging-p
- 计算机信息管理本科自考选题推荐
李哥讲程序开发
javaspringboot开发语言
计算机信息管理专业是一个跨学科的领域,它结合了计算机技术与管理技术,旨在利用计算机完成各类信息管理。以下是一些推荐的自考选题方向:基于SSM的毕业设计管理系统的设计与实现基于SSM大学生校园兼职论坛管理系统基于SSM的家教应聘招聘系统的设计和实现基于SpringBoot住院患者满意度跟踪调查系统的设计与实现基于SpringBoot在线作业提交系统的设计与实现总的来说,这些建议的选题方向覆盖了计算机
- springboot+mybatisplus实现基本的增删改查以及分页查询。这里使用的是Restful风格包括简单描述Restful是什么
okchan666
springbootjava
先实现springboot+mybatisplus的增删改查接口使用postman测试:第一步创建项目导入依赖:直接给大家了:4.0.0org.springframework.bootspring-boot-starter-parent2.6.6com.okchanspringboot_07_ssmp0.0.1-SNAPSHOT1.8org.springframework.bootspring-b
- SpringBoot2:web开发常用功能实现及原理解析-整合EasyExcel实现Excel导入导出功能
生产队队长
SpringAllexcelspringboot
1、工程包结构主要是这5个Java类2、导入EasyExcel包这里同时贴出其他相关springboot的基础包org.springframework.bootspring-boot-starter-weborg.springframework.bootspring-boot-devtoolsruntimetrueorg.springframework.bootspring-boot-config
- nacos管理springboot配置时,发生的Could not resolve placeholder两种原因
生产队队长
SpringAllspringboot
IllegalArgumentException:Couldnotresolveplaceholder'xxx.xxx.xxx'invalue"${xxx.xxx.xxx}"第一种:确实缺少配置,加上对应的配置即可。第二种:这个情况,可能会迷惑很多人报错某个配置无法引用,但是,检查配置时,确实存在,已经配置好了。而且,整个yml文件也没有语法格式错误。原因:我们在解决第一个问题的时候,可能导致这个
- springboot整合MongoDB时碰到的问题
生产队队长
DatabaseSpringAllmongodbspring
1.账号总是不对,导致查不出数据,报错Auth…权鉴错误这次,我也是第一次接触MongoDB,非常的生疏springboot整合MongoDB,要在properties文件中配置账号mongodb基本语法:useDATABASE_NAME;--创建数据库showdbs;--查看我们所有的库,注意,我们刚创建的库,如果没有数据,是不会被显示的showusers;--查看当前库所有拥有的账号db.cr
- python基于django/flask的NBA球员大数据分析与可视化python+java+node.js
QQ_511008285
pythondjangoflaskjavaspringboot数据分析
前端开发框架:vue.js数据库mysql版本不限后端语言框架支持:1java(SSM/springboot)-idea/eclipse2.Nodejs+Vue.js-vscode3.python(flask/django)--pycharm/vscode4.php(thinkphp/laravel)-hbuilderx数据库工具:Navicat/SQLyog等都可以本文针对NBA球员的大数据进行
- Java基于spring boot的国产电影数据分析与可视化python+java+node.js
QQ_511008285
javaspringboot数据分析pythondjangovue.jsflask
前端开发框架:vue.js数据库mysql版本不限后端语言框架支持:1java(SSM/springboot)-idea/eclipse2.Nodejs+Vue.js-vscode3.python(flask/django)--pycharm/vscode4.php(thinkphp/laravel)-hbuilderx数据库工具:Navicat/SQLyog等都可以 该系统使用进行大数据处理和
- SpringBoot—集成AOP详解(面向切面编程Aspect)
Hughman
AOP介绍AOP概述 AOP是Aspect-OrientedProgramming,即为面向(切面)方面编程。在维基百科中的解释:Aspect是一种新的模块化机制,用来描述分散在对象、类或函数中的横切关注点。从关注点中分离出横切关注点是面向切面的程序设计核心概念。分离关注点使得解决特定领域问题的代码从业务逻辑中独立出来,业务逻辑代码不需要再包含针对特定领域问题代码的调用,比如一些公用模块的日志、
- 工程项目管理系统源码与Spring Cloud:实现高效系统管理与二次开发
微服务技术分享
springcloudjava工程项目管理系统源码
随着企业规模的不断扩大和业务的快速发展,传统的工程项目管理方式已经无法满足现代企业的需求。为了提高工程管理效率、减轻劳动强度、提高信息处理速度和准确性,企业需要借助先进的数字化技术进行转型。本文将介绍一款采用SpringCloud+SpringBoot+Mybatis技术框架的工程项目管理系统,该系统涵盖了项目管理、合同管理、预警管理、竣工管理、质量管理等多个方面,通过数据字典、编码管理、用户管理
- springboot结合vue如何展示服务器磁盘里的图片,如何预览图片
夏之小星星
springbootvue.js服务器
1、在springboot配置文件中用spring.web.resources.static-locations配置静态资源路径例如图片的位置存放在服务器C盘下的路径为:C:/image/先在配置文件中使用web.upload-path配置磁盘路径如下web.upload-path=C:/image/再把该路径添加在静态资源路径里spring.web.resources.static-locati
- Spring Boot项目自动生成OpenAPI3.0规范的接口描述文档yaml
[email protected]
springbootjavaopenapi
首先在pom.xml文件中添加springdoc-openapi的依赖:org.springdocspringdoc-openapi-core1.1.45启动SpringBoot程序,通过项目的ip和端口/v3/api-docs访问自动生成的OpenAPI3.0文档(JSON)/v3/api-docs.yaml下载yaml格式的文件如果想要自定义路径,可在application.propertie
- 基于springboot+vue的“考研资讯平台”程序设计实现【毕业论文,源码】
一枚务实的码农
毕业设计毕设考研springboot毕业论文系统源码
摘要随着现在网络的快速发展,网络的应用在各行各业当中它很快融入到了许多学校的眼球之中,他们利用网络来做这个电商的服务,随之就产生了“考研资讯平台”,这样就让学生考研资讯平台更加方便简单。对于本考研资讯平台的设计来说,它主要是采用java技术。在整个系统的设计当中它是应用mysql数据库来完成的,具体根据网上考研资讯平台的现状来进行开发的,具体根据学生需求实现网上考研资讯平台网络化的管理,各类信息有
- tomcat基础与部署发布
暗黑小菠萝
Tomcat java web
从51cto搬家了,以后会更新在这里方便自己查看。
做项目一直用tomcat,都是配置到eclipse中使用,这几天有时间整理一下使用心得,有一些自己配置遇到的细节问题。
Tomcat:一个Servlets和JSP页面的容器,以提供网站服务。
一、Tomcat安装
安装方式:①运行.exe安装包
&n
- 网站架构发展的过程
ayaoxinchao
数据库应用服务器网站架构
1.初始阶段网站架构:应用程序、数据库、文件等资源在同一个服务器上
2.应用服务和数据服务分离:应用服务器、数据库服务器、文件服务器
3.使用缓存改善网站性能:为应用服务器提供本地缓存,但受限于应用服务器的内存容量,可以使用专门的缓存服务器,提供分布式缓存服务器架构
4.使用应用服务器集群改善网站的并发处理能力:使用负载均衡调度服务器,将来自客户端浏览器的访问请求分发到应用服务器集群中的任何
- [信息与安全]数据库的备份问题
comsci
数据库
如果你们建设的信息系统是采用中心-分支的模式,那么这里有一个问题
如果你的数据来自中心数据库,那么中心数据库如果出现故障,你的分支机构的数据如何保证安全呢?
是否应该在这种信息系统结构的基础上进行改造,容许分支机构的信息系统也备份一个中心数据库的文件呢?
&n
- 使用maven tomcat plugin插件debug关联源代码
商人shang
mavendebug查看源码tomcat-plugin
*首先需要配置好'''maven-tomcat7-plugin''',参见[[Maven开发Web项目]]的'''Tomcat'''部分。
*配置好后,在[[Eclipse]]中打开'''Debug Configurations'''界面,在'''Maven Build'''项下新建当前工程的调试。在'''Main'''选项卡中点击'''Browse Workspace...'''选择需要开发的
- 大访问量高并发
oloz
大访问量高并发
大访问量高并发的网站主要压力还是在于数据库的操作上,尽量避免频繁的请求数据库。下面简
要列出几点解决方案:
01、优化你的代码和查询语句,合理使用索引
02、使用缓存技术例如memcache、ecache将不经常变化的数据放入缓存之中
03、采用服务器集群、负载均衡分担大访问量高并发压力
04、数据读写分离
05、合理选用框架,合理架构(推荐分布式架构)。
- cache 服务器
小猪猪08
cache
Cache 即高速缓存.那么cache是怎么样提高系统性能与运行速度呢?是不是在任何情况下用cache都能提高性能?是不是cache用的越多就越好呢?我在近期开发的项目中有所体会,写下来当作总结也希望能跟大家一起探讨探讨,有错误的地方希望大家批评指正。
1.Cache 是怎么样工作的?
Cache 是分配在服务器上
- mysql存储过程
香水浓
mysql
Description:插入大量测试数据
use xmpl;
drop procedure if exists mockup_test_data_sp;
create procedure mockup_test_data_sp(
in number_of_records int
)
begin
declare cnt int;
declare name varch
- CSS的class、id、css文件名的常用命名规则
agevs
JavaScriptUI框架Ajaxcss
CSS的class、id、css文件名的常用命名规则
(一)常用的CSS命名规则
头:header
内容:content/container
尾:footer
导航:nav
侧栏:sidebar
栏目:column
页面外围控制整体布局宽度:wrapper
左右中:left right
- 全局数据源
AILIKES
javatomcatmysqljdbcJNDI
实验目的:为了研究两个项目同时访问一个全局数据源的时候是创建了一个数据源对象,还是创建了两个数据源对象。
1:将diuid和mysql驱动包(druid-1.0.2.jar和mysql-connector-java-5.1.15.jar)copy至%TOMCAT_HOME%/lib下;2:配置数据源,将JNDI在%TOMCAT_HOME%/conf/context.xml中配置好,格式如下:&l
- MYSQL的随机查询的实现方法
baalwolf
mysql
MYSQL的随机抽取实现方法。举个例子,要从tablename表中随机提取一条记录,大家一般的写法就是:SELECT * FROM tablename ORDER BY RAND() LIMIT 1。但是,后来我查了一下MYSQL的官方手册,里面针对RAND()的提示大概意思就是,在ORDER BY从句里面不能使用RAND()函数,因为这样会导致数据列被多次扫描。但是在MYSQL 3.23版本中,
- JAVA的getBytes()方法
bijian1013
javaeclipseunixOS
在Java中,String的getBytes()方法是得到一个操作系统默认的编码格式的字节数组。这个表示在不同OS下,返回的东西不一样!
String.getBytes(String decode)方法会根据指定的decode编码返回某字符串在该编码下的byte数组表示,如:
byte[] b_gbk = "
- AngularJS中操作Cookies
bijian1013
JavaScriptAngularJSCookies
如果你的应用足够大、足够复杂,那么你很快就会遇到这样一咱种情况:你需要在客户端存储一些状态信息,这些状态信息是跨session(会话)的。你可能还记得利用document.cookie接口直接操作纯文本cookie的痛苦经历。
幸运的是,这种方式已经一去不复返了,在所有现代浏览器中几乎
- [Maven学习笔记五]Maven聚合和继承特性
bit1129
maven
Maven聚合
在实际的项目中,一个项目通常会划分为多个模块,为了说明问题,以用户登陆这个小web应用为例。通常一个web应用分为三个模块:
1. 模型和数据持久化层user-core,
2. 业务逻辑层user-service以
3. web展现层user-web,
user-service依赖于user-core
user-web依赖于user-core和use
- 【JVM七】JVM知识点总结
bit1129
jvm
1. JVM运行模式
1.1 JVM运行时分为-server和-client两种模式,在32位机器上只有client模式的JVM。通常,64位的JVM默认都是使用server模式,因为server模式的JVM虽然启动慢点,但是,在运行过程,JVM会尽可能的进行优化
1.2 JVM分为三种字节码解释执行方式:mixed mode, interpret mode以及compiler
- linux下查看nginx、apache、mysql、php的编译参数
ronin47
在linux平台下的应用,最流行的莫过于nginx、apache、mysql、php几个。而这几个常用的应用,在手工编译完以后,在其他一些情况下(如:新增模块),往往想要查看当初都使用了那些参数进行的编译。这时候就可以利用以下方法查看。
1、nginx
[root@361way ~]# /App/nginx/sbin/nginx -V
nginx: nginx version: nginx/
- unity中运用Resources.Load的方法?
brotherlamp
unity视频unity资料unity自学unityunity教程
问:unity中运用Resources.Load的方法?
答:Resources.Load是unity本地动态加载资本所用的方法,也即是你想动态加载的时分才用到它,比方枪弹,特效,某些实时替换的图像什么的,主张此文件夹不要放太多东西,在打包的时分,它会独自把里边的一切东西都会集打包到一同,不论里边有没有你用的东西,所以大多数资本应该是自个建文件放置
1、unity实时替换的物体即是依据环境条件
- 线段树-入门
bylijinnan
java算法线段树
/**
* 线段树入门
* 问题:已知线段[2,5] [4,6] [0,7];求点2,4,7分别出现了多少次
* 以下代码建立的线段树用链表来保存,且树的叶子结点类似[i,i]
*
* 参考链接:http://hi.baidu.com/semluhiigubbqvq/item/be736a33a8864789f4e4ad18
* @author lijinna
- 全选与反选
chicony
全选
<!DOCTYPE HTML PUBLIC "-//W3C//DTD HTML 4.01 Transitional//EN" "http://www.w3.org/TR/html4/loose.dtd">
<html>
<head>
<title>全选与反选</title>
- vim一些简单记录
chenchao051
vim
mac在/usr/share/vim/vimrc linux在/etc/vimrc
1、问:后退键不能删除数据,不能往后退怎么办?
答:在vimrc中加入set backspace=2
2、问:如何控制tab键的缩进?
答:在vimrc中加入set tabstop=4 (任何
- Sublime Text 快捷键
daizj
快捷键sublime
[size=large][/size]Sublime Text快捷键:Ctrl+Shift+P:打开命令面板Ctrl+P:搜索项目中的文件Ctrl+G:跳转到第几行Ctrl+W:关闭当前打开文件Ctrl+Shift+W:关闭所有打开文件Ctrl+Shift+V:粘贴并格式化Ctrl+D:选择单词,重复可增加选择下一个相同的单词Ctrl+L:选择行,重复可依次增加选择下一行Ctrl+Shift+L:
- php 引用(&)详解
dcj3sjt126com
PHP
在PHP 中引用的意思是:不同的名字访问同一个变量内容. 与C语言中的指针是有差别的.C语言中的指针里面存储的是变量的内容在内存中存放的地址 变量的引用 PHP 的引用允许你用两个变量来指向同一个内容 复制代码代码如下:
<?
$a="ABC";
$b =&$a;
echo
- SVN中trunk,branches,tags用法详解
dcj3sjt126com
SVN
Subversion有一个很标准的目录结构,是这样的。比如项目是proj,svn地址为svn://proj/,那么标准的svn布局是svn://proj/|+-trunk+-branches+-tags这是一个标准的布局,trunk为主开发目录,branches为分支开发目录,tags为tag存档目录(不允许修改)。但是具体这几个目录应该如何使用,svn并没有明确的规范,更多的还是用户自己的习惯。
- 对软件设计的思考
e200702084
设计模式数据结构算法ssh活动
软件设计的宏观与微观
软件开发是一种高智商的开发活动。一个优秀的软件设计人员不仅要从宏观上把握软件之间的开发,也要从微观上把握软件之间的开发。宏观上,可以应用面向对象设计,采用流行的SSH架构,采用web层,业务逻辑层,持久层分层架构。采用设计模式提供系统的健壮性和可维护性。微观上,对于一个类,甚至方法的调用,从计算机的角度模拟程序的运行情况。了解内存分配,参数传
- 同步、异步、阻塞、非阻塞
geeksun
非阻塞
同步、异步、阻塞、非阻塞这几个概念有时有点混淆,在此文试图解释一下。
同步:发出方法调用后,当没有返回结果,当前线程会一直在等待(阻塞)状态。
场景:打电话,营业厅窗口办业务、B/S架构的http请求-响应模式。
异步:方法调用后不立即返回结果,调用结果通过状态、通知或回调通知方法调用者或接收者。异步方法调用后,当前线程不会阻塞,会继续执行其他任务。
实现:
- Reverse SSH Tunnel 反向打洞實錄
hongtoushizi
ssh
實際的操作步驟:
# 首先,在客戶那理的機器下指令連回我們自己的 Server,並設定自己 Server 上的 12345 port 會對應到幾器上的 SSH port
ssh -NfR 12345:localhost:22
[email protected]
# 然後在 myhost 的機器上連自己的 12345 port,就可以連回在客戶那的機器
ssh localhost -p 1
- Hibernate中的缓存
Josh_Persistence
一级缓存Hiberante缓存查询缓存二级缓存
Hibernate中的缓存
一、Hiberante中常见的三大缓存:一级缓存,二级缓存和查询缓存。
Hibernate中提供了两级Cache,第一级别的缓存是Session级别的缓存,它是属于事务范围的缓存。这一级别的缓存是由hibernate管理的,一般情况下无需进行干预;第二级别的缓存是SessionFactory级别的缓存,它是属于进程范围或群集范围的缓存。这一级别的缓存
- 对象关系行为模式之延迟加载
home198979
PHP架构延迟加载
形象化设计模式实战 HELLO!架构
一、概念
Lazy Load:一个对象,它虽然不包含所需要的所有数据,但是知道怎么获取这些数据。
延迟加载貌似很简单,就是在数据需要时再从数据库获取,减少数据库的消耗。但这其中还是有不少技巧的。
二、实现延迟加载
实现Lazy Load主要有四种方法:延迟初始化、虚
- xml 验证
pengfeicao521
xmlxml解析
有些字符,xml不能识别,用jdom或者dom4j解析的时候就报错
public static void testPattern() {
// 含有非法字符的串
String str = "Jamey친ÑԂ
- div设置半透明效果
spjich
css半透明
为div设置如下样式:
div{filter:alpha(Opacity=80);-moz-opacity:0.5;opacity: 0.5;}
说明:
1、filter:对win IE设置半透明滤镜效果,filter:alpha(Opacity=80)代表该对象80%半透明,火狐浏览器不认2、-moz-opaci
- 你真的了解单例模式么?
w574240966
java单例设计模式jvm
单例模式,很多初学者认为单例模式很简单,并且认为自己已经掌握了这种设计模式。但事实上,你真的了解单例模式了么。
一,单例模式的5中写法。(回字的四种写法,哈哈。)
1,懒汉式
(1)线程不安全的懒汉式
public cla