Android 集成极光推送之自定义消息
最近项目中要用到推送功能,主要推送广告图片,以弹窗形式弹出。
这就需要推送的消息是自定义的消息。
集成的步骤是:
(1)首先先注册极光账号(注册步骤省略)
(2)登录过后进入极光服务-极光推送界面-立即体验

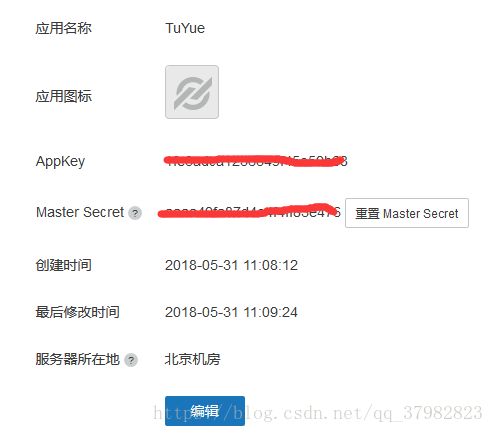
(3)然后点击创建应用,填写应用名、应用图标(可不上传)注意:AppKey:和Master Secret :对应的一串东西要在自己的代码使用的,并且要发给后台服务器端
(4)接下来进入推送设置界面:填写自己应用的包名(一旦填写不可修改)然后可以下载demo,集成到自己的项目中,将所需的依赖包,权限啊一一拷贝到自己的APP中就ok了,之后在将这个Module删除。

(5)****开始集成到自己的APP中了
①在APP的build.gradle中导入Jpush依赖包
//Jpush依赖包
compile ‘cn.jiguang.sdk:jpush:3.1.3’
compile ‘cn.jiguang.sdk:jcore:1.2.1’
②拷贝so文件
defaultConfig {
//Jpush配置
ndk {
//选择要添加的对应cpu类型的.so库。
abiFilters ‘armeabi’, ‘x86’
// 还可以添加 ‘x86’, ‘x86_64’, ‘mips’, ‘mips64’ ,‘armeabi-v7a’, ‘arm64-v8a’,
}
manifestPlaceholders = [
JPUSH_PKGNAME : applicationId,
JPUSH_APPKEY : “1fe3adca1236349f45e59b68”, //JPush上注册的包名对应的appkey.
JPUSH_CHANNEL : “developer-default”, //暂时填写默认值即可.
]
}
③权限以及所需类的拷贝
④自定义Application,在Application中初始化Jpush
public class AppContext extends Application {
private final static String TAG = “AppContext”;
@Override
public void onCreate() {
    super.onCreate();

    //=============================Jpush初始化===============================//

    JPushInterface.setDebugMode(true); 	// 设置开启日志,发布时请关闭日志
    JPushInterface.init(this);     		// 初始化 JPush

    //设置别名
    //之后再看设备别名,这个就是你可以为客户端设置别名,这样在你推送的时候,
    //你就推送到和你设置别名匹配的客户端上,使用直接调用setAlias()方法即可(比如用户登录完,你可以把用户名作为该用户的别名)
//获取Mac地址
String macAddress= DeviceUtils.getMac();
    Log.d(TAG,"当前设备的Mac地址是:"+macAddress);

    JPushInterface.setAlias(this, //上下文对象
            //"tuyue123456", //别名
            macAddress,
            new TagAliasCallback() {//回调接口,i=0表示成功,其它设置失败
                @Override
                public void gotResult(int responseCode, String s, Set set) {
                    if (responseCode==0) {
                        System.out.println("jpush alias@@@@@别名设置成功");
                    }
                    Log.d("alias", "set alias result is" + responseCode);
                }
            });


    //设置标签(TAG)
// 这个和上面别名区别在于,这个可以发送好多个客户端,只要匹配这个标签即可
// 方法是调用setTag()这个方法
// 说下这个方法把,这个方法的第二个参数是个set集合,为什么呢?因为每个人可能有好多个兴趣爱好,这样就可能有多个标签.
// 这里我们假设第一个用户的TAG是sport和game;第二个用户的TAG是music和game
// Set sets = new HashSet<>();
// sets.add(“movie”);//运行第二个模拟器上时把这个注掉
// sets.add(“game”);
//// sets.add(“music”);//运行第二个模拟器上时把这个打开
// JPushInterface.setTags(this, sets, new TagAliasCallback() {
// @Override
// public void gotResult(int i, String s, Set set) {
// Log.d(“alias”, “set tag result is” + i);
// }
// });
    //=============================Jpush初始化===============================//

}
}
⑤在自己的项目中新建一个文件夹jpush里边存放所需的类,尤其是自定义广播这个类
package com.ywb.tuyue.jpush;

import android.content.BroadcastReceiver;
import android.content.Context;
import android.content.Intent;
import android.os.Bundle;
import android.support.v4.content.LocalBroadcastManager;
import android.text.TextUtils;

import com.orhanobut.logger.Logger;
import com.ywb.tuyue.ui.BaseActivity;

import org.json.JSONException;
import org.json.JSONObject;

import java.util.Iterator;

import cn.jpush.android.api.JPushInterface;

/**
 * 自定义接收器
 * 如果不定义这个 Receiver,则:
 * 1) 默认用户会打开主界面
 * 2) 接收不到自定义消息
 * Created by wcystart on 2018/5/31.
 */
public class MyReceiver extends BroadcastReceiver {
    private static final String TAG = "JIGUANG-Example";
    @Override
    public void onReceive(Context context, Intent intent) {
        try {
            Bundle bundle = intent.getExtras();
            Logger.d(TAG, "[MyReceiver] onReceive - " + intent.getAction() + ", extras: " + printBundle(bundle));
            if (JPushInterface.ACTION_REGISTRATION_ID.equals(intent.getAction())) {
                String regId = bundle.getString(JPushInterface.EXTRA_REGISTRATION_ID);
                Logger.d(TAG, "[MyReceiver] 接收Registration Id : " + regId);
                //send the Registration Id to your server...
            } else if (JPushInterface.ACTION_MESSAGE_RECEIVED.equals(intent.getAction())) {
                Logger.d(TAG, "[MyReceiver] 接收到推送下来的自定义消息: " + bundle.getString(JPushInterface.EXTRA_MESSAGE));
                //接收后台推送过来的消息
                String message = bundle.getString(JPushInterface.EXTRA_MESSAGE); //字符串
                String extras = bundle.getString(JPushInterface.EXTRA_EXTRA); //json格式
                System.out.println("在广播中收到了自定义消息@@消息内容是:"+ message+"/////////");
              //  System.out.println("收到了自定义消息@@消息extra是:"+ extras+"EEEEEEEEEEEEEEEEEEEEEEE");
               processCustomMessage(context, bundle);
            } else if (JPushInterface.ACTION_NOTIFICATION_RECEIVED.equals(intent.getAction())) {
                Logger.d(TAG, "[MyReceiver] 接收到推送下来的通知");
                int notifactionId = bundle.getInt(JPushInterface.EXTRA_NOTIFICATION_ID);
                Logger.d(TAG, "[MyReceiver] 接收到推送下来的通知的ID: " + notifactionId);
            } else if (JPushInterface.ACTION_NOTIFICATION_OPENED.equals(intent.getAction())) {
                Logger.d(TAG, "[MyReceiver] 用户点击打开了通知");
                //打开自定义的Activity
                Intent i = new Intent(context, TestActivity.class);
                i.putExtras(bundle);
                //i.setFlags(Intent.FLAG_ACTIVITY_NEW_TASK);
                i.setFlags(Intent.FLAG_ACTIVITY_NEW_TASK | Intent.FLAG_ACTIVITY_CLEAR_TOP );
                context.startActivity(i);
            } else if (JPushInterface.ACTION_RICHPUSH_CALLBACK.equals(intent.getAction())) {
                Logger.d(TAG, "[MyReceiver] 用户收到到RICH PUSH CALLBACK: " + bundle.getString(JPushInterface.EXTRA_EXTRA));
                //在这里根据 JPushInterface.EXTRA_EXTRA 的内容处理代码,比如打开新的Activity, 打开一个网页等..
            } else if(JPushInterface.ACTION_CONNECTION_CHANGE.equals(intent.getAction())) {
                boolean connected = intent.getBooleanExtra(JPushInterface.EXTRA_CONNECTION_CHANGE, false);
                Logger.w(TAG, "[MyReceiver]" + intent.getAction() +" connected state change to "+connected);
            } else {
                Logger.d(TAG, "[MyReceiver] Unhandled intent - " + intent.getAction());
            }
        } catch (Exception e){
        }
    }

    // 打印所有的 intent extra 数据
    private static String printBundle(Bundle bundle) {
        StringBuilder sb = new StringBuilder();
        for (String key : bundle.keySet()) {
            if (key.equals(JPushInterface.EXTRA_NOTIFICATION_ID)) {
                sb.append("\nkey:" + key + ", value:" + bundle.getInt(key));
            }else if(key.equals(JPushInterface.EXTRA_CONNECTION_CHANGE)){
                sb.append("\nkey:" + key + ", value:" + bundle.getBoolean(key));
            } else if (key.equals(JPushInterface.EXTRA_EXTRA)) {
                if (TextUtils.isEmpty(bundle.getString(JPushInterface.EXTRA_EXTRA))) {
                    Logger.i(TAG, "This message has no Extra data");
                    continue;
                }
                try {
                    JSONObject json = new JSONObject(bundle.getString(JPushInterface.EXTRA_EXTRA));
                    Iterator it =  json.keys();
                    while (it.hasNext()) {
                        String myKey = it.next();
                        sb.append("\nkey:" + key + ", value: [" +
                                myKey + " - " +json.optString(myKey) + "]");
                    }
                } catch (JSONException e) {
                    Logger.e(TAG, "Get message extra JSON error!");
                }
            } else {
                sb.append("\nkey:" + key + ", value:" + bundle.get(key));
            }
        }
        return sb.toString();
    }

    //send msg to BaseActivity    // String extras = bundle.getString(JPushInterface.EXTRA_EXTRA);
    private void processCustomMessage(Context context, Bundle bundle) {
        if (BaseActivity.isForeground) {
            String message = bundle.getString(JPushInterface.EXTRA_MESSAGE);
            Intent msgIntent = new Intent(BaseActivity.MESSAGE_RECEIVED_ACTION);
            //解析服务器端推送过来的json
            if(!ExampleUtil.isEmpty(message)){
                msgIntent.putExtra(BaseActivity.KEY_MESSAGE, message);
            }
            LocalBroadcastManager.getInstance(context).sendBroadcast(msgIntent);
        }
    }
}
⑦将广播中收到的消息,使用Intent携带给自己想要传给的那个页面,比如我这里是传给BaseActivity了,那么只要是继承自BaseActivity的所有Activity都能接收到推送的消息
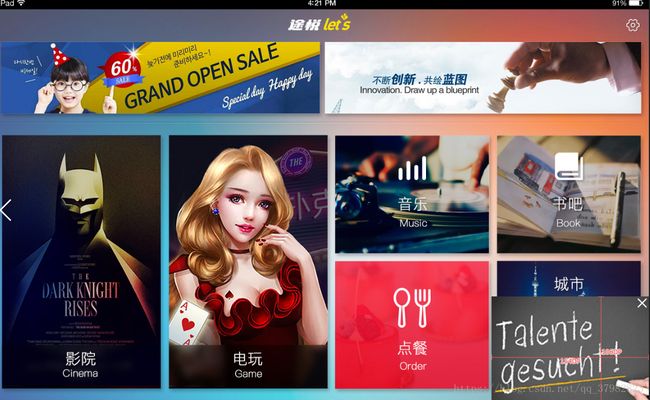
⑧接下来是在BaseActivity中接收广播中传过来的消息,通过json解析获取到所需的字段,例如我这里是拿推送的图片url,去网络请求下载图片,以弹框的形式展示在界面的右下角。
/**
- Created by mhdt on 2017/12/14.
- Activity 基类
*/
public abstract class BaseActivity extends AppCompatActivity {

    public static boolean isForeground = false; //receiver接收消息时使用
    //for receive customer msg from jpush server
    private MessageReceiver mMessageReceiver;
    public static final String MESSAGE_RECEIVED_ACTION = "com.ywb.tuyue.ui.web.MESSAGE_RECEIVED_ACTION";
    public static final String KEY_MESSAGE = "message";

    protected Activity mContext;
    private Unbinder unbinder;
    private boolean isResume;

    @Override
    protected void onCreate(Bundle savedInstanceState) {
        super.onCreate(savedInstanceState);
        mContext = this;
        AppManager.getAppManager().addActivity(this);
        setRequestedOrientation(ActivityInfo.SCREEN_ORIENTATION_LANDSCAPE);
        setContentView(getViewId());
        unbinder = ButterKnife.bind(this);
        initView(savedInstanceState);
        setHeader();
        //注册推送消息的广播
        registerMessageReceiver();
    }
    protected abstract int getViewId();
    protected abstract void initView(Bundle savedInstanceState);

    @Override
    protected void onDestroy() {
        UiHelper.getInstance().destoryDialog();
        unbinder.unbind();
        super.onDestroy();
    }

    /**
     * 返回键处理
     */
    protected View.OnClickListener onBackClickListener = new View.OnClickListener() {
        @Override
        public void onClick(View v) {
            back();
        }
    };

    protected void back() {
        super.onBackPressed();
    }
    @Override
    protected void onResume() {
        //监听网络变化
        if (netWorkStateReceiver == null) {
            netWorkStateReceiver = new NetWorkStateReceiver();
        }
        IntentFilter filter = new IntentFilter();
        filter.addAction(ConnectivityManager.CONNECTIVITY_ACTION);
        registerReceiver(netWorkStateReceiver, filter);
        super.onResume();
        isResume = true;

        isForeground = true;
    }

    /**
     * 注册接受广播
     */
    public void registerMessageReceiver() {
        mMessageReceiver = new MessageReceiver();
        IntentFilter filter = new IntentFilter();
        filter.setPriority(IntentFilter.SYSTEM_HIGH_PRIORITY);
        filter.addAction(MESSAGE_RECEIVED_ACTION);
        LocalBroadcastManager.getInstance(this).registerReceiver(mMessageReceiver, filter);
    }

    @Override
    protected void onPause() {
        unregisterReceiver(netWorkStateReceiver);

        super.onPause();
        isResume = false;
        isForeground = false;
    }
    class MessageReceiver extends BroadcastReceiver{
        String imageUrl;
        @Override
        public void onReceive(Context context, Intent intent) {
                if (MESSAGE_RECEIVED_ACTION.equals(intent.getAction())) {
                    String message = intent.getStringExtra(KEY_MESSAGE);
                    System.out.println("接受从广播中传过来的自定义消息内容是:"+ message+"/////////");
                    //解析后台推送过来的消息
                  if(!ExampleUtil.isEmpty(message)){
                      try
                      {
                          JSONObject jsonObject=new JSONObject(message);
                          imageUrl=jsonObject.getString("picUrl");
                          String name=jsonObject.getString("name");
                          int id=jsonObject.getInt("id");
                          System.out.println("图片的url是:"+ imageUrl+"\n"+"字段名是:"+name+"\n"+"字段ID:"+id+"/////////");
                      }
                      catch (Exception e) {
                          e.printStackTrace();
                      }
                  }
                  showPushMessage(imageUrl);
                }
        }
    }

    private void showPushMessage(String imageUrl) {
        DisplayMetrics metric = new DisplayMetrics();
        getWindowManager().getDefaultDisplay().getMetrics(metric);
        int width = metric.widthPixels;     // 屏幕宽度(像素)
        int height = metric.heightPixels;
        //判断Context是否为空
       Context context =BaseActivity.this;
        if(null!=context){
            Dialog dialog=new Dialog(context,R.style.PushDialog);
            View view = LayoutInflater.from(context).inflate(R.layout.push_dialog, null, false);
            ImageView imageView=  view.findViewById(R.id.push_image);
            System.out.println("开始下载图片了!!!!"+"/////////////////////////");
            Glide.with(getApplicationContext()).load(imageUrl).centerCrop().into(imageView);
            ImageView  cancel=view.findViewById(R.id.iv_cancle);
            cancel.setOnClickListener(new View.OnClickListener() {
                @Override
                public void onClick(View v) {
                    dialog.dismiss();
                }
            });
            dialog.setContentView(view);
            dialog.setCanceledOnTouchOutside(false);
            dialog.setCancelable(false);
            Window window = dialog.getWindow();
            WindowManager.LayoutParams attributes = window.getAttributes();
            window.setGravity(Gravity.BOTTOM);
            attributes.width = width - 10;
            attributes.height = height - 300;
            window.setAttributes(attributes);
            if(!isFinishing()){
                dialog.show();
            }
            System.out.println("dialog展示成功!!!"+"///////////////////////");
       }
    }
}
总结:集成极光推送其实没什么难的,关键是要看你拿到推送的消息,做什么处理了。
集成所需的重要文件:
依赖包
so库文件
权限
Application中初始化
所需类的拷贝以及自己去定义


