什么是Spring Boot?
自行百度
第一个Spring Boot程序
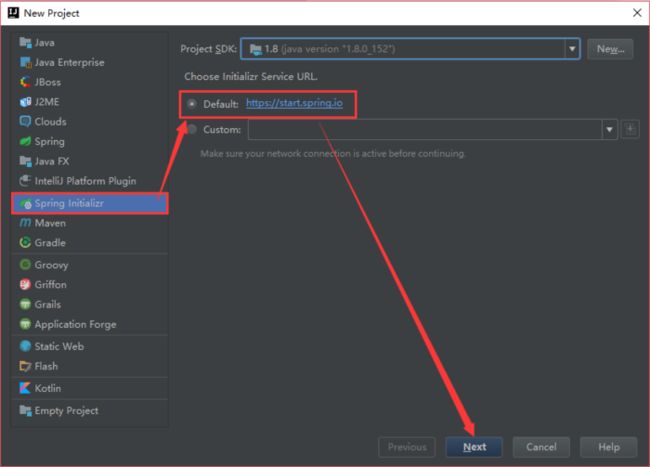
使用IDEA创建Spring Boot项目的步骤:
- New Project,选择左侧的Spring Initializr,注意URL选择默认的https://start.spring.io
-
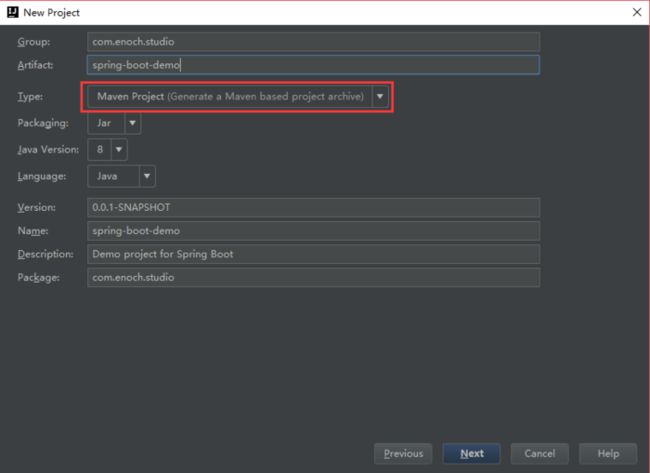
自定义Group和Artifact,type选择Maven Project
-
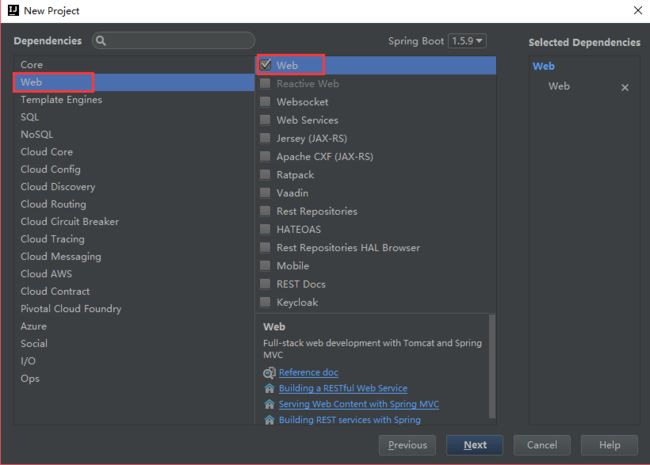
勾选web模块的web
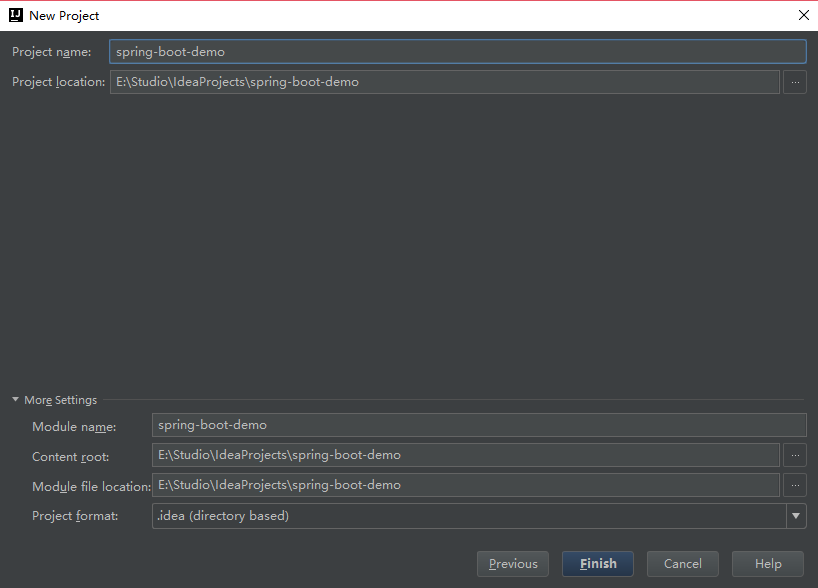
注意第一次使用Spring Initializr的话,需要等待时间,因为IDEA需要下载相关依赖包
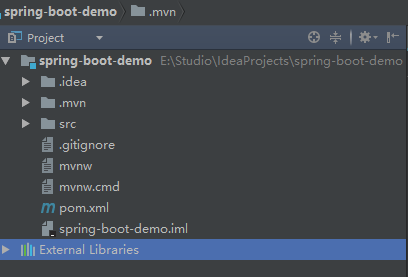
- 创建的项目结构如图所示:
- IDEA已经为我们自动添加pom.xml的相关配置
pom.xml
    4.0.0

    com.enoch.studio
    spring-boot-demo
    0.0.1-SNAPSHOT
    jar

    spring-boot-demo
    Demo project for Spring Boot


        org.springframework.boot
        spring-boot-starter-parent
        1.5.9.RELEASE


        UTF-8
        UTF-8
        1.7


            org.springframework.boot
            spring-boot-starter-web


            org.springframework.boot
            spring-boot-starter-test
            test


                org.springframework.boot
                spring-boot-maven-plugin
可以发现IDEA已经为我们创建了一个spring boot的启动类SpringBootDemoApplication.class
package com.enoch.studio;

import org.springframework.boot.SpringApplication;
import org.springframework.boot.autoconfigure.SpringBootApplication;

@SpringBootApplication
public class SpringBootDemoApplication {

    public static void main(String[] args) {
        SpringApplication.run(SpringBootDemoApplication.class, args);
    }
}
其中@SpringBootApplication的作用
这里我们新建一个UserController.class
package com.enoch.studio.controller;

import org.springframework.web.bind.annotation.RequestMapping;
import org.springframework.web.bind.annotation.RestController;

/**
 * Created by Enoch on 2017/12/14.
 */
@RestController
public class UserController {
    @RequestMapping(value = "/hello")
    public String hello() {
        return "Hello, Spring Boot!!!";
    }
}
其中@RestController的作用
Spring Boot的启动方式
默认8080端口
第一种:idea 在main函数所在类直接右击选择“run”
第二种:在项目根目录下,cmd运行
mvn spring-boot:run
第三种:在项目根目录下,cmd运行
mvn install
然后在target目录下可以发现产生了一个spring-boot-demo-0.0.1-SNAPSHOT.jar文件 cmd运行
java -jar spring-boot-demo-0.0.1-SNAPSHOT.jar
运行后,就可以访问地址:
localhost:8080/hello
spring boot的配置文件
application.properties
application.yml
推荐使用后者
application.properties配置示例
#配置端口
server.port=8088
#配置根路径
server.context-path=/springboot
配置之后重新运行,访问地址:
localhost:8088/springboot/hello
得到相同的效果
application.yml配置示例
server:
  port: 8088
  context-path: /springboot
这里要注意:冒号后面要添加一个空格
自定义属性
server:
  #配置端口
  port: 8088
  #配置路径
  context-path: /springboot

#自定义变量
studioName: ENOCH STUDIO
使用自定义变量,使用@Value的${}
示例:
package com.enoch.studio.controller;

import org.springframework.beans.factory.annotation.Value;
import org.springframework.web.bind.annotation.RequestMapping;
import org.springframework.web.bind.annotation.RestController;

/**
 * Created by Enoch on 2017/12/14.
 */
@RestController
public class UserController {
    @Value("${studioName}")
    private String studioName;

    @RequestMapping(value = "/hello")
    public String hello() {
        return "Hello, Spring Boot!!! " + studioName;
    }
}
配置多个属性示例
application.yml
user:
  username: Enoch
  age: 22
新建一个User类
package com.enoch.studio.entity;

import org.springframework.boot.context.properties.ConfigurationProperties;
import org.springframework.stereotype.Component;

/**
 * Created by Enoch on 2017/12/14.
 */
@Component
@ConfigurationProperties(prefix = "user")
public class User {
    private String username;
    private Integer age;

    public String getUsername() {
        return username;
    }

    public void setUsername(String username) {
        this.username = username;
    }

    public Integer getAge() {
        return age;
    }

    public void setAge(Integer age) {
        this.age = age;
    }

    @Override
    public String toString() {
        return "User{" +
                "username='" + username + '\'' +
                ", age=" + age +
                '}';
    }
}
注意@Component作用是自动扫描
@ConfigurationProperties作用是配置属性
修改UserController.java
package com.enoch.studio.controller;

import com.enoch.studio.entity.User;
import org.springframework.beans.factory.annotation.Autowired;
import org.springframework.beans.factory.annotation.Value;
import org.springframework.web.bind.annotation.RequestMapping;
import org.springframework.web.bind.annotation.RestController;

/**
 * Created by Enoch on 2017/12/14.
 */
@RestController
public class UserController {
    @Autowired
    private User user;
    @Value("${studioName}")
    private String studioName;

    @RequestMapping(value = "/hello")
    public String hello() {
        return "Hello, Spring Boot!!! " + user;
    }
}
多环境配置,比如开发环境、测试环境以及生产环境
新建多个yml
分别命名为
application.yml
application-dev.yml
application-test.yml
application-prod.yml
application.yml配置示例:
spring:
  profiles:
    active: dev
即可通过修改active的属性值选择对应的环境
数据库操作
spring-data-jpa
1.yml配置
spring:
  profiles:
    active: dev
  datasource:
    driver-class-name: com.mysql.jdbc.Driver
    url: jdbc:mysql://localhost:3306/idea_dev
    username: root
    password: whuwjw2013
  jpa:
    database-platform: org.hibernate.dialect.MySQL5Dialect
    hibernate:
      ddl-auto: create
    show-sql: true
pom.xml配置
添加两个依赖:jpa和mysql
            org.springframework.boot
            spring-boot-starter-data-jpa


            mysql
            mysql-connector-java
2.编写entity类
package com.enoch.studio.entity;

import javax.persistence.Entity;
import javax.persistence.GeneratedValue;
import javax.persistence.Id;

/**
 * Created by Enoch on 2017/12/14.
 */
@Entity
public class Role {
    @Id
    @GeneratedValue
    private Integer id;
    private String roleName;

    public Integer getId() {
        return id;
    }

    public void setId(Integer id) {
        this.id = id;
    }

    public String getRoleName() {
        return roleName;
    }

    public void setRoleName(String roleName) {
        this.roleName = roleName;
    }
}
注意@Entity和@Id以及@GeneratedValue的作用
3.编写repository接口并继承JpaRepository接口
package com.enoch.studio.repository;

import com.enoch.studio.entity.Role;
import org.springframework.data.jpa.repository.JpaRepository;

/**
 * Created by Enoch on 2017/12/14.
 */
public interface RoleRepository extends JpaRepository {
}
4.在controller层调用,这里由于逻辑简单,所以直接在controller层调用,原则上是在service层调用
package com.enoch.studio.controller;

import com.enoch.studio.entity.Role;
import com.enoch.studio.repository.RoleRepository;
import org.springframework.beans.factory.annotation.Autowired;
import org.springframework.web.bind.annotation.GetMapping;
import org.springframework.web.bind.annotation.RequestMapping;
import org.springframework.web.bind.annotation.RestController;

import java.util.List;

/**
 * Created by Enoch on 2017/12/14.
 */
@RestController
@RequestMapping("/role")
public class RoleController {
    @Autowired
    private RoleRepository roleRepository;
    @GetMapping(value = "/roleList")
    public List  roleList() {
        return roleRepository.findAll();
    }
}
