前言
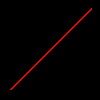
本教程第一步是通过两个点画一条直线到图像中,例如
最后,通过画直线的API,画出一个头部模型
好了,现在我们开始吧
准备工作
现在我们需要做一些准备工作,因为本教程主要参考这个英文教程,所以用的一些基础代码是从那里拷贝过来,包括image文件的创建、写入与保存,以及模型文件的读取。因为我还做了一些小修改,所以大家可以到我的github里面下载代码和资源,有问题随时与我沟通。
1. 试着生成一张tga图片
// 构造了一个*TGAImage*对象用于图片生成,大小为100*100像素。
TGAImage image(100, 100, TGAImage::RGB);
// 之后设置坐标为(40,50)的像素颜色为红色。
image.set(40, 50, TGAColor(255, 0, 0, 255));
// 第三行为图像上下翻转(不翻转一下方向会错误,个中玄机不是很了解)。
image.flip_vertically();
// 第四行为保存为tga文件,注意如果文件夹不存在不会自动创建。
image.write_tga_file("output/lesson1/point.tga");
执行上面的代码,会会生成下面这样一张图片(注意看中间偏左的点):
tips: 如果tga图片打不开,这有个免费软件可以打开tga图片。
假如你生成了上面那个图片,就已经开了个好头了!
2. 增加一个基础数据结构
下面要开始尝试画直线了,在画直线之前我们要准备一个基础的数据结构:点。
struct float2
{
    float x = 0;
    float y = 0;
    float2() {}
    float2(float xx, float yy) : x(xx), y(yy) { }
};
3. 画一条直线
好吧,点已经有了。下面我们构想一下画直线的接口应该如何。一条直线应该是由连续的点组成的,我们做的接口应该可以接受两个顶点为参数,然后这个函数可以针对两个顶点间的每一个点做一些特殊操作(例如写入图像)。英文教程提供的是下面这样的接口:
// x0,y0为点0,x1,y1为点1,image是要写入的图像,color为线颜色
void line(int x0, int y0, int x1, int y1, TGAImage &image, TGAColor color);
我认为这样的接口对于后续的工作不够友好,因此准备做一个这样的接口:
void Interpolation(float2 p1, float2 p2, function handler);
这样是一个插值接口,可以对p1,p2之间的点通过handler做回调。
那么我们画直线的地方就变成了
const TGAColor red = TGAColor(255, 0, 0, 255); // 线的颜色
TGAImage image(100, 100, TGAImage::RGB);  // 图像写入的对象
// 两个顶点分别为(10, 10)和(90, 90)
// 那么这条直线应该就是从(10, 10)到(90, 90)的45度斜线
// p点是线段上的点,例如(10,10)、(11,11)、(12,12)...(90,90)
Interpolation({10, 10}, {90, 90}, [&](float2 p) {
  image.set(p.x, p.y, red);
});
image.flip_vertically();
image.write_tga_file("output/lesson1/redline.tga"); // 输出
好了,现在就差Interpolation函数的实现了。
第一次画线尝试
第一节课的目标是渲染一个由线组成的网格。为了实现这个目标,我们需要先学会如何画一个线。在看其他人的实现之前,我们可以先尝试自己实现一下。在点(x0,y0)与点(x1,y1)之间画一条线段,代码也许看来是这样子的:
void Interpolation(float2 p1, float2 p2, function handler)
{
    int x0 = p1.x;
    int y0 = p1.y;
    int x1 = p2.x;
    int y1 = p2.y;
    for (float t = 0.0; t < 1.0; t += 0.01)
    {
        int x = x0*(1.0 - t) + x1*t;
        int y = y0*(1.0 - t) + y1*t;
        handler(float2(x, y));
    }
}
得到
第二次尝试
第一次尝试的代码存在的问题是那个变量(0.01),如果我们把它变成了0.1,我们的线段就会变成这样。
问题出在有多少个像素要去画,而用一个静态值确定有多少个像素去画显然是不正确的,所以我们尝试对代码做出如下修改
void Interpolation(float2 p1, float2 p2, function handler)
{
    int x0 = p1.x;
    int y0 = p1.y;
    int x1 = p2.x;
    int y1 = p2.y;
    for (int x = x0; x <= x1; x++)
    {
        float t = (x - x0) / (float)(x1 - x0);
        int y = y0*(1. - t) + y1*t;
        handler(float2(x, y));
    }
}
我们通过以下代码进行测试
TGAImage image(100, 100, TGAImage::RGB);
Interpolation0({ 13, 20 }, { 80, 40 }, [&](float2 p) { image.set(p.x, p.y, white); });
Interpolation0({ 20, 13 }, { 40, 80 }, [&](float2 p) { image.set(p.x, p.y, red); });
Interpolation0({ 80, 40 }, { 13, 20 }, [&](float2 p) { image.set(p.x, p.y, red); });
image.flip_vertically();
image.write_tga_file("output/lesson1/temp.tga");
得到结果
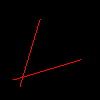
结果第一条线显示的还不错,第二条线中间出现了不连续,而第三条线直接没画出来。注意第一条线和第三条线画的是不同颜色的相同的线,只是方向不同。我们看见了白色的线没有看见红色的线,这又暴露出了我们代码的一个问题:画出的线段不应该依赖与点的顺序,线段(a,b)和线段(b,a)看起来应该是一样的。
第三次尝试
我们可以通过交换p0和p1的来保证x0的总是比x1小。
第二条线段不连续的原因是线段的高度比线段的宽度要大。似乎我们可以通过对线段的旋转保证线段的高度比宽度小来解决这个问题:
void Interpolation(float2 p1, float2 p2, function handler)
{
    int x0 = p1.x;
    int y0 = p1.y;
    int x1 = p2.x;
    int y1 = p2.y;
    bool steep = false;
    // 保证高度小于宽度
    if (std::abs(x0 - x1) < std::abs(y0 - y1))
    {
        std::swap(x0, y0);
        std::swap(x1, y1);
        steep = true;
    }
    // 保证从左向右画
    if (x0 > x1)
    {
        std::swap(x0, x1);
        std::swap(y0, y1);
    }
    for (int x = x0; x <= x1; x++) {
        float t = (x - x0) / (float)(x1 - x0);
        int y = y0*(1.0 - t) + y1*t;
        if (steep) handler(float2(y, x));
        else handler(float2(x, y));
    }
}
得到
看起来还不错
使用最优化的算法
画线是一个图形渲染的基础,对性能要求极高,因此我们需要找出一个比较高效的算法,参考这篇知乎专栏和原英文教程,我们可以最终写出这样的插值算法:
void Interpolation(float2 p1, float2 p2, function handler)
{
    int x0 = p1.x;
    int y0 = p1.y;
    int x1 = p2.x;
    int y1 = p2.y;
    bool steep = false;
    if (std::abs(x0 - x1)x1) {
        std::swap(x0, x1);
        std::swap(y0, y1);
    }
    int dx = x1 - x0;
    int dy = y1 - y0;
    int derror2 = std::abs(dy) * 2;
    int error2 = 0;
    int y = y0;
    for (int x = x0; x <= x1; x++) {
        if (steep)
            handler(float2(y, x));
        else
            handler(float2(x, y));

        error2 += derror2;
        if (error2 > dx) {
            y += (y1>y0 ? 1 : -1);
            error2 -= dx * 2;
        }
    }
}
画出模型
我使用的是英文教程中提供的模型代码,下面是模型绘制代码:
const float width = 1000;
const float height = 1000;
const TGAColor white = TGAColor(255, 255, 255, 255);
Model model("resource/african_head/african_head.obj");
TGAImage image(width, height, TGAImage::RGB);
for (int i = 0; i face = model.face(i);
    for (int j = 0; j<3; j++) {
        float3 v1 = model.vert(face[j]);
        float3 v2 = model.vert(face[(j + 1) % 3]);
        float2 p1((v1.x + 1.0) * width / 2.0, (v1.y + 1.0) * height / 2.0);
        float2 p2((v2.x + 1.0) * width / 2.0, (v2.y + 1.0) * height / 2.0);
        Interpolation(p1, p2, [&](float2 p) {
            image.set(p.x, p.y, white);
        });
    }
}
image.flip_vertically();
image.write_tga_file("output/lesson1/model.tga");
因为我们是正面朝向模型,所以模型中点的深度z我们暂时可以忽略,通过model.vert(int index)接口,我们取得了模型中的顶点数据(face中存储的是顶点索引数据,用顶点索引的好处是节省顶点数量,毕竟每个三角形都会与其他三角形共用顶点),如果你之前写的代码没有问题,那么应该会生成一张这样的图片:
好了,本次的教程就结束了,下次教程我们会开始画三角形,这样我们的模型就会变成不是镂空的了。


