文章作者:Tyan
博客:noahsnail.com | CSDN |
本文主要使用matplotlib进行多图的绘制。
- Demo 1
import matplotlib.pyplot as plt

# 定义figure
plt.figure()
# figure分成3行3列, 取得第一个子图的句柄, 第一个子图跨度为1行3列, 起点是表格(0, 0)
ax1 = plt.subplot2grid((3, 3), (0, 0), colspan = 3, rowspan = 1)
ax1.plot([0, 1], [0, 1])
ax1.set_title('Test')

# figure分成3行3列, 取得第二个子图的句柄, 第二个子图跨度为1行3列, 起点是表格(1, 0)
ax2 = plt.subplot2grid((3, 3), (1, 0), colspan = 2, rowspan = 1)
ax2.plot([0, 1], [0, 1])

# figure分成3行3列, 取得第三个子图的句柄, 第三个子图跨度为1行1列, 起点是表格(1, 2)
ax3 = plt.subplot2grid((3, 3), (1, 2), colspan = 1, rowspan = 1)
ax3.plot([0, 1], [0, 1])

# figure分成3行3列, 取得第四个子图的句柄, 第四个子图跨度为1行3列, 起点是表格(2, 0)
ax4 = plt.subplot2grid((3, 3), (2, 0), colspan = 3, rowspan = 1)
ax4.plot([0, 1], [0, 1])

plt.show()
- 结果
- Demo 2
import matplotlib.pyplot as plt
import matplotlib.gridspec as gridspec

# 定义figure
plt.figure()
# 分隔figure
gs = gridspec.GridSpec(3, 3)
ax1 = plt.subplot(gs[0, :])
ax2 = plt.subplot(gs[1, 0:2])
ax3 = plt.subplot(gs[1, 2])
ax4 = plt.subplot(gs[2, :])

# 绘制图像
ax1.plot([0, 1], [0, 1])
ax1.set_title('Test')

ax2.plot([0, 1], [0, 1])

ax3.plot([0, 1], [0, 1])

ax4.plot([0, 1], [0, 1])

plt.show()
- 结果
- Demo 3
import matplotlib.pyplot as plt

# 划分figure
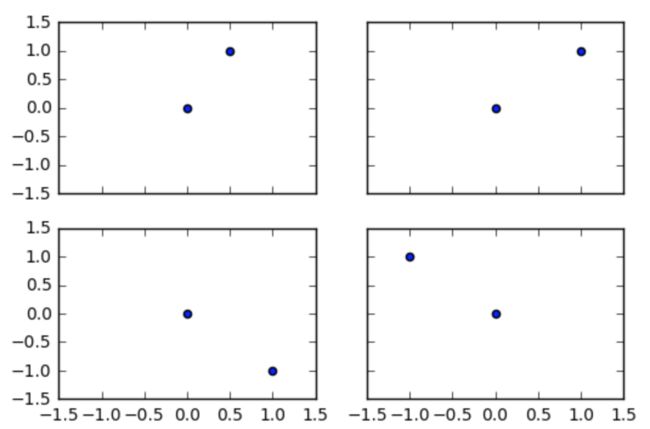
fig, ((ax11, ax12), (ax21, ax22)) = plt.subplots(2, 2, sharex = True, sharey = True)

# 绘制图像
ax11.scatter([0, 0.5], [0, 1])
ax12.scatter([0, 1], [0, 1])
ax21.scatter([0, 1], [0, -1])
ax22.scatter([0, -1], [0, 1])
plt.show()
- 结果
参考资料
- https://www.youtube.com/user/MorvanZhou

