关于LVS负载均衡工作原理及其概述请访问:Centos 7之LVS负载均衡群集
关于地址转换(NAT)模式的负载均衡群集详细配置请访问:构建基于地址转换(LVS—NAT)模式的负载均衡群集
一、开始配置DR模式LVS
准备工作:
Centos 7操作系统四台;
Centos01模拟Web1服务器:IP地址/192.168.100.10
Centos02模拟Web2服务器:IP地址/192.168.100.20
Centos03模拟NFS服务器: IP地址/192.168.100.30
Centos05模拟LVS服务器: IP地址/192.168.100.50
Windows 客户端一台;
1、配置负载调度器
1)配置虚拟IP地址(VIP)
[root@centos05 ~]# cp /etc/sysconfig/network-scripts/ifcfg-ens32
/etc/sysconfig/network-scripts/ifcfg-ens32:0
[root@centos05 ~]# vim /etc/sysconfig/network-scripts/ifcfg-ens32:0

TYPE=Ethernet
PROXY_METHOD=none
BROWSER_ONLY=no
BOOTPROTO=static
DEFROUTE=yes
NAME=ens32:0
DEVICE=ens32:0
ONBOOT=yes
IPADDR=192.168.100.253
NATEMASK=255.255.255.0
[root@centos05 ~]# systemctl restart network
[root@centos05 ~]# ifconfig
ens32: flags=4163  mtu 1500
        inet 192.168.100.50  netmask 255.255.255.0  broadcast 192.168.100.255
        inet6 fe80::20c:29ff:fe16:c54b  prefixlen 64  scopeid 0x20
        ether 00:0c:29:16:c5:4b  txqueuelen 1000  (Ethernet)
        RX packets 2795  bytes 1095013 (1.0 MiB)
        RX errors 0  dropped 0  overruns 0  frame 0
        TX packets 1371  bytes 182001 (177.7 KiB)
        TX errors 0  dropped 0 overruns 0  carrier 0  collisions 0

ens32:0: flags=4163  mtu 1500
        inet 192.168.100.253  netmask 255.255.255.0  broadcast 192.168.100.255
        ether 00:0c:29:16:c5:4b  txqueuelen 1000  (Ethernet)
2)调整/proc相应参数
[root@centos05 ~]# vim /etc/sysctl.conf

net.ipv4.ip_forward = 1
net.ipv4.conf.all.send_redirects = 0
net.ipv4.conf.default.send_redirects = 0
net.ipv4.conf.ens32.send_redirects = 0

[root@centos05 ~]# sysctl -p
3)配置负载分配策略
[root@centos05 ~]# modprobe ip_vs
[root@centos05 ~]# yum -y install ipvsadm
[root@centos05 ~]# ipvsadm -C
[root@centos05 ~]# ipvsadm -A -t 192.168.100.253:80 -s rr
[root@centos05 ~]# ipvsadm -a -t 192.168.100.253:80 -r 192.168.100.10:80 -g -w 1

[root@centos05 ~]# ipvsadm -a -t 192.168.100.253:80 -r 192.168.100.20:80 -g -w 1

[root@centos05 ~]# ipvsadm-save > /etc/sysconfig/ipvsadm
[root@centos04 ~]# ipvsadm -ln
IP Virtual Server version 1.2.1 (size=4096)
Prot LocalAddress:Port Scheduler Flags
  -> RemoteAddress:Port           Forward Weight ActiveConn InActConn
TCP  192.168.100.253:80 rr
  -> 192.168.100.10:80            Route   1      0          0
  -> 192.168.100.20:80            Route   1      0          0
2、配置web节点1服务器
[root@centos01 ~]# yum -y install httpd
[root@centos01 ~]# echo "www.benet.com" > /var/www/html/index.html

[root@centos01 ~]# systemctl start httpd
[root@centos01 ~]# systemctl enable httpd
[root@centos01 ~]# cp /etc/sysconfig/network-scripts/ifcfg-lo
/etc/sysconfig/network-scripts/ifcfg-lo:0
[root@centos01 ~]# vim /etc/sysconfig/network-scripts/ifcfg-lo:0

DEVICE=lo:0
IPADDR=192.168.100.253
NETMASK=255.255.255.255
ONBOOT=yes
[root@centos01 ~]# systemctl restart network
[root@centos01 ~]# ifconfig
lo:0: flags=73  mtu 65536
        inet 192.168.100.253  netmask 255.255.255.255
        loop  txqueuelen 1  (Local Loopback)
[root@centos01 ~]# vim /etc/sysctl.conf
net.ipv4.conf.all.arp_ignore = 1
net.ipv4.conf.all.arp_announce = 2
net.ipv4.conf.default.arp_ignore = 1
net.ipv4.conf.default.arp_announce = 2
net.ipv4.conf.lo.arp_ignore = 1
net.ipv4.conf.lo.arp_announce = 2
[root@centos01 ~]# sysctl -p
3、配置web节点2服务器
[root@centos02 ~]# yum -y install httpd
[root@centos02 ~]# echo "www.accp.com" > /var/www/html/index.html

[root@centos02 ~]# systemctl start httpd
[root@centos02 ~]# systemctl enable httpd
[root@centos01 ~]# scp /etc/sysctl.conf [email protected]:/etc/

The authenticity of host '192.168.100.30 (192.168.100.20)' can't be established.
ECDSA key fingerprint is SHA256:PUueT9fU9QbsyNB5NC5hbSXzaWxxQavBxXmfoknXl4I.
ECDSA key fingerprint is MD5:6d:f7:95:0e:51:1a:d8:9e:7b:b6:3f:58:51:51:4b:3b.
Are you sure you want to continue connecting (yes/no)? yes
Warning: Permanently added '192.168.100.20' (ECDSA) to the list of known hosts.
[email protected]'s password:
sysctl.conf
[root@centos01 ~]# scp /etc/sysconfig/network-scripts/ifcfg-lo:0
                            [email protected]:/etc/sysconfig/network-scripts/
[email protected]'s password:
ifcfg-lo:0                                                          100%   70   177.3KB/s   00:00
[root@centos02 ~]# sysctl -p
net.ipv4.conf.all.arp_ignore = 1
net.ipv4.conf.all.arp_announce = 2
net.ipv4.conf.default.arp_ignore = 1
net.ipv4.conf.default.arp_announce = 2
net.ipv4.conf.lo.arp_ignore = 1
net.ipv4.conf.lo.arp_announce = 2
[root@centos02 ~]# systemctl restart network
4、客户端访问
客户端配置和服务器同网段IP地址,浏览器访问http://192.168.100.253
关闭浏览器删除缓存,重新访问就会得到一个新的页面,实现了负载均衡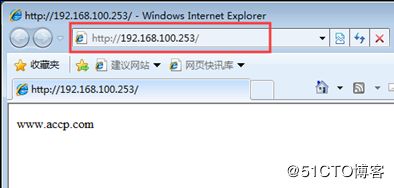
二、安装NFS共享存储
1、配置NFS
[root@centos03 ~]# yum -y install rpcbind nfs-utils
[root@centos03 ~]# mkdir /web
[root@centos03 ~]# echo "www.nfs.com" > /web/index.html
[root@centos03 ~]# vim /etc/exports
/web    192.168.100.10(ro) 192.168.100.20(rw)
[root@centos03 ~]# systemctl start rpcbind
[root@centos03 ~]# systemctl start nfs
[root@centos03 ~]# systemctl enable rpcbind
[root@centos03 ~]# systemctl enable nfs
[root@centos03 ~]# showmount -e 192.168.100.30
Export list for 192.168.100.30:
/web 192.168.100.20,192.168.100.10
2、Web节点1服务器挂载共享目录
[root@centos01 ~]# mount 192.168.100.30:/web /var/www/html/

[root@centos01 ~]# cat /var/www/html/index.html
www.nfs.com
[root@centos01 ~]# systemctl restart httpd
3、Web节点2服务器挂载共享目录
[root@centos02 ~]# mount 192.168.100.30:/web /var/www/html/

[root@centos02 ~]# cat /var/www/html/index.html
www.nfs.com
[root@centos02 ~]# systemctl restart httpd
4、客户端访问
使用tail -f /var/log/httpd/access.log查看访问成功日志,一定要想监听再去访问才可以看到效果


5、配置自动挂载NFS
1)web节点1服务器
[root@centos01 ~]# vim /etc/fstab
192.168.100.30:/web /var/www/html/                                nsf     defaults        0 0
2)web节点2服务器
[root@centos02 ~]# vim /etc/fstab
192.168.100.30:/web /var/www/html/                                nsf     defaults        0 0
—————— 本文至此结束,感谢阅读 ——————