温馨提示:
前一篇博文己经介绍过了corosync+pacemaker基本用法,这篇将重点介绍基于corosync+pacemaker的web高可用
---本文大纲
资源分配及拓扑图
实现过程
测试
==================
一、资源分配及拓扑图
1、资源分配
| 系统 | 主机名 | 角色 | ip地址 | 关系 |
| Centos 6.5x86_64 | essun.maridb1.org | 数据库+NFS | 192.168.1.110 |
为两个web节点存储数据与站点 |
| Centos 6.5x86_64 | essun.web1.org | web | 192.168.1.109 | apache+php 站点位于1.110 |
| Centos 6.5x86_64 | essun.web2.org | web | 192.168.1.108 | apache+php 站点位于1.110 |
2、拓扑图
二、实现过程
注:
主机名(与uname -n相同,节点之间可以解析主机名)
时间同步
无密码登录
1、node1配置过程
己安装的包组
#yum groupinstall -y "Development tools" "Server Platform Development"
# yum install -y crmsh-1.2.6-4.el6.x86_64.rpm pssh-2.3.1-2.el6.x86_64.rpm
编译安装LAMP
web1
[root@essun .ssh]# curl -I http://192.168.1.108
HTTP/1.1 200 OK
Date: Wed, 30 Apr 2014 06:05:04 GMT
Server: Apache/2.4.9 (Unix)
X-Powered-By: PHP/5.4.26
Content-Type: text/html
连接数据库测试
[root@essun web]# curl http://192.168.1.108
Success...
安装corosync、pacemaker
#yum install corosync pacemaker
以上步骤出需要在节点web2上执行。
修改corosync的配置文件(/etc/corosync/corosync),增加service区域
[root@localhost download]# cd /etc/corosync/
[root@localhost corosync]# ls
corosync.conf.example       service.d
corosync.conf.example.udpu  uidgid.d
[root@localhost corosync]# cp corosync.conf.example corosync.conf
[root@localhost corosync]# vim corosync.conf
配置结果
# Please read the corosync.conf.5 manual page
compatibility: whitetank
totem {
    version: 2
    secauth: on
    threads: 0
    interface {
        ringnumber: 0
        bindnetaddr: 192.168.1.1
        mcastaddr: 226.94.1.1
        mcastport: 5405
        ttl: 1
    }
}
logging {
    fileline: off
    to_stderr: no
    to_logfile: yes
    to_syslog: no
    logfile: /var/log/cluster/corosync.log
    debug: off
    timestamp: on
    logger_subsys {
        subsys: AMF
        debug: off
    }
}
service {
    ver:0
    name:pacemaker
}
aisexec {
    user :root
    group:root
}
amf {
    mode: disabled
}
生成密钥
[root@localhost corosync]# mv /dev/random /dev/xrandom
[root@localhost corosync]# mv /dev/urandom /dev/random
[root@localhost corosync]# corosync-keygen
Corosync Cluster Engine Authentication key generator.
Gathering 1024 bits for key from /dev/random.
Press keys on your keyboard to generate entropy.
Writing corosync key to /etc/corosync/authkey.
[root@localhost corosync]# mv /dev/random /dev/urandom
[root@localhost corosync]# mv /dev/xrandom /dev/random
查看一下生成后的文件属性(authkey的属性必须的600否则corosync无法启动)
[root@localhost corosync]# ll
total 24
-r-------- 1 root root  128 Apr 30 09:25 authkey
-rw-r--r-- 1 root root  480 Apr 30 09:21 corosync.conf
将配置好的文件复制到节点web2上
[root@localhost corosync]# scp authkey corosync.conf essun.web2.org:/etc/corosync/
The authenticity of host 'essun.web2.org (192.168.1.109)' can't be established.
RSA key fingerprint is b8:9d:cb:7b:4d:ad:c2:fb:a4:00:23:b0:f2:6b:3f:ad.
Are you sure you want to continue connecting (yes/no)? yes
Warning: Permanently added 'essun.web2.org' (RSA) to the list of known hosts.
authkey                          100%  128     0.1KB/s   00:00
corosync.conf                    100%  480     0.5KB/s   00:00
启动服务
root@essun web]# service pacemaker start
Starting Pacemaker Cluster Manager                         [  OK  ]
[root@essun web]# service corosync start
Starting Corosync Cluster Engine (corosync):               [  OK  ]
查看在线节点
[root@essun web]# crm
crm(live)# status
Last updated: Wed Apr 30 15:16:37 2014
Last change: Wed Apr 30 14:21:31 2014 via crmd on essun.web1.org
Stack: classic openais (with plugin)
Current DC: essun.web2.org - partition with quorum
Version: 1.1.10-14.el6_5.3-368c726
2 Nodes configured, 2 expected votes
0 Resources configured
Online: [ essun.web1.org essun.web2.org ]
2、编译mariadb(此文中有详细的介绍)
安装nfs
#yum install -y nfs*
指定共享目录
#mkdir -p /web/share
#vim /etc/exports
/web/share *(insecure,rw,async,no_root_squash)
# exportfs -rav
exporting *:/web/share
# service nfs restart
Shutting down NFS daemon:                                  [  OK  ]
Shutting down NFS mountd:                                  [  OK  ]
Shutting down NFS quotas:                                  [  OK  ]
Shutting down NFS services:                                [  OK  ]
Shutting down RPC idmapd:                                  [  OK  ]
Starting NFS services:                                     [  OK  ]
Starting NFS quotas:                                       [  OK  ]
Starting NFS mountd:                                       [  OK  ]
Starting NFS daemon:                                       [  OK  ]
Starting RPC idmapd:                                       [  OK  ]
安装Discuz
# unzip Discuz_X3.1_SC_UTF8.zip
# mv readme/ upload/ utility/ /web/share/
# chmod -R 777 upload/
挂载到web1上
[root@essun download]# mount -t nfs 192.168.1.110:/web/share /www/web/
使用网页访问安装Discuz
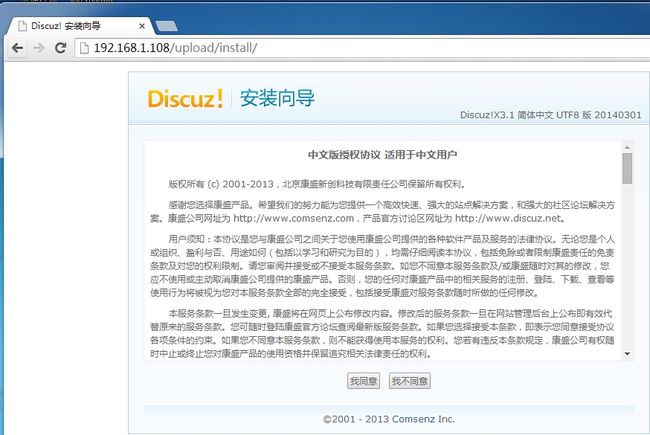
第一步
-
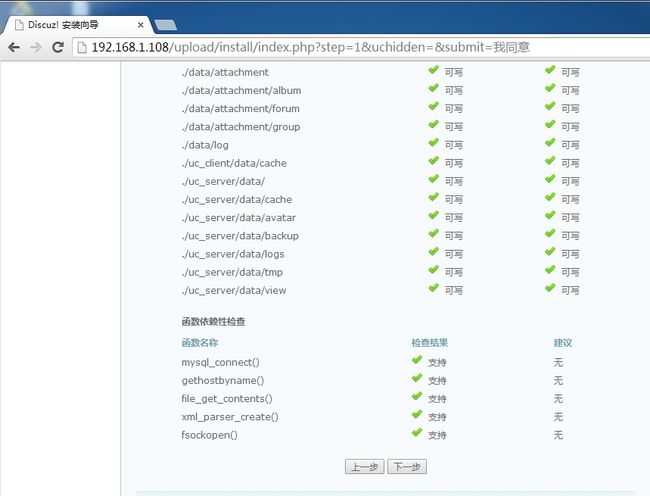
第二步
-
第三步
-
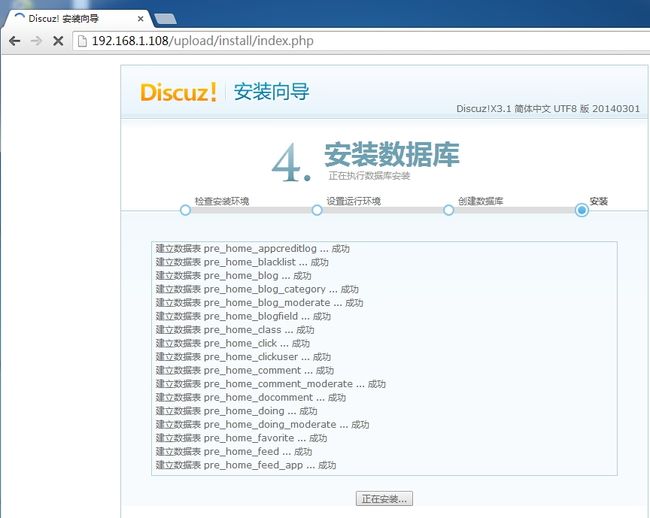
第四步
-
第五步
-
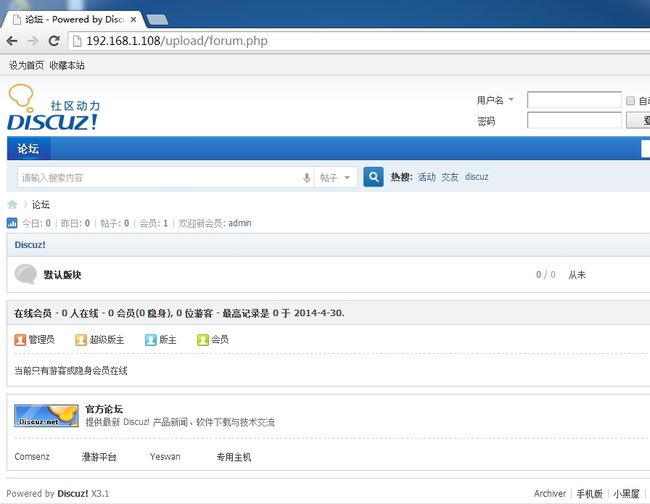
第六步
这样在web1上可以访问了,在web2上只要挂载nfs(1.110:/web/share),在站点目录就可以访问了
3、实现 web高可用
禁用stonith及忽略投票功能
crm(live)configure# property stonith-enabled=false
 crm(live)configure# property no-quorum-policy=ignore
crm(live)configure# verify
crm(live)configure# commit
crm(live)configure# show
node essun.web1.org
node essun.web2.org
property $id="cib-bootstrap-options" \
    dc-version="1.1.10-14.el6_5.3-368c726" \
    cluster-infrastructure="classic openais (with plugin)" \
    expected-quorum-votes="2" \
    stonith-enabled="false" \
    no-quorum-policy="ignore"
定义vip
crm(live)configure# primitive webip ocf:heartbeat:IPaddr params ip=192.168.1.100
crm(live)configure# verify
crm(live)configure# commit
挂载文件系统
crm(live)configure# primitive webnfs ocf:heartbeat:Filesystem params device="192.168.1.110://web/share" directory="/www/web" fstype="nfs"  op monitor interval=60s timeout=60s op start timeout=60s op stop timeout=60s
crm(live)configure# verify
crm(live)configure# commit
定义web、php-fpm服务
crm(live)configure#  primitive webserver lsb:httpd24
crm(live)configure# verify
crm(live)configure# commit
crm(live)configure# primitive webphp lsb:php-fpm
crm(live)configure# verify
crm(live)configure# commit
crm(live)configure# show
node essun.web1.org
node essun.web2.org
primitive webip ocf:heartbeat:IPaddr \
    params ip="192.168.1.100"
primitive webnfs ocf:heartbeat:Filesystem \
    params device="192.168.1.110://web/share" directory="/www/web" fstype="nfs" \
    op monitor interval="60s" timeout="60s" \
    op start timeout="60s" interval="0" \
    op stop timeout="60s" interval="0"
primitive webphp lsb:php-fpm
primitive webserver lsb:httpd24
property $id="cib-bootstrap-options" \
    dc-version="1.1.10-14.el6_5.3-368c726" \
    cluster-infrastructure="classic openais (with plugin)" \
    expected-quorum-votes="2" \
    stonith-enabled="false" \
    no-quorum-policy="ignore"
将多个资源整合在一起(此处也可以使用排列约束)
crm(live)configure#  group webservice webip webnfs webserver webphpcrm(live)configure# verify
crm(live)configure# commit
crm(live)configure# show
node essun.web1.org
node essun.web2.org
primitive webip ocf:heartbeat:IPaddr \
    params ip="192.168.1.100"
primitive webnfs ocf:heartbeat:Filesystem \
    params device="192.168.1.110:/web/share" directory="/www/web" fstype="nfs" \
    op monitor interval="60s" timeout="60s" \
    op start timeout="60s" interval="0" \
    op stop timeout="60s" interval="0"
primitive webphp lsb:php-fpm
primitive webserver lsb:httpd24
group webservice webip webnfs webserver webphp
property $id="cib-bootstrap-options" \
    dc-version="1.1.10-14.el6_5.3-368c726" \
    cluster-infrastructure="classic openais (with plugin)" \
    expected-quorum-votes="2" \
    stonith-enabled="false" \
    no-quorum-policy="ignore"
注:
集群内节点资源都不要开机自动启动。
在web1测试一下
crm(live)# status
Last updated: Wed Apr 30 16:32:55 2014
Last change: Wed Apr 30 16:32:47 2014 via cibadmin on essun.web1.org
Stack: classic openais (with plugin)
Current DC: essun.web2.org - partition with quorum
Version: 1.1.10-14.el6_5.3-368c726
2 Nodes configured, 2 expected votes
4 Resources configured
Online: [ essun.web1.org essun.web2.org ]
 Resource Group: webservice
     webip  (ocf::heartbeat:IPaddr):    Started essun.web1.org
     webnfs (ocf::heartbeat:Filesystem):    Started essun.web1.org
     webserver  (lsb:httpd24):  Started essun.web1.org
     webphp (lsb:php-fpm):  Started essun.web1.org
crm(live)#
三、测试
访问192.168.1.100/upload
模拟节点web1故障,看看所有的资源是不是能够转移
crm(live)node# standby essun.web1.org
crm(live)node# cd ..
crm(live)# status
Last updated: Wed Apr 30 16:38:07 2014
Last change: Wed Apr 30 16:38:02 2014 via crm_attribute on essun.web1.org
Stack: classic openais (with plugin)
Current DC: essun.web2.org - partition with quorum
Version: 1.1.10-14.el6_5.3-368c726
2 Nodes configured, 2 expected votes
4 Resources configured
Node essun.web1.org: standby
Online: [ essun.web2.org ]
 Resource Group: webservice
     webip  (ocf::heartbeat:IPaddr):    Started essun.web2.org
     webnfs (ocf::heartbeat:Filesystem):    Started essun.web2.org
     webserver  (lsb:httpd24):  Started essun.web2.org
     webphp (lsb:php-fpm):  Started essun.web2.org
结果完全无影响
